
We have the option of adding a Glance scene to a watch app, and while many will not need it, our app is going to make use of this opportunity to provide a small snippet of the information provided by the main app. The Apple Watch's Glance is reachable at all times with a swipe upwards from the watch face, and is intended as a brief, non-interactive engagement with your app. Given how easy it is to reach, the Glance enables your app to provide a limited amount of data which is immediately accessible.
You cannot add most UI objects to a Glance scene, there will be no tapping buttons and selecting from tables and the like. If your user wishes to engage more deeply with your app, she can do so by tapping the Glance screen which will open your main app, just as if she had launched it from the home screen.
When designing and implementing the Glance screen, the main challenge is not so much deciding how to code it, which is likely to be a simplified version of some part of the main app, but much more deciding exactly which information your users are likely to need in the context of a short look at your app. Each app will have different needs, of course, but the general approach is to identify the most important, core purpose of your app. Which is the feature that makes most sense without the rest of the app's functionality?
We will be presenting the information about the city that we identified as faveCity in our code in our Glance.
There is little to do in the GlanceController that we have not done before, the code is basically a reduced version of the WeatherTableInterfaceController class. We only need to add the code and hook it up to a very minimal UI.
In the project navigator, select the file GlanceController.swift, and replace everything inside the GlanceController class's curly braces with the following code:
    @IBOutlet var topLabel: WKInterfaceLabel!
    @IBOutlet var bottomLabel: WKInterfaceLabel!

    override func awakeWithContext(context: AnyObject?) {
        super.awakeWithContext(context)
        requestWeatherData()
    }

    func requestWeatherData() {
        WeatherSessionManager.sharedInstance.fetchWeatherData(){ (data: NSData?, response: NSURLResponse?, taskError: NSError?) in

            if taskError == nil {
                do {
                    let jsonData = try NSJSONSerialization.JSONObjectWithData(data!, options: .AllowFragments) as! jsonDict
                    self.showWeather(jsonData)
                }
                catch let jsonErrorasNSError {
                    print(jsonError.localizedDescription)
                }
            }
            else {
                let action = WKAlertAction(title: "OK", style: .Default, handler: {})
                let alertText = taskError!.localizedDescription
                self.presentAlertControllerWithTitle(
                    alertText,
                    message: "",
                    preferredStyle: .ActionSheet,
                    actions: [action])
            }
        }
    }

    func showWeather(data: jsonDict) {
        guard let list = data["list"] as? jsonArray else {return }
        if let
            cityName = list[0]["name"] as? String,
            weather = list[0]["weather"] as? jsonArray,
            descriptionStr = weather[0]["main"] as? String {
                topLabel.setText(cityName)
                bottomLabel.setText(descriptionStr)
        }
}Again, although there is nothing new here, do read carefully through the code, making sure that you understand exactly what is going on. This repetition of common tasks in programming is what will turn you into a better and faster developer (those two adjectives are in order of importance, by the way).
We will now turn to setting up the UI in Interface Builder.
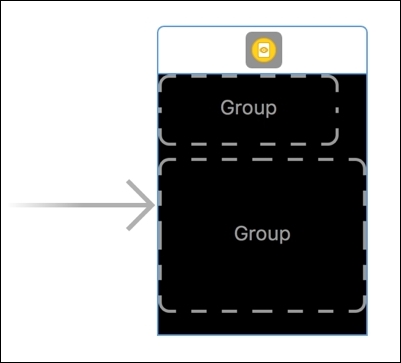
The Glance Interface Controller currently looks like this:
In the storyboard window, select the GlanceController that Xcode included when we first created the project, and perform the following steps:
- With the Glance Interface Controller Scene selected in the Document Outline, the Attributes Inspector shows the two Groups provided by the template:
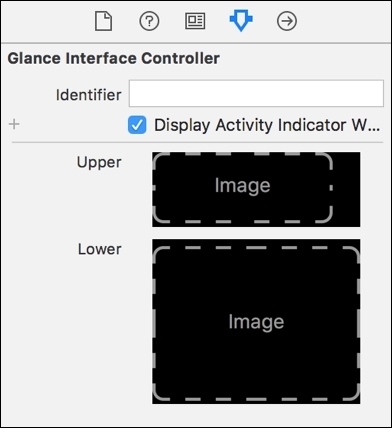
- We don't need Image objects here, we want Label objects, so click on Upper and select the Label that is shown as "Label…………." (you might have to scroll down to see it).
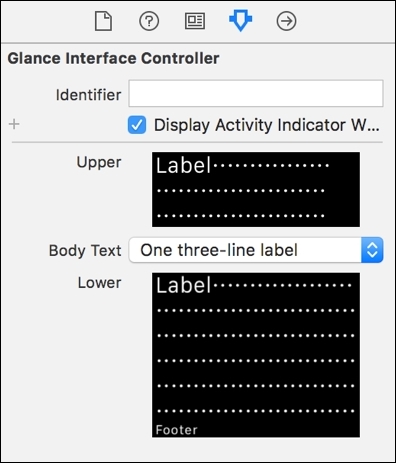
- Do the same for Lower, but select the Label and Footer combination, so that the Attributes Inspector looks as it does here:
- Select the top Label, and set its Title to Fetching Data.
- Connect it to
@IBOutlet var topLabel: WKInterfaceLabel!In the source code. - Select the middle Label and set its Title to be empty.
- Connect it to
@IBOutlet var bottomLabel: WKInterfaceLabel!In the source code. - Select the Footer Label, and set its Title to More Cities… (this label, while not being anything interactive, will serve to invite the user to tap on the screen to get to your main app—it won't matter where he taps, though).
Your storyboard should now look like this:

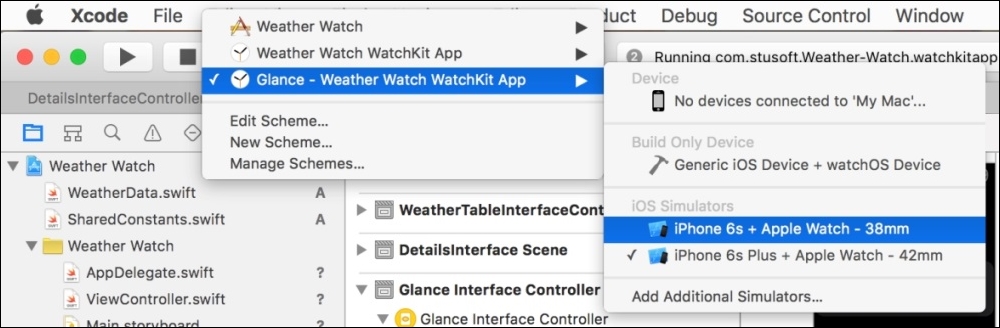
To test the Glance Scene, select the Glance Weather Watch WatchKit App scene, as illustrated here:
Now hit Run, and you'll see your Glance Scene launch on the Simulator or on your physical device, as if you had just swiped up from your watch face (assuming your app is selected to Show In Glances in the iOS Watch app).