
Chapter 2
Signing Up and Creating Your Account
IN THIS CHAPTER
![]() Joining LinkedIn with or without an invitation
Joining LinkedIn with or without an invitation
![]() Registering and setting your preferences
Registering and setting your preferences
![]() Connecting with people you already know on LinkedIn
Connecting with people you already know on LinkedIn
When LinkedIn first launched, it grew primarily through invitations — you joined only if someone who was already a member invited you and encouraged you to join. However, membership is now open to anyone 14 years or older (as long as the user hasn’t previously been suspended or removed from LinkedIn, of course). You can have only one active account, but you can attach multiple email addresses, past and present, to your account so that people can more easily find you.
You’ll be presented with some configuration settings during the sign-up process that might confuse you until you’re more familiar with the system. Fortunately, you can customize all those settings later, but for now, we suggest some initial settings. In addition, based on your initial settings, LinkedIn recommends people to invite to your network. This chapter touches on the initial recommendation process.
Joining LinkedIn
Many people join LinkedIn because a friend or colleague invited them. You can join just as easily without receiving an invitation, though. Everyone joins at the basic level, which is free. (You can opt for different levels of paid membership, as spelled out in Book 5, Chapter 1.) Being able to start at the basic level makes the sign-up process quite straightforward. Most importantly, the basic level still gives users the ability to take advantage of the most powerful tools that LinkedIn offers.
Joining with an invitation
When a friend or colleague invites you to join, you receive an email invitation. The email clearly identifies the sender and usually has Invitation to connect on LinkedIn as its subject line. (There’s a chance, though, that the sender came up with a custom header.)
When you open the message, you see an invitation to join LinkedIn, such as the message shown in Figure 2-1. There might be some extra text if the person inviting you personalized the message. You also see a button or link that takes you back to LinkedIn to create your account, such as the Accept Joel’s Invitation button shown in Figure 2-1.
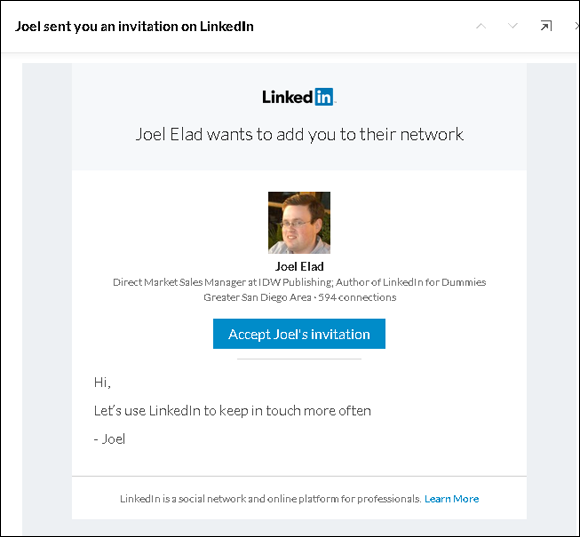
FIGURE 2-1: An invitation to connect on LinkedIn.
When you’re ready to join LinkedIn with an invitation, you’ll start with these two steps:
-
Click the button or link from your invitation email.
A new window appears that goes to the LinkedIn website, as shown in Figure 2-2.
-
Enter your correct first name and last name, and create a new password for your account.
 If you want to be known on LinkedIn by another version of your name (say a nickname, maiden name, middle initial, or proper name), or if you want to use a different email address from the one used for your invitation, you can change the details in those fields — First Name, Last Name, Email.
 -
Click the Join Name’s Network button.
You are taken to the next part of the sign-up process, where you provide basic information that LinkedIn will use to create your account. The remainder of the sign-up process is covered in “Completing the sign-up process,” later in this chapter.

FIGURE 2-2: Provide your name and create a password.
Try to choose a password that no one else can guess. You should use a combination of letters and numbers, and avoid commonly used passwords such as your name, the word password, a string of letters or numbers that are next to each other on the keyboard (for example, qwerty), or a password that you use on many other sites.
Joining without an invitation
If you haven’t received an invitation to join LinkedIn, don’t let that turn you into a wallflower. You can join LinkedIn directly, without an invitation from an existing user. Open your web browser and go to https://www.linkedin.com. You see the initial LinkedIn home page, as shown in Figure 2-3. When you’re ready to join LinkedIn, simply provide your first name, last name, and email address, and enter a password in the boxes provided. Then click the Join Now button.

FIGURE 2-3: Join LinkedIn from its home page.
After you click the button, you advance to the next part of the sign-up process, where LinkedIn collects some basic information to create your account.
Completing the sign-up process
Whether you’ve been invited to join LinkedIn or created an account directly from its home page, LinkedIn requires some basic information beyond your name and email address to finish creating the basic account. When you’re ready to complete the sign-up process, follow these steps:
-
In the First, Let’s Make Sure You’re Recognizable window, select the country where you reside.
LinkedIn then asks for a zip code or a postal code, as shown in Figure 2-4.
-
Provide your zip code or postal code, and then click the Next button.
You’re taken to the next step, where LinkedIn starts to build your professional profile by asking about your current employment status and whether you are a student, as shown in Figure 2-5.
-
Complete the fields regarding your student status and current employment.
Specifically, you need to provide the following information:
- Are You a Student?: Select the appropriate radio button to indicate Yes or No.
- Job Title: If you’re not a student, indicate your current job title, whether you’re employed, unemployed (a.k.a. “a job seeker”), or self-employed.
-
Company: LinkedIn asks for a company name and prompts you by showing existing companies in its database as you type in the name of your company, as shown in Figure 2-6. After you provide the company name, LinkedIn adds the Industry field. Use the drop-down list to identify which industry you feel you belong to, as shown in Figure 2-7.
If you find it difficult to choose an industry that best describes your primary expertise, just choose one that’s closest. You can always change the selection later. If you’re employed but looking for another job, you should still choose the industry of your current profession.
-
Click the blue Next button to continue.
LinkedIn asks you what you’re most interested in doing on the website, as shown in Figure 2-8.
-
Click the option that best represents your goal for using LinkedIn.
LinkedIn tailors your remaining account creation prompts based on your choice here, but you’ll still have access to fully customize your profile regardless of your choice. You can also skip this step by clicking the Not Sure Yet? I’m Open! option.
 It might be tempting to start inviting friends and colleagues to connect with you right away, but you might want to work on creating your complete and up-to-date profile before flooding people’s email inboxes with invitations. You can invite people to connect with you at any time.
 -
Confirm the email address for your account.
LinkedIn emails you a confirmation with a verification code to help verify the email account you’re using, especially if you joined LinkedIn without an invitation.
Open your email program and look for an email from LinkedIn Email Confirmation with the subject line Please confirm your email address. Open that email, and note the verification code. Go back to LinkedIn and enter the verification code in the box provided, as shown in Figure 2-9. Click the Verify button to proceed.
 If you skip the step of confirming your email with LinkedIn, you won’t be able to invite any connections, apply for jobs on the LinkedIn job board, or take advantage of most other LinkedIn functions.
 - If you’re asked to log in to your account, simply provide your email address and password when prompted and then provide the verification code.
-
Start building your network.
LinkedIn offers to import your contacts from your email program, as shown in Figure 2-10. You are walked through the steps of importing your address book and can also connect with existing members of LinkedIn. You can also do these tasks after you create your account by clicking Skip.
As mentioned, it’s best to create a complete profile before sending invitations. people’s email inboxes with invitations. You can connect with people at any time. -
Start using the site based on your goals for using LinkedIn.
Suppose that you chose Finding a Job as the reason why you’re setting up a LinkedIn account (in Step 5). You would be taken to the web page shown in Figure 2-11, where LinkedIn offers to set up a job alert so you’re notified of jobs that might interest you. In this example, you can alter the title and location of the jobs you’re searching for, and the frequency of the alert emails. After you make your choices, click the Create Alert button and LinkedIn will notify you that your job alert is saved. Or you can click Skip to go to the next step.
Based on the choice you made in Step 5, LinkedIn may prompt you for other features of its site, such as choosing companies or influencers to follow.
-
Upload a profile photo.
One of the most important elements of your LinkedIn profile is the profile photo you use to represent yourself. Your profile photo should indicate that you’re a professional and responsible person. (In other words, this is not the social networking site to show off your party animal skills.) Locate a respectable photo of your face.
- Click the pencil icon, as shown in Figure 2-12, and follow the prompts to select a photo from your computer.
- Rotate or crop your photo, if necessary, to capture your face (and the top of your shoulders if available), as shown in Figure 2-13.
- Click Save to upload the photo.
- Click Continue to assign it to your profile.
LinkedIn prompts you to receive a link to download its mobile app.
-
Provide your mobile number in the text box provided to receive the download link, and then click the Send an SMS button.
Your LinkedIn home page appears.
You can also click the Apple Store or Google Play button to go directly to their app repositories, or click Next and install the app later.
-
Follow the prompts to guide you through the rest of the creation process.
You see pop-up messages offering you more information on aspects of LinkedIn, such as updating your background photo (see Figure 2-14) and sections you can add.
-
Follow the long series of prompts to increase your profile strength.
The Profile Strength box appears below the main box that contains your name and profile photo. Scroll down to that section of your LinkedIn profile page (as shown in Figure 2-15) and click the blue button to provide the requested information to help complete your profile. You’ll see prompts for areas such as work dates, your skills, educational background, past employers, and current job details.
Fill in information for each prompt and click the Save button to advance in the process. You can always click Skip to save a task for later.

FIGURE 2-4: Tell LinkedIn where you are located.
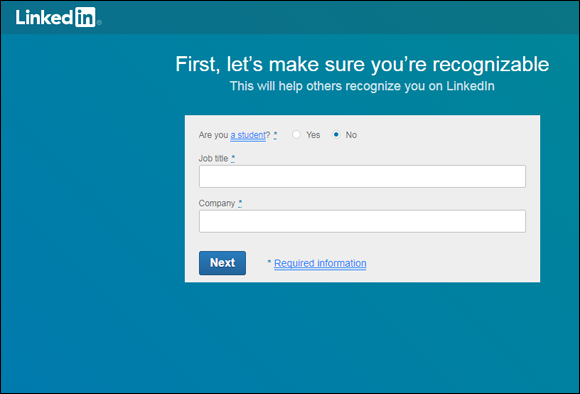
FIGURE 2-5: Tell LinkedIn a little about yourself to create your account.
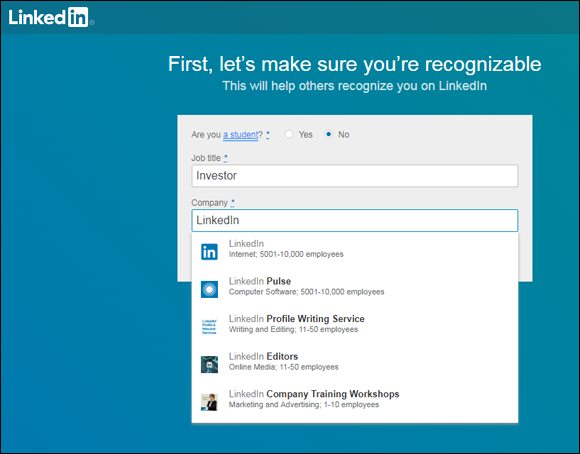
FIGURE 2-6: LinkedIn can help associate you with known companies in its database.

FIGURE 2-7: Choose the industry that best matches your current job.

FIGURE 2-8: LinkedIn helps you customize your account to your own needs.

FIGURE 2-9: Confirm your email address with LinkedIn.
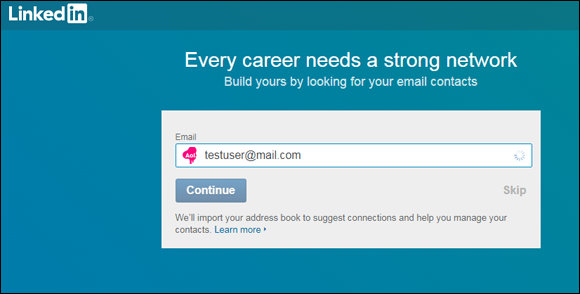
FIGURE 2-10: LinkedIn can help you identify whom to add to your network.

FIGURE 2-11: LinkedIn offers to help you reach your goals for using the site.
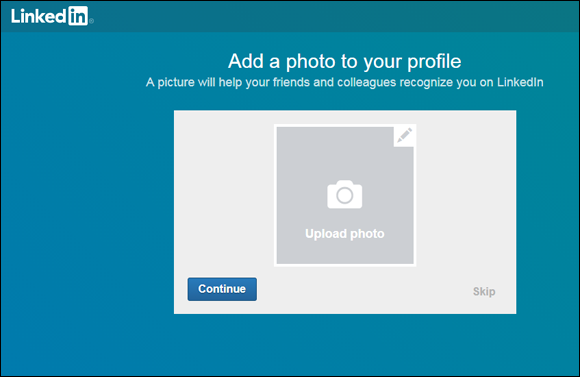
FIGURE 2-12: LinkedIn offers you the chance to upload your profile photo.
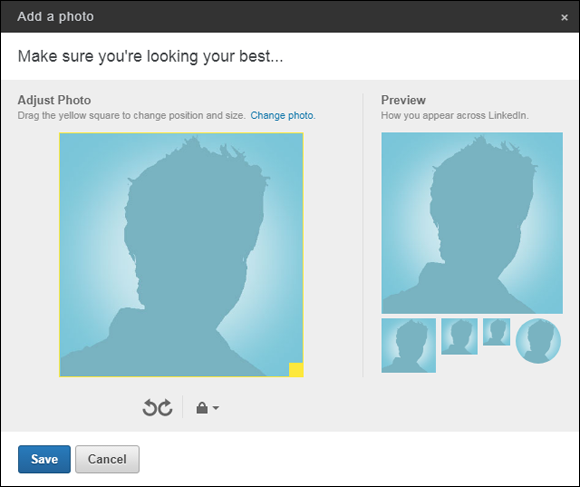
FIGURE 2-13: Use LinkedIn’s tools to customize your photo.

FIGURE 2-14: Follow the LinkedIn prompts for more information.
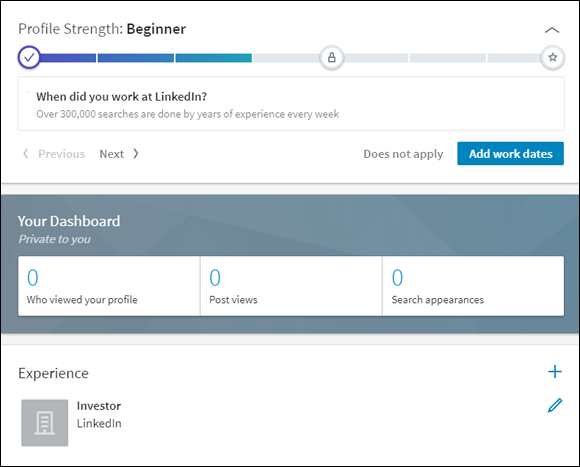
FIGURE 2-15: LinkedIn prompts you to complete your profile.
After you complete the series of prompts, your profile page appears. From here, you can decide what to update next. For example, if you click the drop-down arrow next to the Add New Profile section, you’ll see a list of sections you can update, as shown in Figure 2-16.
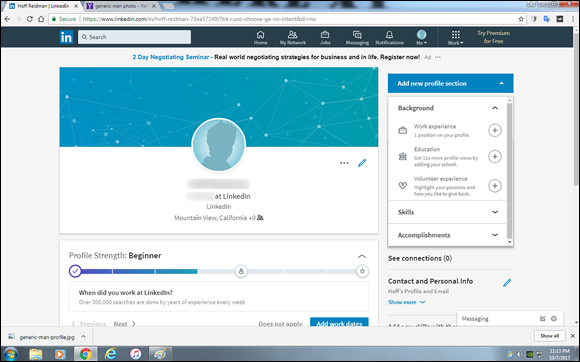
FIGURE 2-16: Continue to work on your profile.
Starting to Build Your Network
You’re ready to look at how to build your network, with tools and forms provided by LinkedIn. Your first step is to decide whom you want to invite to connect with you on LinkedIn.
Be sure to completely fill out your profile before you start inviting people to connect. Having a complete profile makes it easier to find former colleagues and classmates. After all, if you invite someone to connect whom you haven’t spoken to recently, he’ll probably take a quick look at your profile before responding. If he doesn’t see a part of your professional history where he knows you, he will most likely ignore your invitation.
Your best bet now is to start using LinkedIn with some thought and planning. Here are some common pitfalls after signing up:
- You feel compelled to start inviting friends and colleagues to connect with you right away, before working on your profile.
- You get nervous and decide not to invite anybody beyond one or two close friends or family members.
- You wonder about the value of LinkedIn (or get busy with your career and daily activities) and leave your account alone for a long period of time with no activity.
We’ve seen all three scenarios occur with various people who have joined LinkedIn, so don’t feel bad if one of these is your natural reaction.
When you want to start using LinkedIn, begin by navigating to the home page and clicking Sign In. You’re asked for your email address and LinkedIn password, which you provided when you joined the site. After you are logged in, you can access any of the functions from the top navigation bar.
Next, start thinking about whom you’d like to invite to join your network (see Figure 2-17). LinkedIn provides some neat tools to help you identify, in your existing networks, people you know and trust well enough to feel confident about inviting them and expecting that they will accept.
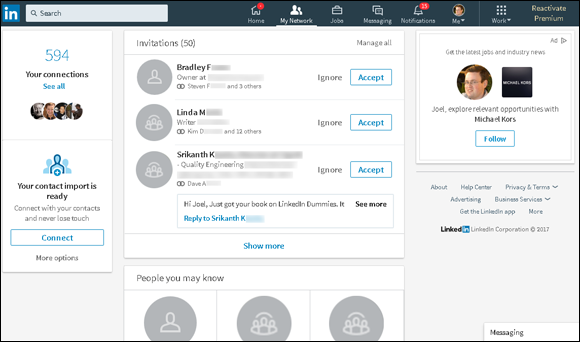
FIGURE 2-17: Add connections to your network.
You can add connections by syncing your email account with LinkedIn. Start by clicking My Network at the top of any LinkedIn page, and then click the More Options link below the Connect button in the bottom-left section of the My Network page. This section incorporates some basic options to identify and grow your network:
- Check the address book for your web-based email system, such as Yahoo! Mail, Gmail, Hotmail, and AOL.
- Check your address book for contacts to invite by importing your desktop email contacts with the link provided.
- Upload contact files from other applications.
- Invite people to connect by their email address. (By specifying people’s individual email addresses, you can decide whom you want to invite without sending a blind invitation to everyone in your address book.)
We cover these techniques in greater detail in Chapter 3 of this minibook. We recommend that you first spend a little time thinking about whom you want to invite. Then focus on setting up your profile, and then invite people to connect.