Chapter 17. Using Pictures and Clip Art
In this chapter
Using Pictures on Worksheets 352
Excel worksheets have a tendency to be dominated by numbers. A picture can liven up a spreadsheet and add interest. The picture functionality in Excel 2007 is vastly improved over that in previous versions of Excel.
Excel 2007 offers 28 quick picture styles, plus the tools to create thousands of additional effects.
When the spreadsheet was invented in 1979, accountants were amazed and thrilled with the simple black-and-white, numbers-only spreadsheets. The new image processing tools available in Excel 2007 elevate spreadsheets from simple tables of numbers to beautiful marketing showpieces.
Using Pictures on Worksheets
The first step in creating a great-looking picture is to insert a picture on a worksheet. To do so, you follow these steps:
- Select the cell where you would like the upper-left corner of the picture to be positioned.
- From the Insert ribbon, select Illustrations, Picture.
- Browse to the folder that contains your pictures.
- Choose the picture you want. (Valid types include JPG, GIF, PNG, BMP, and many others.) Click Insert.
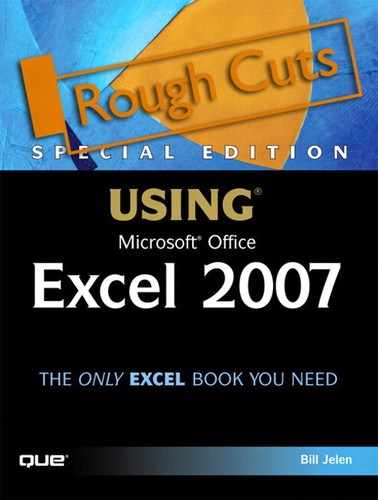
When the picture is inserted, a new Picture Tools Format tab appears on the ribbon, as shown in Figure 17.1.
Figure 17.1. When a picture is selected, the new Picture Tools Format ribbon is available.
Formatting with Picture Styles
For a quick way to make a picture look interesting, you can use one of the 28 presets in the Picture Styles gallery. These presets include various combinations of rotation, shadow, frame, and shape. Here’s how you use them:
- Select a picture. The Picture Tools ribbon appears.
- To the right of the Picture Styles icon, choose the drop-down arrow.
- Hover over the 28 built-in styles until you find one that is suitable.
- To apply the style, click the style in the gallery.
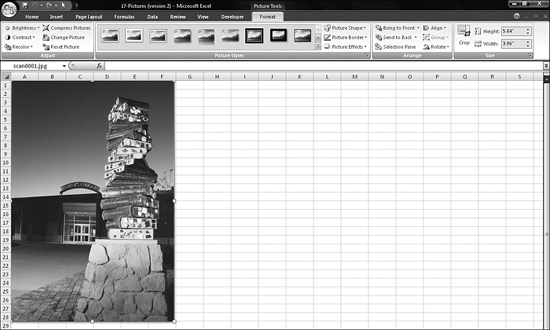
Figure 17.2 shows the gallery and several varieties of built-in picture styles.
Figure 17.2. The Picture Styles gallery offers many quick alternatives for formatting pictures.
Resizing and Cropping Pictures
One problem you might have when using a picture on a worksheet is that the image may be too large. As digital cameras improve, it is becoming increasingly common for digital images to be 4, 5, 6, or more megapixels. These images are very large, For example, an image from a 3 megapixel camera occupies from A1 through Q41.
You can use the Zoom slider in the lower-right corner of the window to zoom out so that you can see the complete image. Then you can resize the picture. It is important that you resize the picture so that it remains proportional. The tools in the Format ribbon allow you to do this.
In the Picture Tools section of the Format ribbon, there are Height and Width spin buttons in the Size group. You can use either of them to resize an image. Any change you make to either spin button results in a proportional change to the other spin button as well.
You can also resize a picture by dragging one of the corner handles inward or outward.
Cropping a picture involves removing extraneous parts of the picture while in Crop mode. To crop a picture, you follow these steps:
- Select a picture.
- Click the Crop icon in the Size group of the Picture Tools section of the Format ribbon. Eight crop handles appear on the edges and corner of the picture. Use the handles as follows:
• To crop out one side of a picture, drag the center handle on that side inward toward the middle of the picture.
• To crop both sides equally, hold down Ctrl while you drag the center handle on either side inward.
• To crop equally on all four sides, hold down Ctrl while dragging one of the corner handles inward.
- When the picture is cropped appropriately, click the Crop icon in the Picture Tools Format ribbon to exit Crop mode.
Reducing a Picture’s File Size
When you import a picture into a workbook, the file size of the workbook can grow dramatically. If you are planning on only viewing the image onscreen, you can dramatically reduce the size of the picture to also reduce the size of the workbook. Here’s how you do it:
- Select the picture.
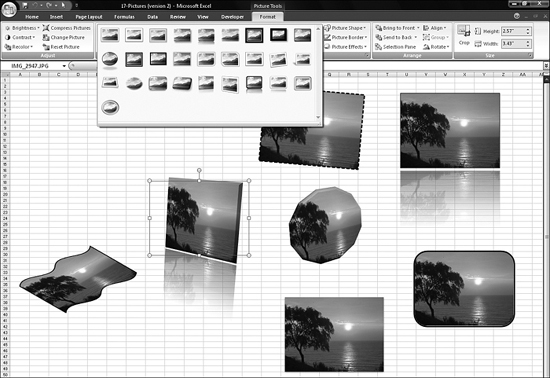
- In the Picture Tools Format ribbon, select Compress Pictures from the Adjust group. Excel displays the Compress Pictures dialog as shown in Figure 17.3.
Figure 17.3. You use the Compress Pictures dialog to reduce file size.
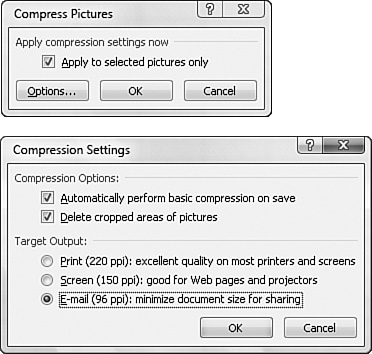
- If desired, click the Options button. Excel will allow you to choose from three compression rates, as shown in Figure 17.3. This dialog estimates the file size reduction that you can accomplish by applying compression.
- To reduce the file size even more, click the Options button in the Compress Pictures dialog. The Compression Settings dialog appears.
- Select a compression setting in the Compression Settings dialog. By default, Excel compresses the picture to 220 dpi, which is suitable for printing. If you will only be showing the workbook in a presentation, however, the 150 dpi setting will be fine. To minimize the file size as much as possible, use the 96 dpi setting, as shown in Figure 17.4.
Figure 17.4. The Compression Settings dialog allows you to change compression settings based on the planned use of the workbook.
Applying a Color to a Picture
For an old-time look, you can apply a sepia tone to a photograph. Using Excel 2007, you can now convert photographs to appear in any color. Here’s how:
- Select the image.
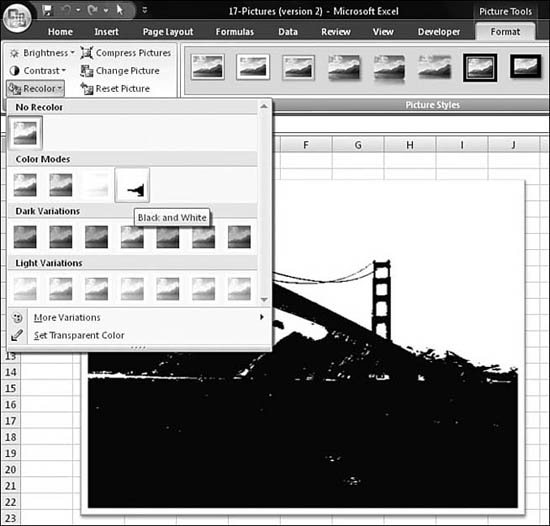
- From the Adjust group of the Format ribbon, choose Recolor from the Picture Tools group. Then choose one of the four color mode options: grayscale, sepia, washed out, or black and white. Or choose grayscale colored by one of the six accent colors in the current theme.
- If you choose More Dark Variations, you can choose to color the image in any of 16 million colors.
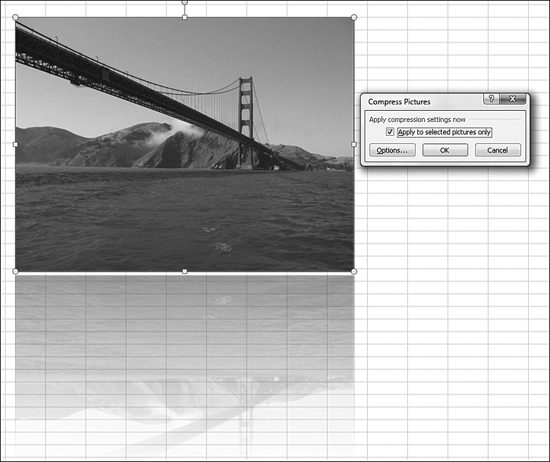
Because of the physical limitations of this book, any of the color options shown here would look like grayscale. Therefore, Figure 17.5 shows the stark contrast of the black-and-white color mode.
Figure 17.5. By selecting the recolor option, you can washout a photo, present it in one of 16 million colors, or produce a stark black-and-white image, as shown here.
Changing Brightness and Contrast
You can use the Brightness and Contrast drop-downs in the Adjust group to make a picture darker or lighter. These drop-downs offer choices from +40% to -40%, in 10 percentage-point increments. For more control, choose Picture Corrections Options from the bottom of the menu. The Format Shape dialog offers a range of -100% to +100% in 1% intervals.
Increasing the brightness makes an image lighter. Increasing the contrast makes the blacks blacker and the whites whiter. Both of these adjustments cause the photograph to lose some detail. If the image you’re working with is going to be printed in a glossy annual report, it would be better to use an image editing tool such as Photoshop. For the department staff meeting, though, Excel’s options are good enough.
Adding Borders
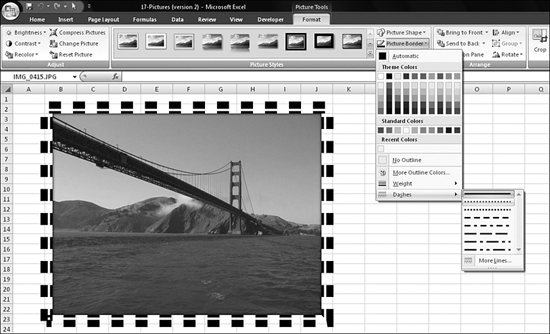
The Border menu on the Picture Tools Format ribbon lets you add a border around an image. You can choose any color, various line thicknesses, and dashed-line effects, as shown in Figure 17.6.
Figure 17.6. The Border group allows you to add a border around an image.
Adding Effects
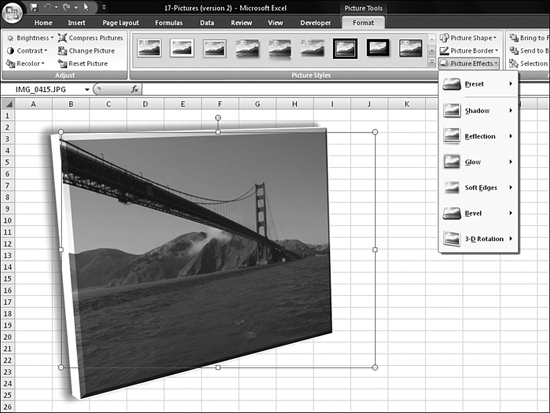
The Picture Effects dropdown is where most of the powerful new image toys are located. You can use the tools from this menu, for example to apply a glow effect, a preset bevel effect, and a 3-D effect, as shown in Figure 17.7. The bevel effect is found under the Preset fly out menu. This definitely runs circles around anything that was possible in prior versions of Excel.
Figure 17.7. You can add a soft glow, 3-D, and bevel effects to make this cool picture in three clicks.
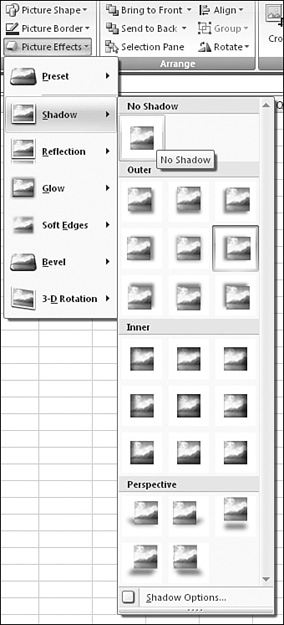
The Shadow flyout menu under the Picture Effects dropdown allows for nine different types of shadows behind the picture, called outer shadows. There are also nine different types of shadows you can use within the picture, making it look as though the picture is actually set into a window behind the spreadsheet. There are five types of perspective shadows. Figure 17.8 shows the various shadow options.
Figure 17.8. The Shadow drop-down offers 23 shadow presets and the link More Shadows, which gives you absolute control over shadows.
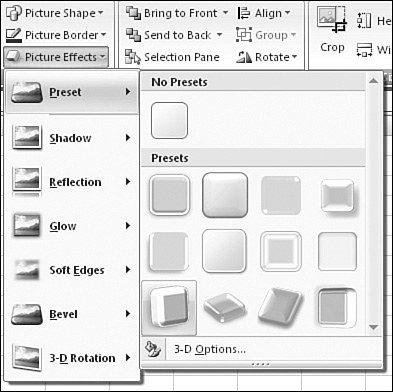
The Preset flyout menu contains 12 versions of bevels that you can apply to the photograph, as shown in Figure 17.9.
Figure 17.9. Adding beveled edges to a workbook takes on a new dimension in Excel 2007.
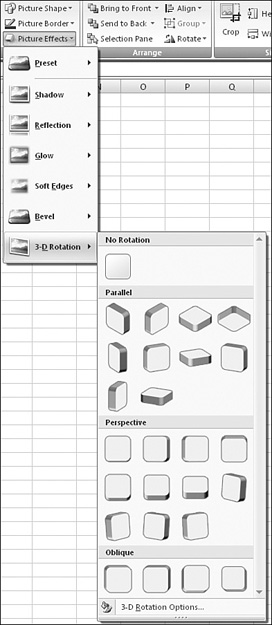
As shown in Figure 17.10, the 3-D Rotation flyout menu offers 25 various types of 3-D rotation. After you choose one of these 25 presets, you can drag the green handle to adjust the angle of rotation.
Figure 17.10. Twenty-five varieties of 3-D Rotation are available.
The Glow menu enables you to add a glow in one of four thicknesses in each of the six colors of the current theme. You can choose More Glow Colors to choose from any of 16 million colors.
The Soft Edges drop-down enables you to feather the edges of the workbook in 1-, 2.5-, 5-, 10-, 25-, and 50-point settings.
The Reflection drop-down offers reflections in light, half, and full, with an offset of 1, 4, or 8 points.
Tip From
![]()
If you want even more control over picture effects, look for a More option in most effects’ drop-down menus. When you click this option, the Format Object dialog appears, offering you complete control over fill, line, line style, shadow, 3-D format, and 3-D rotation.
Arranging Pictures
The Arrange group on the Picture Tools Format ribbon offers a rotation tool. You can use this tool to flip a portrait picture to landscape or vice versa. You can use the Bring to Back and Send to Back options to determine which of two overlapping pictures is displayed on top.
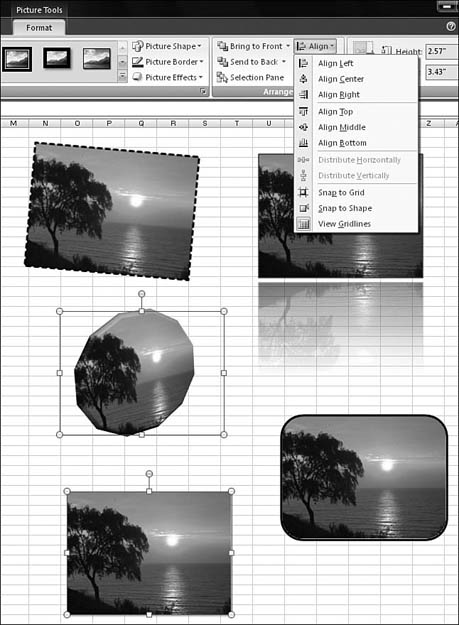
The Align option allows you to snap the pictures to a grid or to make sure that several images line up. To use the latter feature, you need to select the image that was placed last. Try this example:
- Select Image3.
- Ctrl+click Image2 and then Ctrl+click Image1.
- Choose Align, Align Left. The left edges of Image2 and Image3 move so they line up with the left edge of Image1.
All the available alignment options are shown in Figure 17.11. One interesting option here is View Gridlines, which was formerly tucked away on an obscure tab in the Options dialog.
Figure 17.11. The Align drop-down allows you to line up multiple images with each other.
If you select multiple images and group them together by using the Group drop-down, you can then move the images, and their location relative to each other remain the same.
Displaying the Selection Pane
The selection and visibility pane is new in Excel 2007. It lists all the images on the worksheet and allows you to make certain images invisible. To display the pane, you select the Picture Tools Format ribbon and then select Arrange, Selection Pane.
There is a check box to the right of each image name. You can select this check box to toggle the visibility. The buttons Show All and Hide All allow you to quickly show and hide all images.
Using Clip Art
Clip art has gotten a makeover in Excel 2007. Clips from Office Online are now automatically incorporated in the results when you are connected to the Internet.
To add clip art to a worksheet, you follow these steps:
- Position the cell pointer near where you want the clip art to be inserted.
- Choose Insert, Illustrations, Clip Art.
- Type a keyword for the clip art in the Search For box. Then press Go. A gallery of matching clip art is displayed in the Clip Art pane.
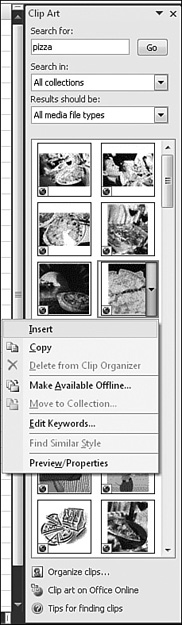
- Every clip art thumbnail has a drop-down available on the right side. Choose a drop-down to display a context menu, as shown in Figure 17.12. Choose Insert to add the clip art at the active cell.
Figure 17.12. You can choose Insert to add clip art at the desired location.
- Resize the clip art as needed to fit the desired space.
The Clip Art context menu also includes the following options:
- Copy—You use this option to copy the clip art to the clipboard
- Delete from Clip Organizer—You use this option to delete any local copy of the clip art.
- Make Available Offline—You use this option to copy the clip art from Clips Online to your computer.
- Move to Collection—You use this option to organize clip art on your computer.
- Edit Keywords—You use this option to add your own keywords to clip art. This is like tagging in Flickr.com.
- Find similar style—You use this option to narrow the results to similar images.
- Preview/Properties—You use this option to display the exact size of the clip art before you import it.
After you add clip art, you can resize it by dragging any of the resize handles around the selected clip art.