
Chapter 3. The Anatomy of a Visual Basic Project
Although you can create lots of kinds of projects both for Windows and the Web with Visual Basic 2012, there is a common set of files for each project. In this chapter you learn which files give the structure to each project and how the files influence the building of an application. You also get an overview of references, namespaces, classes, modules, and Visual Basic keywords.
Brief Overview of Types and Members
In the second part of this book, we discuss important topics related to object-oriented programming with Visual Basic 2012, and we explore features such as types, classes, modules, namespaces, interfaces, and class members. Before going into this, it would be a good idea to have at least an overview of classes, modules, namespaces, and class members because you will find these objects in code examples or in Visual Basic features that are shown prior to Chapter 7, “Class Fundamentals.”
If Something is Not Clear
The following is only a brief overview of some important topics. Don’t be afraid if any of the following concepts are not clear or worry if things seem small. Starting in Chapter 4, “Data Types and Expressions,” and continuing through Part II, “Object-Oriented Programming with Visual Basic 2012,” of this book, all concepts are discussed in detail.
Classes
Classes in .NET development represent objects whose declaration is enclosed within Class..End Class blocks. The following is an example of class declaration:
Class Person
End Class
Classes are reference types (explained more in Chapter 4) and can expose members that influence the object’s behavior, such as properties and methods. Classes can implement interfaces; they can also be static (or Shared according to the VB terminology) and can provide support for inheritance.
Properties
Properties are characteristics of a type. For example,, the previously shown class Person could have two properties, such as the first name and the last name:
Class Person
Property FirstName As String
Property LastName As String
End Class
Properties in the Latest Versions of Visual Basic
Visual Basic 2010 first introduced a new syntax for properties known as auto-implemented properties. To declare properties you need the Property keyword without explicitly specifying getters and setters. This is discussed further in Chapter 7.
Methods
Methods are the .NET representation of what in other programming environments you define as functions and procedures. A method can be a member of classes, structures, and modules. Methods that return a value are represented by Function..End Function blocks, such as the following:
Function DoSomething() As String
Return "A text message"
End Function
Methods that do not return a value are represented by Sub..End Sub blocks, such as the following:
Sub DoSomething()
'write your code here
End Sub
Methods can receive parameters that can be processed within code blocks. Such parameters are called, using .NET terminology, arguments. The following code block shows an example of an argument named message:
Sub DoSomething(ByVal message As String)
Console.Writeline(message)
End Sub
Modules
Modules are defined within a Module..End Module code block. Modules are basically Shared classes but, unlike classes, they cannot implement interfaces or use inheritance. The following is an example of a module:
Module Module1
Sub DoSomething()
'Code goes here
End Sub
End Module
Members defined inside modules don’t require the name of the module when invoked.
Structures
Structures are .NET objects represented by a Structure..End Structure code block. Structures are value types, which are described more in Chapter 4, and for classes, can expose properties, methods, and so on. The following is an example of a structure declaration:
Structure SomeValues
Property FirstValue As Boolean
Property SecondValue As Integer
Sub DoSomething()
End Sub
End Structure
Inheritance
Inheritance is one of the most important features of the .NET Framework. A class can inherit or derive from another class, meaning that the new class can have all properties, methods, and members exposed by the first class, which is called “the base class;” it can then define its own members. Inherited members can then be overridden to adapt their behavior to the new class’s context. The .NET Framework provides one-level inheritance, meaning that a class can inherit from one other class per time. Each class derives implicitly from System.Object. The Inherits keyword is used to inherit classes. The following code provides an example of a base class named Person and of a derived class named Customer:
Public Class Person
Public Property FirstName As String
Public Property LastName As String
'A new definition of System.Object.ToString
Public Overrides Function ToString() As String
Return String.Concat(FirstName, " ", LastName)
End Function
End Class
Public Class Customer
Inherits Person
Public Property CompanyName As String
Public Overrides Function ToString() As String
Return CompanyName
End Function
End Class
In the preceding example, the Person class overrides (that is, provides a new definition of) the System.Object.ToString method. The Customer class exposes a new CompanyName property whereas, via inheritance, it exposes the FirstName and LastName properties. Finally, the class also overrides the Person.ToString method. Inheritance is discussed in Chapter 12, “Inheritance.”
Namespaces
A namespace is basically a container of types. This means that one namespace can contain multiple classes, multiple modules, multiple interfaces, multiple structures, and so on. The following is an example of a namespace exposing two classes, one module, one structure, and one interface:
Namespace Test
Class Person
Property FirstName As String
Property LastName As String
End Class
Class Employee
Inherits Person
Property EmployeeID As Integer
End Class
Module Module1
Sub DoSomething()
End Sub
End Module
Interface ITest
Sub TakeATest()
End Interface
Structure SomeValues
Property FirstValue As Boolean
Property SecondValue As Integer
End Structure
End Namespace
Namespaces are important for a better organization of types, but there is another reason. You could have two classes with the same name (for example, Employee) but with different properties. Namespaces enable you to avoid conflicts in such scenarios. You can access types exposed by a namespace by writing its identifier followed by a dot and then by the type name. For example,, if you want to invoke the method DoSomething in Module1 you could write the following line of code:
Test.Module1.DoSomething()
Namespaces are described in detail in Chapter 9, “Organizing Types Within Namespaces,” where you will also find a discussion about a new feature in Visual Basic 2012: global namespaces.
Accessing Members
Unless you declare shared objects, you need to instantiate classes and structures before you can use members and store information within those objects. You instantiate a class declaring a variable and using the New keyword as in the following line of code:
Dim testPerson As New Person
Then you can set properties for the new instance or eventually invoke other members such as methods. For example,, you could initialize testPerson’s properties as follows:
testPerson.FirstName = "Alessandro"
testPerson.LastName = "Del Sole"
When you need to invoke a member of a class, you type the name of the instance (in this example testPerson) followed by a dot and the name of the member. For shared members, you just write the name of the class or structure followed by a dot and the name of the member.
Initializing Members
Since version 2008, Visual Basic offers an alternative way for initializing members’ values when instantiating classes. This feature is known as Object Initializers and is discussed in Chapter 7.
Imports Directives
As you saw before, namespaces can expose objects that expose members. Moreover, namespaces can expose nested namespaces, exposing objects and so on. You often need to access members of objects exposed by nested namespaces. To avoid the need to type the entire name of long (or nested) namespaces and write long lines of code, the Visual Basic language offers the Imports directive. For example, consider the following lines of code that open a file on disk:
Dim myFile As New System.IO.FileStream("C: est.bin",
IO.FileMode.Open)
myFile.Close()
The FileStream class is exposed by the IO namespace that is exposed by the System namespace. You could place the following directive at the beginning of the code:
Imports System.IO
At this point the first line of code could be rewritten as follows:
Dim myFile As New FileStream("C: est.bin", FileMode.Open)
Since you might be using long namespaces, Visual Basic offers a feature known as namespace aliasing, which allows defining a custom identifier to represent the namespace. The following line demonstrates how to define a GZip identifier to import the System.IO.Compression namespace:
Imports GZip = System.IO.Compression
This is useful when you need to invoke members of the namespace in code, like in the following example:
'Instead of using System.IO.Compression.GZipStream,
'you can use a shortened format with namespace aliasing
Dim archive As GZip.GZipStream
Imports directives are useful because they help to handle a much clearer code. Just remember that such directives must be the first lines of each code file. The only exception is constituted by the Option clause that must precede the Imports directives and, of course, by comments.
Region Directives
Visual Basic provides an efficient way for organizing your code within regions. A region represents a collapsible area of the code editor that can contain any code and that takes advantage of the outlining feature of the Visual Studio 2012 code editor. Regions are defined with #Region..#End Region directives. The following code snippet shows how to define a region:
#Region "Private Members"
Private firstItem As String
Private secondItem As Integer
#End Region
The #Region directive requires the specification of a descriptive caption. When you declare regions, you can then collapse regions by clicking the - (minus) symbol on the left of the #Region directive. When collapsed, the region shows just the descriptive caption and can then be expanded again by clicking the + (plus) symbol. Also notice that the Visual Studio 2012 IDE allows collapsing a region by double-clicking anywhere on the #Region..#End Region connector line on the left side of the code window. Such directives will not be compiled and will not affect performance at all.
Attributes
Attributes are classes deriving from the System.Attribute class and provide declarative information to objects or members they are applied to, providing the capability to change their behavior. As a convention, applying an attribute is also known as decorating or marking a member. Attributes are basically class instances; you can apply attributes enclosing their names within < > symbols; moreover they can receive arguments. The following are examples of decorating members with attributes:
<Serializable()> Class Test
End Class
<CLSCompliant(True)> Class Test
End Class
In the preceding snippets, the Serializable attribute creates a new instance of the System.SerializableAttribute class that indicates to the compiler that the decorated class can take advantage of the serialization process. The CLSCompliant attribute, whose value is True, means that the decorated class is compliant to Microsoft’s Common Language Specifications. Attributes are discussed in Chapter 47, “Coding Attributes,” and you often find examples in this book that require code to be decorated with attributes.
Implicit Line Continuation
In versions of Visual Basic prior to 2010, if you needed to split a long line of code into more brief and readable lines of code in the editor, you had to add an underscore (_) character. This is no longer necessary due to a feature called implicit line continuation, which makes the underscore unnecessary. You can press Enter when you need to split a line of code, and the compiler will automatically recognize a line continuation, depending on the type of code you are writing. In some situations, implicit line continuation is not allowed; the following is a list of situations in which the implicit line continuation is allowed:
• Within LINQ queries
• Within embedded expressions in LINQ to XML queries
• After dots
• After commas
• After brackets
• When decorating members with attributes
• Before an assignment
Let’s see how implicit line continuation works. The first code snippet shows a LINQ query:
Dim query = From proc In Process.GetProcesses.AsEnumerable
Where (proc.ProcessName.StartsWith("A"))
Select proc
Before Visual Basic 2010, you needed to add an underscore after the first and second lines of code. Fortunately, this is no longer necessary. The second code snippet shows a LINQ to XML query with embedded expressions without underscores:
Dim doc = <?xml version="1.0"?>
<Processes>
<%= From proc In query
Select <Process>
<Name <%= proc.ProcessName %>/>
</Process>
%>
</Processes>
The third code snippet shows both commas and brackets without underscores:
Dim p As New List(Of Integer) From {
1,
2,
3,
4}
The fourth code snippet is about dots. In this case implicit line continuation can be useful when invoking methods or properties:
Dim appDataDir As String = My.Computer.FileSystem.
SpecialDirectories.AllUsersApplicationData()
The fifth code snippet shows implicit line continuation with attributes:
<CLSCompliant(True)>
Class Test
End Class
The sixth and last code snippet demonstrates how you can use implicit line continuation before an assignment:
Dim aValue As Integer
aValue =
10
All the preceding code snippets are now perfectly legal. In all cases other than the preceding examples, implicit line continuation is not allowed. For example, you still must add an underscore after the Handles clause when handling events:
Private Sub AnEventHandler(ByVal sender As Object, ByVal e As EventArgs) _
Handles anObject.Disposed
End Sub
Of course, implicit line continuation is not mandatory: If you still prefer using the underscore when writing code, you can certainly do that.
Visual Basic 2012 Reserved Keywords
When writing code, you often define types or declare variables. Types and variables are recognizable via identifiers. An identifier is essentially the name of a type or of a variable and not necessarily a word that makes sense, although it is a good practice to assign human-readable identifiers. For example, an identifier such as DoSomething is much better than DoSmt. For this, there are some words in the Visual Basic lexical grammar that you cannot use as identifiers for your variables because they are reserved for the language.
Identifiers Naming Conventions
.NET programming principles establish that identifiers must match some rules when writing code, including identifiers. Such naming conventions are stated by the Common Language Specifications, which are covered in Chapter 20, “Advanced Language Features.” For now, keep in mind the best practice regarding human-readable identifiers. Later in the book you learn how identifiers should be correctly written.
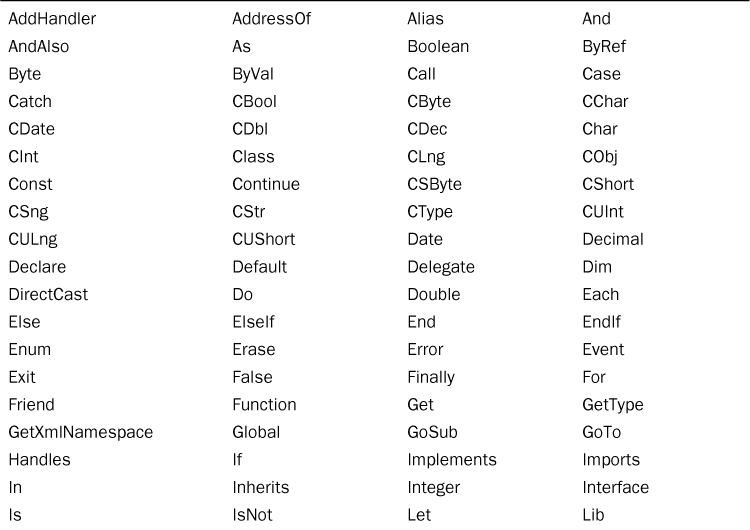
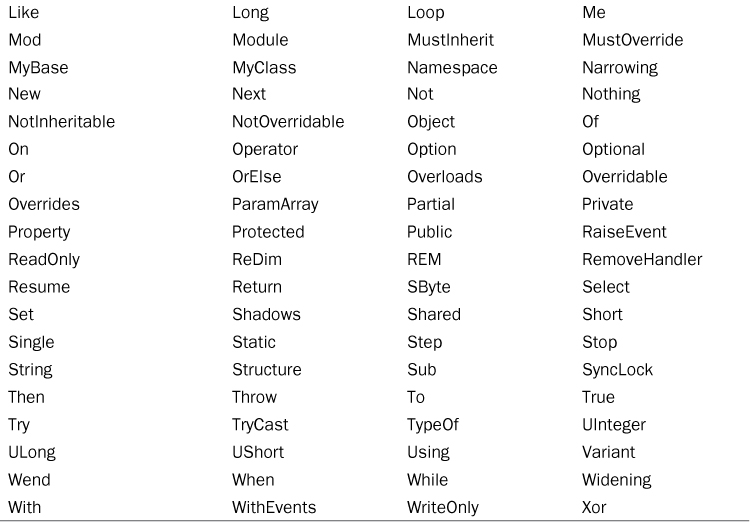
Table 3.1 shows a list of the Visual Basic 2012 reserved words.
Table 3.1. Visual Basic 2012 Reserved Keywords
Using Reserved Words as Identifiers
As an exception, you can use reserved words as identifiers, enclosing them in a couple of square brackets. For example, New is a reserved word and cannot be used whereas [New] can be accepted. Although allowed, this practice should be used only in particular cases because it could lead to confusion—especially if you are not an experienced developer.
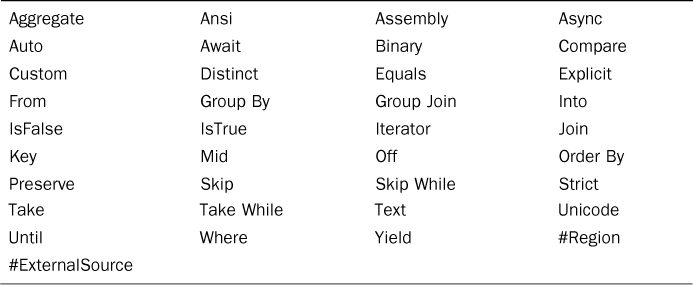
Although the code editor is powerful enough to advise when you are attempting to use a reserved keyword as an identifier, having a reference is practical. In addition, a number of so-called unreserved keywords are available that are basically words you can use as identifiers but that the programming language keeps for its own usage with particular technologies or scenarios. Table 3.2 provides the full list of unreserved keywords. The suggestion is to always avoid the usage of unreserved keywords as identifiers for your objects or variables.
Table 3.2. Visual Basic 2012 Unreserved Keywords
Visual Basic is Case-Insensitive
When writing code, remember that Visual Basic is a case-insensitive programming language. This means that, unlike C#, writing Hello is the same of writing HELLO or hello or heLLo. Take care with this feature when assigning identifiers.
Understanding Project Files
Each Visual Basic project is composed of several code files. Some of them are by default visible to the developer and are the ones you need to edit to create your application. Additionally, some other files (which are hidden by default but can be made visible manually) can be considered as support files. To understand the kind of support these files offer, consider that most of the settings we can provide to our applications via the My Project window are represented with Visual Basic code. Particularly, Visual Basic translates into code the content of the Application, Resources, Settings and My Extensions tabs. In this chapter you get a detailed description of files that represent the Application tab in My Project; then you get an overview of files that represent other tabs. Although you seldom edit these code files manually because all of them have design time support from My Project (as detailed in Chapter 19, “The My Namespace,” when describing the My namespace), there could be some situations in which you need to manually edit them. Thus, it’s important to know something about them. Before continuing, you need to click the Show All Files button in Solution Explorer. This gives visibility to several code files that are hidden by default and that provide the main infrastructure for each Visual Basic project. Notice that Windows 8 projects for Windows 8 applications have a slightly different structure; because the focus of this book is not Windows 8 development, in this chapter you learn about the composition of Visual Basic projects except Windows 8 ones.
Dissecting My Project
In Chapter 2 we introduced the My Project window and showed how it offers graphical tools for specifying some settings when developing applications, such as application information and compile options. Understanding My Project is important because it also provides the infrastructure of the My namespace, offering the ability for specifying important settings that are discussed in Chapter 19. For now, you need to know that My Project offers a graphical representation of information stored in some code files. In Solution Explorer is an element named My Project. When you double-click this element, you are redirected to the My Project window. But when you enable the All Files view, you notice how the My Project element can be expanded. Within this element (which is a folder physically stored inside the project’s folder and that contains all files described in this section), you can notice the presence of several files packaged into the assembly’s metadata when you build the project. We now describe such files and how they work.
My Project is Versatile
Depending on the kind of application you develop, My Project can implement additional tabs or remove some. For example, if you develop a Silverlight application, you can find tabs in My Project that are specific for Silverlight and that will be discussed in the appropriate chapters.
Application.MyApp
The Application.myapp file is an XML representation of the project’s main properties. Listing 3.1 shows the content of this file as it becomes available when you create a new Console application.
Listing 3.1. The Content of Application.myapp
<?xml version="1.0" encoding="utf-8"?>
<MyApplicationData xmlns:xsi="http://www.w3.org/2001/XMLSchema-instance"
xmlns:xsd="http://www.w3.org/2001/XMLSchema">
<MySubMain>false</MySubMain>
<SingleInstance>false</SingleInstance>
<ShutdownMode>0</ShutdownMode>
<EnableVisualStyles>true</EnableVisualStyles>
<AuthenticationMode>0</AuthenticationMode>
<ApplicationType>2</ApplicationType>
<SaveMySettingsOnExit>true</SaveMySettingsOnExit>
</MyApplicationData>
XML elements in this file are self-explanatory, and you might notice how each of them represents a particular item on the Application tab. The Application.myapp file is the brother of another file named Application.Designer.vb. Such a file stores information related to Windows Forms applications, such as the authentication mode and the shutdown mode. It is the complement for those application options that you can see in the Windows Application Framework Properties group in the Application tab. Listing 3.2 shows the content of the Application.Designer.vb as it is generated for a Windows Forms application.
Windows Forms Compatibility
Even if Windows Forms will not be discussed in this book because it is an obsolete presentation technology, this paragraph has some reference to Windows Forms for compatibility with existing applications and to provide a way to get a deeper knowledge of what you have developed in the past (or that you are currently building with that platform).
Listing 3.2. The Content of Application.Designer.vb
Partial Friend Class MyApplication
Public Sub New()
MyBase.New(Global.Microsoft.VisualBasic.ApplicationServices.
AuthenticationMode.Windows)
Me.IsSingleInstance = false
Me.EnableVisualStyles = true
Me.SaveMySettingsOnExit = true
Me.ShutDownStyle = Global.Microsoft.VisualBasic.ApplicationServices.
ShutdownMode.AfterMainFormCloses
End Sub
Protected Overrides Sub OnCreateMainForm()
Me.MainForm = Global.WindowsApplication1.Form1
End Sub
End Class
For the sake of simplicity, in the preceding code some attributes are omitted that Visual Studio adds to class members and that are related to the debugger interaction. As you can see examining Listing 3.2, items in the Application tab of My Project have been mapped to Visual Basic properties. The Me identifier represents the instance of the current application. The OnCreateMainForm method establishes which window must be the startup one. In this case, Form1 is the default name that Visual Studio assigns to the main window when a new project is created. If you also examine the code inside the IDE, you can notice how some comments in the code advise that the code itself is auto-generated and that you should not edit it manually because you can use the My Project designer that will automatically map changes to the Visual Basic code. You might need to set custom actions for application events (such as Startup or Shutdown, which are usually handled in the ApplicationEvents.vb file), and Application.designer.vb is the right place.
AssemblyInfo.vb
In Chapter 2 we discussed the Assembly Information dialog box, describing how it is used for specifying information about applications. All the information is stored in a file named AssemblyInfo.vb. Listing 3.3 shows the content of this file as it is available when you create a new project.
Listing 3.3. AssemblyInfo.vb Content
Imports System
Imports System.Reflection
Imports System.Runtime.InteropServices
' General Information about an assembly is controlled through the following
' set of attributes. Change these attribute values to modify the information
' associated with an assembly.
' Review the values of the assembly attributes
<Assembly: AssemblyTitle("WindowsApplication1")>
<Assembly: AssemblyDescription("")>
<Assembly: AssemblyCompany("")>
<Assembly: AssemblyProduct("WindowsApplication1")>
<Assembly: AssemblyCopyright("Copyright © 2009")>
<Assembly: AssemblyTrademark("")>
<Assembly: ComVisible(False)>
'The following GUID is for the ID of the typelib if this project is exposed to COM
<Assembly: Guid("5572d199-a7ca-48c3-98d3-56533cd6ba86")>
' Version information for an assembly consists of the following four values:
'
' Major Version
' Minor Version
' Build Number
' Revision
'
' You can specify all the values or you can default the Build and Revision Numbers
' by using the '*' as shown below:
' <Assembly: AssemblyVersion("1.0.*")>
<Assembly: AssemblyVersion("1.0.0.0")>
<Assembly: AssemblyFileVersion("1.0.0.0")>
In Listing 3.3, there are several items whose identifier begins with the word Assembly, such as AssemblyTitle, AssemblyCompany, and so on. Each item is in relationship with fields of the Assembly Information dialog box. Such items are marked with an attribute named Assembly. Attributes are discussed in Chapter 47. The reason it is useful to know about the previous file is because sometimes you’ll need to edit this file manually. Examples are localization of WPF applications or marking an assembly as compliant to Microsoft Common Language Specifications.
Resources and the Resources.resx File
Visual Studio 2012 enables defining resources that you can embed in your assembly’s metadata and use within your applications. Resources can include strings, icons, picture files, audio files, and so on. My Project offers a tab named Resources that provides a visual way for defining project level resources.
Although available in several kinds of projects, resources have to be used to fit particular scenarios. For example, resources can be successfully used in Windows applications such as Console and Windows Forms, but they are not the best choice for Windows Presentation Foundation applications. So you need to pay attention when using resources according to the particular situations.
Figure 3.1 shows the Resources designer with the definition of a String resource named TextMessage that has a value and a description. We revisit the Resources tab in Chapter 19, where we discuss My namespace, but if you are curious, you can play with the designer to see what types of resources you can add.
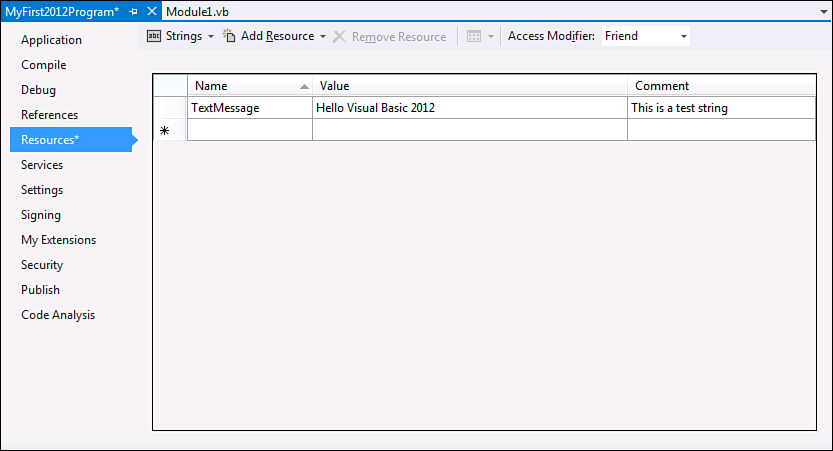
Figure 3.1. The My Resources designer.
Resources are supported by two files stored inside the My Project folder: Resources.resx and Resources.designer.vb. The first one is basically an XML schema used by Visual Studio for working with resources. Listing 3.4 shows the content of the schema.
Listing 3.4. The Content of Resources.resx
<root>
<xsd:schema id="root" xmlns="" xmlns:xsd="http://www.w3.org/2001/XMLSchema"
xmlns:msdata="urn:schemas-microsoft-com:xml-msdata">
<xsd:import namespace="http://www.w3.org/XML/1998/namespace" />
<xsd:element name="root" msdata:IsDataSet="true">
<xsd:complexType>
<xsd:choice maxOccurs="unbounded">
<xsd:element name="metadata">
<xsd:complexType>
<xsd:sequence>
<xsd:element name="value" type="xsd:string" minOccurs="0" />
</xsd:sequence>
<xsd:attribute name="name" use="required" type="xsd:string" />
<xsd:attribute name="type" type="xsd:string" />
<xsd:attribute name="mimetype" type="xsd:string" />
<xsd:attribute ref="xml:space" />
</xsd:complexType>
</xsd:element>
<xsd:element name="assembly">
<xsd:complexType>
<xsd:attribute name="alias" type="xsd:string" />
<xsd:attribute name="name" type="xsd:string" />
</xsd:complexType>
</xsd:element>
<xsd:element name="data">
<xsd:complexType>
<xsd:sequence>
<xsd:element name="value" type="xsd:string" minOccurs="0" msdata:Ordinal="1" />
<xsd:element name="comment" type="xsd:string" minOccurs="0" msdata:Ordinal="2" />
</xsd:sequence>
<xsd:attribute name="name" type="xsd:string" use="required" msdata:Ordinal="1" />
<xsd:attribute name="type" type="xsd:string" msdata:Ordinal="3" />
<xsd:attribute name="mimetype" type="xsd:string" msdata:Ordinal="4" />
<xsd:attribute ref="xml:space" />
</xsd:complexType>
</xsd:element>
<xsd:element name="resheader">
<xsd:complexType>
<xsd:sequence>
<xsd:element name="value" type="xsd:string" minOccurs="0" msdata:Ordinal="1" />
</xsd:sequence>
<xsd:attribute name="name" type="xsd:string" use="required" />
</xsd:complexType>
</xsd:element>
</xsd:choice>
</xsd:complexType>
</xsd:element>
</xsd:schema>
<resheader name="resmimetype">
<value>text/microsoft-resx</value>
</resheader>
<resheader name="version">
<value>2.0</value>
</resheader>
<resheader name="reader">
<value>System.Resources.ResXResourceReader, System.Windows.Forms,
Version=4.0.0.0, Culture=neutral, PublicKeyToken=b77a5c561934e089</value>
</resheader>
<resheader name="writer">
<value>System.Resources.ResXResourceWriter, System.Windows.Forms, Version=4.0.0.0, Culture=neutral, PublicKeyToken=b77a5c561934e089</value>
</resheader>
<data name="TextMessage" xml:space="preserve">
<value>Hello Visual Basic 2012!</value>
<comment>This is a test string</comment>
</data>
</root>
This schema establishes how a resource is defined, with names, values, comments, and a MIME (Multipurpose Internet Mail Extensions) type that identifies the file type. At the end of the XML markup code, you can see how resources are stored. Continuing with our example, you can see the name of the resource (inside the data element), its value, and the description we provided via the designer. This schema is used by Visual Studio for design time purposes. To work with resources in our applications, Visual Studio also needs to provide Visual Basic code support for resources. Such support is provided by a code file named Resources.designer.vb. This file handles a reference to a .NET object called ResourceManager that is responsible for managing resources in code. Listing 3.5 shows the content of Resources.designer.vb. (For the sake of simplicity, auto-generated attributes are not covered here.)
Listing 3.5. Content of Resources.designer.vb
Friend Module Resources
Private resourceMan As Global.System.Resources.ResourceManager
Private resourceCulture As Global.System.Globalization.CultureInfo
Friend ReadOnly Property ResourceManager() As
Global.System.Resources.ResourceManager
Get
If Object.ReferenceEquals(resourceMan, Nothing) Then
Dim temp As Global.System.Resources.ResourceManager =
New Global.System.Resources.ResourceManager("MyFirst2012Program.Resources",
GetType(Resources).Assembly)
resourceMan = temp
End If
Return resourceMan
End Get
End Property
Friend Property Culture() As Global.System.Globalization.CultureInfo
Get
Return resourceCulture
End Get
Set(ByVal value As Global.System.Globalization.CultureInfo)
resourceCulture = value
End Set
End Property
Friend ReadOnly Property TextMessage() As String
Get
Return ResourceManager.GetString("TextMessage", resourceCulture)
End Get
End Property
End Module
At this point in the book you don’t effectively need to know what each type used in code refers to, although it is useful to know the existence of the ResourceManager property that points to the project resources. (See the declaration of the temp variable.) This handles a reference to the application-level ResourceManager that enables access to resources. There is another property named Culture that is of type System.Globalization.CultureInfo. This property sets or returns the current localization for resources. The last property in the code is named TextMessage and is the Visual Basic representation of the string resource defined in My Project. This is a read-only property because you cannot change it in code (you can change it only via designer); it returns a localized version of the resource invoking the GetString method of the ResourceManager class. GetString requires an object of type CultureInfo (in our code it’s resourceCulture) that represents the culture to which the resource must be localized. The following line of code shows how you can access the preceding defined resource, which is discussed further in Chapter 19:
Dim myString As String = My.Resources.TextMessage
When you access resources, as shown in Chapter 19, you do not need to manually invoke this background code, but you need to know how it is structured to better understand what’s happening behind the scenes. Resources are not the only feature in My Project that is supported by Visual Basic code for design time features. Settings are another one of these features.
Application Settings
Settings in Visual Basic development are particular objects that provide a managed way for manipulating applications and user-level settings. For example, you could provide users with the ability to customize options in the user interface of your application. To save and read such customizations to and from disk, you can use .NET Settings. My Project provides a tab named Settings that enables specifying information at the application or user level. Figure 3.2 shows an example.

Figure 3.2. Settings tab in My Project.
As you can see in Figure 3.2, you can specify an identifier for each setting, a type (which you can understand better by reading Chapter 4), the scope, and the value. For the scope, User means that only the user who runs the application can use that setting. Application means that the setting is available at the application level, independently from the user who logged in to Windows (and therefore is available to all users). As with Resources, Settings are also described in detail in Chapter 19. Settings are represented by a simple XML file, named Settings.settings. Listing 3.6 shows the content of Settings.settings after the addition of the sample setting.
Viewing the Settings.Settings File with the XML Editor
To view the XML content for the Settings.settings file, right-click the filename in Solution Explorer, select the Open With command, and select Xml (Text) Editor in the Open With dialog box.
Listing 3.6. Settings.settings Content
<?xml version='1.0' encoding='utf-8'?>
<SettingsFile xmlns="http://schemas.microsoft.com/VisualStudio/2004/01/settings"
CurrentProfile="(Default)" GeneratedClassNamespace="My" GeneratedClass-
Name="MySettings" UseMySettingsClassName="true">
<Profiles />
<Settings>
<Setting Name="StartState" Type="System.Boolean" Scope="User">
<Value Profile="(Default)">True</Value>
</Setting>
</Settings>
</SettingsFile>
In the XML markup you can see the presence of a Settings node that stores as many Setting elements and as many settings that you specify in My Project. In our example there is just one Setting element that contains the name of the setting, the data type, the scope, and the default value (which means the value you specify in My Project). The Settings.settings file also has Visual Basic support, which is represented by another file named Settings.designer.vb. We do not need to examine all the content of this file when just a couple of parts of the code can be interesting for us. First, this file implements a property named Settings that is accessible via the My namespace, as detailed in Chapter 19. Listing 3.7 shows the definition of this property.
Listing 3.7. Definition of the Settings Property
Friend ReadOnly Property Settings() As
Global.MyFirst2012Program.My.MySettings
Get
Return Global.MyFirst2012Program.My.MySettings.Default
End Get
End Property
The Settings property represents the active instance of the Settings object that you can use in your applications. How the active instance is defined is beyond the scope of this chapter, but now you know that the Settings tab in My Project also has a counterpart in two support files. Just for your convenience, the following line of code shows how you can access settings and how we set them before:
Dim currentValue As Boolean = My.Settings.StartState
The value stored in the StartState setting will be assigned to a variable named currentValue. Examining the My namespace in Chapter 19 can clarify the usage of Settings and Resources and of many other interesting features.
Understanding References
The Base Class Library exposes types through several assemblies that are part of the .NET Framework, and you will often need to invoke types from those assemblies. Moreover, although very rich, the Base Class Library (BCL) cannot define types covering every aspect of application development. This means that you will often need to use types exposed by other assemblies, such as other projects in the same solution or external compiled assemblies.
Each time you create a new project, Visual Studio automatically adds references to some .NET assemblies that are necessary for each kind of application and that expose the BCL’s core part, such as System.dll and System.Core.dll.
To use types defined in external assemblies, you need to add a reference to the desired assembly in your project. To accomplish this, right-click the project name in Solution Explorer and click the Add Reference command from the pop-up menu or select the References tab in My Project and click Add. This activates the Reference Manager dialog box, as shown in Figure 3.3.
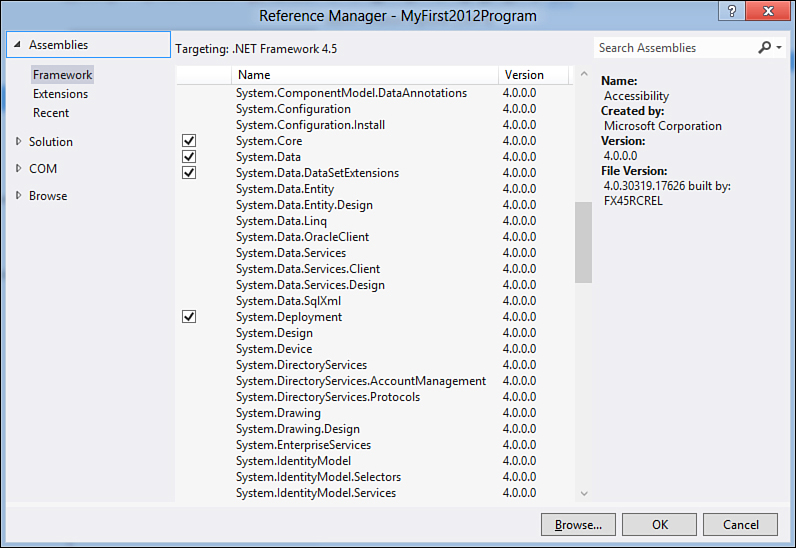
Figure 3.3. The Reference Manager dialog box.
You can select all the assemblies you want to reference; multiple selections are allowed by clicking the check box near the assembly name or by pressing Ctrl and then clicking the name of the required assembly. The Reference Manager dialog box is divided into several tabs. The default tab is named Assemblies and shows a list of all the available assemblies in the Global Assembly Cache through a group called Framework and a list of available assemblies exposed by installed extensions for Visual Studio through a group called Extensions.
What is the Global Assembly Cache?
The Global Assembly Cache (GAC) can be described as a repository for information and locations on installed assemblies. The .NET Framework knows where assemblies can be found by browsing the GAC, which also can distinguish between different versions of an assembly. The GAC is discussed in detail in Chapter 50, “Understanding the Global Assembly Cache.”
The Reference Manager dialog box shows the version number of assemblies; this is useful because you can have different versions of an assembly with the same name. When you add a reference to an assembly, Solution Explorer updates the References node. For example, if you want to add security features to your applications, you need to add a reference to the System.Security.dll assembly (refer to Figure 3.3), which is part of the BCL. When added, Solution Explorer looks like Figure 3.4.
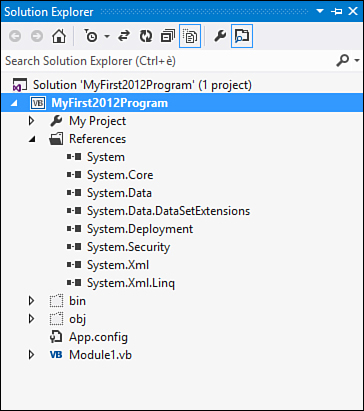
Figure 3.4. Solution Explorer is updated with the new reference.
You can use your code types exposed by the specified assemblies that have public visibility. The Reference Manager dialog box provides other tabs and groups. The Recent group in the Assemblies tab shows a list of all the most recently used assemblies for faster reuse. The Browse tab enables searching for assemblies that are not registered into the GAC. The Solution tab enables adding references to other projects in the solution. This is typically the case when you have a class library that exposes types you want to use inside a client application. Another tab, named COM, lets you add references to COM-type libraries as we discuss next.
Adding References to COM Libraries
You might come across situations in which you are required to use COM type libraries in your .NET applications, a scenario also known as COM Interop. This should be rare because .NET and COM are such different architectures, and the second one was not made to work within the first one. Visual Studio 2012 enables you to add references to old libraries. To accomplish this, you need to select the COM tab in the Reference Manager dialog box. All the registered COM-type libraries will be shown within the dialog box, and you can select the needed components (see Figure 3.5).
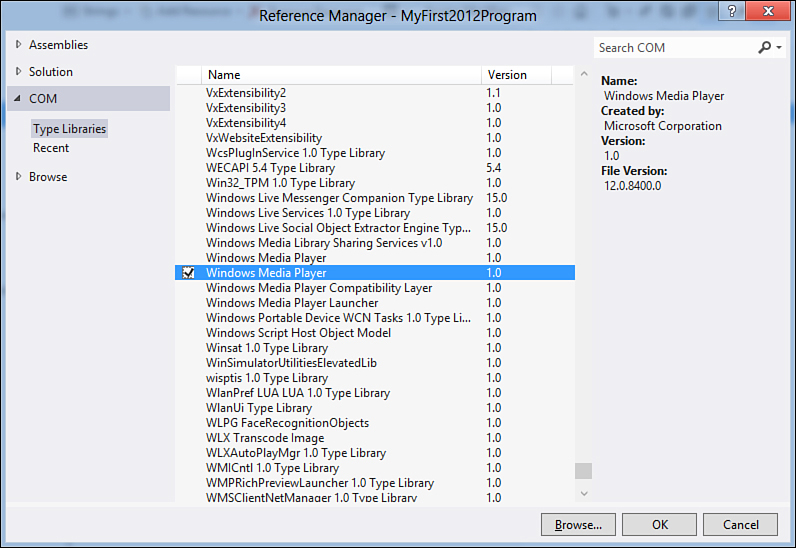
Figure 3.5. Adding a reference to a COM component.
For example, you might want to include the Windows Media Player functionalities in your application; to do this, you can select the Windows Media Player component and then click OK (see Figure 3.5). Visual Studio will show a reference named WMPLib.dll in Solution Explorer and generate an assembly named Interop.WMPLib.dll. This assembly is a managed wrapper for the Windows Media Player component and will provide managed access to types exposed by the type library. More generally, Visual Studio generates an Interop.AssemblyName.dll assembly (where AssemblyName is the original name of the assembly) for each referenced type library, which is known as Primary Interoperability Assembly (PIAs) and that allows interoperation between .NET and COM architectures. Different from previous versions of .NET Framework and Visual Studio, by default you no longer see the wrapper assemblies included in your build output because of a feature called Deploy Without Primary Interoperability Assemblies.
Deploy Without PIAs
When deploying applications that reference a COM library, you also must include in your distribution the primary interoperability assemblies. In our example, the PIA is Interop.WMPLib.dll. In Visual Studio 2012, you can avoid including primary interoperability assemblies in your distributions, although you reference those assemblies. This is possible because Visual Studio can embed in your executable only the types that you effectively use from the referenced assembly. This avoids the need of including the assembly itself in the build output and, consequently, in the deployment process. For our sample scenario about including the Windows Media Player component, we could write a small application that has the name of a media file provided by the user and then launches WMP. Listing 3.8 accomplishes this.
Listing 3.8. Using a COM Component in Code
Module Module1
Sub Main()
Console.WriteLine("Type the name of a media file:")
Dim fileName As String = Console.ReadLine
Dim wmp As New WMPLib.WindowsMediaPlayer
wmp.openPlayer(fileName)
End Sub
End Module
In the preceding code, you need to take a look at this simple line:
Dim wmp As New WMPLib.WindowsMediaPlayer
Declaring an instance of the WMPLib.WindowsMediaPlayer class is sufficient for Visual Studio to embed the definition of the WindowsMediaPlayer object inside our executable so that it will not need to include the entire Interop.WMPLib.dll assembly in the build output. As you can imagine, this is a great feature because, if you have a large type library and you need to use only a few types, you can save space and preserve performances. The Deploy Without PIAs feature is enabled by default. If you instead prefer to avoid embedding types within your executable and including the primary interoperability assemblies in your build output, you need to right-click the referenced assembly in Solution Explorer and then click Properties. Continuing our example, you would need to select WMPLib.dll in Solution Explorer. The Properties window will show a property called Embed Interop Types that is set to True by default (see Figure 3.6).
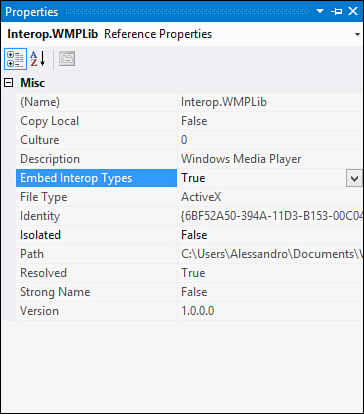
Figure 3.6. Enabling the Deploy Without PIAs feature and setting the Embed Interop Types property.
If you change the value to False, types will no longer be embedded in your executable and the primary interoperability assemblies will be included in the build output.
Verifying Types Embedding
If you are an experienced developer, you can easily verify whether types have been embedded in your executable via the Deploy Without PIAs feature by opening executables with tools such as Reflector or IL Disassembler.
Final Considerations
The first three chapters of this book provide a necessary overview of tools and features that you must understand before moving on. Now that you have completed the introductory steps, you are ready to get your hands dirty on the core of the Visual Basic 2012 programming language.
Summary
This chapter provided an overview of some important language features. You also got a complete list of the Visual Basic 2012 reserved words that you cannot use as identifiers for your variables. Another important topic discussed is how a Visual Basic project is structured and which files compose a Visual Basic project. Finally, you got an overview of references and why they are important in developing applications. In this discussion you learned about a new feature of Visual Studio 2012 and .NET Framework 4.5: the Deployment Without the Primary Interoperability Assemblies.