
Chapter 31. Manipulating Media and Documents
Windows Presentation Foundation (WPF) offers native controls for working with media content and manipulating documents. This last topic is also important because documents are one of the most common requirements in modern applications, and WPF provides a way for creating and managing documents that can be dynamically arranged to offer a better user experience. In this chapter you learn how to use media contents to enrich your applications and to manipulate dynamic documents through built-in controls exposed by the .NET Framework.
Viewing Images
You use the System.Windows.Controls.Image control to show images. To see how the control works, create a new WPF project that will be used for all examples in this chapter and name it DocumentsAndMedia. When ready, drag an Image control from the toolbox onto the new Window; then set its dimensions as you like. To view an image, you need to set the Source property that points to a Uri, but you might want to add some images to your project first. As for any other kind of project, it is a good idea to organize contents into subfolders based on their types. So, in Solution Explorer create a new project subfolder called Images. Right-click this folder and then select Add, Existing Item. When the dialog box appears, select the number of image files you want to be added to the project. At this point, select the Image control either in the XAML designer or in the XAML code editor and open the Properties window by pressing F4. Select the Source property and expand the drop-down box for this property (see Figure 31.1). Here you can pick up an image from a list of image files and the image will be assigned to the Image control.
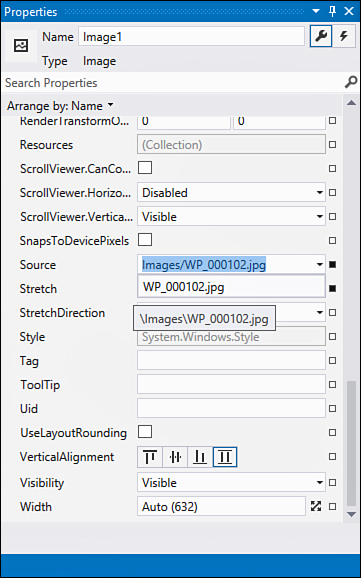
Figure 31.1. Adding images to the project.
Visual Studio automatically sets the Source property in XAML, taking advantage of the packed Uri, as demonstrated by the following line of XAML code:
<Image Source="Images/IMG006.jpg"
Stretch="Fill" Name="Image1" />
The Stretch property enables you to establish how pictures will be tiled inside the Image control. Fill, which is the default value, dynamically adapts the picture to fill the entire Image control, but when you resize the control you can lose the original aspect ratio. If you instead use Uniform, you can keep the aspect ratio and dynamically adapt the picture. While setting UniformToFill, the picture will work like Uniform except that it will clip the source image so that the layout will be based on the Image control size. If you assign the Stretch property with None, the source image will be shown in its original size. Figure 31.2 shows how the image looks with Stretch set as Fill. You can also assign the Source property at runtime from Visual Basic code so you can provide users the capability to select different pictures. Unlike the XAML code, in VB you need to first create an instance of the BitmapImage class and assign some of its properties as follows:
Private Sub LoadPicture(ByVal fileName As String)
Dim img As New BitmapImage
With img
.BeginInit()
.BaseUri = New Uri("MyPicture.jpg")
.EndInit()
End With
Image1.Source = img
End Sub
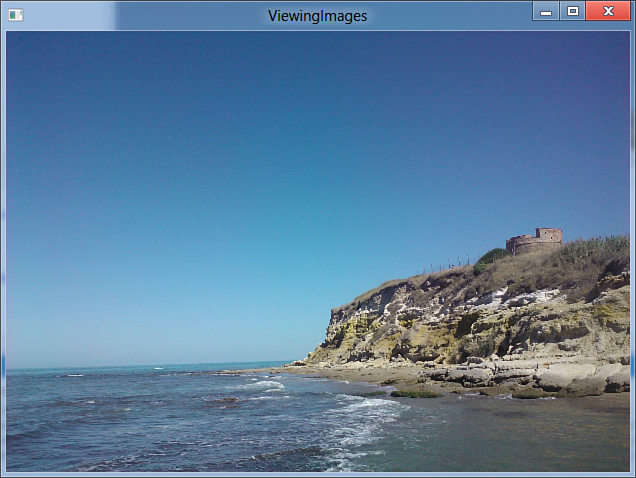
Figure 31.2. Showing images with the Image control.
You invoke BeginInit to start editing; then you set BaseUri pointing to the desired file and finally invoke EndInit to finish editing. When you perform these steps, you can assign the new instance to the Image.Source property.
Playing Media
Windows Presentation Foundation enables you to easily reproduce media files, such as audio and videos, through the System.Windows.Controls.MediaElement control. This enables reproducing, among others, all media contents supported by the Windows Media Player application, such as .wmv, .wma, .avi, and .mp3 files. This section shows you how to build a simple media player using MediaElement and Visual Basic 2012. Now add a new Window to an existing project, setting this as the main window. The goal of the next example is to implement a media player and buttons for controlling media reproduction. Code in Listing 31.1 declares the user interface (UI).
Listing 31.1. Defining the User Interface for a Simple Media Player
<Window x:Class="PlayingMedia"
xmlns="http://schemas.microsoft.com/winfx/2006/xaml/presentation"
xmlns:x="http://schemas.microsoft.com/winfx/2006/xaml"
Title="PlayingMedia" Height="300" Width="600">
<Grid>
<Grid.RowDefinitions>
<RowDefinition />
<RowDefinition Height="50" />
</Grid.RowDefinitions>
<MediaElement Name="Media1" Grid.Row="0" LoadedBehavior="Manual"
Volume="{Binding ElementName=VolumeSlider, Path=Value}"
MediaFailed="Media1_MediaFailed"
MediaEnded="Media1_MediaEnded"/>
<StackPanel Orientation="Horizontal" Grid.Row="1">
<Button Name="PlayButton" Width="70" Height="40"
Margin="5" Click="PlayButton_Click"
Content="Play"/>
<Button Name="PauseButton" Width="70" Height="40"
Margin="5" Click="PauseButton_Click"
Content="Pause"/>
<Button Name="StopButton" Width="70" Height="40"
Margin="5" Click="StopButton_Click"
Content="Stop"/>
<Button Name="BrowseButton" Width="40" Height="40"
Margin="5" Content="..."
Click="BrowseButton_Click"/>
<Slider Name="VolumeSlider" Width="80" Margin="5"
Minimum="0" Maximum="1" Value="0.5"
TickFrequency="0.1"
AutoToolTipPlacement="TopLeft"
TickPlacement="BottomRight"
ToolTip="Adjust volume"/>
</StackPanel>
</Grid>
</Window>
The MediaElement control has no look, so when you place it onto the user interface, it has a dark gray background and border, although you can replace this with your custom background and border. The LoadedBehavior property enables you to establish how the media file needs to be reproduced. For example, Play means that the associated video will be automatically played when the control is loaded; Manual means that playing will be started via Visual Basic code at the specified moment. (IntelliSense can help you to choose the most appropriate self-explanatory option.) You associate a media file to the MediaElement by assigning the Source property, but this is not mandatory because you can accomplish this later in code. The Volume property enables you to adjust reproduction volume, and its range is between 0 and 1. In this example the Volume value is bound to the VolumeSlider.Value property. The control also offers some events such as MediaFailed and MediaEnded that are raised when an error occurs when attempting to open the media file and when the reproduction completes, respectively. The MediaElement control also provides some methods for controlling reproduction in code, such as Play, Pause, and Stop. The code in Listing 31.2 shows how to implement the features and how to enable media selection from disk.
Listing 31.2. Controlling the MediaElement in Code
Public Class PlayingMedia
Dim sourceMedia As String = String.Empty
Private Sub Media1_MediaEnded(ByVal sender As System.Object,
ByVal e As System.Windows.
RoutedEventArgs)
'Playing completed
End Sub
Private Sub Media1_MediaFailed(ByVal sender As System.Object,
ByVal e As System.Windows.
ExceptionRoutedEventArgs)
MessageBox.Show(e.ErrorException.Message)
End Sub
Private Sub PlayButton_Click(ByVal sender As System.Object,
ByVal e As System.Windows.RoutedEventArgs)
If String.IsNullOrEmpty(Me.sourceMedia) = False Then
Me.Media1.Play()
End If
End Sub
Private Sub PauseButton_Click(ByVal sender As System.Object,
ByVal e As System.Windows.RoutedEventArgs)
If String.IsNullOrEmpty(Me.sourceMedia) = False Then
Me.Media1.Pause()
End If
End Sub
Private Sub StopButton_Click(ByVal sender As System.Object,
ByVal e As System.Windows.RoutedEventArgs)
If String.IsNullOrEmpty(Me.sourceMedia) = False Then
Me.Media1.Stop()
End If
End Sub
Private Sub BrowseButton_Click(ByVal sender As System.Object,
ByVal e As System.Windows.RoutedEventArgs)
Dim dialog As New Microsoft.Win32.OpenFileDialog
With dialog
.Title = "Select a media file"
.Filter = "Avi & Wmv|*.avi;*.wmv|Audio|*.wma;*.mp3|All files|*.*"
If .ShowDialog = True Then
Me.sourceMedia = .FileName
Me.Media1.Source = New Uri(sourceMedia,
UriKind.RelativeOrAbsolute)
End If
End With
End Sub
End Class
Notice how the MediaFailed event handler shows an error message in case an exception is thrown and how the media file is assigned under the form of a Uri to the MediaElement.Source property. This also means that you can assign a Uri such as a web address to play media content stored on a website. Now you can run the application, click the Browse button to select your media content, and click Play. Figure 31.3 shows the application playing a video. The MediaElement control also offers a Position property (of type TimeSpan) that provides the capability to seek the desired position within the media content.
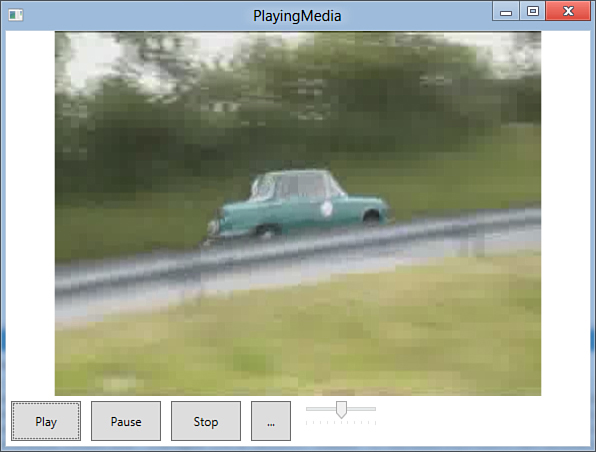
Figure 31.3. The sample application playing a video.
Manipulating Documents
One of the most important requirements in modern applications is the ability to manage documents. WPF offers the System.Windows.Documents namespace that exposes objects so you can create flexible and dynamic documents that can adapt their layouts dynamically to the user interface. These kinds of documents use the Clear Type technology and are hosted inside FlowDocument objects. A FlowDocument is composed of Paragraph objects where you can place and format your text. Paragraphs are powerful because they enable you to add figures, bulleted lists, fully functional hyperlinks, and text formatting. To present and browse a flow document, you need to add a FlowDocumentReader control to the user interface. Flexibility and dynamicity are just two benefits of flow documents. Another cool feature in flow documents is that users can interact with documents as if they were reading a book, so they can add annotations and highlights that can be stored to disk for later reuse. Annotations are provided by the System.Windows.Annotations namespace that needs to be imported at the XAML level. The goals of the next code example are
• Illustrating how you can create flow documents
• Illustrating how you can add and format text within flow documents
• Implementing features for adding annotations to documents and saving them to disk
Add a new Window to the current one, setting it as the startup page. When ready, write the XAML code shown in Listing 31.3 that implements the UI side of the application. The code is explained at the end of the listing.
Note
The content of the sample flow document is just an excerpt of the content of Chapter 28, “Creating WPF Applications,” which is provided as an example, but you can replace it with a more complete text of your own.
Listing 31.3. Implementing Flow Documents
<Window x:Class="ManipulatingDocuments"
xmlns="http://schemas.microsoft.com/winfx/2006/xaml/presentation"
xmlns:x="http://schemas.microsoft.com/winfx/2006/xaml"
xmlns:ann="clr-namespace:System.Windows.Annotations;assembly=PresentationFramework"
Title="ManipulatingDocuments" Height="480" Width="600">
<Grid>
<Grid.RowDefinitions>
<RowDefinition />
<RowDefinition Height="40"/>
</Grid.RowDefinitions>
<StackPanel Grid.Row="1" Orientation="Horizontal">
<StackPanel.Resources>
<Style x:Key="ButtonStyle" TargetType="Button">
<Setter Property="Width" Value="100"/>
<Setter Property="Height" Value="30"/>
<Setter Property="Margin" Value="5"/>
</Style>
</StackPanel.Resources>
<Button Command="ann:AnnotationService.CreateTextStickyNoteCommand"
CommandTarget="{Binding ElementName=FlowReader1}"
Style="{StaticResource ButtonStyle}">
Add note</Button>
<Separator/>
<Button Command="ann:AnnotationService.CreateInkStickyNoteCommand"
CommandTarget="{Binding ElementName=FlowReader1}"
Style="{StaticResource ButtonStyle}">
Add Ink
</Button>
<Separator/>
<Button Command="ann:AnnotationService.DeleteStickyNotesCommand"
CommandTarget="{Binding ElementName=FlowReader1}"
Style="{StaticResource ButtonStyle}">
Remove note
</Button>
<Separator/>
<Button Command="ann:AnnotationService.CreateHighlightCommand"
CommandTarget="{Binding ElementName=FlowReader1}"
Style="{StaticResource ButtonStyle}">
Highlight
</Button>
<Separator/>
<Button Command="ann:AnnotationService.ClearHighlightsCommand"
CommandTarget="{Binding ElementName=FlowReader1}"
Style="{StaticResource ButtonStyle}">
Remove highlight
</Button>
</StackPanel>
<FlowDocumentReader Grid.Row="0" BorderThickness="2" Name="FlowReader1">
<FlowDocument Name="myDocument"
TextAlignment="Justify"
IsOptimalParagraphEnabled="True"
IsHyphenationEnabled="True"
IsColumnWidthFlexible="True"
ColumnWidth="300"
ColumnGap="20">
<Paragraph FontSize="36" FontWeight="Bold"
FontStyle="Oblique">Chapter 28</Paragraph>
<Paragraph FontSize="24" FontWeight="Bold">Introducing
WPF</Paragraph>
<Paragraph>
Windows Presentation Foundation relies on a layered architecture
that is represented in Figure 28.1. The first layer is the
Windows operating system. The second layer is constituted by the
combination of two communicating layers:
User32, which is the part of the operating system responsible
for exchanging messages with applications, and the DirectX
libraries which are the real power of WPF.
<!— Add other text here.... —>
<Figure Width="300">
<BlockUIContainer>
<StackPanel>
<!—Replace the image file with a valid one—>
<Image
Source="/DocumentsAndMedia;component/Images/28fig01.tif"
Width="200"
Height="300"
Stretch="Fill" />
<Separator></Separator>
<TextBlock VerticalAlignment="Center"
Width="220" TextWrapping="Wrap"
FontSize="10" FontStyle="Italic">
Figure 28.1 – WPF architecture
</TextBlock>
</StackPanel>
</BlockUIContainer>
</Figure>
<Bold>PresentationFramework</Bold> exposes namespaces
and classes
through a complex hierarchy of inheritance,
where the root class is System.Object.
Such hierarchy provides the infrastructure for the user
interface elements.
This hierarchy is composed by the following list of classes,
where each class inherits from the previous one:
</Paragraph>
<List>
<ListItem>
<Paragraph
FontFamily="Courier New">System.Object</Paragraph>
</ListItem>
<ListItem>
<Paragraph
FontFamily="Courier New">
System.Threading.DispatcherObject</Paragraph>
</ListItem>
<ListItem>
<Paragraph FontFamily="Courier New">
System.Windows.DependencyObject</Paragraph>
</ListItem>
<ListItem>
<Paragraph
FontFamily="Courier New">
System.Windows.Media.Visual</Paragraph>
</ListItem>
</List>
<Paragraph>
The
<Hyperlink
NavigateUri="http://msdn.microsoft.com/en-
us/library/ms750441(VS.110).aspx
#System_Threading_DispatcherObject">
System.Threading.DispatcherObject</Hyperlink>
is responsible for threading and messages which
WPF relies on. The dispatcher takes advantage
of the User32 messages for performing
cross thread calls.
</Paragraph>
</FlowDocument>
</FlowDocumentReader>
</Grid>
</Window>
Let’s begin by illustrating the FlowDocumentReader control. It provides a container for flow documents and automatically implements buttons for browsing multiple-page documents and controlling documents’ layout, as you see later in Figure 31.4. The FlowDocument object instead contains the document and exposes some interesting properties. The previous code uses the most important ones. TextAlignment enables specifying how the text must be aligned within the document and can have one of the following values: Center, Right, Left, or Justify. IsOptimalParagraph set as True enables paragraph layout optimization. IsHyphenationEnable set as True enables word hyphenation in the document. IsColumnWidthFlexible set as True means that the value of the ColumnWidth property is not fixed. This last property takes place when you enable the document view by columns. The ColumnGap property indicates the spacing between columns. A complete list of properties is available in the MSDN Library: http://msdn.microsoft.com/en-us/library/system.windows.documents.flowdocument.aspx. For the document content, notice the following techniques:
• You divide the content into multiple Paragraph objects to provide different paragraph formatting.
• You can add inline formatting. For example, the following line contains bold formatting within a paragraph:
<Bold>PresentationFramework</Bold> exposes namespaces and classes
• You can also add fully functional hyperlinks as in the following sample line:
<Hyperlink
NavigateUri="http://msdn.microsoft.com/en-
us/library/ms750441(VS.110).aspx#System_Threading_DispatcherObject">
System.Threading.DispatcherObject</Hyperlink>
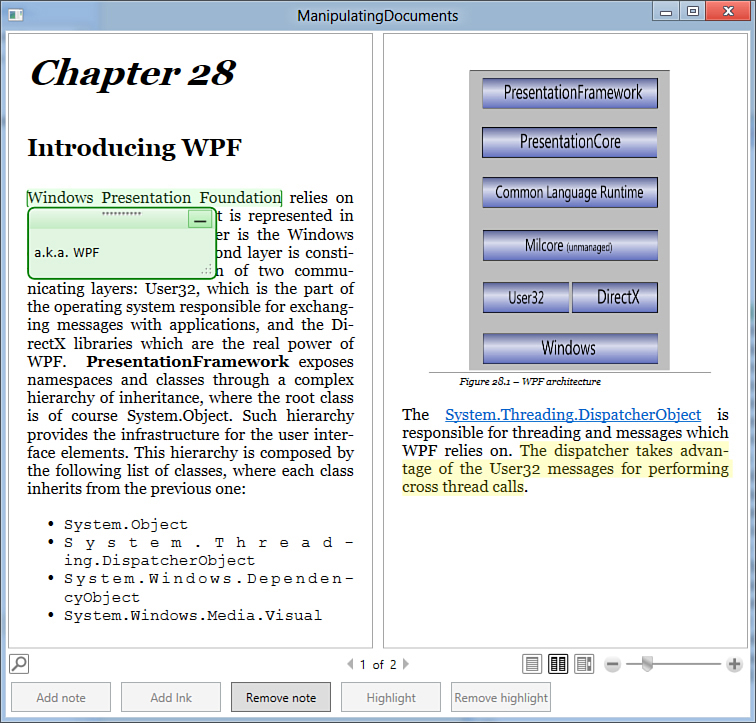
Figure 31.4. Viewing and annotating a flow document.
The sample document also shows how to implement bulleted lists via a List object that contains ListItem elements. It is interesting how flow documents also support figure insertion via a Figure element that contains a BlockUIContainer object nesting an Image control that stores the figure and a TextBlock control describing the figure. Each paragraph and subparagraph can be customized by setting font properties different from other paragraphs.
Switching the discussion to buttons implementation, instead of handling Click events, the code uses a technique known as commanding that takes advantage of built-in commands associated to specific actions. Each button is associated to one of the built-in actions for the annotation service via the Command property and points to the flow document as the target of the action (CommandTarget). At this point, you need to write code that enables the annotation service at the application startup so that the user can annotate or highlight text and then save annotations to disk for later reuse. The annotation service relies on the System.Windows.Annotations namespace that provides an AnnotationService class whose instance enables you to edit the document. Next, the System.Windows.Annotations.Storage namespace provides objects for storing annotations to XML files for later reuse. The code in Listing 31.4 shows how to implement the annotation service with Visual Basic. The code must be written to the code-behind file for the current window and contains comments for better reading.
Listing 31.4. Implementing the Annotation Service
Imports System.Windows.Annotations
Imports System.Windows.Annotations.Storage
Imports System.IO
Public Class ManipulatingDocuments
Dim annotationStream As FileStream
Private Sub ManipulatingDocuments_Initialized(ByVal sender As Object,
ByVal e As System.EventArgs) _
Handles Me.Initialized
'Gets the instance of the AnnotationService pointing to the FlowDocument
Dim annotationServ As AnnotationService = _
AnnotationService.GetService(FlowReader1)
'Declares a store for annotations
Dim annotationArchive As AnnotationStore
'If no annotation service already exists for
'the current flow document...
If annotationServ Is Nothing Then
'...creates a new service
' and a new store to an Xml file
annotationStream = New FileStream("annotations.xml",
FileMode.OpenOrCreate)
annotationServ = New AnnotationService(FlowReader1)
'Gets the instance of the stream
annotationArchive = New XmlStreamStore(annotationStream)
'Enables the document
annotationServ.Enable(annotationArchive)
End If
End Sub
Private Sub ManipulatingDocuments_Closed(ByVal sender As Object,
ByVal e As System.EventArgs) _
Handles Me.Closed
Dim annotationServ As AnnotationService = _
AnnotationService.GetService(FlowReader1)
'If an instance of the annotation
'service is available
If annotationServ IsNot Nothing And _
annotationServ.IsEnabled Then
'shuts down the service
'and releases resources
annotationServ.Store.Flush()
annotationServ.Disable()
annotationStream.Close()
End If
End Sub
End Class
The annotation service startup is placed inside the Window.Initialized event handler, whereas the annotation service shutdown is placed inside the Window.Closed event handler. Now run the demo application by pressing F5. As you can see on the screen, if you resize the window, the flow document content is automatically and dynamically adapted to the window’s layout. Moreover, you can decide, using the appropriate controls on the FlowDocumentReader, how the document has to be viewed (for example, if one or two pages appear on the window or with zoom enabled). The best way for getting a feel about how this works is to resize the window. Figure 31.4 shows how the application looks, including an example of annotation.
Applying Annotations and Highlight
You apply annotations or highlights by selecting the desired text and then clicking one of the related buttons. You write the annotation text just after clicking the green box. Annotations are editable when reloaded.
You can also add ink annotations to your documents. Figure 31.5 shows how ink annotations look and how text is exposed with fonts other than the standard one. Also notice how the hyperlink is correctly highlighted and functional so that if you click it, you will be redirected to the related web page associated via the NavigateUri property in the XAML code.
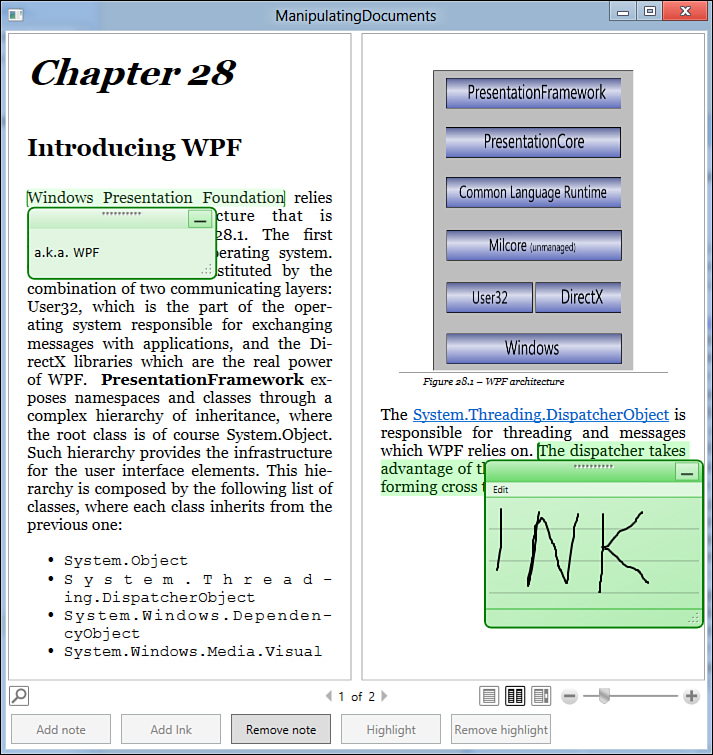
Figure 31.5. Adding ink notes and viewing formatted text.
Annotations are automatically stored into an XML file, as implemented in code. Remember to resize the window to understand the flexibility of flow documents and of the FlowDocumentReader control.
Understanding the RichTextBox Control
WPF offers a RichTextBox control that works as you would expect for some aspects, thus enabling advanced formatting and image support. However, it differs from other technologies in that this control stores its content as a flow document. This is the reason for discussing this control in the current chapter. In XAML code the control definition looks like this:
<RichTextBox Name="RichTextBox1">
<!— add your flow document here —>
</RichTextBox>
You could nest within the control the flow document shown in the previous section to get a fully editable document or write your text into the control, where such text takes standard formatting settings. You can also load an existing file into the RichTextBox, which requires some lines of code. The following method shows how to load a document as text:
Private Sub LoadDocument(ByVal fileName As String)
Dim range As TextRange
If File.Exists(fileName) Then
range = New TextRange(RichTextBox1.Document.ContentStart,
RichTextBox1.Document.ContentEnd)
Using documentStream As New FileStream(fileName,
FileMode.
OpenOrCreate)
range.Load(documentStream,
System.Windows.DataFormats.Text)
End Using
End If
End Sub
The TextRange class represents the text area, and the code takes the entire area from start to end. Then the code invokes the TextRange.Load method to open the specified stream and converts the file content into a System.Windows.DataFormats.Text format that is acceptable for the RichTextBox. Notice that the previous example loads a text document that is then converted into XAML by the runtime. You can also load contents from XAML files using the DataFormats.Xaml option. To save the document content, you need to invoke the TextRange.Save method. The following method shows an example:
Private Sub SaveDocument(ByVal fileName As String)
Dim range As New TextRange(Me.RichTextBox1.Document.ContentStart,
Me.RichTextBox1.Document.ContentEnd)
Using documentStream As New FileStream(fileName,
FileMode.Create)
range.Save(documentStream, DataFormats.Xaml)
End Using
End Sub
In this case the document content is saved under the form of XAML content, but you can still use the Text option to save such content as text, although this can cause a loss of formatting settings due to the restrictive conversion.
Implementing Spell Check
The RichTextBox control provides built-in spell check support. This can be enabled by setting the SpellCheck.IsEnabled property as follows:
<RichTextBox Name="RichTextBox1" SpellCheck.IsEnabled="True">
When enabled, when the user types unrecognized words in the English language the words are highlighted in red. By right-clicking the highlighted word, a list of valid alternatives is suggested, similar to what happens in applications such as Microsoft Word. Figure 31.6 shows how the spell check feature can help users fix typos in their documents.
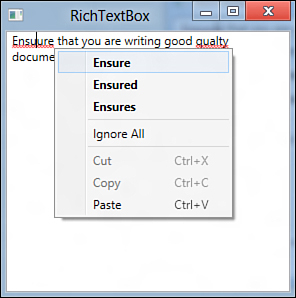
Figure 31.6. The built-in spell check feature helps users fix typos.
Viewing XPS Documents
Starting from Windows Vista, Microsoft introduced a new file format known as XPS that is a portable file format for documents and is useful because you can share documents without having installed the application that generated that type of document because you need a viewer. WPF offers full support for XPS documents, also offering a DocumentViewer control that enables developers to embed XPS viewing functionalities in their applications. Support for XPS documents is provided by the ReachFramework.dll assembly (so you need to add a reference) that exposes the System.Windows.Xps.Packaging namespace. For code, you drag the DocumentViewer control from the toolbox onto the Window surface so that the generated XAML looks like the following:
<DocumentViewer Name="DocumentViewer1" />
At design time, this control offers a number of buttons for adjusting the document layout, zooming, and printing. XPS documents are fixed documents, unlike flow documents, so you need to create an instance of the XpsDocument class and get a fixed sequence of sheets to be assigned to the Document property of the viewer. This is demonstrated in the following code snippet that enables loading and presenting an XPS document:
Dim documentName As String = "C:MyDoc.xps"
Dim xpsDoc As XpsDocument
xpsDoc = New XpsDocument(documentName, IO.FileAccess.ReadWrite)
DocumentViewer1.Document = xpsDoc.GetFixedDocumentSequence
Figure 31.7 shows a sample XPS document opened in the DocumentViewer control.
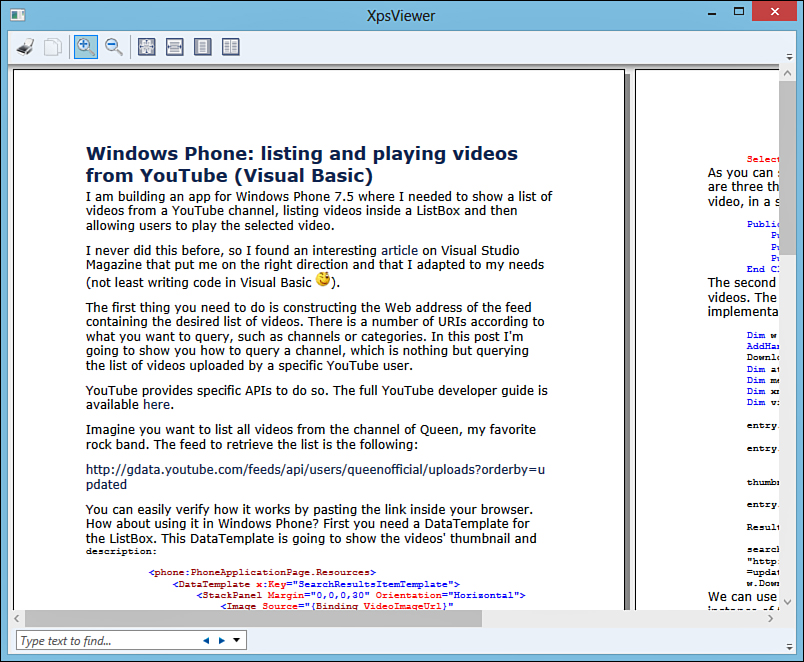
Figure 31.7. Viewing XPS documents through the DocumentViewer control.
So with a few steps, you can embed XPS functionalities in your applications.
Summary
This chapter was an overview about manipulating media and documents in WPF 4.5. You saw how you can present pictures with the Image control and how to reproduce media contents—such as videos and audio—through the MediaElement control, which also exposes events that you can intercept to understand the state of reproduction. Then flow documents and the FlowDocumentReader and RichTextBox controls were covered, examining how documents can be produced for dynamic arrangement within the user interface. Finally, we discussed WPF support for XPS documents through the DocumentViewer control and the XpsDocument class.