
Chapter 5. Start with Data
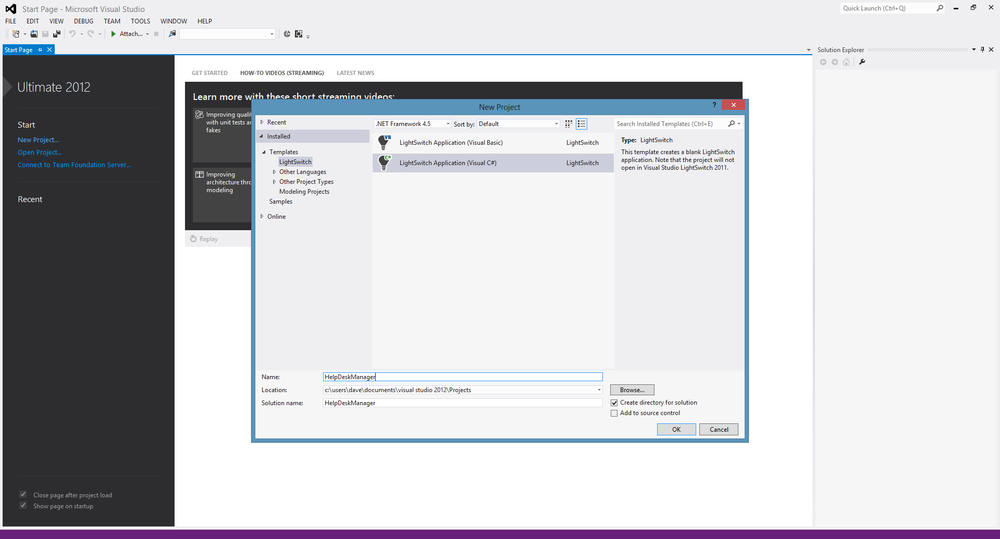
When we open Visual Studio, we’re presented with options of how to begin. We can connect to Team Foundation Server, Create a new project, or Open an existing project. Because we’re just starting out, we’ll select New Project and create a LightSwitch application in C# (see Figure 5-1). You can choose VB if that language is a better fit for your background, but we’ll be using C# throughout the book.
After entering the name for our project, HelpDeskManager, go ahead and click OK to start Visual Studio.
You’ll see the words “Creating HelpDeskManager” in the bottom left corner as Visual Studio gets everything set up for you. Once the project is arranged, and as the designer home page states, we “Start with Data"(Figure 5-2).
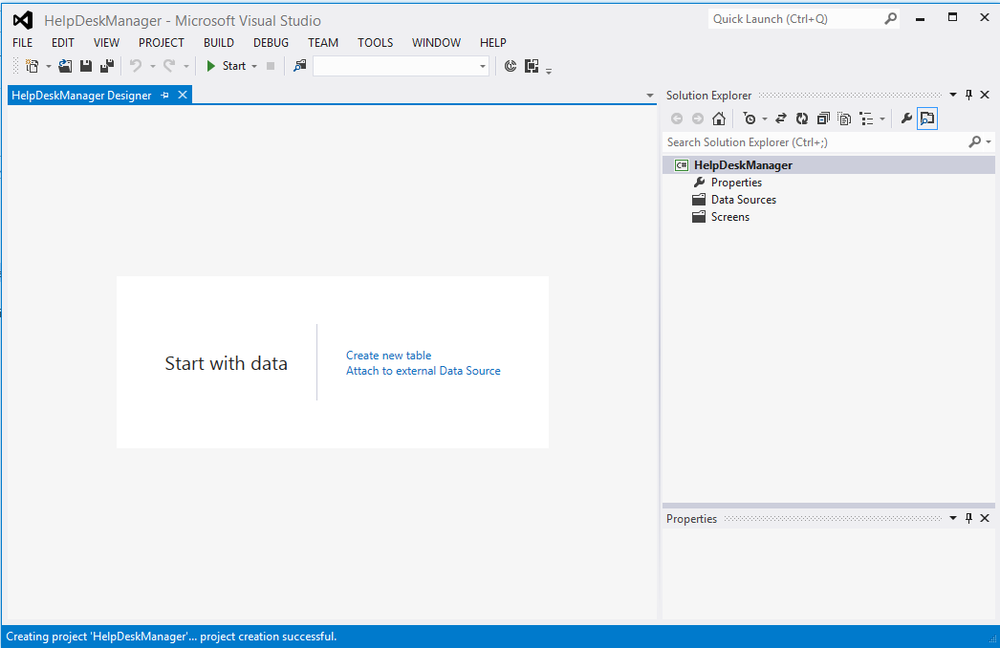
There are a few things you can do from the start page: you can create a new table (create your own database design right here in LightSwitch), or you can attach to external data to pull in an existing database, an OData Service, an RIA Service, or a SharePoint list.
If we had an existing system into which we were connecting, or wanted to build a user interface in front of a SharePoint list, we would choose Attach to external Data Source. In fact, we’ll do that a bit later when we do want to integrate with SharePoint. For now, let’s get started by clicking Create new table.
Defining Basic Fields and Data Types
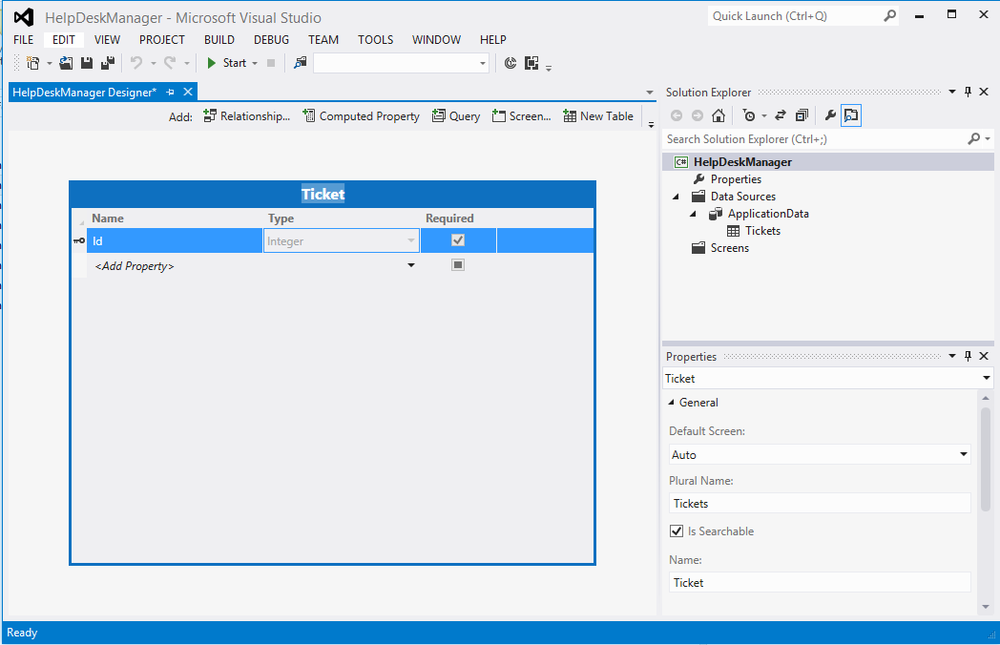
The designer you see in Figure 5-3 is called the LightSwitch entity designer. In the entity designer, we will define the fields and data types that represent our data. Based upon the model that we create here, LightSwitch will create our database and our WCF Web Services. In Visual Studio 2010 with LightSwitch 2011, RIA Services are generated; these are a binary web service optimized for Silverlight. In Visual Studio 2012 with LightSwitch, WCF Data Services are generated using the Open Data Protocol. When you upgrade an existing project from 2011 to 2012, the services will be upgraded automatically. The logic we place in this model will also be used when we generate our screens later on. To get started, the first entity we are going to create is our help desk ticket.
Note
Notice that when we provide a name for our entity (Ticket), the entity collection or table on the right is automatically named Tickets. Had we chosen a plural noun like Tickets for our entity name, the collection would have been named TicketsSet, so always remember to use singular nouns when naming your entities.
The other thing to notice is that the ID column was automatically added to the entity. This column is required and uniquely identifies each row in this table and will be used when we define relationships between tables. Every entity or table that you create in LightSwitch will automatically be assigned this identity column to enable relationships via foreign keys in the database.
Using the Properties Window
Consistent with other project types in Visual Studio, you can examine the details of the selected control by using the Properties window. The Properties window is dockable and is found in the lower right by default. Notice the fields for providing a Description and Display Name, and a checkbox to control whether a field will be displayed by default. In most scenarios, you will not display the generated ID to your users and you can uncheck it.
The Properties window is commonly used to set properties on any items you have selected in Visual Studio. When you’re investigating the options that are available, remember to start by checking out the Properties window.
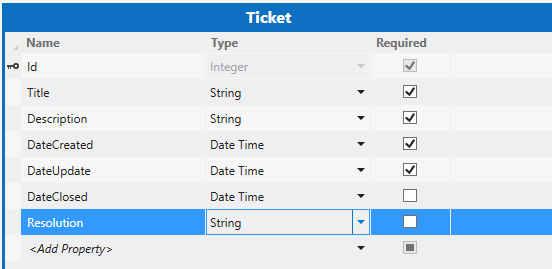
Let’s go ahead and build out the Ticket entity with some properties that make sense for our scenario Figure 5-4. For each of these properties, just click in the designer where it says Add Property, type the name, and select the data type from the drop down list. Repeat this technique to add Title, Description, DateCreated, DateUpdated, DateClosed, and Resolution. When new tickets are created, DateClosed and Resolution will start out blank, so we can’t make them required. We will be able to add some custom validation using C# to make sure that they are entered if the status is set to complete.
Enhancing a String with a Choice List
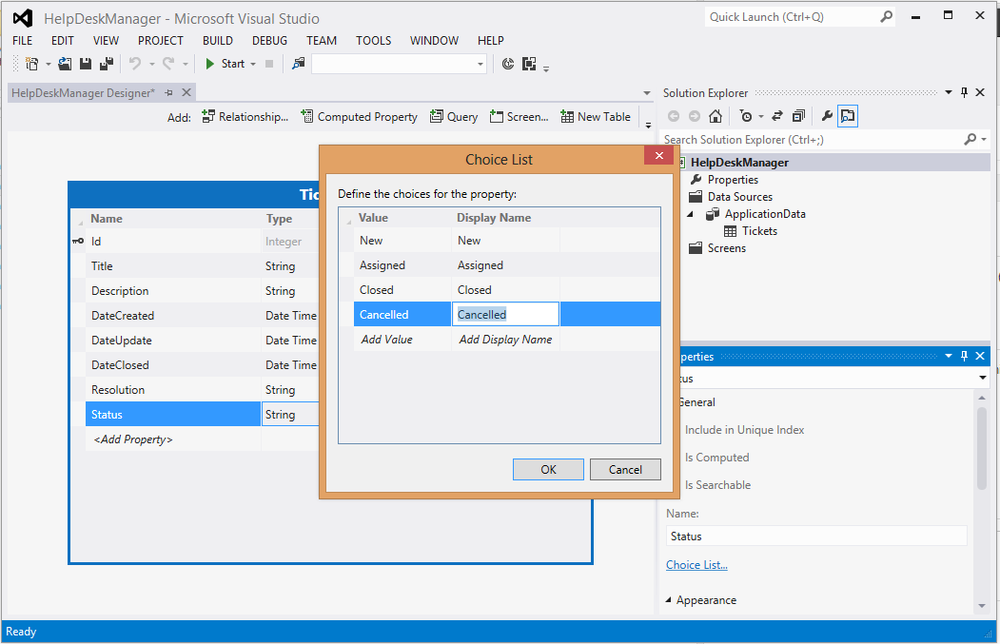
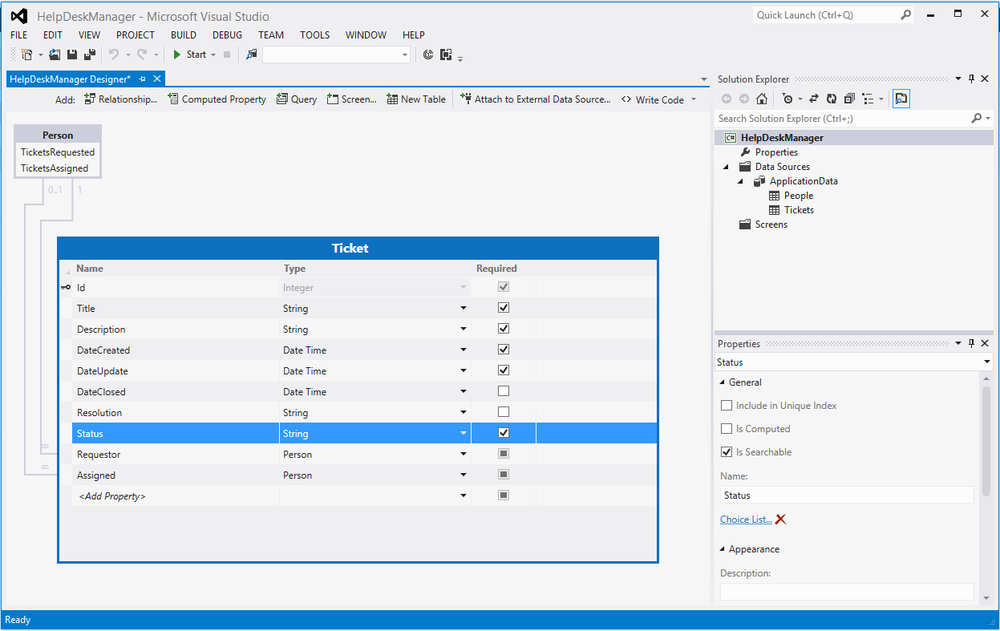
For any String in your entity model, the default behavior is to accept any text data entered by the user. LightSwitch’s entity designer also enables you to constrain the acceptable values by using a Choice List. Let’s add a string called Status to our entity and then select the Choice List link in the Properties window. We have the ability to define Value and Display Name separately for each of our choices. In this example (Figure 5-5), we can leave them the same. When a Choice List is displayed on our screen, it will be rendered by default as an auto-complete box.
Setting Default Values
So far we’ve talked about how to create a basic entity structure in LightSwitch. This is pretty much as easy as creating a database table would have been in SQL Server Management Studio. Unlike creating just a database table, our model can be extended with business logic. LightSwitch includes a number of events or hooks that allow you to add some code to implement your logic.
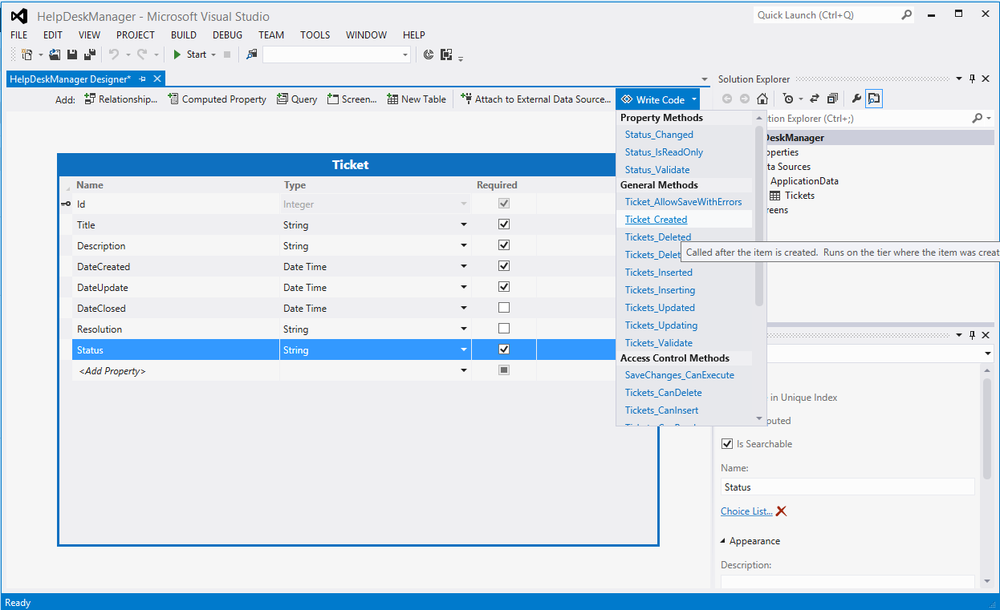
In our sample application, we want to default the Status of a Ticket to new when it’s created, rather than make the user select the status each time they create a ticket. To set a default, we’re going to write some code. Click the Write Code drop-down menu item (Figure 5-6) and select Ticket_Created. The Created event fires when a new Ticket is created before it displays in the user interface, so it’s the perfect place to set up some defaults.
When you click on the Ticket_Created event, Visual Studio will generate a partial class to extend the code it will generate for the Ticket entity. Early code generation techniques often risked overwriting your custom code if the generated class needed to be rebuilt. By using a partial class, the generated code can be in one file, and your custom extensions in another file.
Visual Studio generates both the partial class for Ticket and the method signature for Ticket_Created(). A good way to explore what properties are available in a given context when coding in C# is to use the “this” keyword and leverage Intellisense to explore available APIs. In this case, we see the properties of the Ticket entity and can simply assign the string “New” to our status property.
public partial class Ticket
{
        partial void Ticket_Created()
        {
            this.Status = "New";
        }
}
It’s that easy. We’ve set up a default value that new Tickets will automatically be assigned at creation. Go ahead and close that code window and we’ll keep building out our data model.
Adding Relationships
In thinking about the critical information you’d want to track in a help desk application, you probably realized that you would want to capture the Person who requested the Ticket and the Person who is assigned to the ticket. Remembering what we learned about eliminating repeating data from Chapter 3, we know that we want to eliminate duplicate data and store our Persons in their own entity, which we will relate to tickets.
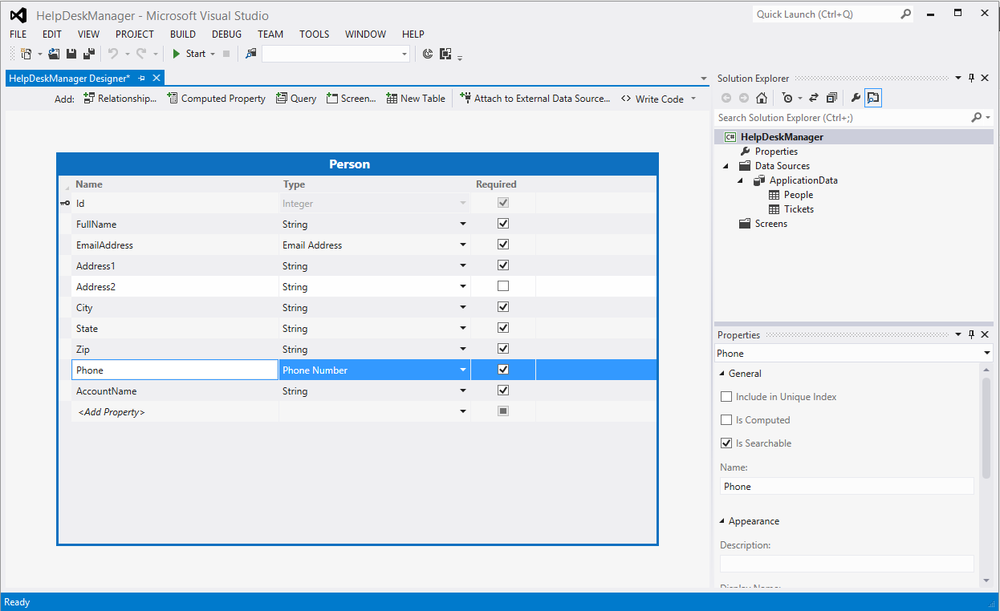
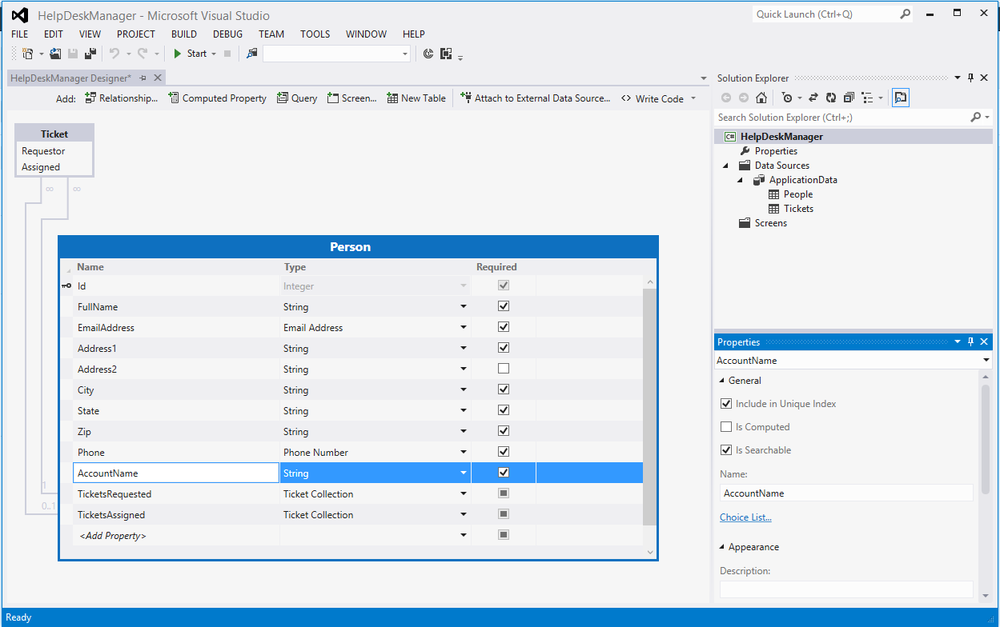
Let’s start by creating a Person entity using the same technique from the Ticket entity. In Figure 5-7, you can see some common properties you might use to define a Person such as name, email, address information, and account name. You may also notice that in the Solution Explorer window on the right, LightSwitch correctly pluralized a person into the People entity. Inspecting the Person entity more closely, you may notice that some of those types like Email Address and Phone Number look a little bit more interesting than normal string and integer basics. LightSwitch calls these Business Types and we’ll talk about them after we finish adding relationships.
Now that we have both our Person and Ticket entities created, we just need to relate the two entities together. Click the Relationship button on the toolbar at the top and the Add New Relationship window appears, as shown in Figure 5-8.
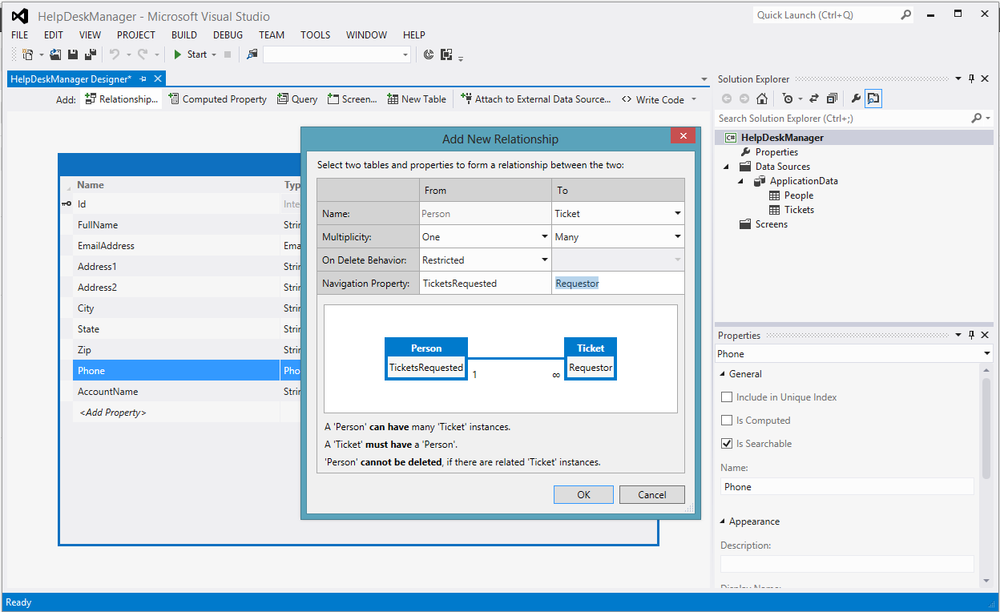
One of the great things about this dialog is the textual explanation of the relationship at the bottom. In this case we have a one-to-many relationship between Person and Ticket. This means that one Person can have many Tickets and each Ticket must be related to one Person. In order to traverse the relationship between the tables, LightSwitch uses a navigation property.
LightSwitch creates navigation properties on entities to manage the relationship between tables. An entity reference property points to a single entity and an entity collection property points to many. These navigation properties will automatically create database foreign key relationships between tables in the database based on what you define here. LightSwitch loads related entities on demand when the navigation property is requested.
Because we are going to have two relationships between Person and Ticket, we want to customize the name of the navigation property to make it meaningful. Just replace the text for Navigation Property as shown in Figure 5-8. This first relationship between Tickets and Person will capture the Requestor of the help desk ticket. Then, as shown in Figure 5-9, we’ll repeat the process to capture the person assigned to work the ticket.

The second relationship we add will describe the Person assigned to work the ticket. Notice that this time we selected Zero or one Multiplicity as new Tickets may not have anyone assigned to work them (see Figure 5-9). Once again, just replace the default text in Navigation Property as shown in Figure 5-9 with more meaningful names. When viewing the entities in the designer, we’ll see these navigation properties as additional properties on each table.
When reviewing the entity designer in Figure 5-10, you’ll notice that the Type of each Navigation Property is a Person entity. By defining the relationship in the model, LightSwitch was able to create foreign keys in the database and generate strongly typed objects representing the related entity.
Business Types
In the previous section, we mentioned that we’d talk a little more about Email Address and Phone in our Person entity. Generally speaking, in the entity designer we are selecting basic types that have a clear similarity to the types we know in .NET. Email Address and Phone Number are a bit different and are known as Business Types in LightSwitch. They are still stored as strings in the database, but add additional formatting and automatic data validation.
In the case of Email Address and Phone Number, the string will be validated as having the proper format for an email address and phone number, respectively, when rendered to the screen. LightSwitch has a user interface assistant that enables you to properly format any type of phone number.
While Email Address and Phone Number Business Types are available out of the box, this is also one of many extensibility points in LightSwitch. Creating these custom extensions is beyond the scope of this book, but more information can be found at the MSDN website.
Defining Uniqueness
Often, you will have properties other than your ID that should be unique in order to avoid repeated records in your application. A good example of this in our application is that there should only be one Person entity with any given AccountName.
The AccountName property on a person needs to be unique, and LightSwitch makes implementing this easy. If we were creating a database manually, we might add a unique index to this table to provide the enforcement. In LightSwitch, this is as easy as checking the Include in Unique Index checkbox in the Properties window, as shown in Figure 5-11. LightSwitch will manage the creation of our unique index for us.
Practicing What We Just Learned
We’ve just walked through the concepts around creating entities, using Business Types, adding relationships, and creating unique indexes. So far, our help desk application describes only tickets and people. In order to understand what issues our customers are having, we’ll want to categorize the Ticket by assigning it to a help desk queue.
Let’s apply the same concepts we learned in the previous sections to build out an additional entity for the help desk queue. Adding these queues will give us more helpful data to use when analyzing our help desk activity in the BI solution that we’ll develop in Part III and Part IV of this book.
When creating the help desk Queue entity, start by adding properties for Name, Description, and a Boolean flag for IsActive. Then create two relationships to the Ticket and Person entity. The navigation properties Tickets and Manager will allow us to view the tickets assigned to this queue and the profile of the queue manager. If you need a reference, take a look at Figure 5-12. We haven’t added the computed properties shown yet, but that’s next.

Calculated Computed Properties
So far in LightSwitch, all the data for our application has been stored in a database. Often, you may want to have additional data that is computed at runtime based on logic or a calculation. This data is calculated and can be displayed on a screen, but it is not stored in the database.
OpenTickets is an example where we will write code to count all the tickets with the status of Open. ClosedTickets repeats the process for Tickets with a status of Closed.
Once again, LightSwitch generates the interface for our code and we
simply fill in the implementation logic. A partial class is created once
again to separate our custom code from the LightSwitch-generated portion
of the Queue entity. Notice that OpenTickets_Compute returns an
integer by reference, which will be known as result
inside our code.
public partial class Queue
{
    partial void OpenTickets_Compute(ref int result)
    {
    result = Tickets.Where(x => x.Status == "New"
    || x.Status == Assigned").Count();
    }

    partial void ClosedTickets_Compute(ref int result)
    {
            result = Tickets.Where(x => x.Status == "Closed"
            || x.Status == "Cancelled").Count();
        }
    }
As you can see in the code, each of the computed properties has the result property that we assign as the output of our business logic. Our logic here itself is just a query against the navigation property of Tickets, written as a lambda expression. A lambda expression is an anonymous function that can contain expressions and statements. More information about lambda expressions is available online.
Advanced Relationships
In addition to traditional relationships between entities in a single data source, LightSwitch also supports inter-data-source relationships. While inter-data-source relationships cannot guarantee referential integrity, they allow us to manage associated external data that share a common value such as an ID or an email address. We’ll use that technique later when relating data from our database to a SharePoint list.
Summary
When we opened our new LightSwitch project, the start page suggested that we start with data. In this chapter, we did exactly that, starting with Tickets, People, and Queues to track the information for our help desk application. We defined relationships between these entities and added custom validation logic, and even computed properties.
By building these rules into the model, LightSwitch allows us to model our business application rather than code screens. In the next section, we will use our model and have LightSwitch generate screens based on the logic we defined.