
Chapter 34. Visual Studio LightSwitch
Visual Studio LightSwitch is a development tool that has been covered in depth throughout this book, but we have not yet discussed its installation requirements or how to host the developed code and make it available to the users.
In this chapter, we will:
Explain the Microsoft minimum requirements for running Visual Studio LightSwitch
Experiential recommendation for Visual Studio LightSwitch requirements
Walk through the client-side installation of Visual Studio LightSwitch
Detailed prerequisites
Explain the server-side implementation of Visual Studio LightSwitch code
Walk through an installation of Visual Studio LightSwitch server-side extensions
Explain changes to Visual Studio 2012 server-side requirements
Visual Studio LightSwitch Client-Side Installation
This section will walk through the end user experience for installing Visual Studio LightSwitch on a developer’s system.
Microsoft Minimum Requirements for Running Visual Studio LightSwitch
Once the decision has been made regarding a virtual or physical infrastructure, the key piece of software leveraged for developing the solutions in this book is Visual Studio LightSwitch. Installing LightSwitch is a straightforward operation; however, there are minimum system requirements from Microsoft to keep in mind:
Processor requirements: 1.6 GHz or higher
Required operating systems: Windows XP (x86) with Service Pack 3 (all editions except Starter Edition), Windows Vista (x86 & x64) with Service Pack 2 (all editions except Starter Edition), Windows 7 (x86 and x64), Windows Server 2003 (x86 and x64) with Service Pack 2, Windows Server 2003 R2 (x86 and x64), Windows Server 2008 (x86 and x64) with Service Pack 2, Windows Server 2008 R2 (x64)
Required memory: 1GB (1.5 GB for virtual)
Required hard disk speed: 5400RPM
Required hard disk space: 3GB
Note: while this is the required minimum from Microsoft, the basic installation screens call for a minimum of 4.4GB. If you chose to customize the installation you can lower the hard disk requirements.
Required video card: DirectX 9 capable video card running at 1024 × 768 or higher-resolution display
Experiential Recommendation for Visual Studio LightSwitch Requirements
Experience has shown that running with the minimum set of requirements is not a true reflection of what it takes to be successful with doing development. The other concern is that for the purposes of this book, most people will likely be doing an installation of LightSwitch on a developer system that also contains a SharePoint installation. As such, here are the recommended minimum system requirements for this scenario:
Processor requirements: Dual 2.0 GHz or higher
Required operating systems: Windows 7 x64, Windows Server 2008 R2 x64, or higher
Required memory: 3GB
Required hard disk speed: 7200RPM
Required hard disk space: 10GB
Required video card: DirectX 9 capable video card running at 1024 × 768 or higher-resolution display
Client-Side Installation of Visual Studio LightSwitch
Skipping ahead and assuming that you have met the minimum system requirements for LightSwitch it is time to begin the installation. After initial download or media insertion, launch the installer and read the End User License Agreement.
What follows is a very simple installation process, regardless of the custom options that we have opted not to interact with for the purposes of this book due to the requirements being met by the standard installation. A very friendly install option is prominent on the screen and will allow you to proceed with the installation, as seen in Figure 34-1.
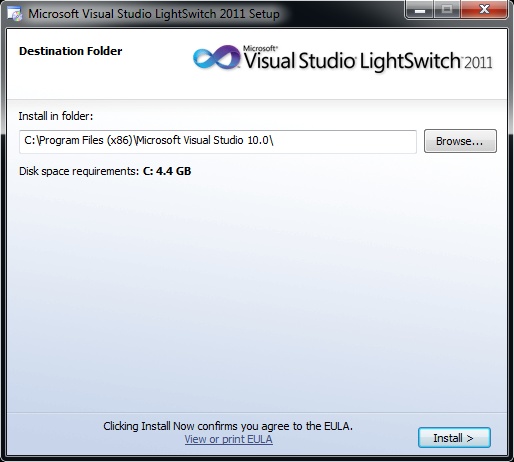
As stated previously, the basic installation requires 4.4GB of hard drive space. Once the installation has begun, the following components will be installed:
Microsoft Application Error Reporting
VC 9.0 Runtime (x86)
VC 10.0 Runtime (x86)
VC 10.0 Runtime (x64)
Microsoft .NET Framework 4
.NET Framework 4 Multi-Targeting Pack
Update for Microsoft .NET Framework 4
Microsoft Help Viewer 1.1
Microsoft Visual Studio 2010 64bit Prerequisites (x64)
Microsoft SQL Server System CLR Types
Microsoft SQL Server 2008 R2 Management Objects
Microsoft SQL Server 2008 Express Service Pack 1 (x64)
Microsoft SQL Server Compact 3.5 SP2 (x86) ENU
Microsoft SQL Server 3.5 SP2 (x64) ENU
TFS Object Model (x64)
Microsoft Web Deployment Tool (x64)
Microsoft Silverlight 4.0
Microsoft Silverlight 4 SDK
WCF RIA Services
Microsoft Visual Studio LightSwitch 2011 Deployment Prerequisites (x64)
Microsoft Visual Studio LightSwitch 2011
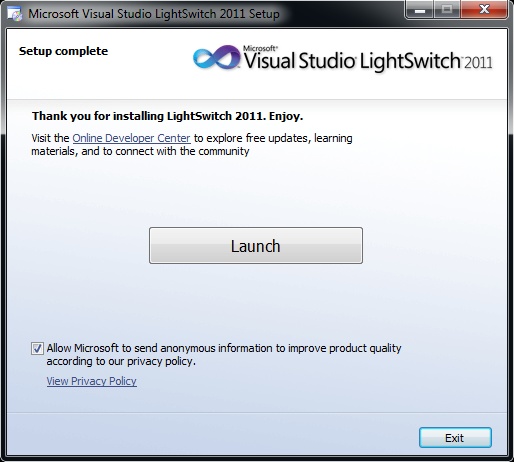
During this installation process, LightSwitch will attempt to go out to the Web and pull in updates to these packages and run the installation automatically. Once complete, your development environment is ready for use, as seen in Figure 34-2.
Visual Studio LightSwitch Server-Side Implementation
LightSwitch code can be deployed either to Azure or on premises. When deploying on premises, it is key to understand the architecture to which you are deploying. LightSwitch does not require its own server and can be implemented alongside SharePoint on the same servers. The caveat to this is that LightSwitch should be deployed in its own standalone web application. It is technically feasible to run them together, though it is not recommended. As long as you have the prerequisites installed and keep the web applications and app pools separated, the LightSwitch server-side code implementations will be straightforward.
Installing Visual Studio LightSwitch Server-Side Extensions
Microsoft took an enormous step forward when they implemented the individual worker processes in IIS 7.0 and since that time has been making strides to ensure that IIS is able to be configured as optimally as possible. In IIS 7.0, we first saw the Features View and Content View, which allow us to be more granular when configuring a system.
In an effort to continuously improve the ITPro experience with IIS, on January 21, 2009 Microsoft released the first version of the Microsoft Web Platform Installer (Web PI). The goal of Web PI is to make installation of ASP.NET environmental development tools and web platforms as easy as possible.
The latest version of Web PI delivers on this promise and has made the installation of the LightSwitch Application Services extremely straightforward. The download of the most up-to-date version can be found at http://www.iis.net/webpi, however for this book we have opted to utilize version 3.0.
Once you have completed the download of Web PI, open the package and locate the appropriate version of the server runtime component. For our scenario, we chose the Visual Studio LightSwitch 2011 Server Runtime without Local SQL option as seen in Figure 34-3.
This will install (if not already there):
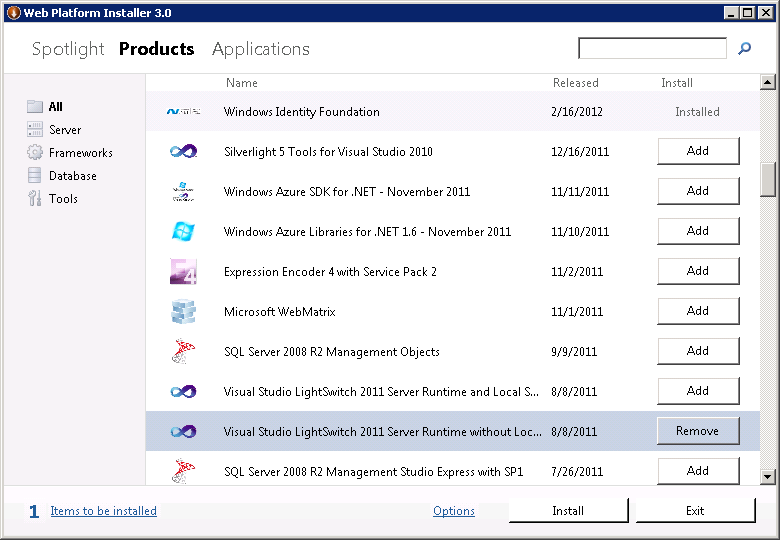
The key in our scenario was running the “without Local SQL” option to keep Web PI from installing SQL Express on the application server as we already have a SQL Server environment. Once you add the Visual Studio LightSwitch 2011 Server Runtime without Local SQL option, you will be prompted with information about all of the components that are being installed as a part of Web PI (listed previously).
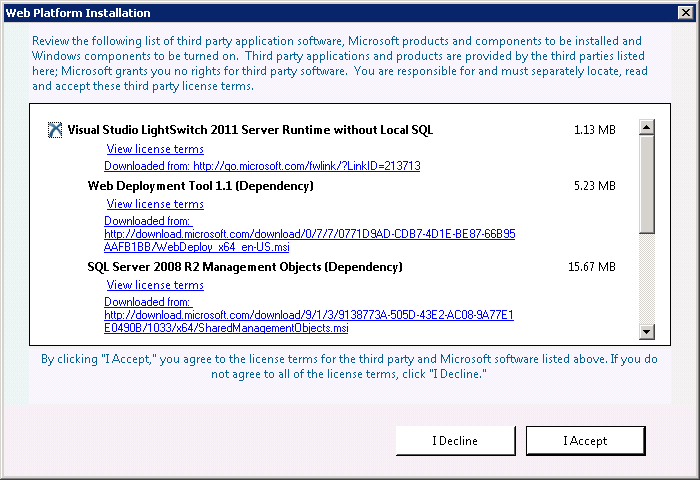
Upon accepting (seen in Figure 34-4), the installation will kick off and complete in relatively short order. At this point, you will now be able to host LightSwitch applications on this application server (Figure 34-5).

Once this installation has completed successfully, the developer is ready to begin working with the scenarios covered in this book.
Summary
In this chapter, we explained the Microsoft minimum requirements for running Visual Studio LightSwitch, gave you experiential recommendations for Visual Studio LightSwitch requirements, and walked through the client-side installation of Visual Studio LightSwitch including the detailed prerequisites. We also explained the server-side implementation of Visual Studio LightSwitch code, walked through an installation of Visual Studio LightSwitch server-side extensions, and explained changes to Visual Studio 2012 server-side requirements.