In this recipe, we will see how we can display an Adobe form within a Web Dynpro application. We will use one of the forms that we created in the Creating nested tables recipe in Chapter 13, SAP Interactive Forms by Adobe.
We will now see the required steps in detail:
- We create a new Web Dynpro component. On the
MAINview, we create an interactive UI element. We name itINTERACTIVEUI.
- Within the properties, the template source (that is, Adobe form) was set as
ZST8_NESTED_TABLES_EXAMPLEas used in the Creating nested tables recipe in Chapter 13, SAP Interactive Forms by Adobe.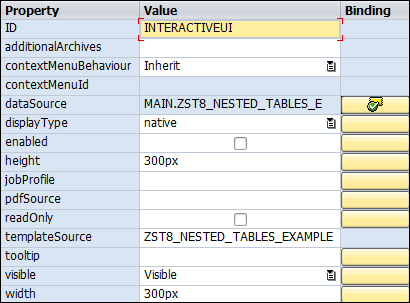
We will also increase the height and width to
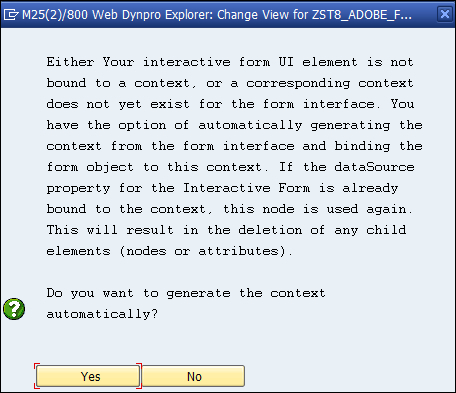
1500pxinstead of the default300px. - After pressing Enter, a dialog box is displayed. This asks you whether context nodes should be created within the view context node corresponding to the context defined in the Adobe form. Click on the Yes button in order to generate the context automatically.
- This will generate appropriate context nodes within the Web Dynpro view corresponding to the context of the Adobe form. The two nodes
EMPLOYEE_GRADESandEMPLOYEE_ADDRESSare generated in theCONTEXT MAINwindow of the view in question.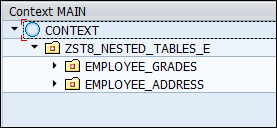
- Next, we will write the code that is necessary to populate the data regarding the
EMPLOYEE_GRADESandEMPLOYEE_ADDRESSnodes in theWDDOINITmethod of theMAINview. We use the Web Dynpro code wizard and choose the settings shown in the following screenshot (both for theEMPLOYEE_ADDRESSand theEMPLOYEE_GRADESnodes).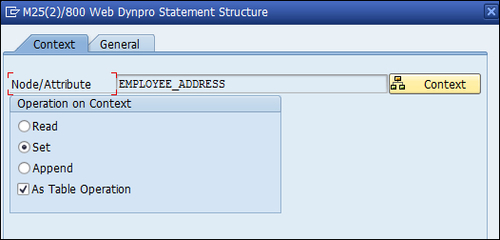
- The main part of the added code for the
EMPLOYEE_GRADESnode is shown as follows:DATA LO_ND_EMPLOYEE_GRADES TYPE REF TO IF_WD_CONTEXT_NODE.DATA LT_EMPLOYEE_GRADES TYPE WD_THIS->ELEMENTS_EMPLOYEE_GRADES.LO_ND_EMPLOYEE_GRADES = WD_CONTEXT->PATH_GET_NODE( PATH = `ZST8_NESTED_TABLES_E.EMPLOYEE_GRADES`).""" code to fill LT_EMPLOYEE_GRADES not shownLO_ND_EMPLOYEE_GRADES->BIND_TABLE( NEW_ITEMS = LT_EMPLOYEE_GRADES SET_INITIAL_ELEMENTS = ABAP_TRUE ).
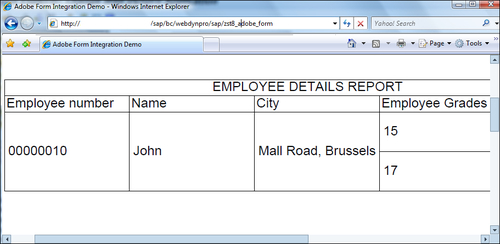
We first created an interactive UI element in our view layout. Then we linked it to our Adobe forms using the template source property. We then generated a context corresponding to the Adobe form in our view. The appropriate code was then added in the WDDOINIT view for populating the data context nodes EMPLOYEE_GRADES and EMPLOYEE_ADDRESS. Upon running the application, the data of the grades and addresses were passed on to the Adobe form cotext node.
The displayed PDF form opens in the browser as shown in the following screenshot: