
The standard ALV toolbar provides a number of useful functions. However, depending on the requirement, you may be asked to add new buttons to the ALV toolbar. This recipe will show how to add your own buttons to the ALV toolbar and then writing appropriate coding to be executed when the user presses the button.
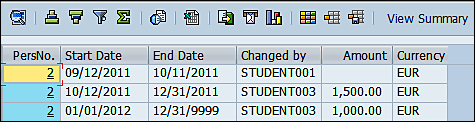
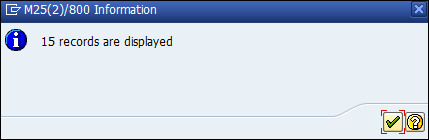
We will add a new button saying View Summary to the toolbar. Upon clicking, the total number of displayed records will be shown (for purpose of illustration).
For creating your own toolbar buttons, we need to make a copy of the GUI status displayed in the original ALV program. We will then make changes to the copied status. Proceed as follows:
- For finding out the program whose GUI status is currently being called, generate the output of the ALV program and then select the menu option System | Status.. On the dialog that appears, we will use the values shown in the Program (GUI) and GUI status fields. The GUI status being used is
ALV_TABLE_STANDARDresiding in the program having nameSAPLSALV_METADATA_STATUS.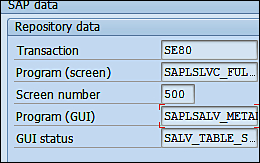
- We will copy this GUI status from the respective standard SAP program into our program. This may be done by using transaction
SE80.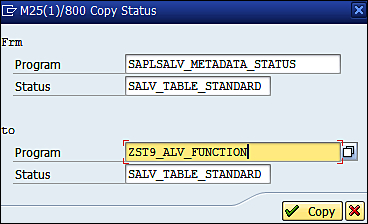
In the next section, we will see how new buttons are added.
We will see how to add new buttons and adding appropriate coding. Proceed as follows.
- Use transaction
SE80to see the various components of your program. The newly copied status SALV_TABLE_STANDARD is shown under the GUI Status node.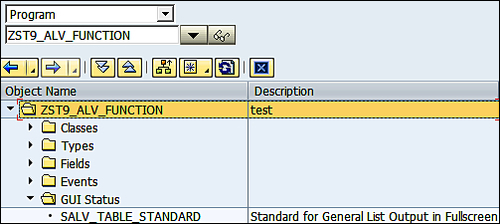
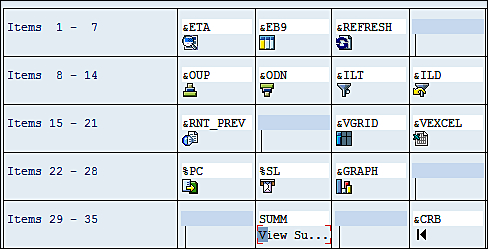
- Double-click the GUI status name to display its contents in the right-hand pane. From the section of toolbar buttons, we will remove the INFO button item, as it is not needed, and add our own function SUMM having the display text View Summary, as shown in the following screenshot:
- Next, we will call the method
set_screen_statusof the classcl_salv_tableand pass it the name of our programSY-REPIDand the newly created statusSALV_TABLE_STANDARD.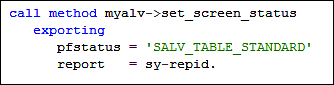
- We will then create a class by the name
summbutton(we can also use the existing class for hotspot created in a previous Adding hotspots to columns recipe). In the definition, a static methodon_button_pressis defined that responds to the triggering of the ALV eventadded_function. The method has an importing parametere_salv_functionthat provides the function code of the selected customer function.
- Next, the implementation of the method is created. Within the
on_button_pressmethod, we check to see if theSUMMfunction button has been pressed. If found true, we then calculate the number of lines in the tableIT_PA0008, then concatenate the line numbers with appropriate text and display in an information message.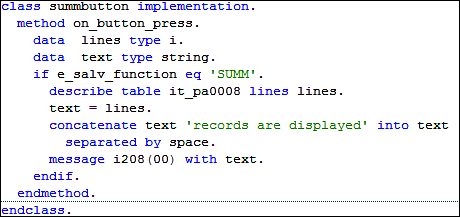
- Finally we use the
SET HANDLERstatement to link the static methodon_button_pressof the classnewbuttonwith the events objectmyevents. This will make sure the clicking on the New button triggers the execution of theon_button_pressmethod.
Calling the
set_screen_status method results in the display of our newly created GUI status having the button View Summary. The method is called in order to make sure that instead of the standard GUI status, our newly created GUI Status is shown.
The CL_SALV_EVENTS_TABLE class contains an ADDED_FUNCTION event that is raised when our added button is pressed.
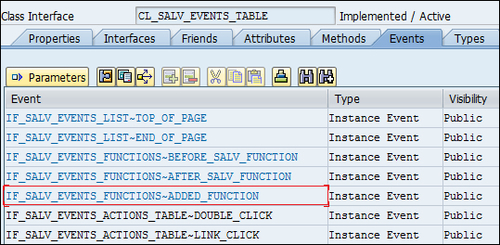
We registered this event with the static method on_button_press of our class newbutton using SET HANDLER statement.
Upon clicking the View Summary button, the code of the on_button_press method is called. We make sure in the method that the code is run only when the function code supplied by importing variable e_salv_function contains SUMM. If that is the case, the number of lines determined in the internal table are displayed using a MESSAGE statement.
For adding icons in the toolbar button, refer to the SAP documentation at http://help.sap.com/saphelp_nw04/helpdata/en/d1/801d43454211d189710000e8322d00/frameset.htm.
The work so far done looks fine, but has a small problem. Clicking on the View Summary button will give the entire set of rows in the internal table IT_PA0008, irrespective of taking into account any filter applied.
We will now refine the recipe in order to read the filters, the column names included on which the filters have been applied, and the selection options specifying the filter values. At the end, we will delete the rows from IT_PA0008 that do not adhere to the filter criteria (so that the row count is correct). The example may then be refined later for deletion of filters, and so on.
The code that will be added will be within the IF statement (checking the function code) just before the DESCRIBE statement. The code is divided into three parts:
- First, we declare necessary variable pertaining to ALV filters. We then use the
get_filtersmethod in order to read the filter objects.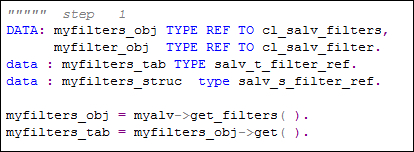
- The
getmethod of thecl_salv_filtersclass is then called in order to fetch the internal tablemyfilters_tabspecifying the column names on which filter has been specified. The R_FILTER component of this table row is a reference to the classCL_SALV_FILTER, which contains the values, entered at the filter screen.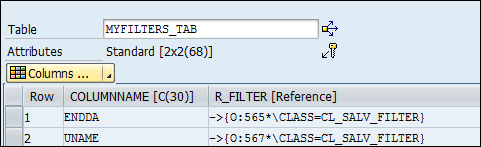
- Next, a loop is run at this internal table and the details of the
r_filterobject are fetched.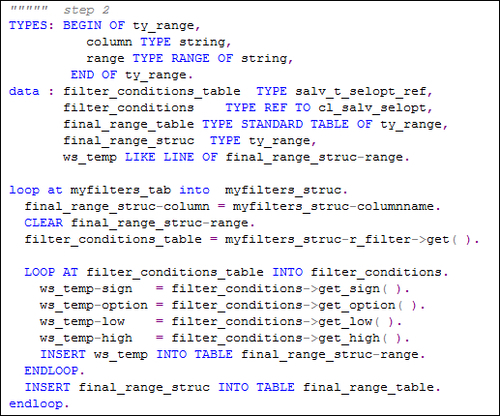
- We run a loop at the
myfilters_tabmethod and get the filter conditions object for each column. Theget_sign,get_option,get_low, andget_highmethods of the classcl_SALV_SELOPTis used for getting the sign, option, low, and high values of the filter condition respectively. These are added to therangetable of thefinal_range_struc. Finally, thefinal_range_struccontents are inserted into the internal tablefinal_range_table. The purpose of this step is to form a final range table namedfinal_range_table, which will provide us with the name of each column specified in the filter definition, along with the filter values in the form ofrangetable.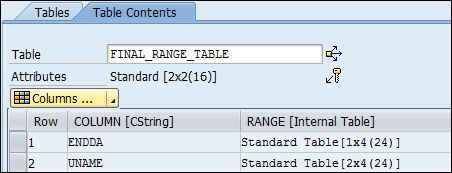
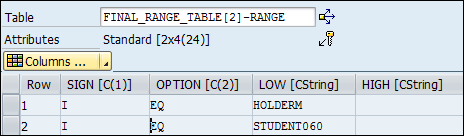
- As you can see the user had specified two fields ENDDA and UNAME in the filter criteria. For the UNAME field, two filter values are specified, that is, UNAME = HOLDERM and UNAME = STUDENT060.
- We will keep the third step simple, and will run a loop at the final range table which will delete from the main
IT_PA0008internal table those records that violate any of the filter criteria.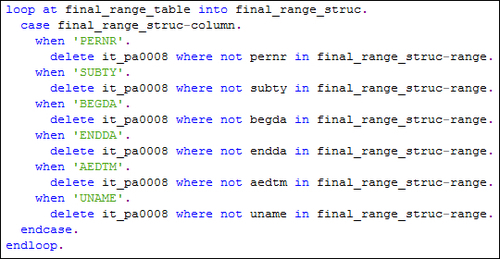
Once this additional code is added, the internal table IT_PA0008 will take into account any applied filter. Thus, the correct values will be shown by the View Summary button.
The code shown may be written more efficiently and elegantly using field symbols. Since the table contains fewer entries and for the sake of simplicity, field symbols were not used.