
Click on Back to Dashboard, or the Jenkins link in the top-left corner. Back on the main dashboard page, click on the Credentials link. Choose a domain from the list; in my case, I just used the default global credentials domain. Click on Add Credentials, and you'll be presented with the following screen:
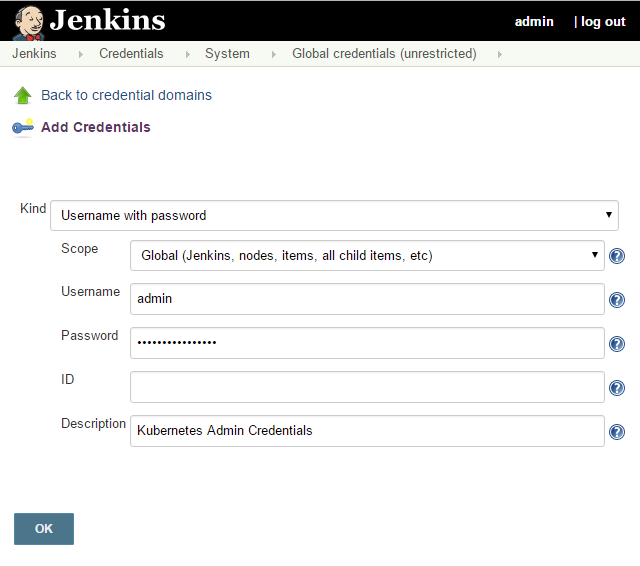
Leave Kind as Username with password and Scope as Global (Jenkins, nodes, items, all child items, etc). Add your Kubernetes admin credentials. Remember that you can find these by running the following config command:
$ kubectl config view
You can leave ID blank, fill in Description with something sensible, and then click on the OK button.
Now that we have our credentials saved, we can add our Kubernetes server. Click on the Jenkins link in the top-left corner, and then Manage Jenkins. From there, select Configure System and scroll all the way down to the Cloud section. Select Kubernetes from the Add a new cloud drop-down menu and a Kubernetes section will appear, as follows:

You'll need to specify the URL for your master in the form of https://<Master IP>/.
Next, choose the credentials we added from the drop-down menu. Since Kubernetes uses a self-signed certificate by default, you'll also need to check the Disable https certificate check checkbox.
Click on Test Connection, and if all goes well, you should see Connection successful appear next to the button.
Finally, we will add a pod template by choosing Kubernetes Pod Template from the Add Pod Template drop-down menu next to Images.
This will create another new section. Use jenkins-slave for the Name and Labels section. Click on Add next to Containers and again use jenkins-slave for the Name. Use csanchez/jenkins-slave for the Docker Image and leave /home/jenkins for the Working Directory.
Labels can be used later on in the build settings to force the build to use the Kubernetes cluster:

Here is the pod template that expands the cluster addition, as shown in the following screenshot:

Click on Save and you are all set. Now, new builds created in Jenkins can use the slaves in the Kubernetes pod we just created.