
In this chapter, you are going to look at how to work with color and choose the correct color choices in Illustrator CC.
Note
This chapter does not have any actual projects; however, you can use the files in the Chapter 11 folder to practice opening and viewing for this lesson. They are at https://github.com/Apress/graphics-multimedia-web-adobe-creative-cloud .
Working with Color
Choose RGB for the web images and not CMYK, which is for print

Some presets show an alert if you choose RGB color from the New Document dialog box

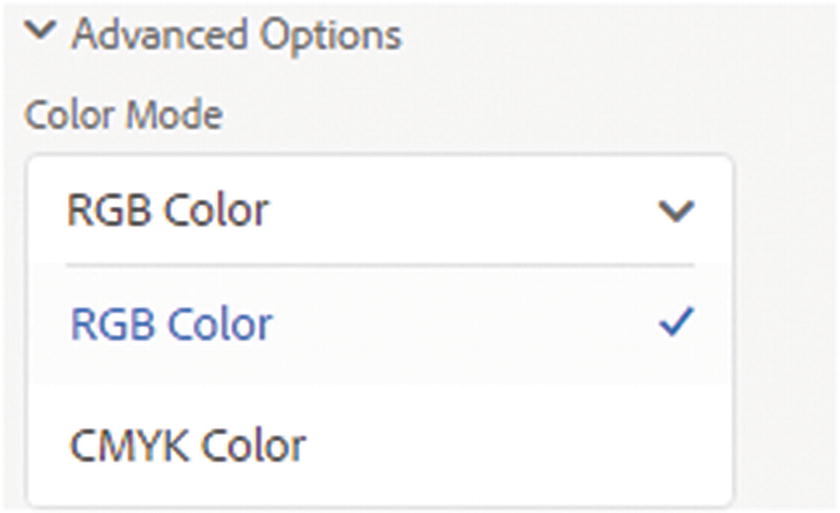
To make sure your Color panel is the same as your documents color mode, change it in the Color panel menu

Change the document color mode to RGB if it is CMYK
Be aware that there may be a color shift, so if you are using some files for print later, always work with a copy before adjusting the color mode.
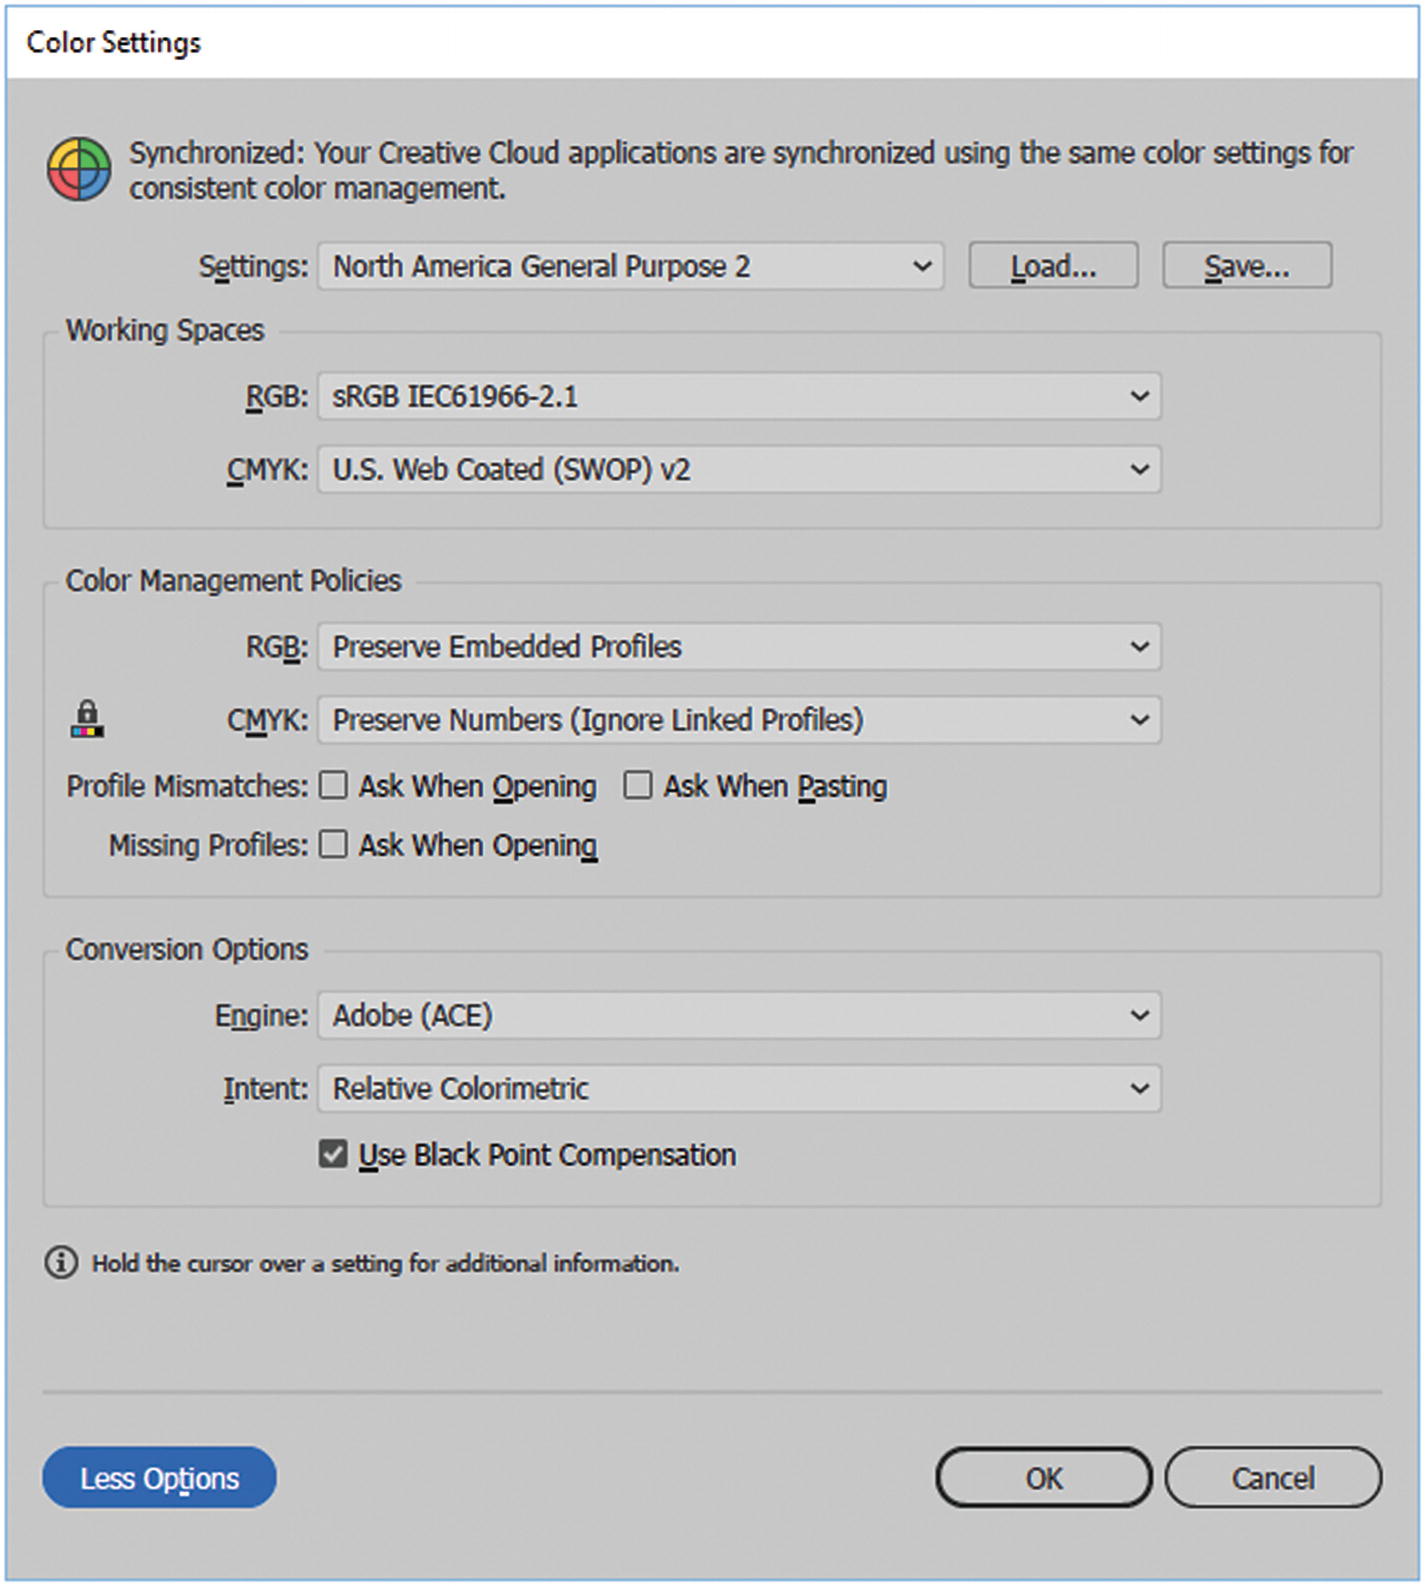
Alter color settings
Here you can review your current color spaces, if you don’t want to make any changes, click Cancel; otherwise, make an adjustment, and to save it, click OK. In this case, the color space of sRGB is good for the website projects, so you don’t need to change it.

Assign a color profile if your AI or EPS document does not have one
Generally, for the web, the RGB profiles are left at the default sRGB, so you can leave these settings as is and click Cancel to exit the dialog box.

Color modes are displayed along with the file name of a document
Copying CMYK Graphics to an RGB Document
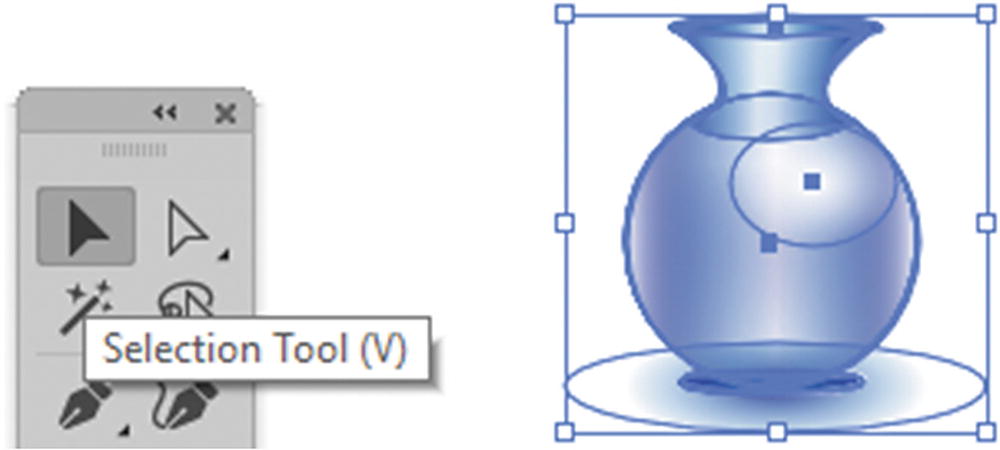
Use the Selection tool to select an illustration and convert it to RGB mode if you suspect it is not RGB
This ensures that the graphic shape added to the RGB AI or EPS file is in RGB color mode.
Note
In an RGB mode file, CMYK conversion is unavailable. If you are in a CMYK file, Convert to RGB is unavailable. Refer to Figure 11-9.
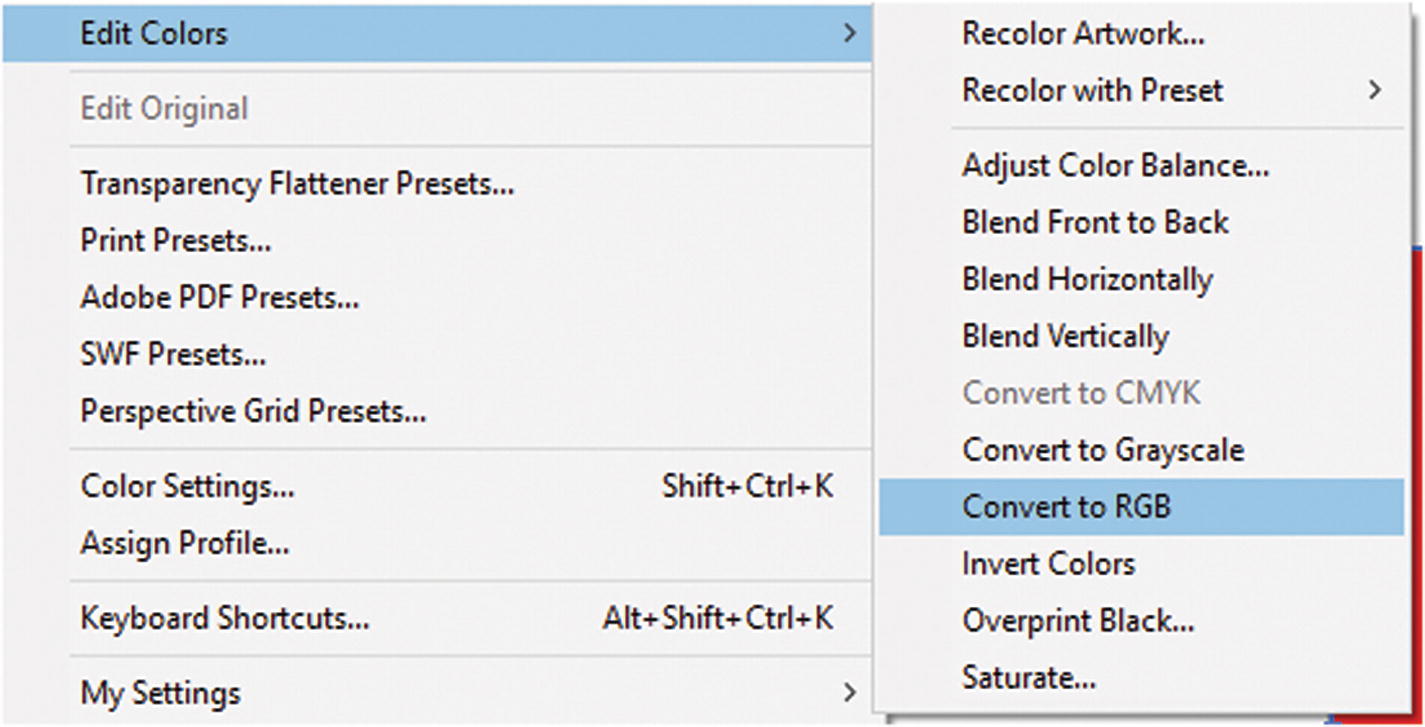
Features of the Edit Colors CMYK are unavailable if in RGB mode
You can also convert your item to a grayscale color, but it is still in an RGB mode format in your file. There is no actual grayscale color mode in Illustrator.
Color Panel
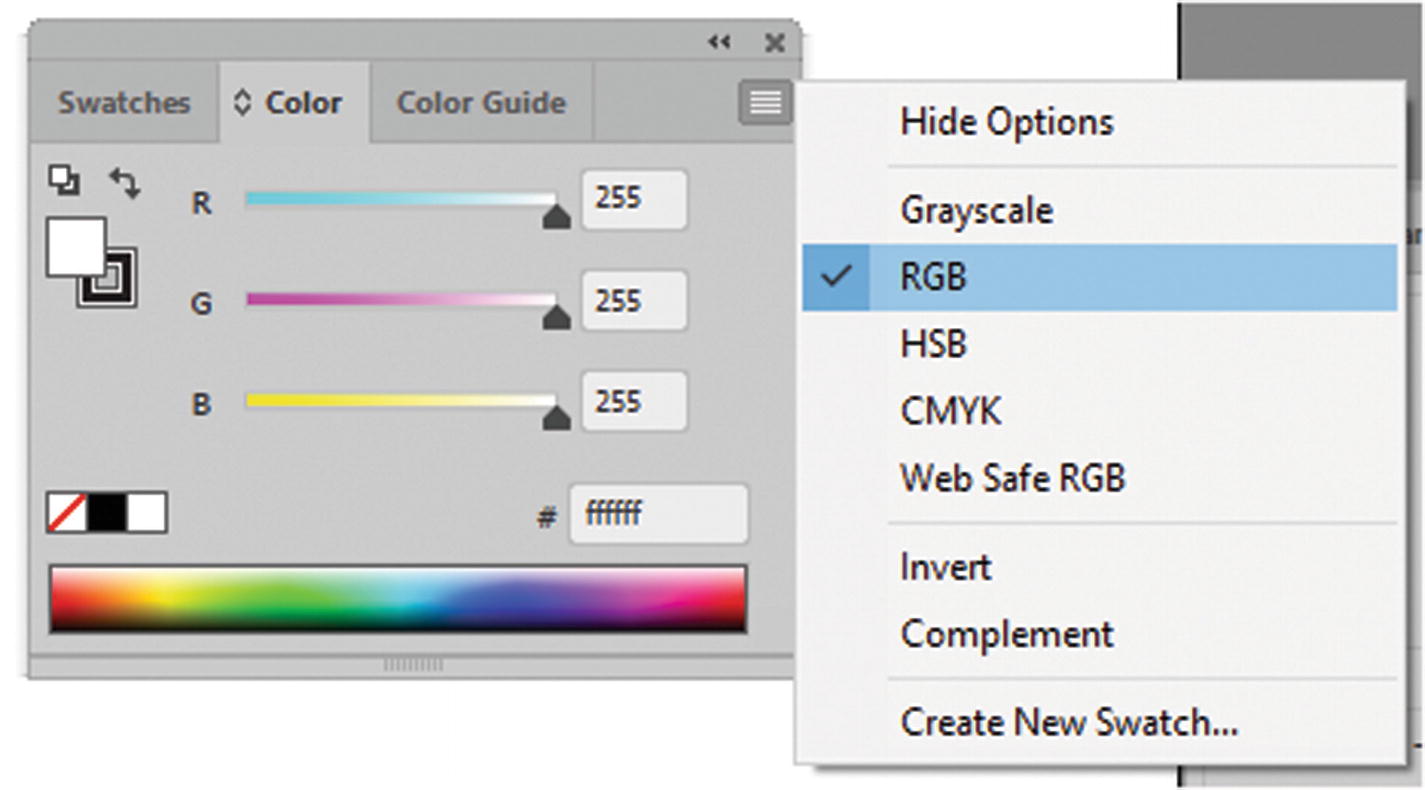
Changing the color mode display in the Color panel

Grayscale and Web Safe RGB setting in the Color panel
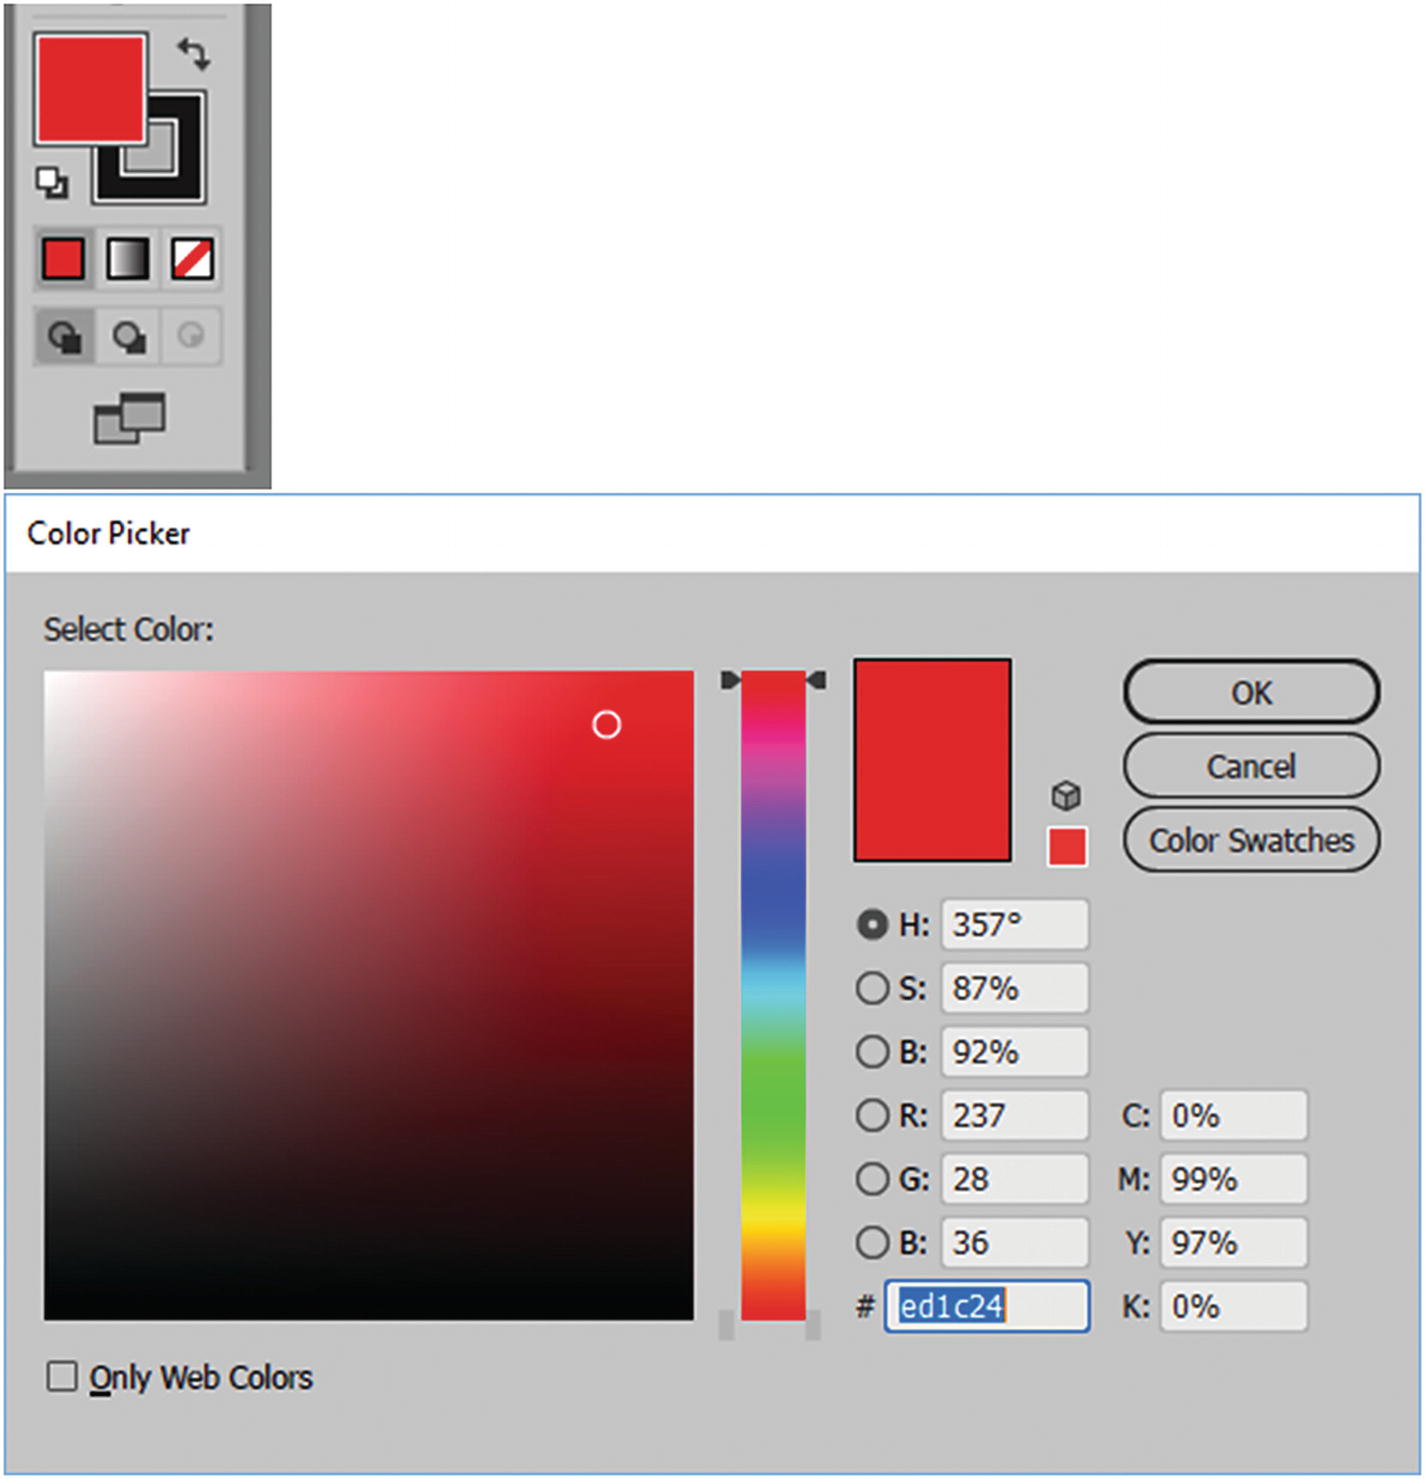
Choose a color for shape using the Color Picker found when clicking a color in the tool panel
As you can see, it is almost identical to the one used in Photoshop in Chapter 3. You can also choose Only Web Colors. You can view by color swatches by clicking that button to toggle between it and the current color models.
Swatches Panel
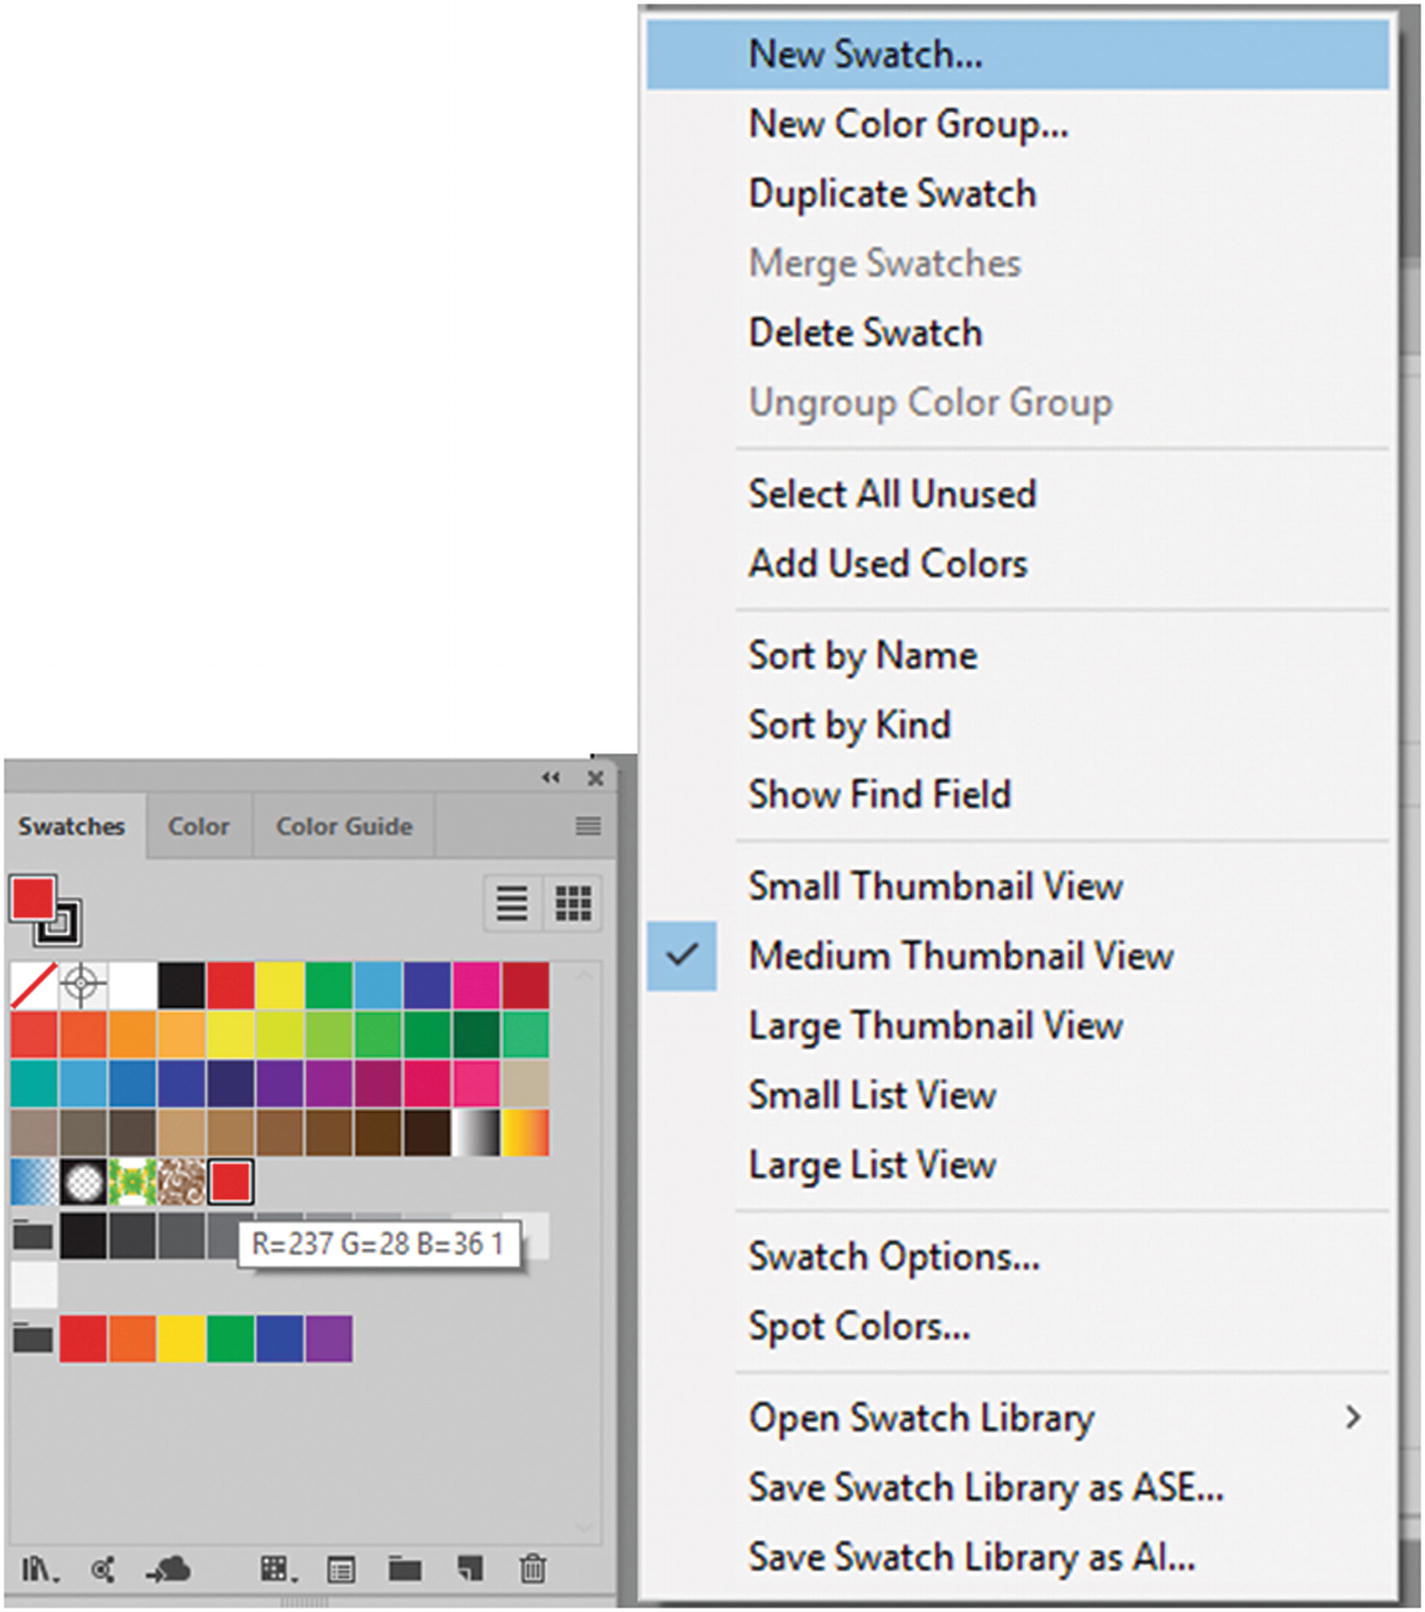
Add your new RGB swatch so that you can use it for other shapes later on
When you create new swatches, they are saved within your document. You can save them as a swatch library or open them from other AI or ASE documents from the Swatches menu, as seen in Figure 11-13.
Other Panels for Working with Color
Though not part of the main discussion of this book, there are a few other panels in Illustrator that you can use while working with color. I will briefly mention a few that you may want to use for your projects.
Color Guide Panel


Use the Color Guide to adjust colors for complex shapes
Clicking the lower Edit or Apply Colors icon (color wheel) on the panel allows you to access the Recolor Artwork dialog box.
You can save these colors as swatches in the Swatches panel for later use.
Adobe Color Themes Panel

The Adobe Color Themes panel assists in finding complimentary colors for your themes
Gradient Panel

Use the Gradient panel to add a gradient to your shape
Gradients can be linear, radial, or freeform, and have a differing opacity and locations at each point on the slider. Gradients also work with the Mesh tool (U), which is to the left of the Gradient tool in the Tools panel.
Transparency Panel
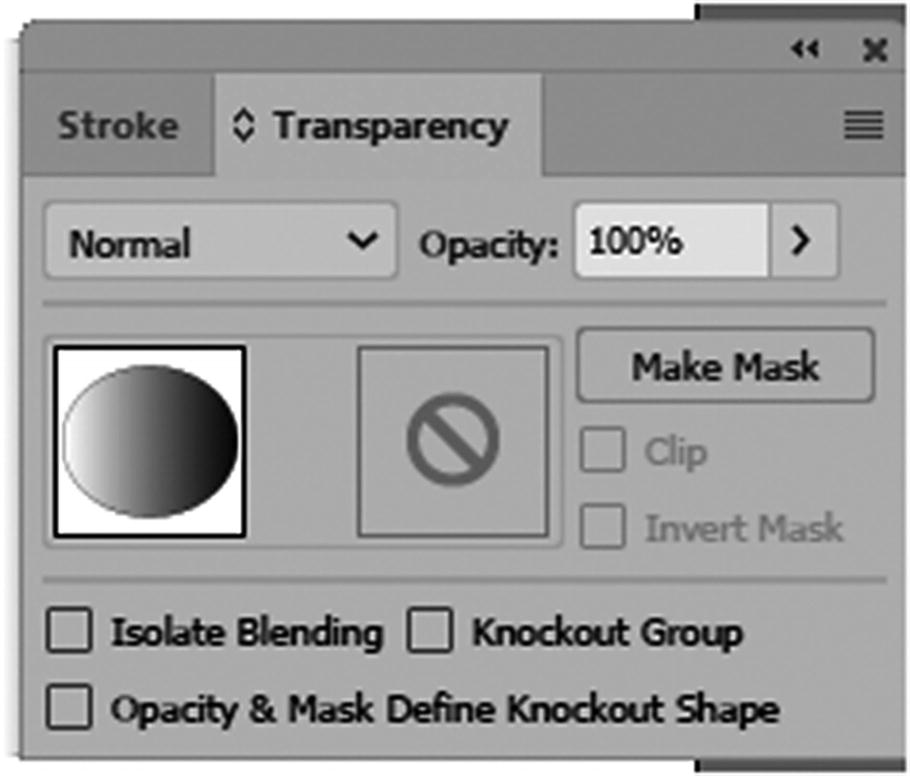
The Transparency panel has many blending, opacity and mask features
Appearance Panel

The Appearance panel and Properties panel allow you to alter your fills and strokes to create a variety of colors and effects (FX)
You will look at the Graphic Styles panel and other related panels in more detail in Part 3.
For now, take some time to review these panels and see how you can use them for your own projects.
Note that many of these panels’ settings can be accessed through the Properties panel when a vector graphic is selected.
Summary
In this chapter, you looked at the two color mode settings: RGB and CMYK. You also saw how to emulate grayscale color. You looked at some of Illustrator’s settings and panels, and saw how they allow you to effect and control your RGB colors.
In the next chapter, you discover how to use Illustrator’s export settings to save your graphics for the web.