
In this chapter, you look at how to import audio and video into your ActionScript 3.0 file or HTML5 Canvas FLA files.
Note
This chapter does not have any actual projects; however, you can use the files in the Chapter 20 folder to practice opening and viewing for this lesson. They are at https://github.com/Apress/graphics-multimedia-web-adobe-creative-cloud .
Import Audio

Possible Adobe programs used to edit or extract audio
Audio that You Can Import into Your ActionScript 3.0 and HTML5 Canvas Files
Audio Formats for the Web | ActionScript 3.0 FLA (.mov Video) | HTML5 Canvas FLA |
|---|---|---|
MP3 Sound (.mp3) | ✔ | ✔ |
WAV Sound (.wav) | ✔ | ✔ |
Ogg Vorbis (.ogg, .oga) | ✔ | * |
Other Audio Formats | ||
AIFF Sound(.aif, .aiff, .aifc) | ✔ | |
Adobe Sound Document (.asnd). non-destructive and from legacy, Adobe Soundbooth | ✔ | |
Sun AU (.au, .snd) | ✔ | |
Sound Designer II (*.sd2) | ✔ | |
Free Lossless Audio Codec (.flac) | ✔ |
Note
While you cannot add Ogg Vorbis sound to your HTML5 Canvas file via Animate CC, there is another way to alter the sound files attached to your Canvas later in Dreamweaver CC in Part 6. I will show you how you can replace or swap the audio link outside of Animate in Dreamweaver’s Code view. Having said that, MP3 and WAV audio are accepted by the most modern browsers, so if you don’t have an Ogg Vorbis file option, it’s not a deal breaker. You may also have access to audio formats not listed here if you have QuickTime 4 or higher installed on your computer.
Once the sound is added or imported into the Library panel, be aware that ActionScript 3.0 FLA has more sound options than the HTML5 Canvas FLA. These sound options can only be accessed when you click the layer and then the frame that contains the sounds. It is good practice to keep sounds on their own layers. Sound can also be added to button symbols.
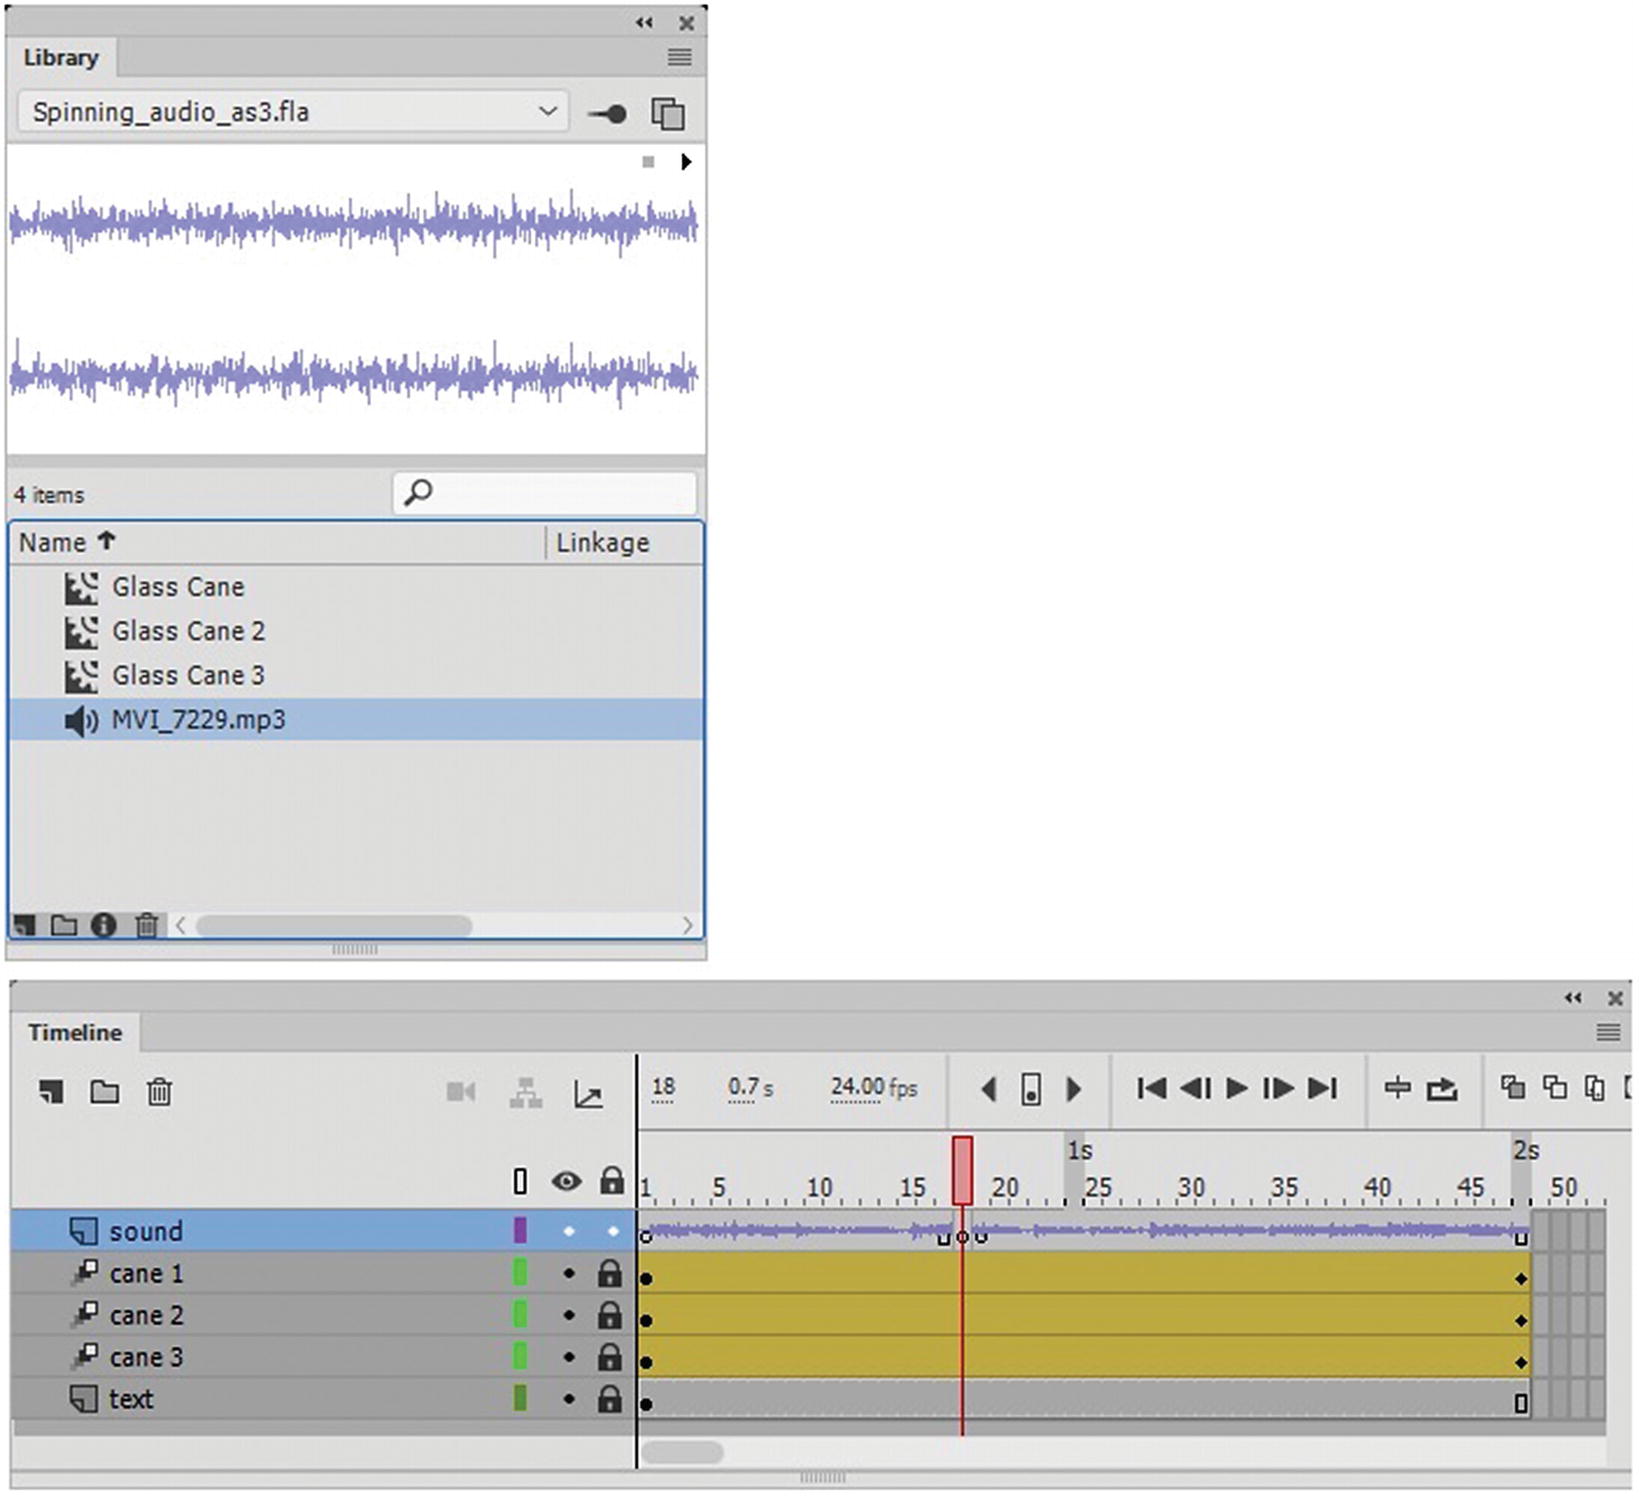
The sound is in the Library panel and in the Timeline panel on its own layer that I named sound
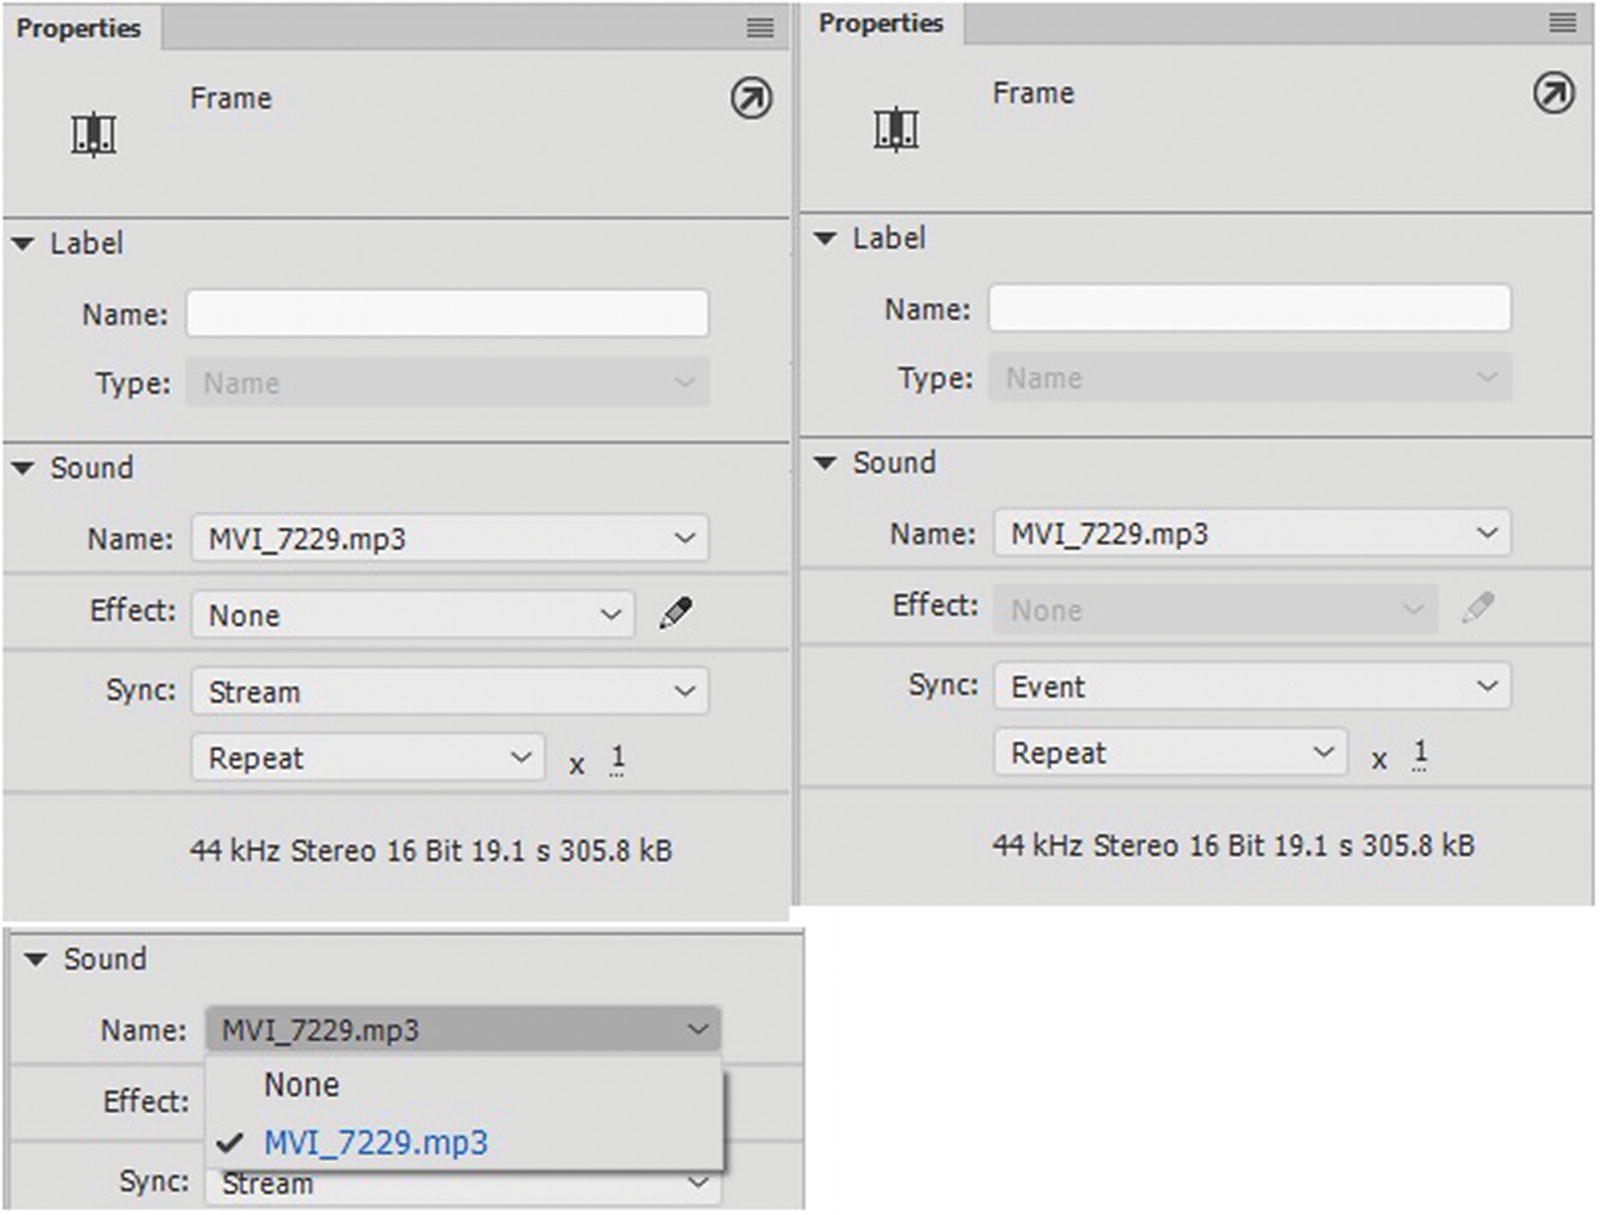
The options for sound in the Properties panel for ActionScript 3.0 (left) and HTML5 Canvas (right). You can remove and replace a sound.
Notice that the ActionScript 3.0 file has more sound options than HTML5 Canvas.
When a sound is replaced, it updates in the Timeline panel as well.
Sound Effect Settings
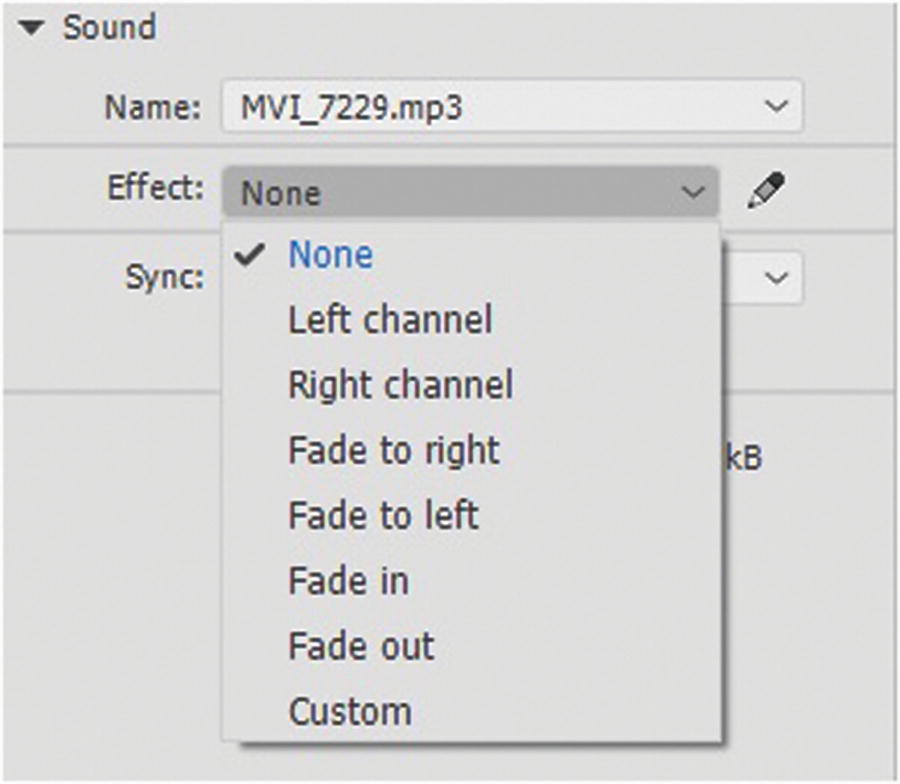
Adjust the sound channel in the Effect drop-down menu
You saw a setting similar to this in Photoshop when you created your video timeline in Chapter 7, so you should know a little bit about sound already.

The Edit Envelope dialog box
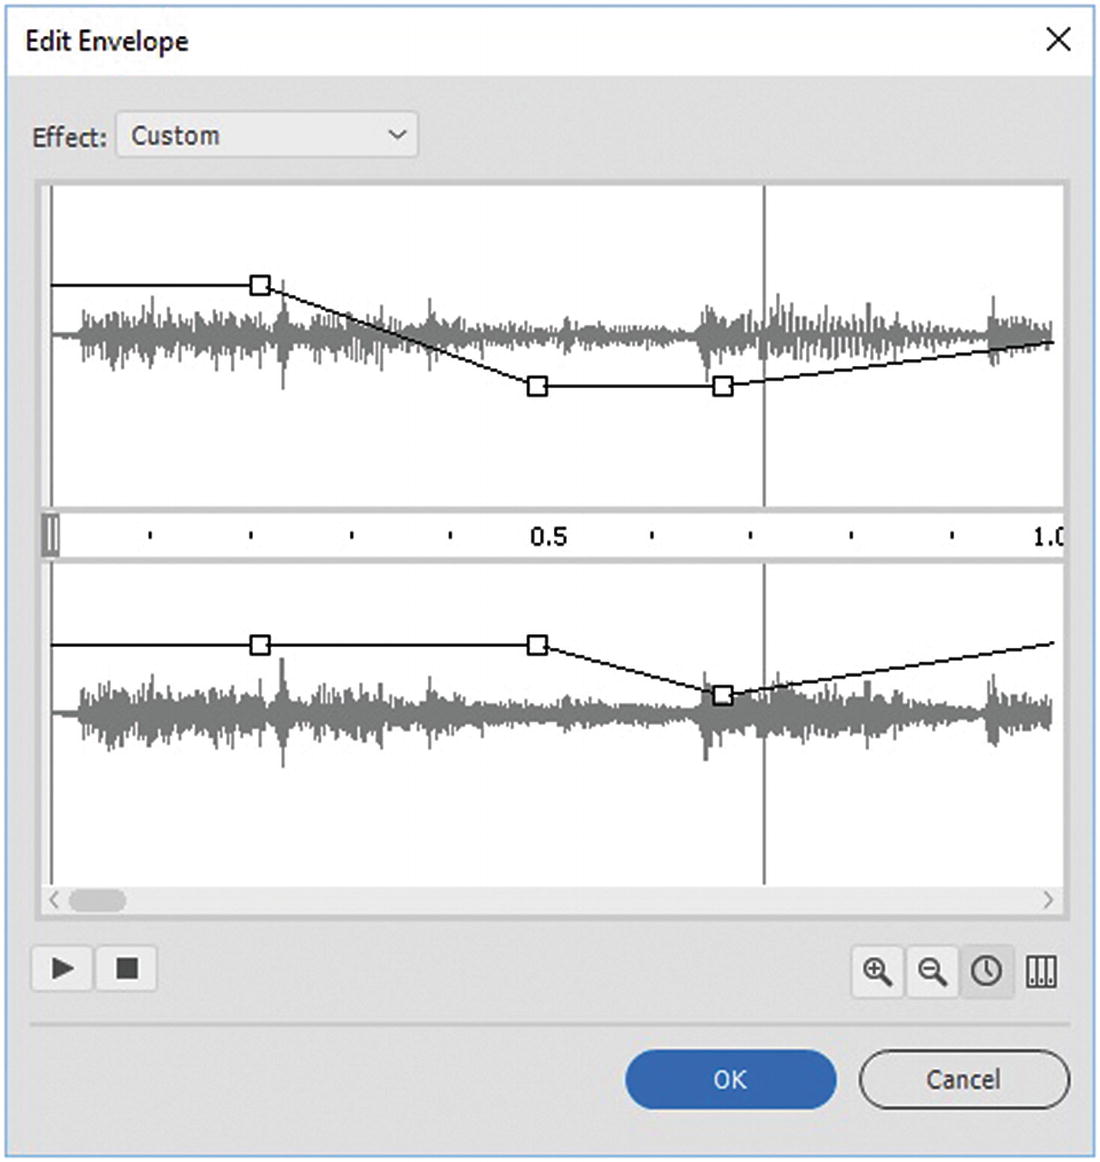
Edit the sounds
When you complete your edits, hit the Play button to preview your sound (the square stops the sound), and then click OK to exit and keep the changes. You can enter this area anytime to adjust your edits again. The original sound in the Library panel is not affected; only the sound on the stage in the Timeline panel.
Note
This adjustment is not available for HTML5 Canvas FLA or WebGL. I recommend that if you need to clip your sound outside of Animate, do your adjustments in Adobe Audition CC, or very basic clipping using Media Encoder CC, as we will look at in Part 5.
Sync Setting

Sync for ActionScript 3.0 (left) and HTML5 Canvas (right)
For HTML5 Canvas, you only have the Event option.
Event
Synchronizes the sound to an event occurrence. An event sound plays when its starting keyframe first appears, and then plays in its entirety, independently of the playhead in the timeline, even if the Canvas file stops playing. Event sounds can overlap when you play your published Canvas file.
If an event sound is playing, and the sound is instantiated (for example, by the user clicking a button again, or the playhead passing the starting keyframe of the sound), the first instance of the sound continues to play, and another instance of the same sound begins to play simultaneously. Keep this in mind when using longer sounds, as they can potentially overlap and cause unintended audio effects that you may not want for your buttons or while playing a video component on the canvas.
Start
Start is the same as Event, except that if the sound is already playing, no new instance of the sound plays.
Stop
With Stop, the sound is muted. It silences the specified sound, which can be resumed on another frame when sync is changed. This is like when you cut your audio for the video in the Photoshop video timeline and then continued it at another point in the track.
Stream
Stream synchronizes sound to play on a website. Animate forces animation to keep pace with streaming sounds. If Animate CC can’t draw animation frames quickly enough, it skips frames. Unlike event sounds, stream sounds stop if the video file or older SWF stops playing. Also, a stream sound can never play longer than the length of the frames it occupies or the video timeline. Stream sounds can overlap when you publish your video file.
An example of a stream sound is the voice of a character in an animation that plays in multiple frames.
These sound settings are remembered in the sync options in the Property inspector. If a sound is selected from the sound section of the Property inspector, then on trying to set another sound on a new keyframe from the Property inspector, Animate CC remembers the previous sound’s stream or event sync options.

Split the audio if you need to create a silent space of in the ActionScript 3.0 file
Repeat Sound
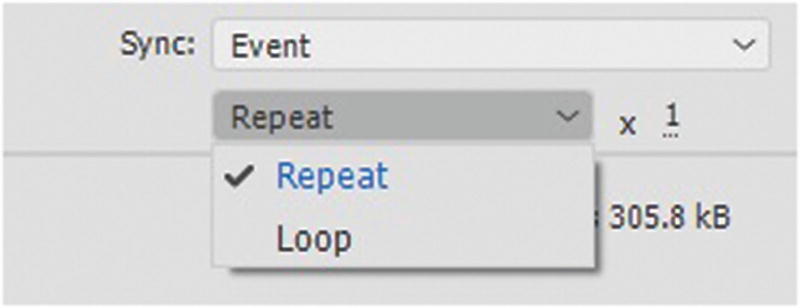
Set the number of times the sound should repeat or a continuous loop
In the next section, you look at the options available for importing video.
Import Video
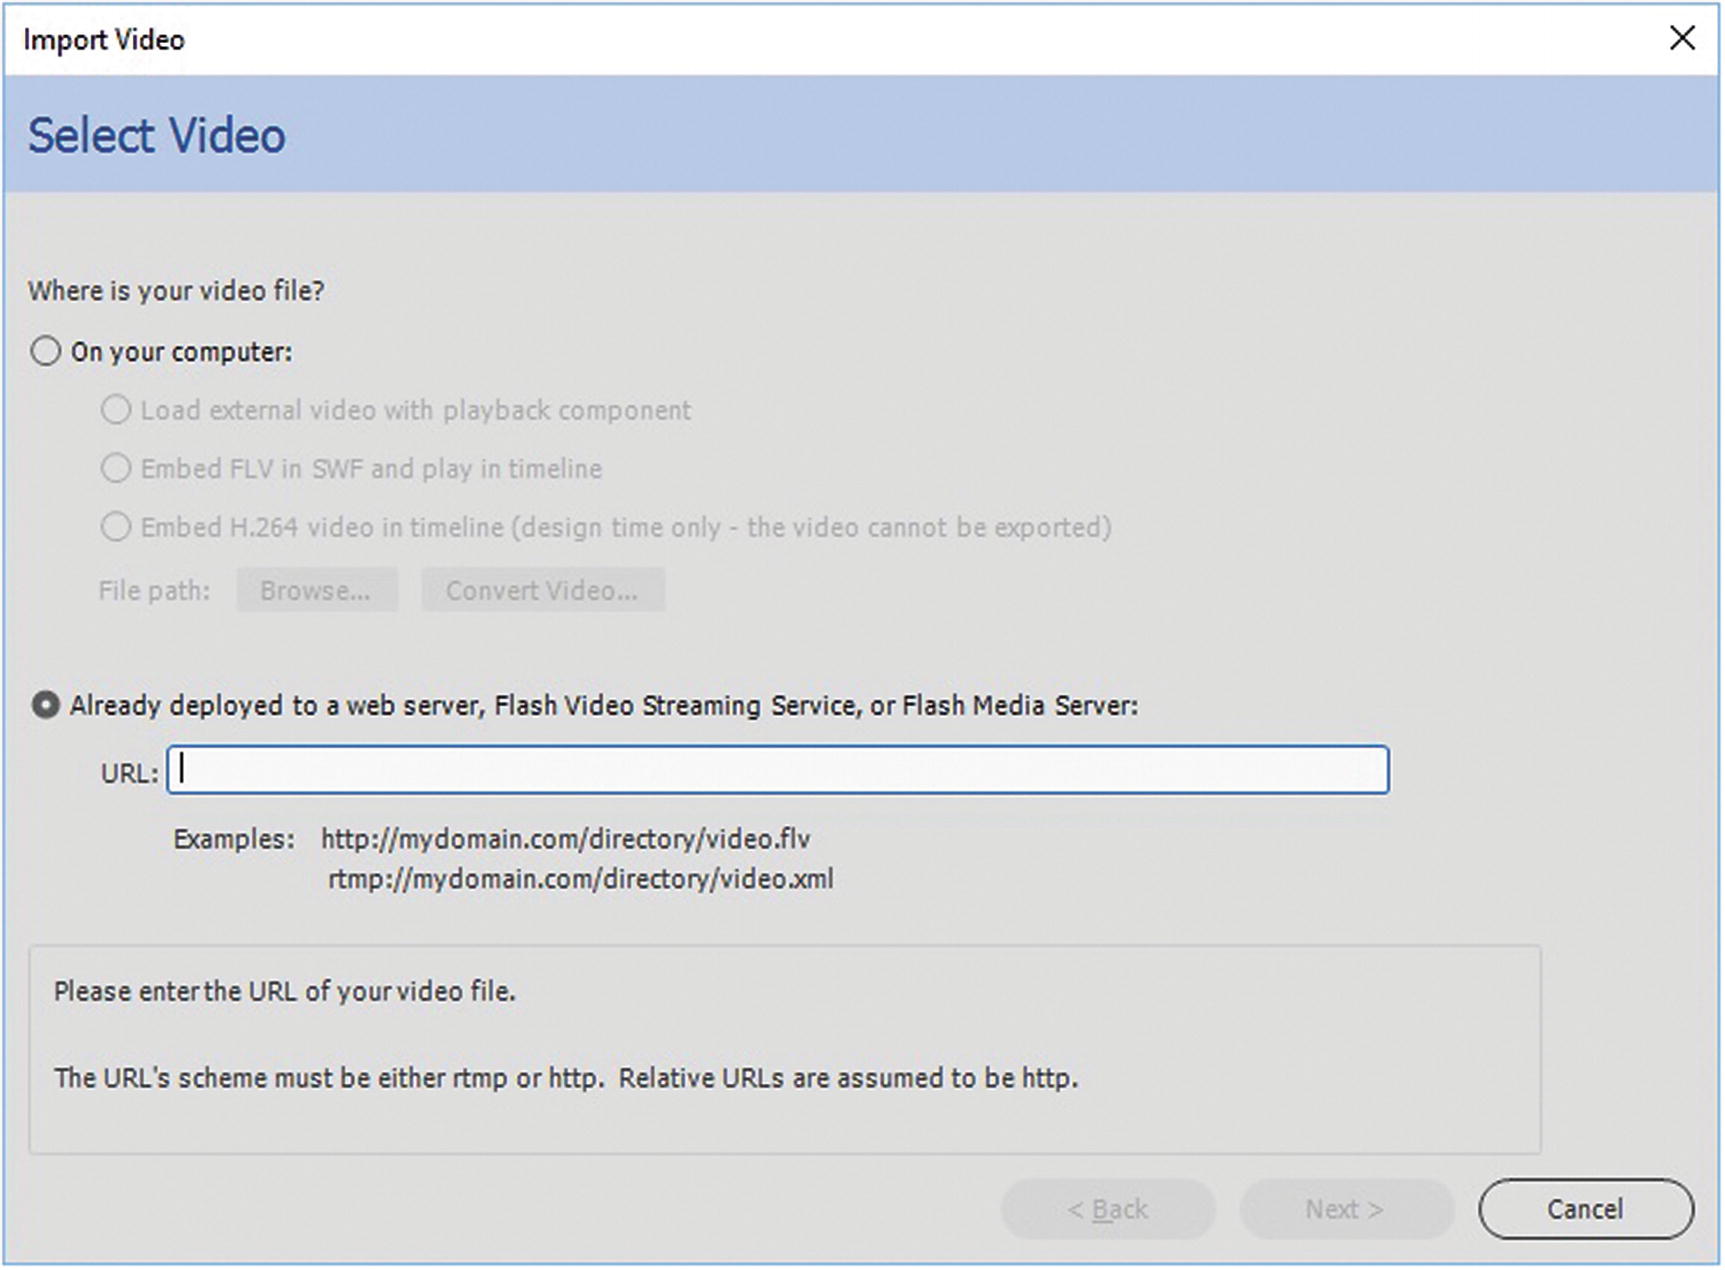
The Import Video dialog box works with SWF video
In this book, Animate CC’s main purpose is to create an animation that could become a video, used in a Photoshop as part of a video, or used as an HTML5 Canvas. There may be times that you want to import a small video into HTML5 Canvas. For example, in my animation (video_canvas.fla), I created my characters appear to be watching a TV screen or in a theater. How was this accomplished?
Components and Component Parameters
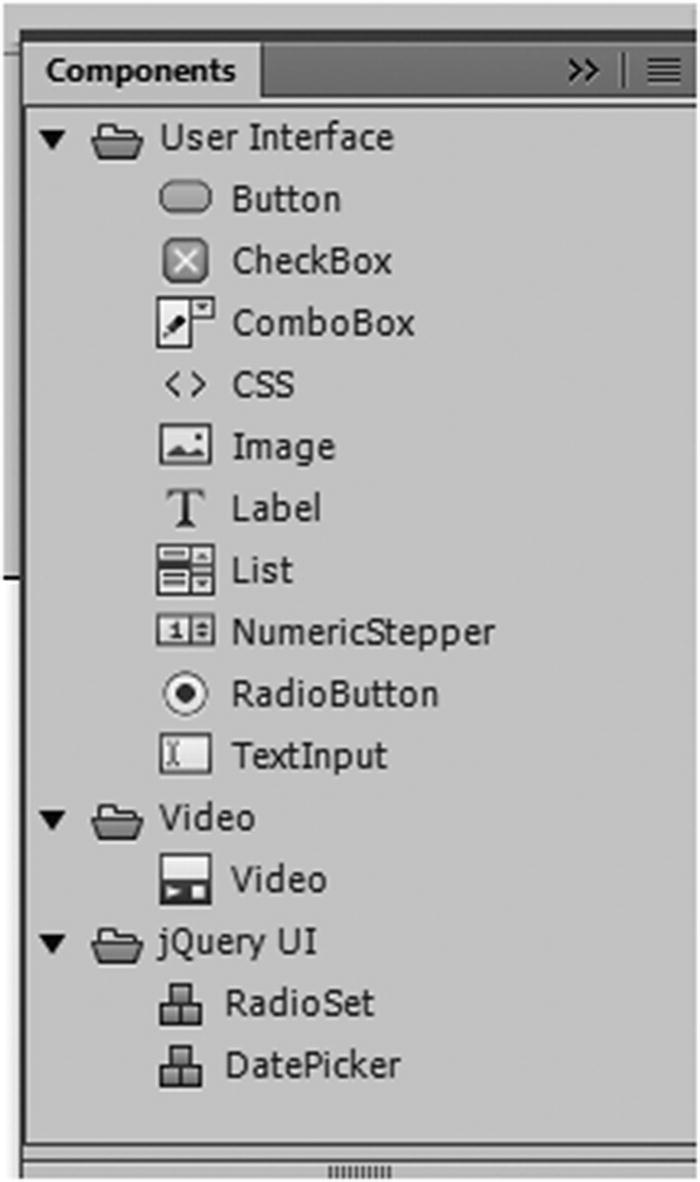
Options for the Components panel
While also containing form components in the Components panel, toward the bottom, there is also a video component available. Again, it is possible to add video to an ActionScript 3.0 file if you add images that were in a sequence or frame by frame.

The video component is added to the stage

The video component is added to the Library panel
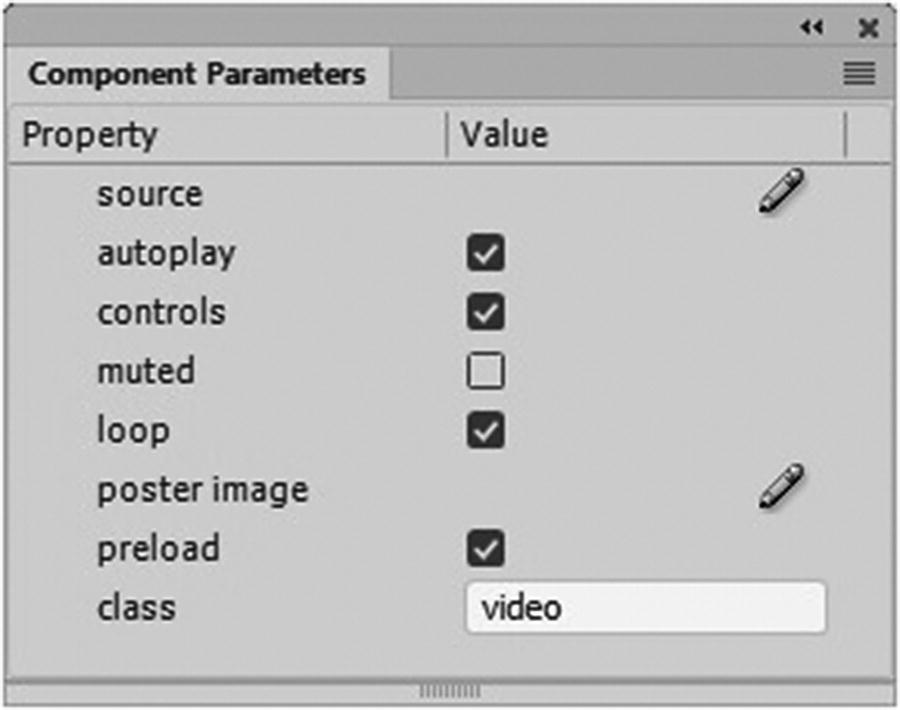
The Video Component Parametes panel
In the parameters, you can adjust the setting for the video as you would any HTML5 video.

Adding a Video Source content path
Match source dimensions causes the video component to scale.
Autoplay ensures that the video plays at start.
Controls makes the HTML5 video controls visible.
Muted turns off or on sound, if there is sound in the video. It does not mute sound that is outside the video on another layer in the canvas.
Loop determines whether the video loops.
Poster image is an image that appears on the front of the video either before it plays or when it completes; it can be in JPEG, PNG, GIF, or bitmap format. It should be the same dimensions as your video to scale correctly.
Preload determines how the video loads.
Class effects how the video appears in the HTML5 file and how it reacts with the CSS class styling. Refer to Figure 20-16.
Note
Until the file is published as an HTML5 Canvas, you will not be able to interact or preview the video; only animations around the video. Make sure that your timeline and fps (frames per second) match those in the video, or you could end up with some unusual results in which the video moves faster or slower than expected.
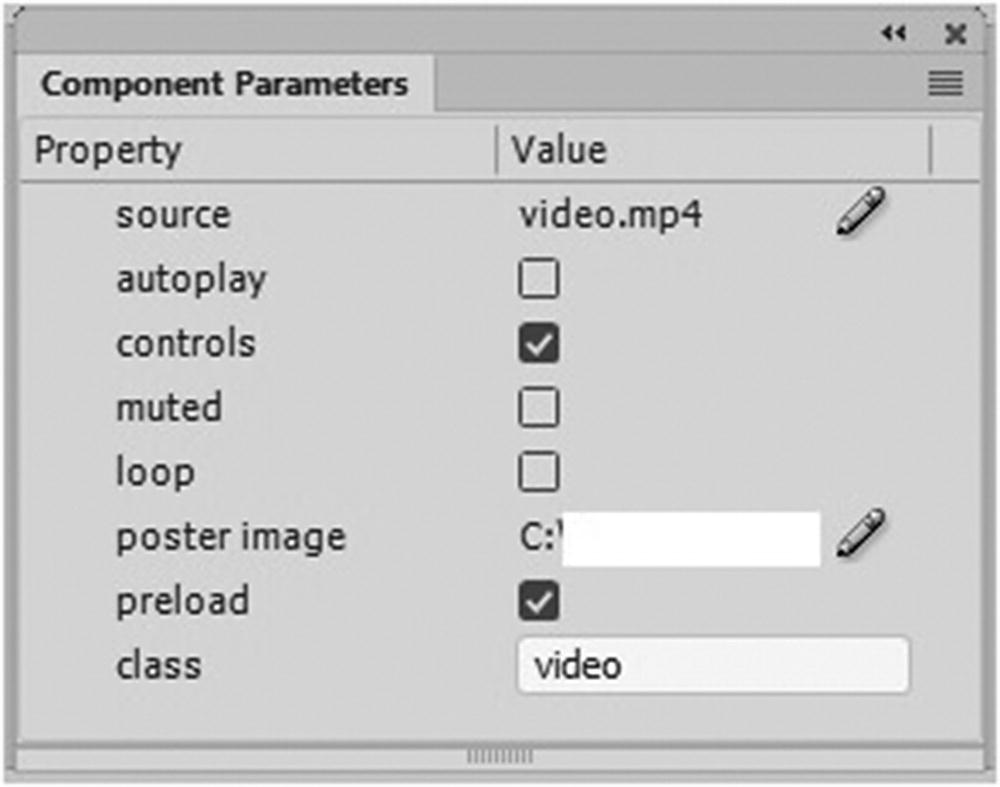
The final component parameters
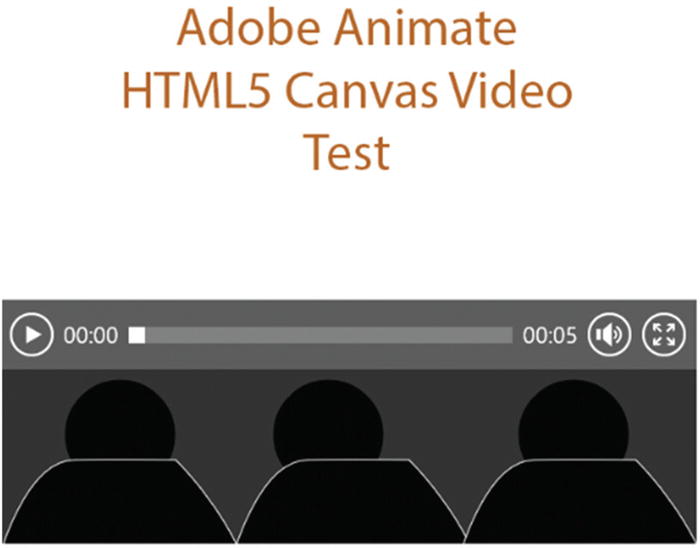
Adding a graphic below the video gives the effect that people are watching a video in a movie theater
Note
You cannot add a graphic over the top of the video component because it will always try to remain on top. You may need to make your canvas a little taller so that you can incorporate your cartoon animated audience below it.
Summary
In this chapter, you looked at how to add audio to your ActionScript 3.0 and HTML5 Canvas. You also added a small video component so that you could link an HTML5 video to your Canvas file. Hopefully, you are beginning to see where each FLA option has its unique uses.
In the next chapter, you review the Timeline panel and look at some of the tools that you can use to modify your animation before you export it.