
In this chapter, you look at how to use scripts, along with the Actions panel and batch actions, to speed up your workflow. Then you look at slicing tools and image maps for the web using Illustrator CC.
Note
This chapter does not have any actual projects; however, you can use the files in the Chapter 13 folder to practice opening and viewing for this lesson. They are at https://github.com/Apress/graphics-multimedia-web-adobe-creative-cloud .
Using Scripts

Basic scripts that you can use to save documents either in the PDF or SVG format
These scripts allow you to quickly save a PDF or SVG file into a selected folder; however, there are no options to allow you to adjust settings, so I do not recommend this option if you need your files to have specific adjustments before exporting.
Actions to Speed up the File Conversion Process
Like Photoshop CC, the Actions panel is available in Illustrator CC. It comes with some default or prebuilt actions that you can use for files for the web, or you can create your own.
Actions Panel
Save For Web GIF 64 Dithered
Save For Web JPG Medium
Save For Web PNG 24
All of these take you to the File ➤ Export ➤ Save For the Web (Legacy) dialog box, where you can adjust your settings before saving. Refer to Figure 13-2.
The Actions panel in Illustrator
Note
As with Photoshop CC, you can access the Actions panel menu to clear, reset, load, save or even replace actions. Actions that are not saved cannot be reloaded and will be lost from the list.

The default actions have settings that are already saved for you
Create a New Action
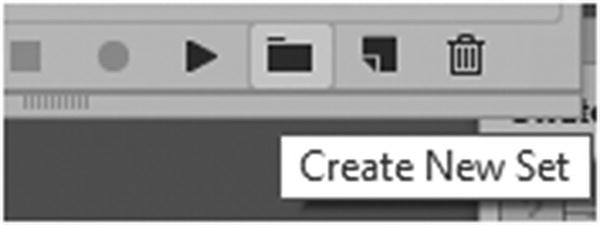
Create a new action set
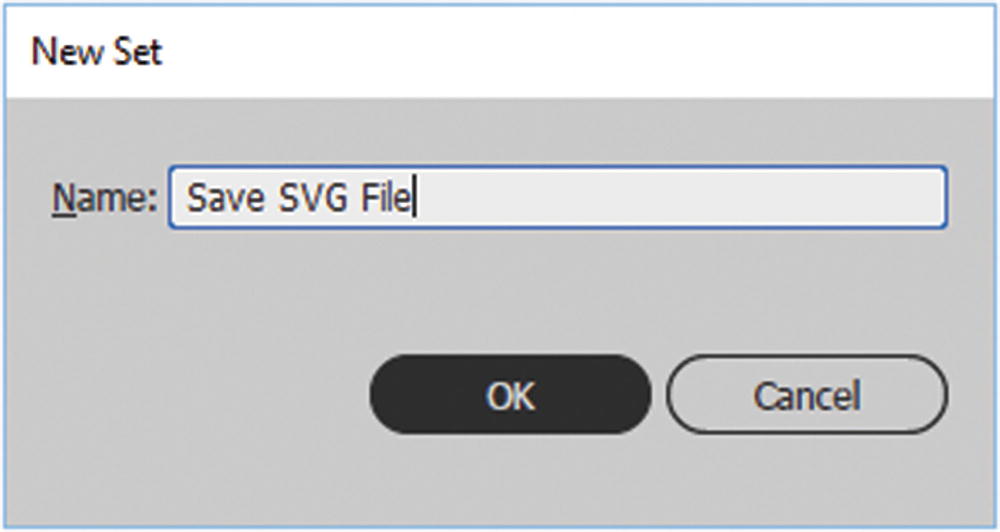
Give the new set a name
Then click OK.
I created the new set to keep the new action separate from my default actions.

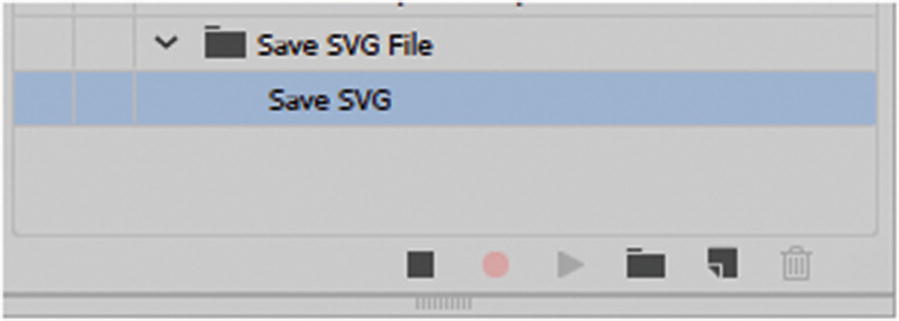
Name the new action
Click the Record icon to begin recording the action
You now notice that the little red Record button is on, and you can begin recording your actions as you move along. If at any time you wish to stop recording, click the square icon to the left. If you make a mistake in an action, you can use the Trash icon on the right to remove it. You can then resume by clicking the Record button and redoing the actions. Afterward, to test an action, click the triangle (play) to the right. Right now, nothing will happen until you do another action in Illustrator.
With your AI file open, you can choose File ➤ Export ➤ Export As and choose SVG as the file type, and click Export.

Choose settings in the SVG Options dialog box
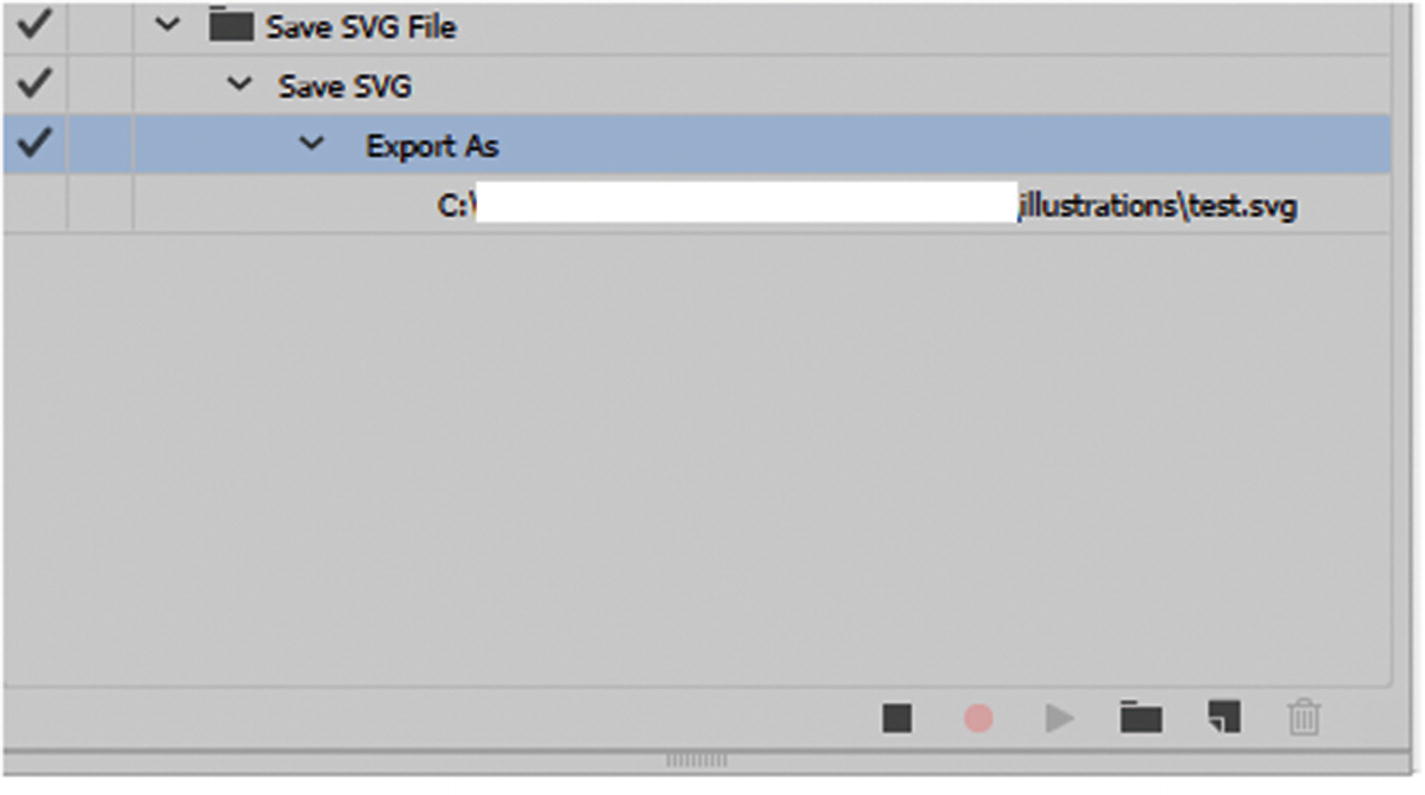
The action now appears in the Actions panel
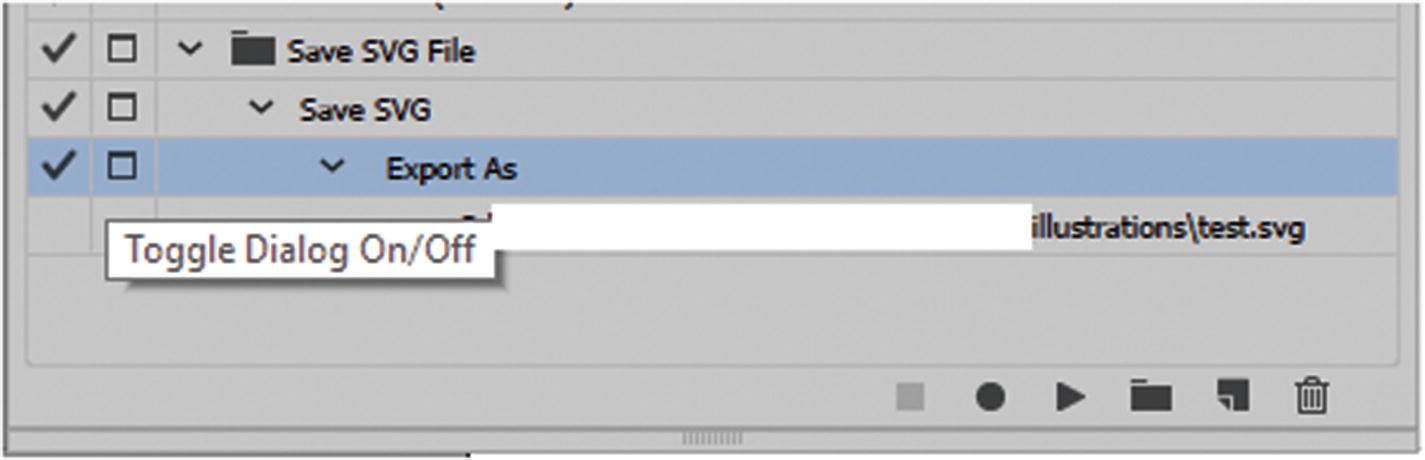
Add to the action the option for the dialog box to open
Note
You can also insert stops if you want to record a message to remind you of a step. In the Actions menu, choose Insert Stop and enter a message, and then click OK. The stop is inserted into the action.
Open another AI or EPS file in Illustrator to test the action to see if it works. Do this by clicking the Play button.
While this is good for one image at a time, it would not make the process much faster if you have several images and then need to export another folder, since it goes to the same folder each time. To get around this, you need to create a batch.
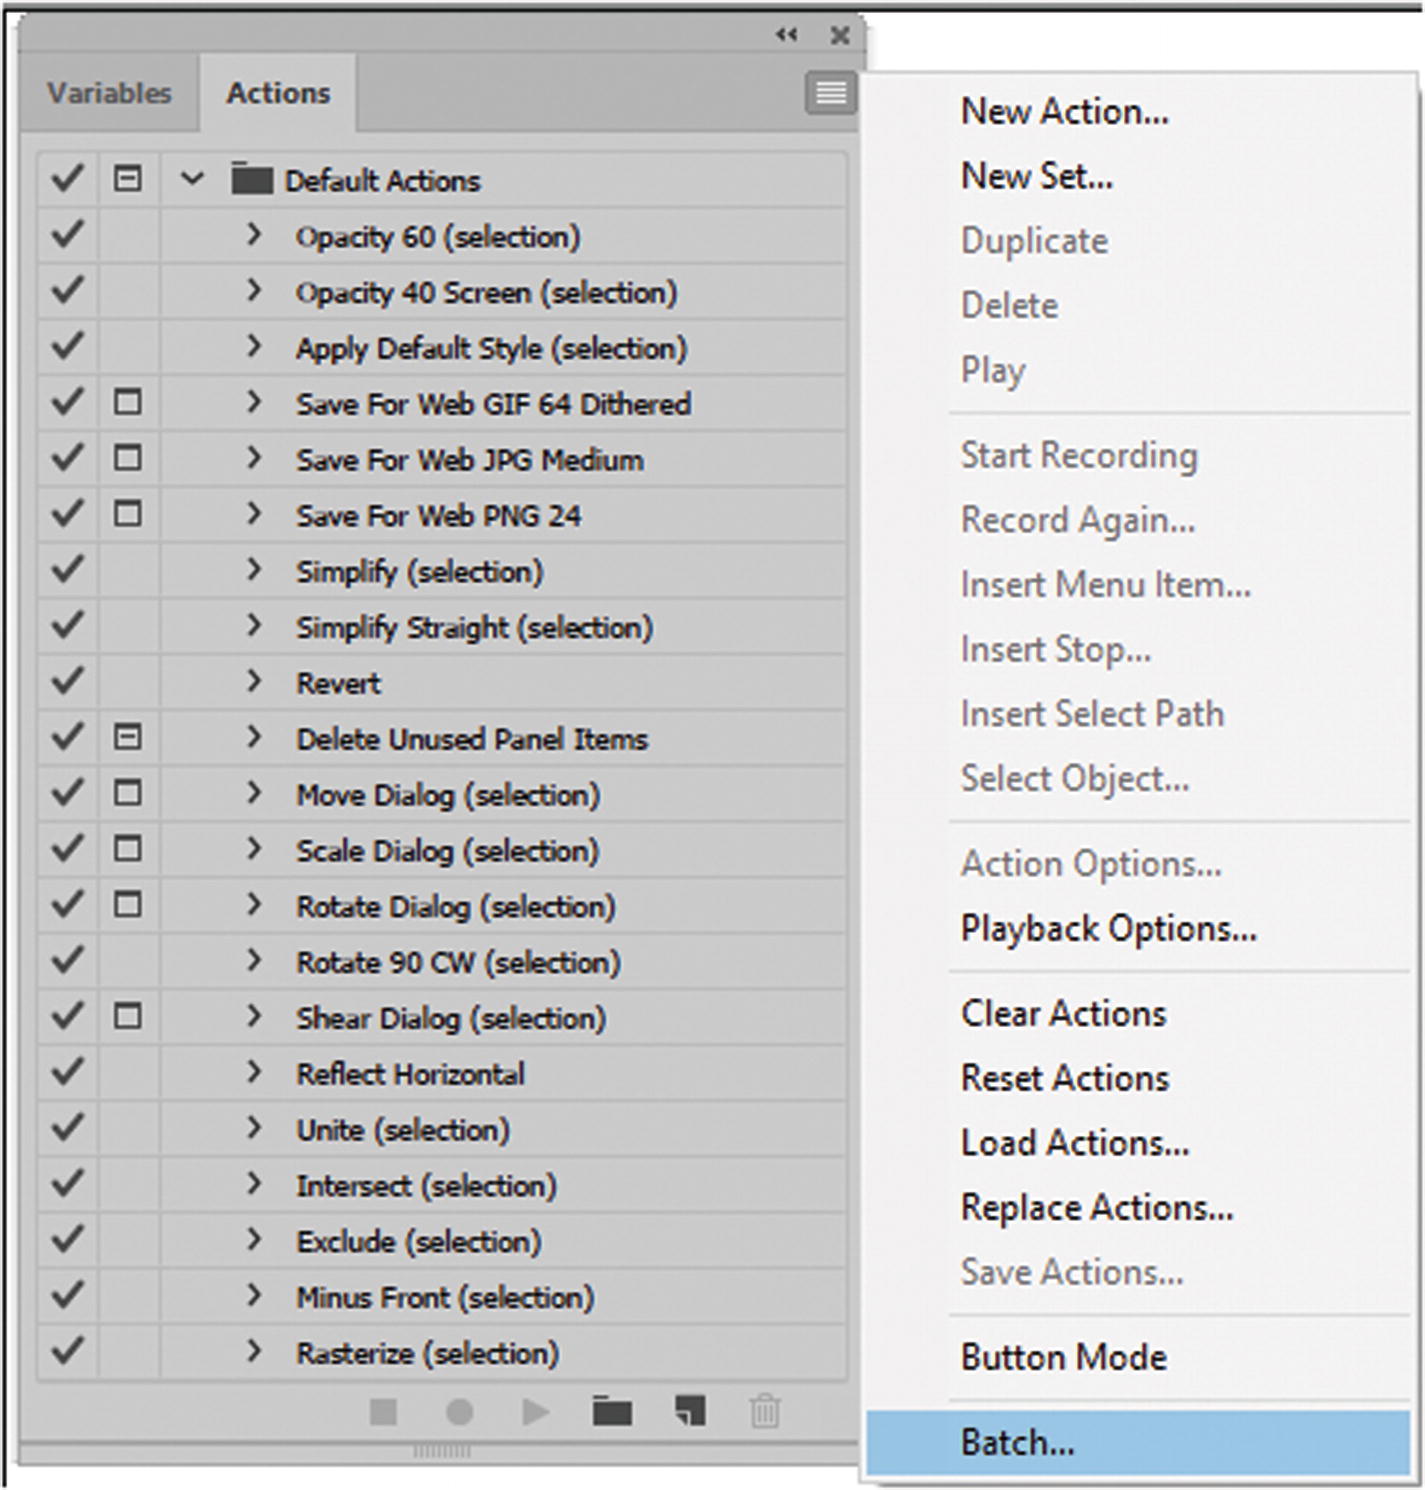
Automate Batch Actions
As you saw in Photoshop, you can batch files. While the Actions panel is OK for a few images a day, what if you have over 20 images that need to be adjusted for a gallery or an e-commerce website?
The Batch option is not in the main menu. You need to use the Actions panel menu. Refer to Figure 13-2, where you see the Batch option at the bottom of the Actions panel’s menu.

The Batch dialog box for Illustrator
As with Photoshop CC, the Illustrator Batch feature allows you to choose a set of actions and the actions within the set. You can also choose a folder or data set as a source for where the file came from and a destination folder, if different from where the files will be saved or exported. Also, you can override these commands to be different than the actions. If you do not choose a different folder, you can choose to save and close from the Destination drop-down menu.
Note
If the Source drop-down menu is set to Data Sets (it is assumed that your file contained data sets and you are working from one file), use the Batch command to populate a template for data-driven graphics with different sets of data. You can give the output file from those sets a file name and number or data set name. This sets an option for generating file names from the original document when overriding Save and Export commands. However, with Folder as the Source option, this area is unavailable. Refer to Figure 13-12.

Setting data sets in the Batch dialog box
For now, leave both the source and destination options as a folder, as seen in Figure 13-11.
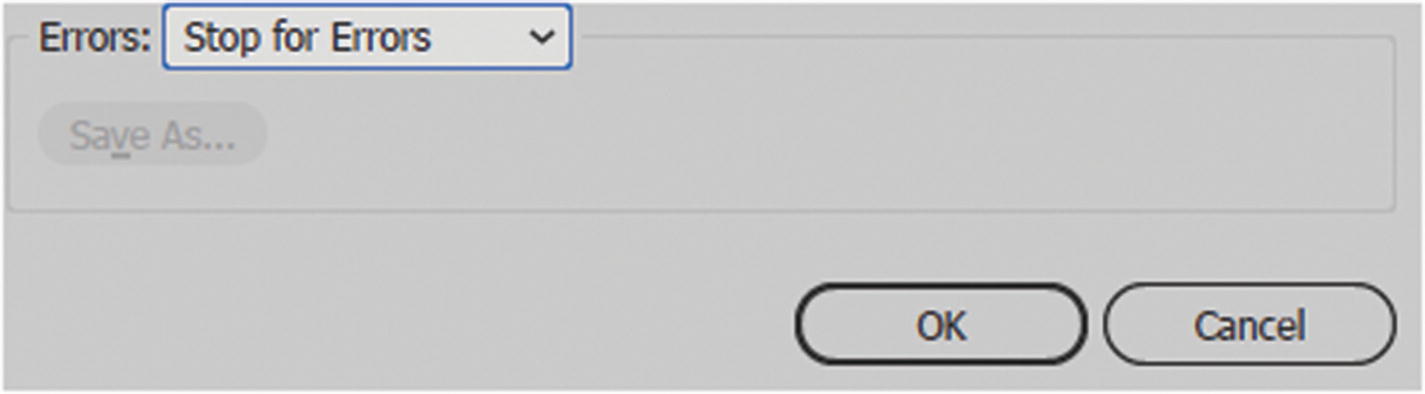
The batch process stops for errors if there is an issue with the file
Click OK to start the batch action.
You can save, export, and open each file’s settings, one at a time, and adjust the settings if required. As you can see, Illustrator actions are more simplified than Photoshop CC, but they can be just as efficient when working with the conversion of more than one image for the web.
Note
There is no automate droplet available in Illustrator as there is in Photoshop CC.
Slicing Tools
As you saw in Chapters 4 and 5, when you save files for the web in Photoshop CC, you might save many photos or graphics that will appear somewhere in an HTML file on a solid background. However, they are times when you might want an image to appear in the background of one or more <div> tags or in a table. In Illustrator, you can use the same principles to slice up a background that can later be saved for the web.
If you wish to review some of the basic ways to slice, refer to Chapters 4 and 5. In Illustrator, you will look at where you can find similar features and compare them.

Choose the Web tab when you create a new document that you plan to use as a layout for your website
A webpage with areas that have been sliced
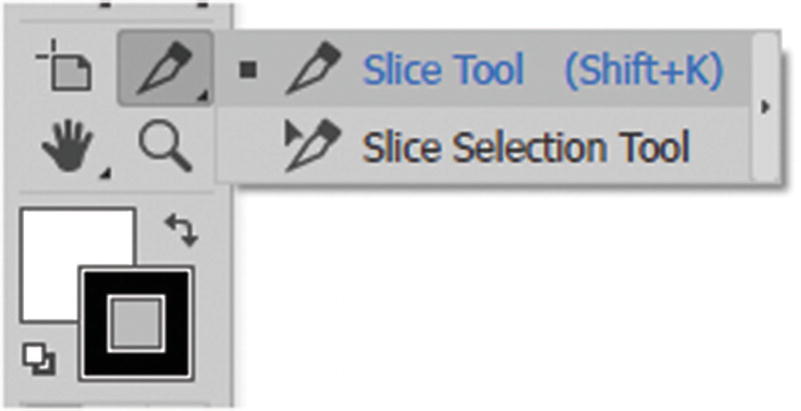
Use the Slice tool to create slices from your website
Use the Slice and Slice Select Tools

Example of user and auto slices on a page

Example or auto or layer-based slicing in the Layers panel
Like any user slice or layer-based slice, it can be moved and resized as you would a vector object.
Slice lines : Define the boundary of the slice. Solid lines indicate that the slice is a user slice or layer-based sliced; lighter solid lines indicate that the slice is an auto slice.
Slice colors : Differentiates user slices from auto slices. By default, user slices and layer-based slices have blue symbols, and auto slices have gray symbols and often a link icon when viewed in the Save for Web (Legacy) dialog box. Normally on the artboard, they appear in the default red color and not always with link icon while working on the artboard. The Save For Web (Legacy) dialog box uses color adjustments to dim unselected slices. These adjustments are for display purposes only and do not affect the color of the final image. By default, the color adjustment for auto slices is twice the amount of that for user slices. Refer to Figure 13-19.

How slices appear in the Save for Web (Legacy) (01,02) and on the artboard (07,06)
Slice numbers : Numbers are from left to right and top to bottom, beginning in the upper-left corner of the image. If you change the arrangement or the number of slices, every slice number is updated to reflect the new order.
Note
For further alterations to slice color, go to Edit ➤ Preferences ➤ Slices for Windows, and Illustrator ➤ Preferences ➤ Slices for macOS. You can alter the line color and hide/show the slice number. Click OK to confirm changes. Refer to Figure 13-20.
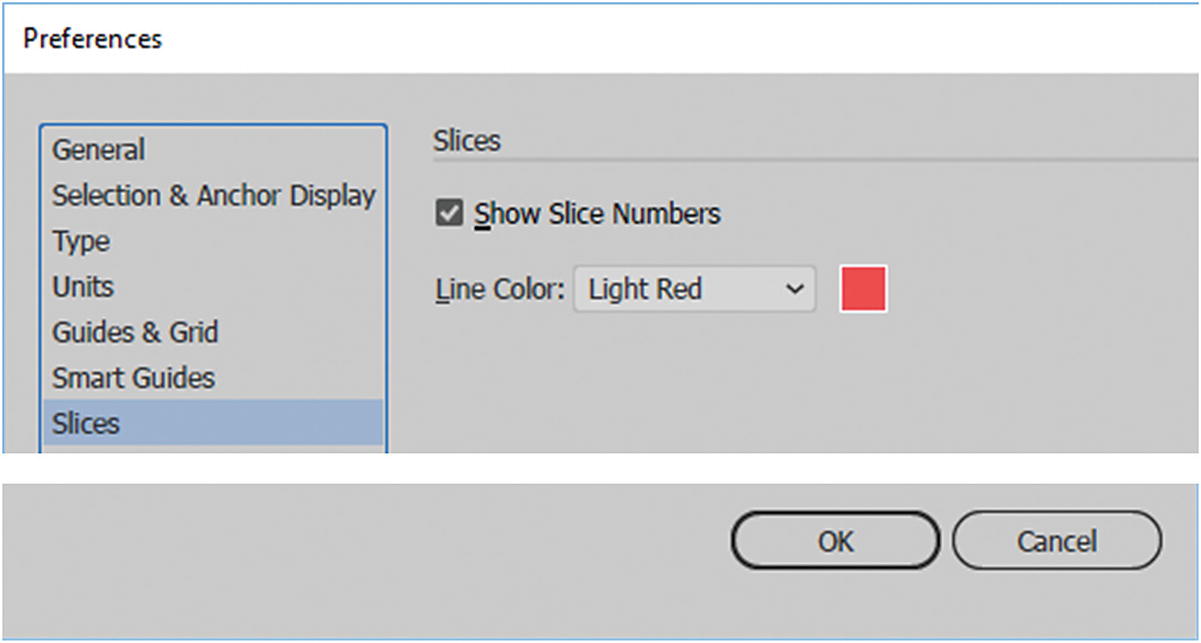
If you don’t like the default color of the slices, alter it here as well as show or hide the slice numbers
Object ➤ Slice Options

There are more options for working with slices in the Object ➤ Slices main menu
In this area, you can make or release a slice to its own sublayer. You can create a slice from guides or a selection when an object on the artboard is selected.
Note
The Create from Guides feature overrides all current slices and slice numbers with any new slices created based on the guides.
When a slice is selected with the slice select tool in the Tools panel, you can duplicate, combine, divide, or delete all slices. The Clip to Artboard feature forces the slices to stay within the artboard’s boundaries.
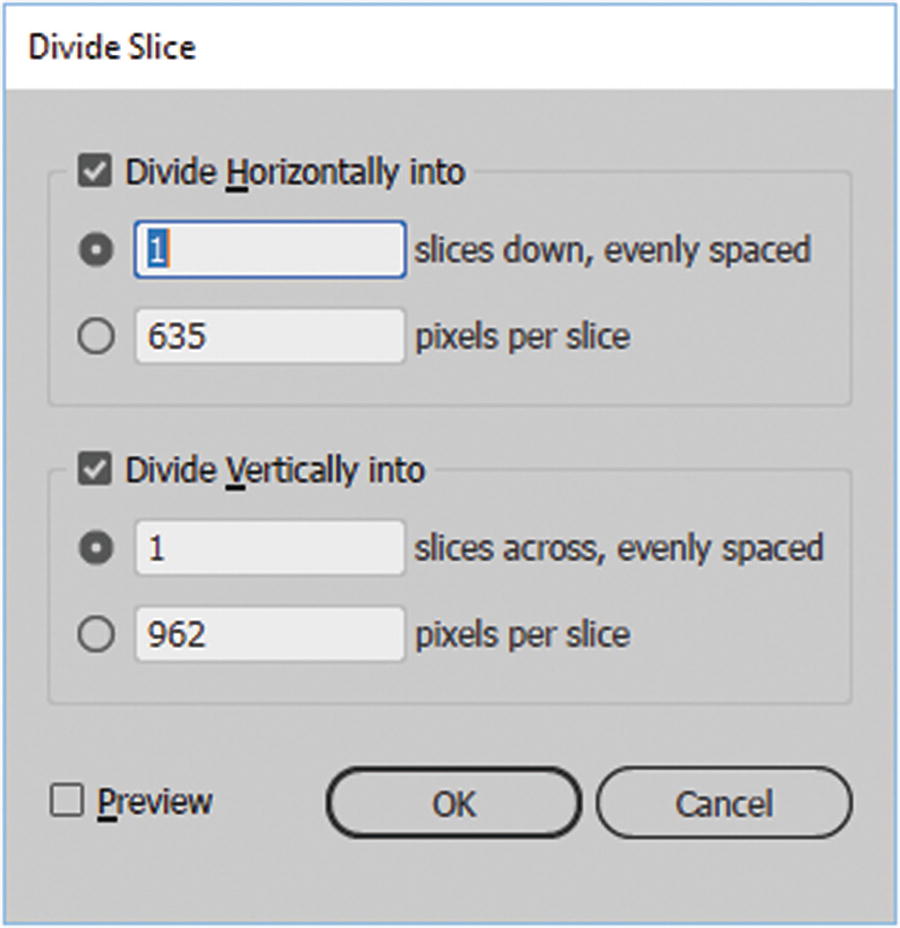
The Divide Slice dialog box
Align Slices
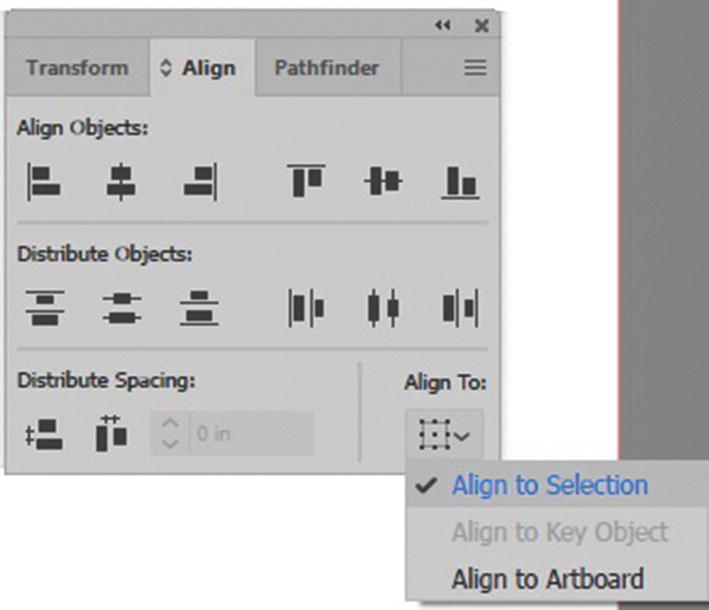
Use the Align panel to align your slices as you would align objects

Send slices forward or back as you would objects
You can send the slices forward or backward in sublayer order.
Slice Options
Use the Slice Selection tool to gain access to the Slice Options dialog box
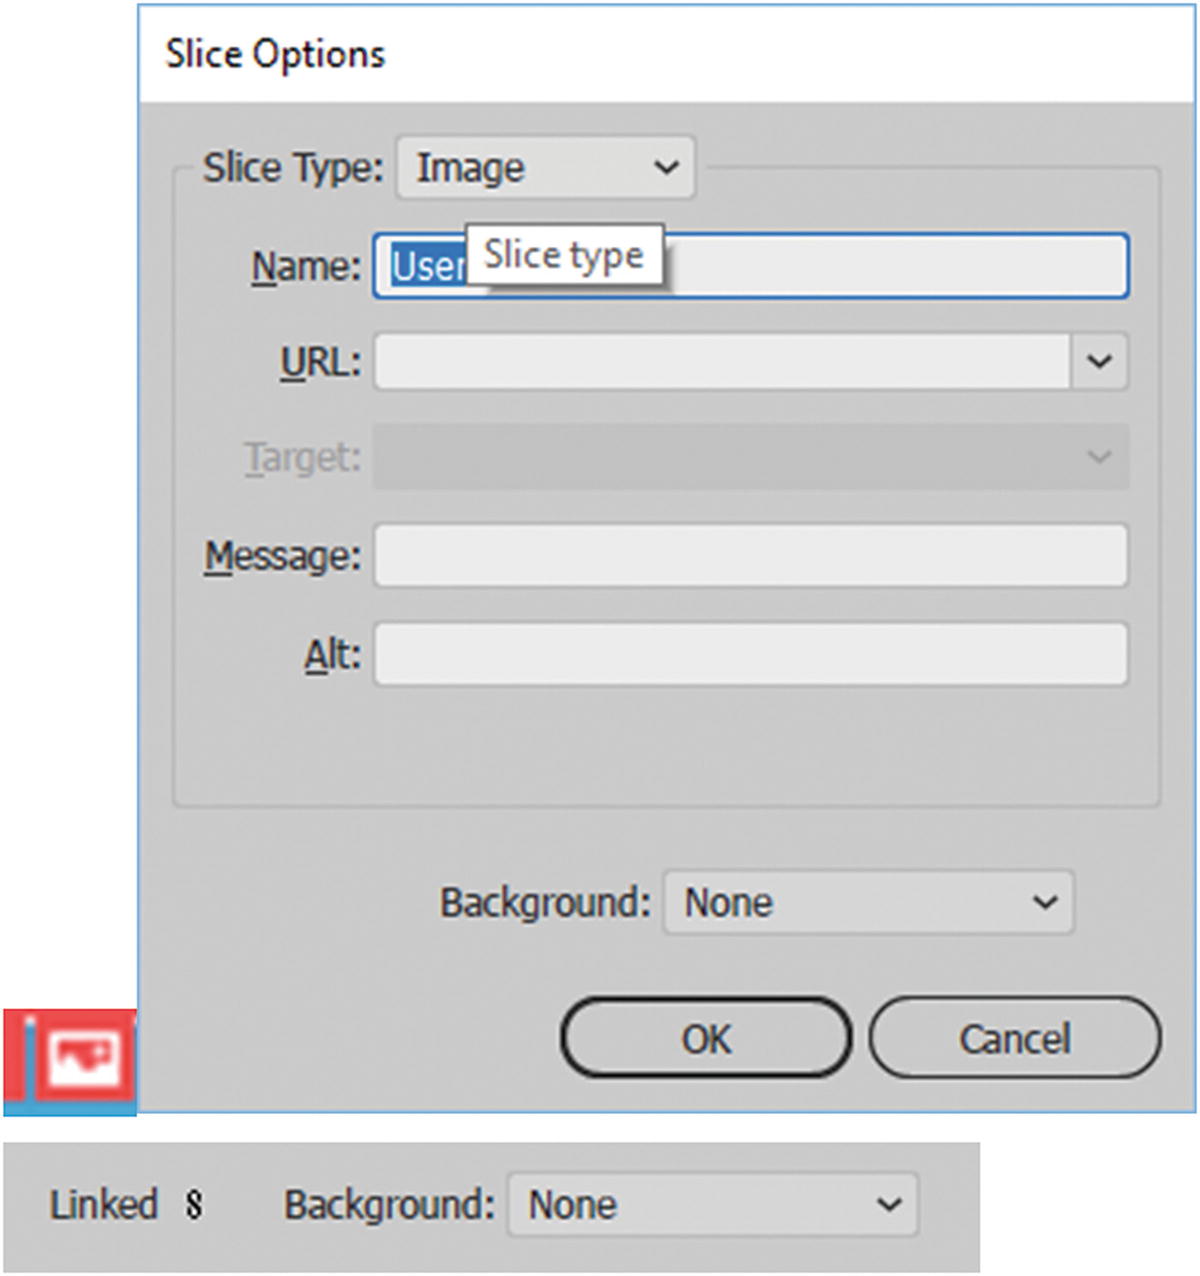
Setting for the Slice Options for the image slice
Image

Choose none or a color background from the background options
In Slice Type, select Image if you want the slice area to be an image file in the resulting webpage. If you want the image to have an HTML link, enter a URL and target in the drop-down menu. Like Photoshop CC, you have the options of blank, self, parent, and top. For more information on those, refer to Chapter 5.
You can also specify that a message appear in the browser’s status area when the mouse is positioned over the image, alternative text (alt) that appears when the image is not visible, and a background color for the table cell or <div> tag.
Background color options include None, Matte, Black, and White. Eyedropper Color and Other let you choose custom colors from the color picker. Refer to Figure 13-27.
No Image
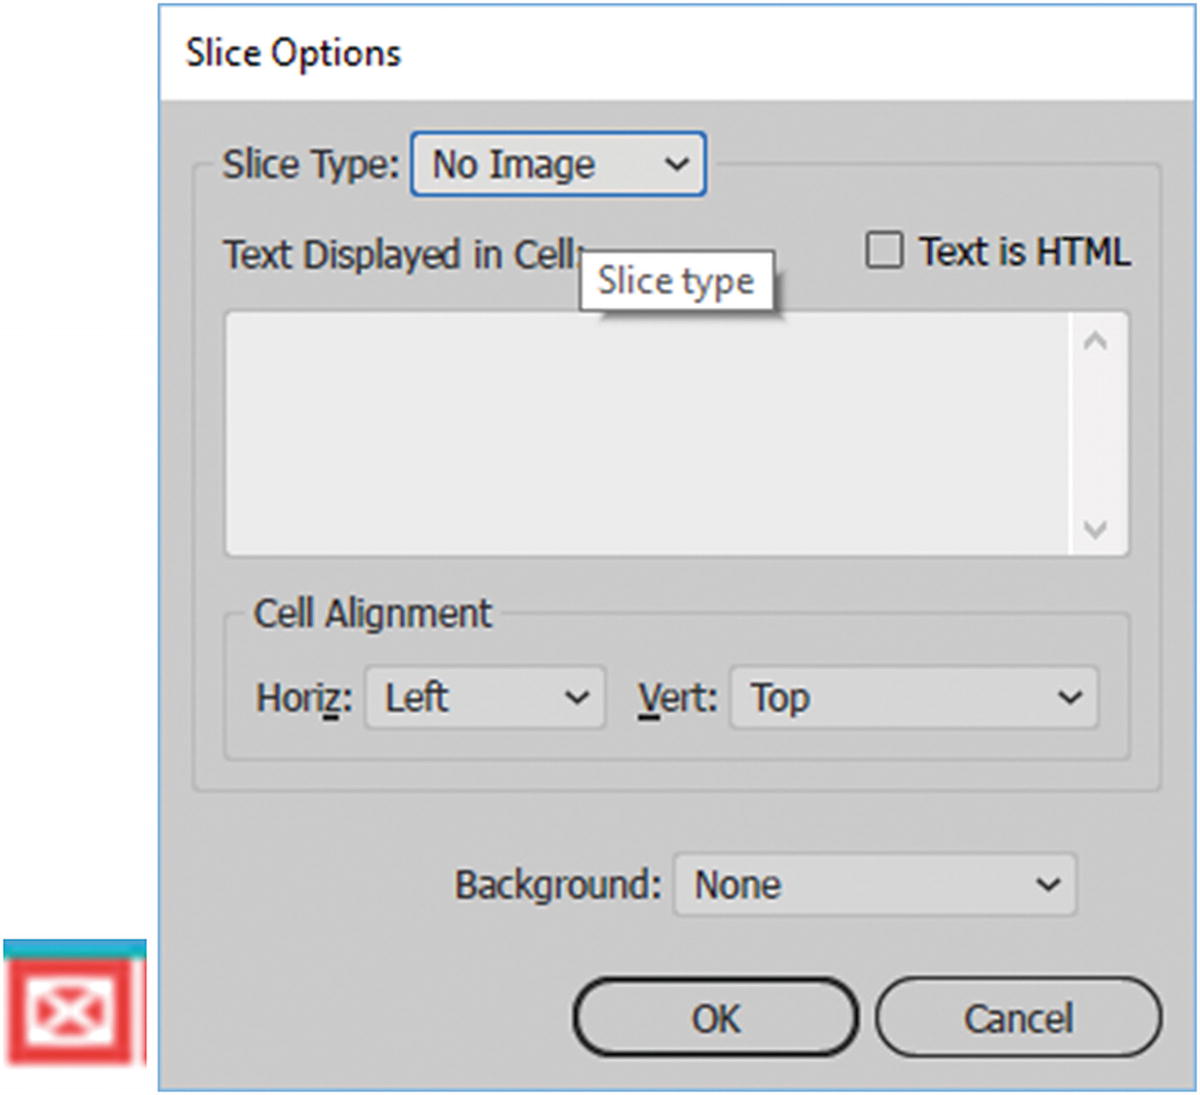
Select a slice and choose No Image if you do not want it to export that slice
Select No Image if you want the slice area to contain HTML text and a background color in the resulting webpage. Enter the text you want in the Text Displayed in Cell text box, and format the text using standard HTML tags.
Take care not to enter more text than can be displayed in the slice area. If you enter too much text, it will extend into neighboring slices and affect the layout of your webpage. However, because you cannot see the text on the artboard, this will not be apparent until you view the webpage in a browser or in Dreamweaver CC.
Set the Horiz and Vert options to change the alignment of text in the table cell. Later, you can use CSS in Dreamweaver to alter the layout and change the table to <div> tags.
HTML Text

Select a text box area that you can transform into a slice, and then set it to Slice Type: HTML Text
The Illustrator text is converted to HTML text with basic formatting attributes in the resulting webpage. To edit the text, update the text in your artwork on the artboard. Set the Horiz and Vert options to change the alignment of text in the table cell. You can also select a background color for the table cell. Later, you can use CSS in Dreamweaver to alter the layout and change the table to <div> tags.
Tip
To edit the text for HTML Text slices in the Slice Options dialog box, change the slice type to No Image. This breaks the link with the text object on the artboard. To ignore text formatting, you can enter <unformatted> as the first word in the text object.
Delete All Slices
Each time you draw a slice, it is numbered, and auto slices around it need to renumber to match. Sometimes, subslices overlap, which can get confusing if you don’t keep track and the image requires many slices. If you ever need to clear the slices from the page and start over, select Object ➤ Slices ➤ Delete All, and begin to slice again.
Lock Slices
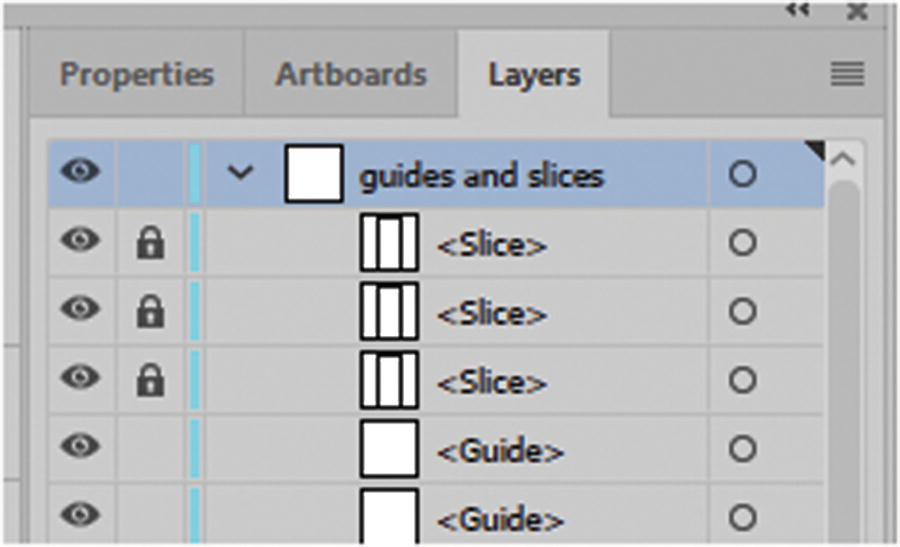
Lock slices in the Layers panel
Hide Slices
To Hide the slices, choose View ➤ Hide Slices.
Save Your Slices for the Web

Save for Web (Legacy) dialog box tools
The background slice default is usually a GIF, but you can change each slice to a PNG or a JPEG file.

Choose how you want to export your slices
You can choose to export all the slices, all the user slices, or just the slices you have selected.

Choose Optimize to File Size to alter each slice’s size
Remember to select more than one slice, use Shift+mouse-click.
Tip
Another quick way to save the slices if you are not in the Save for Web (Legacy) dialog box as GIF only is from the main menu choose File ➤ Save Selected Slices (GIF). However unlike save for web, this option does not allow you to adjust your slice settings or set other file formats for the slices like JPEG or PNG. Refer to Figure 13-34.

Save Select Slices only lets you save a GIF slice
Note
When you click Save in the Save for Web (Legacy) dialog box (see Figure 13-35), you may discover that you can only save the GIF images and not the HTML, as you can in Photoshop CC. I’m not sure if this was something the Illustrator designers forgot to update, but do not despair. You can copy this code if you press the Preview button in the lower left. This opens the browser. The code for your slices is below the images. You can then copy this information into your HTML file and edit it in Dreamweaver CC.

Click the Preview button if you want to see the HTML code
The code in your file will likely be different, but at least this is a decent work-around should you require HTML and CSS as a starting point for your site design.
Creating Image Maps
You can also create a hotspot or image map within a slice using the Attributes panel. Refer to my image_map example.ai file.
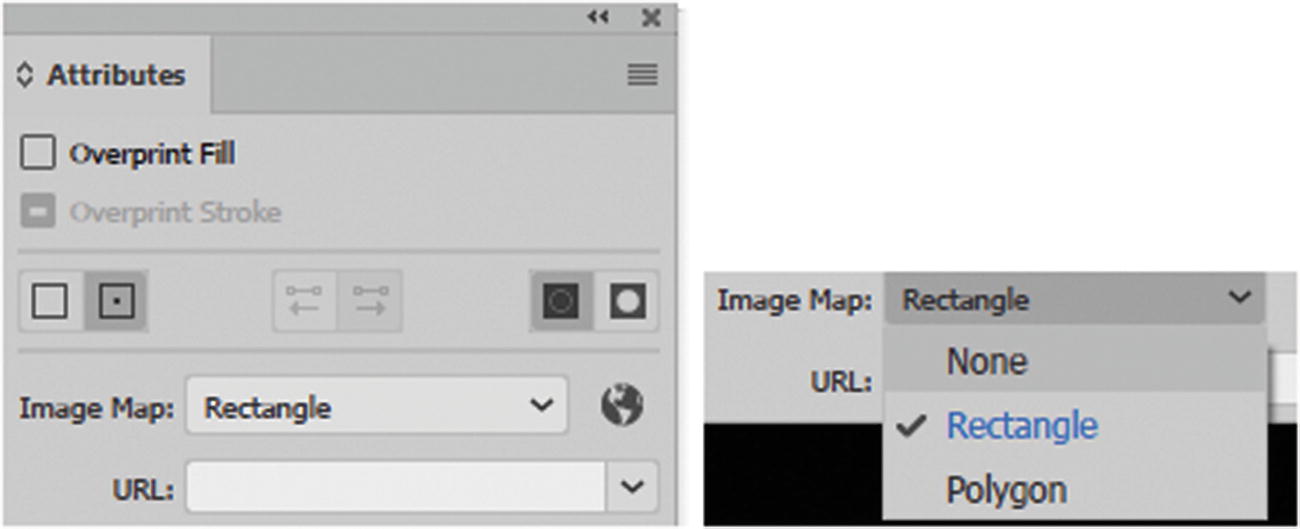
Creating an image map with the Attributes panel

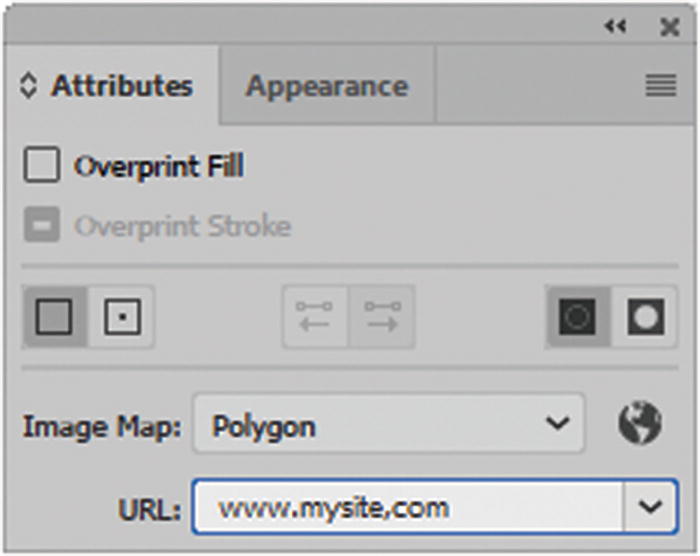
Creating an image map (star) with the Attributes panel
Complex objects do not produce image maps in Illustrator, so it is better to use Dreamweaver to draw complex shapes, as you will see in Part 6.
Note
Style information for the image map can be retrieved when you go to Save for Web (Legacy) and click the Preview button.
Summary
In this chapter, you reviewed scripts, actions, batching actions, slicing tools, and image maps. You also saw how to retrieve important CSS and HTML information for your slices that you could later use in Dreamweaver to build your website.
Although you can’t create animations or videos in Illustrator, in the next chapter, you learn that you can use some of its tools to create objects and layouts that could be used as frames in animations or for video. In addition, you discover a SVG file JavaScript interactivity secret.