
Getting Started
In Part 5, you work with Adobe Media Encoder
Note
This chapter does not have any actual projects; however, you can use the files in the Chapter 25 folder to practice opening and viewing for this lesson. They are found at https://github.com/Apress/graphics-multimedia-web-adobe-creative-cloud .

These five Creative Cloud programs are often used in creating and rendering professional video

Audition can be used to assist you in working with audio files

Files rendered from Media Encoder are used in your website
If you have never used Media Encoder before, it is not a difficult program to use. Unfortunately, since there is not a “Classroom in a Book” for beginners to this software, I recommend reading resources, such as the Adobe Help section ( https://helpx.adobe.com/media-encoder/using/whats-new.html ), as an overview of the program and many of its tools.

As with other Adobe Creative Cloud programs, there are several web file formats that you can export to

Click the Install button beside your Media Encoder icon if the program is not already installed
In older versions of Creative Cloud, Media Encoder automatically installs along with Flash (now Animate CC); however, since you can use Media Encoder with several other programs, Adobe now regards it as a separate program, so you can choose whether to install it now or later. If you are working with Animate or Photoshop, however, I recommend that you install it at the same time as these programs.
Note
Before you install an Adobe program, make sure that your computer meets the system requirement; otherwise, the install may fail. For more information, check https://helpx.adobe.com/media-encoder/system-requirements.html .
Also, if you plan to render large files, make sure to have an external drive to render onto so that you do not crash your computer during the rendering.

Open Media Encoder CC so that you can start working in the program
I am using the 2018 and 2019 version.
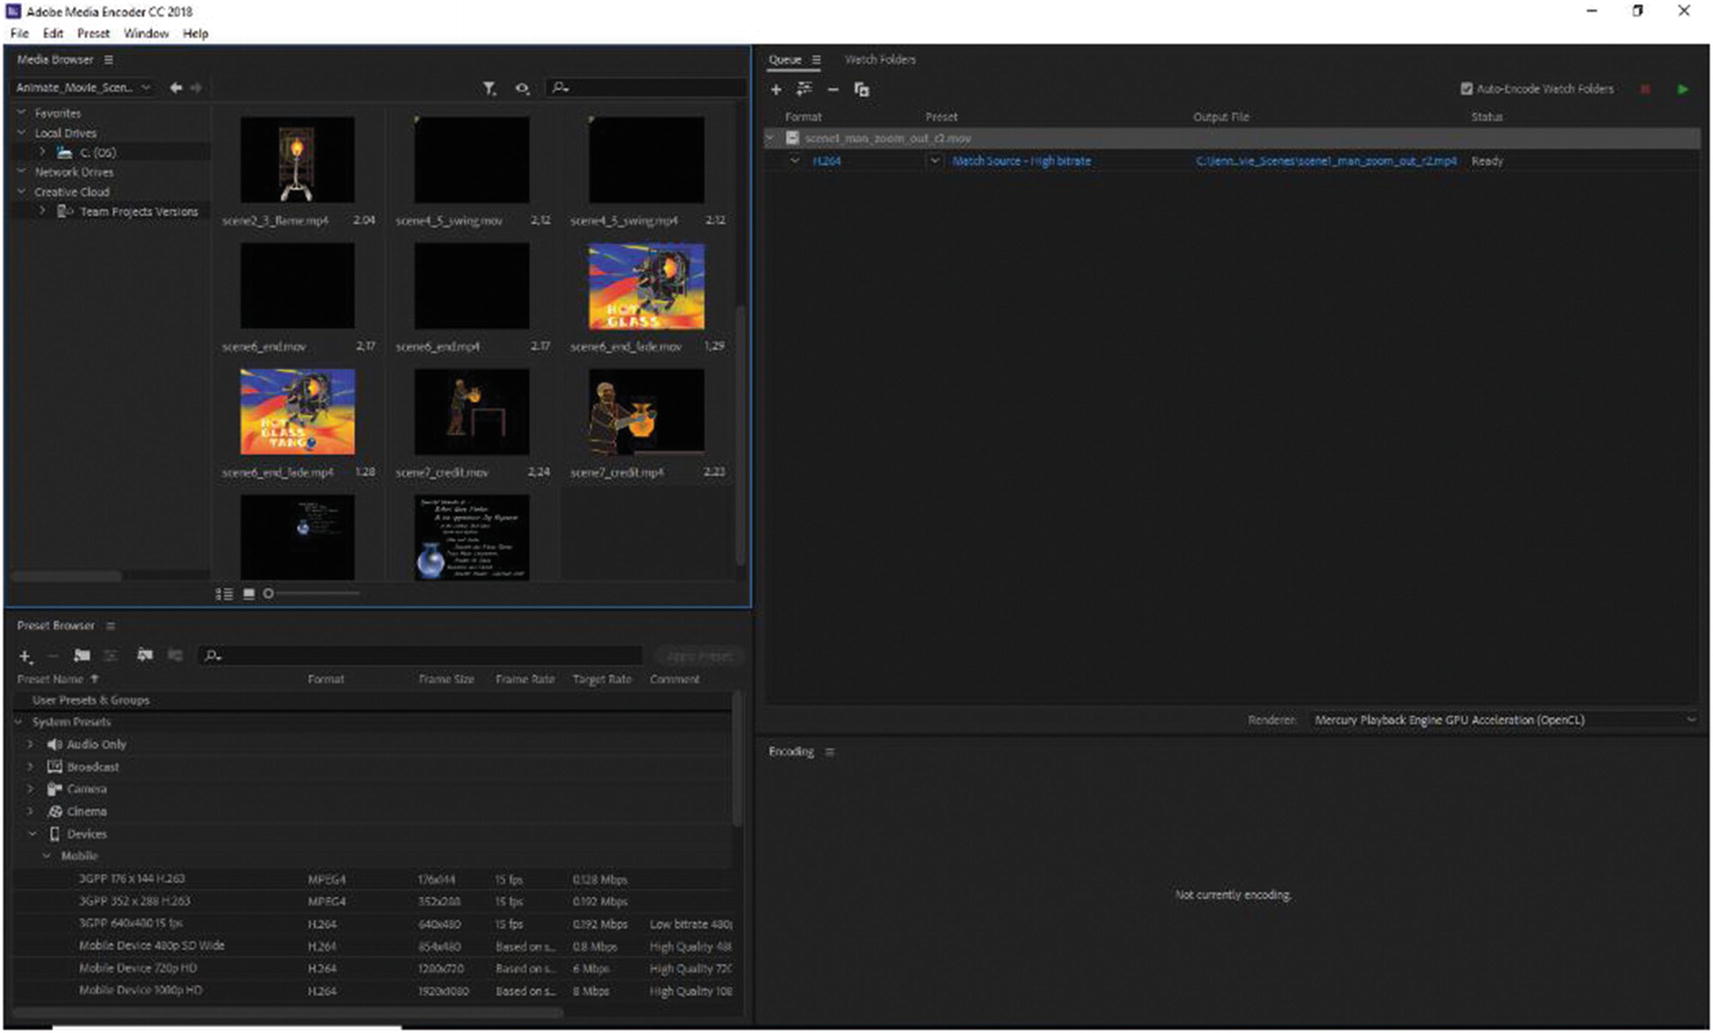
Inside the Adobe Media Encoder CC program
Looking at the Setup of Media Encoder CC and Queue

The MOV file was added to the Queue panel
You’ll look at this panel in a moment, but first let’s look at an overview of the entire program.

The File drop-down menu
If you had files that came from other Adobe programs, you could choose Add After Effects Composition or Add Premiere Pro Sequence. Any video from another source—Adobe program or not, you have to choose Add Source to add to the Queue panel.
Set up a Workspace
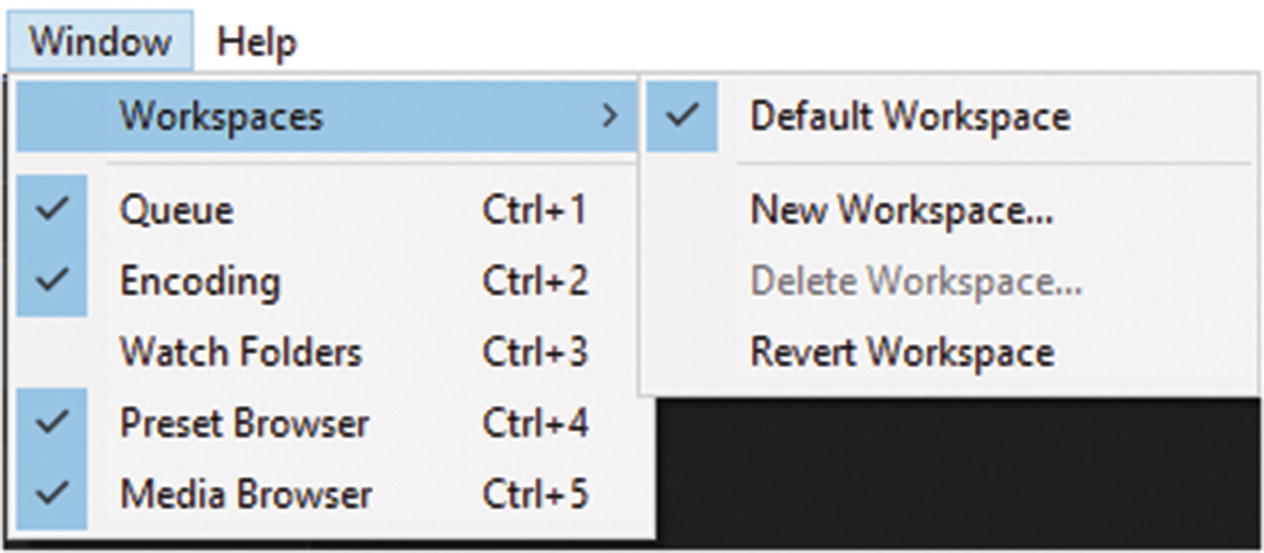
Choose a workspace or create your own
This may be because there are only five panels to work with. You can rearrange the panels in any order that works for your workflow and create a new workspace; however, for now, you stay with the default workspace.
Adjusting Your Preferences

Setting the Appearance Preferences of the program
In the other Adobe programs, I prefer to work with a mid-gray background, but for video in Media Encoder, I prefer the brightness level to be set at darker. Feel free to adjust these settings while working on your projects; for now, just leave them at the default settings—including highlight color, interactive controls, focus indicators, and language—so that you can follow along.
General: Settings for the queue (how it handles the encoding and alerts you), importing Premiere Pro Files, output, video renderer and color management. The video rendering is the GPU engine that comes with your computer processor. On my computer, I use Mercury Playback Engine GPU Acceleration (Open CL); however, there may be a different one on your computer. Refer to Figure 25-13.
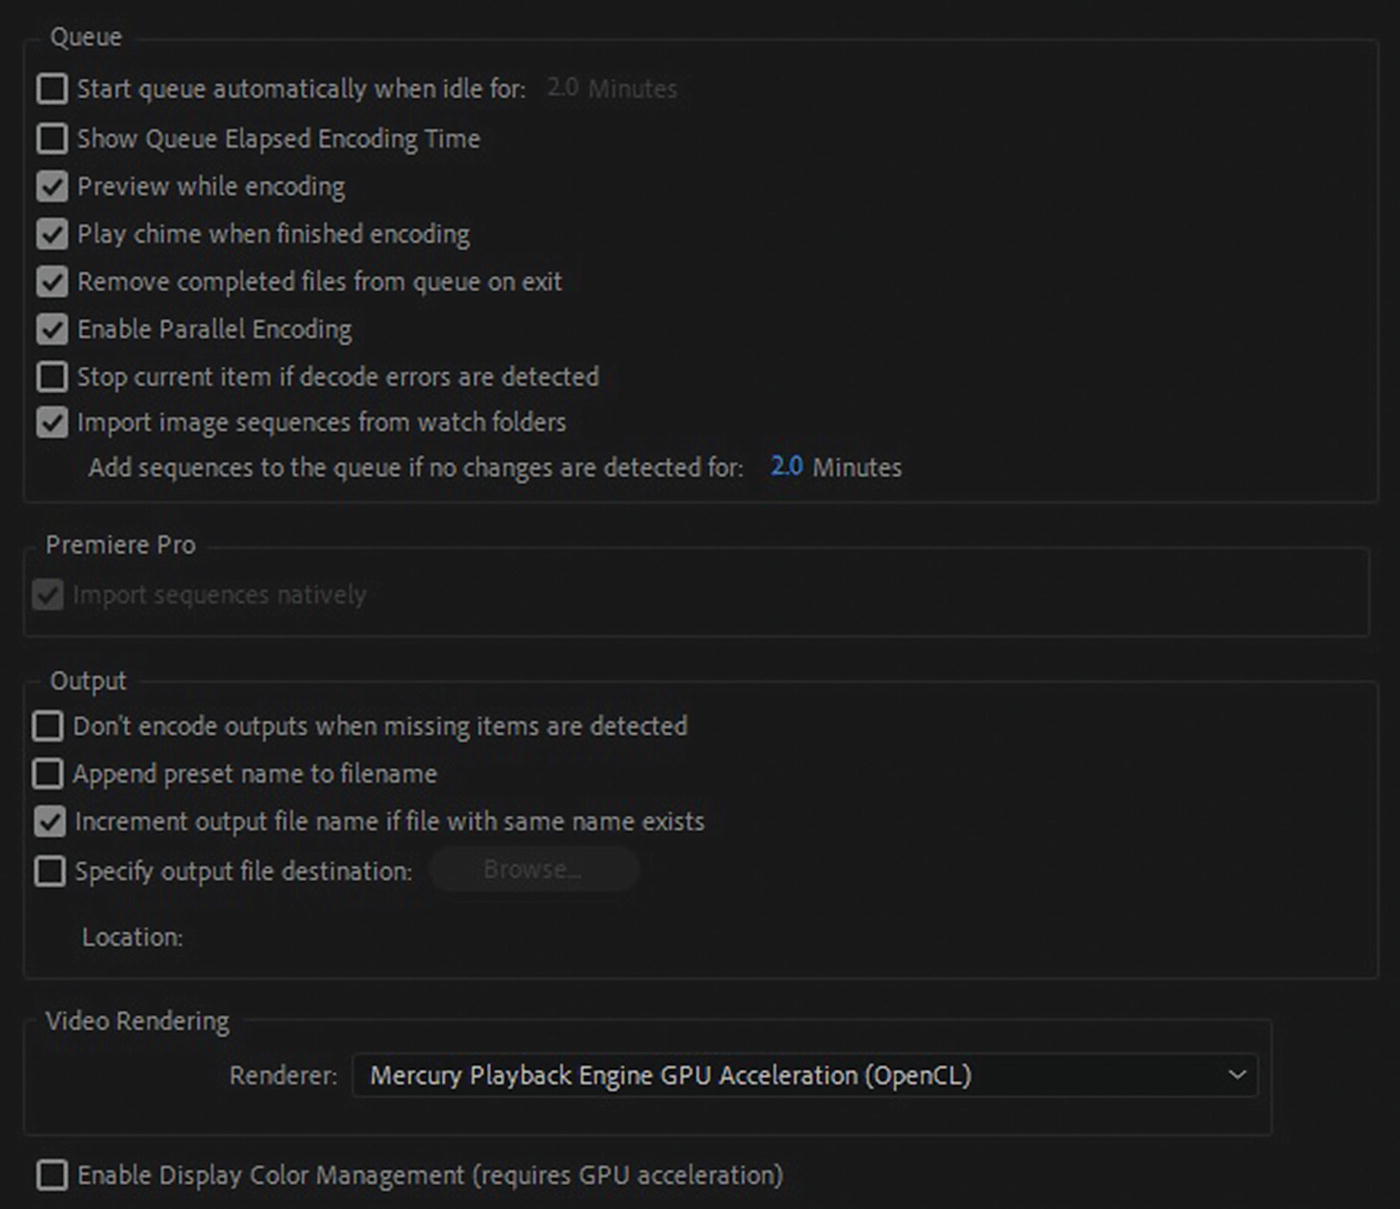
General tab settings
Audio Hardware: Settings for the type of audio hardware that is being used. I am using Realtek Audio, which came with my computer, as the default output; but on your computer, it might be a different setting. Refer to Figure 25-14.

Audio Hardware tab settings
Media: Settings for media cache files and database, intermediate media timebase, captions on import, and accelerated decoding for H.264.
Metadata: Writes a unique identifier to imported files that don’t already contain one. Also, settings for source and output template metadata that was added to the file.
Memory: You may have to adjust the RAM for programs such as After Effects, Premiere Pro, Prelude, Photoshop, SpeedGrade, or Audition; otherwise, leave at the default settings. Refer to Figure 25-15.
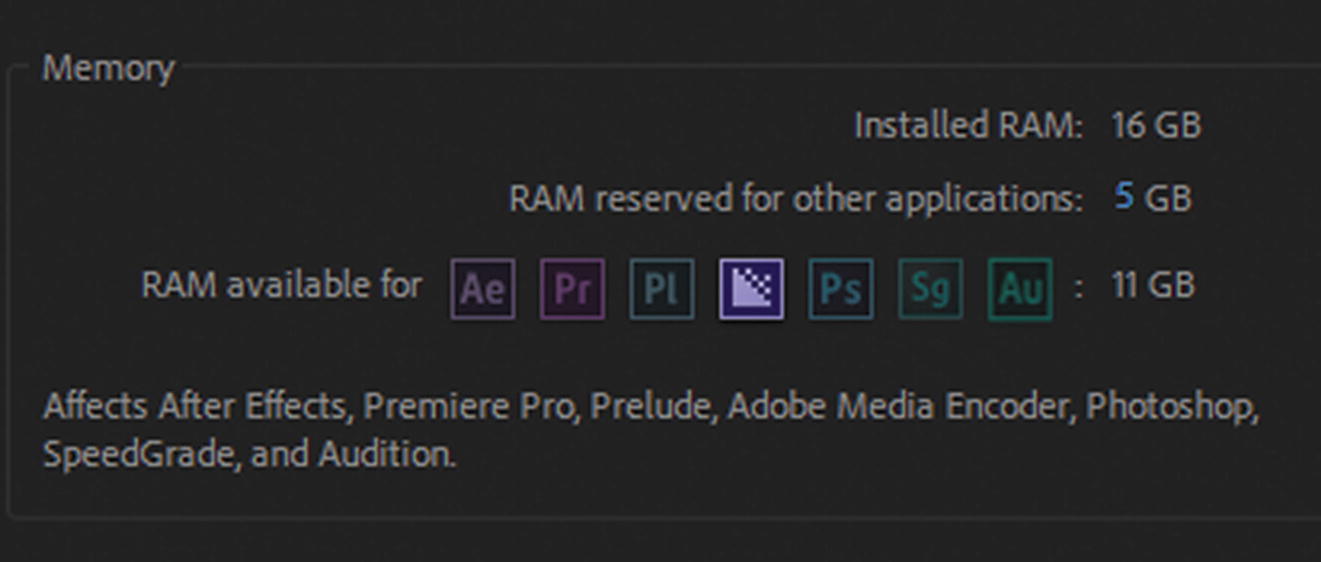
Memory tab settings
Sync Settings: If certain settings must remain in sync or synchronized within the program, they can be enabled or disabled here. They can be synchronized across multiple machines. You can upload preferences related to your workspace layouts. Also, there are keyboard shortcuts and presets to your Creative Cloud account. These settings could be downloaded and uploaded to other machines within your company. Refer to Figure 25-16.

Sync Settings tab with settings
Sync Settings can be cleared when you quit the application.

Click OK or Cancel to exit the Preferences dialog box
Now let’s look at each of the panels, moving clockwise within the default workspace.
Media Browser Panel
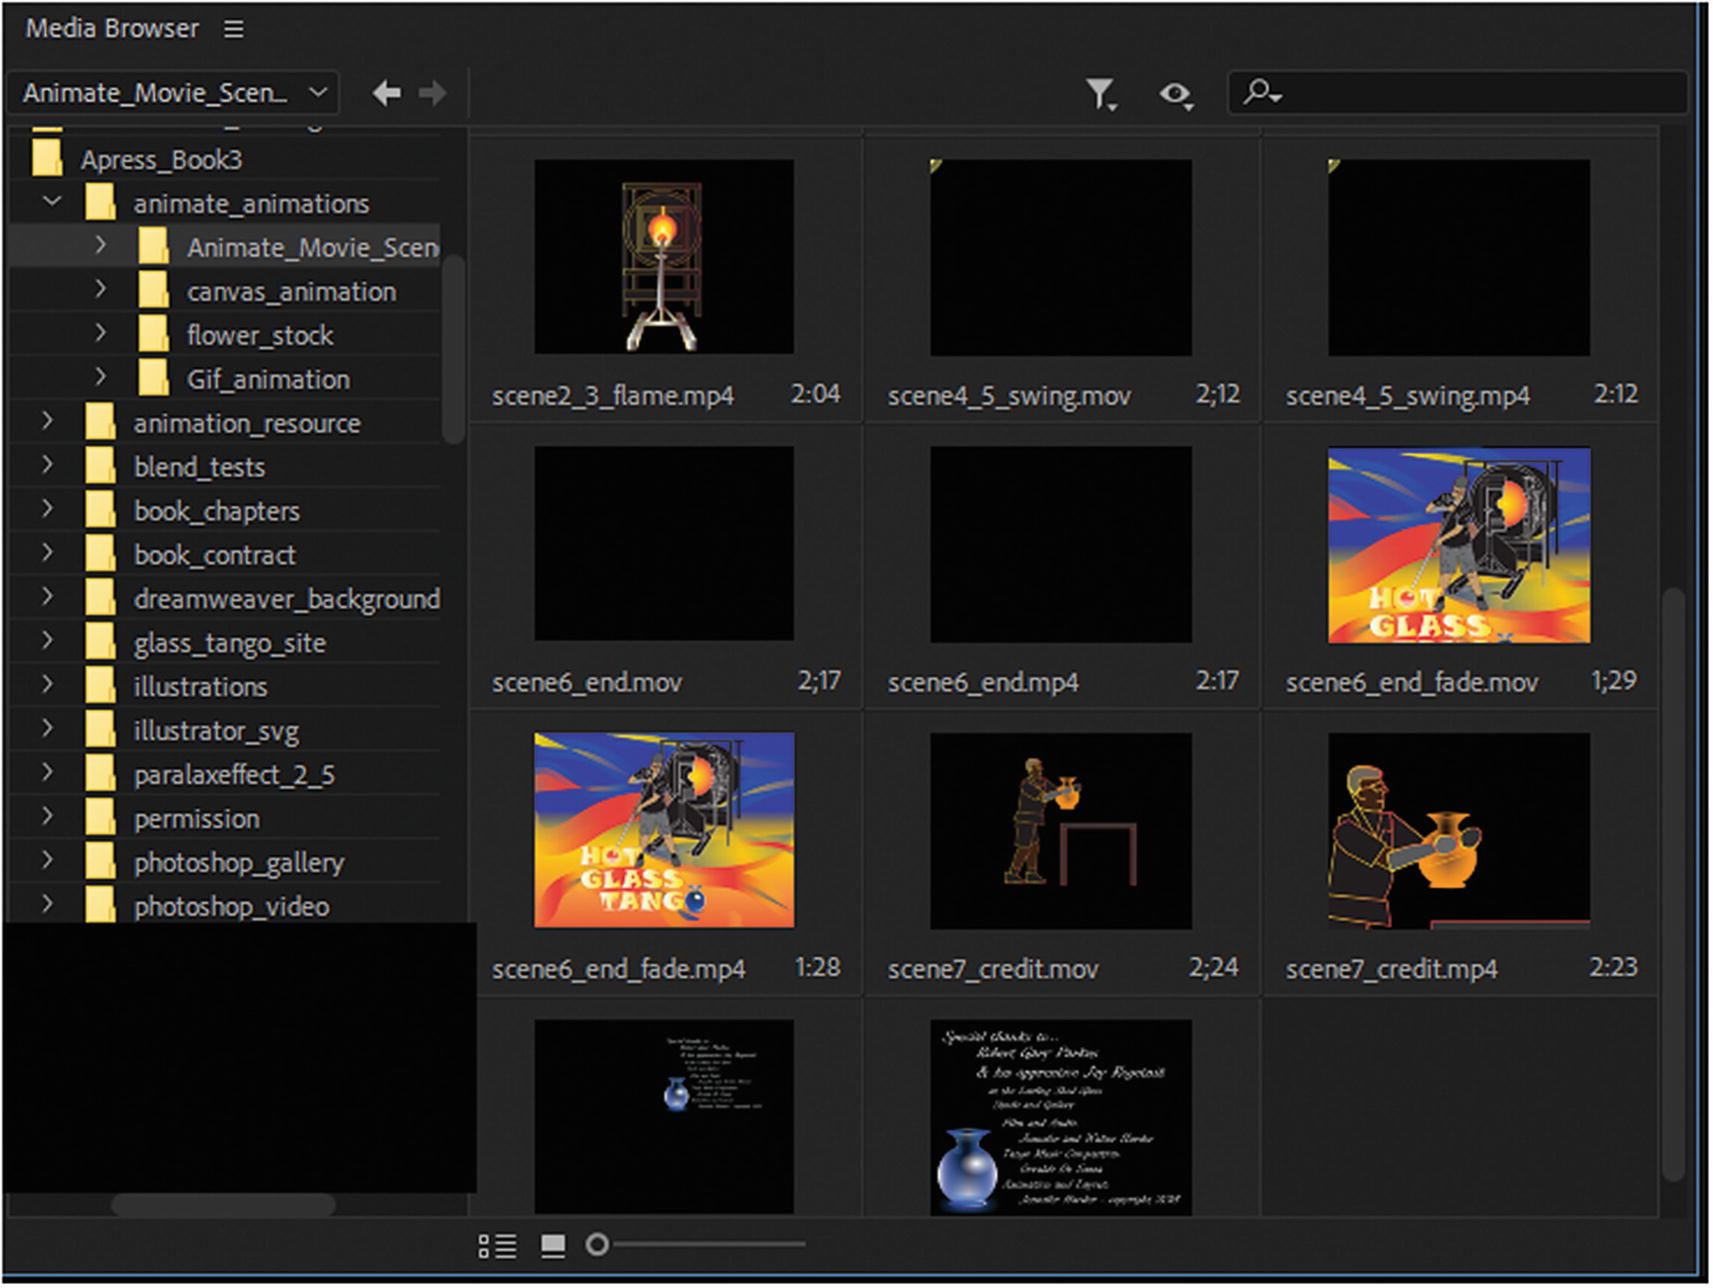
Inside the Media Browser panel
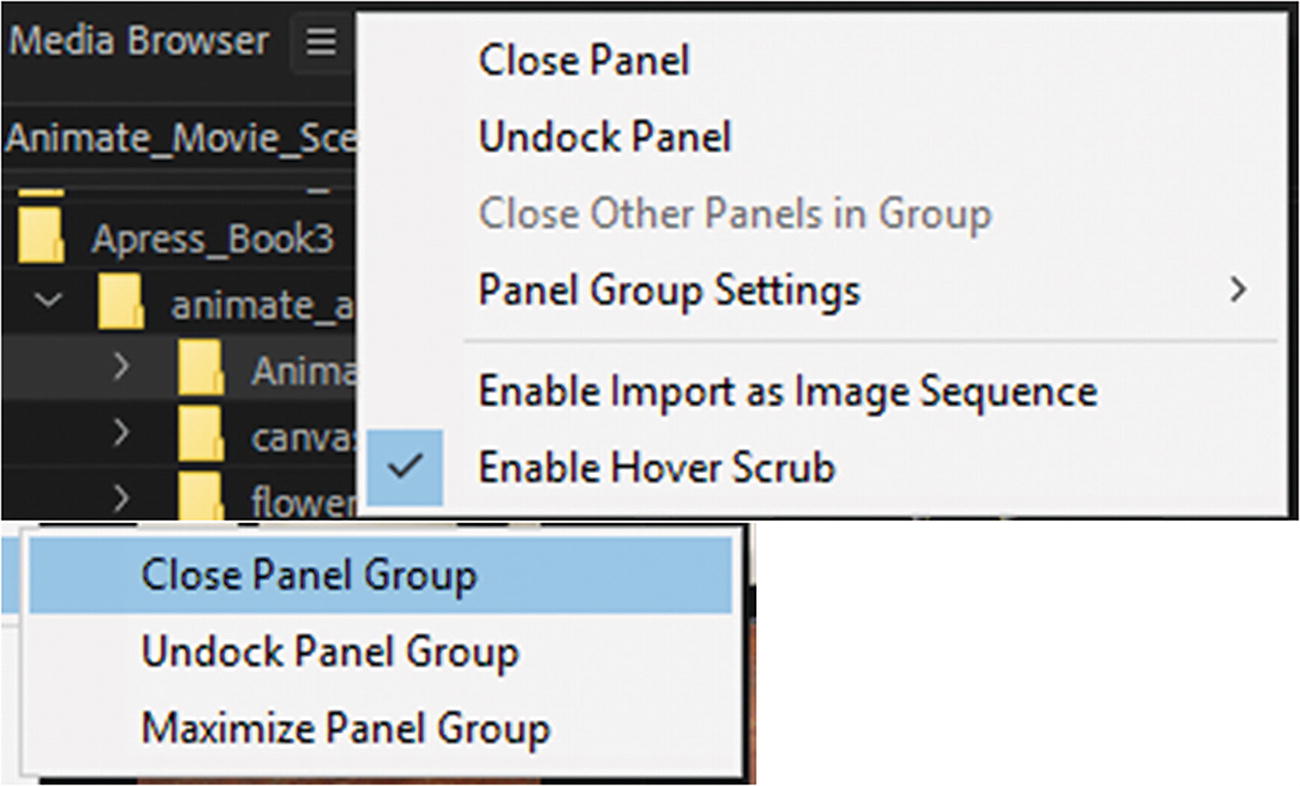
Panel menu options
Here you can look through various internal and external drives, including the Creative Cloud, and search for the folder that contains your media. If your media is several raster images (GIF, JPEG, or PNG), you can enable Import As Image Sequence. To revert panel settings, choose Window ➤ Workspaces ➤ Revert Workspace.

Hover scrub allows you to preview the video before it is added to the Queue panel

Choose what you would like to do with the video before you import

Search options in the Media Browser panel

Search by file type. There are many more options than what are shown here.

Search by directory viewers

Search by name of file

Navigate your files by thumbnail, list, or zooming in or out to see a better view
Queue Panel

The Queue panel lets you add all the files that you plan to export

The Queue panel adds or removes files from the queue
When you click, yes this removes the file from the Queue panel it does not delete it from the drive. Choosing the No button in the alert leaves the file in the Queue.
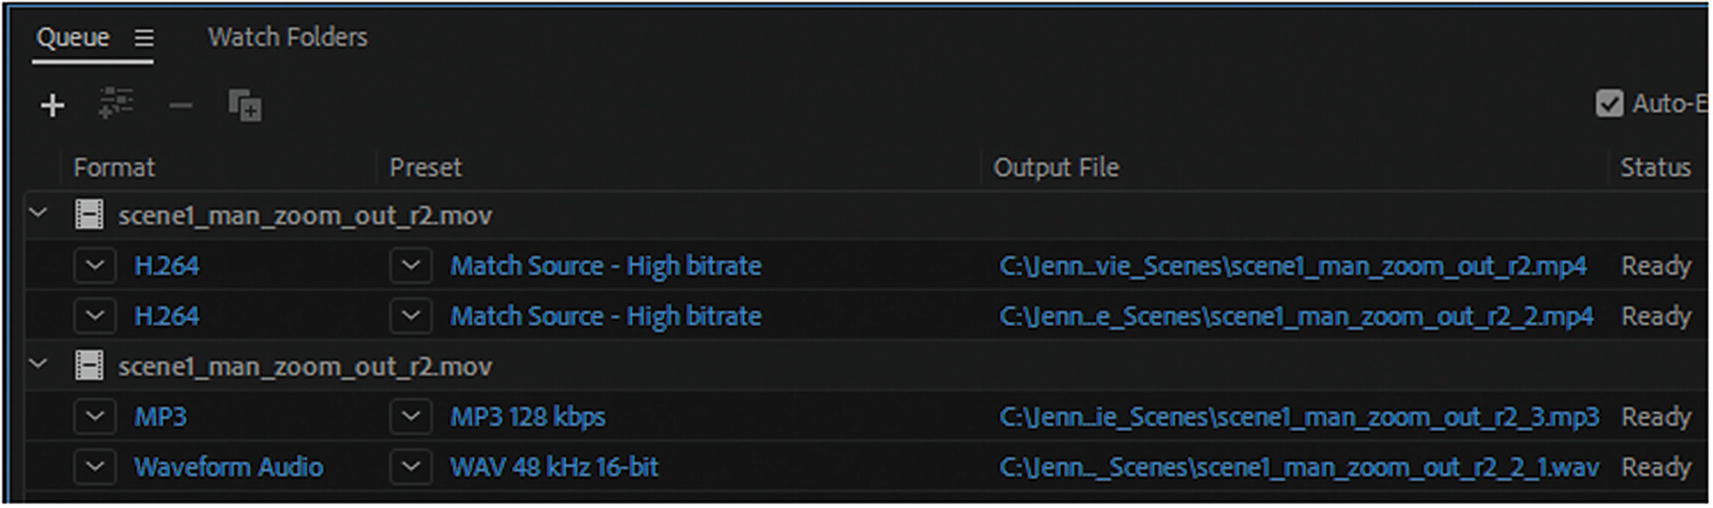
Adding various file settings to the Queue panel
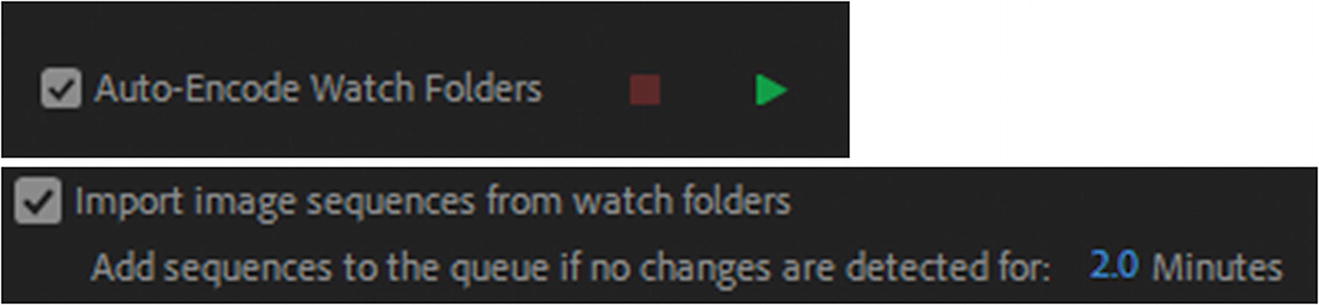
Audio-Encode Watch Folders setting: stop and start
A watch folder is a set folder that you can place media into, and Media Encoder detects these files after a few minutes, depending on what time detection preferences you set, and then adds them to the queue and automatically starts rendering. I explain how this speeds up your workflow in more detail shortly.
Next to the Auto-Encode check box you will see two more icons when you are ready to encode all files with the new format, preset and output folder file location, the green triangle Play button can be clicked. This begins the encoding and rendering export process of your imported file. If you realize that you made a mistake, press the red Stop button square to stop the process. Your video renderer is listed in the lower right of the panel (see Figure 25-27), and you can change it from the drop-down menu should you choose to. For now, leave it at whatever default the program is currently using for your computer.
Format Options
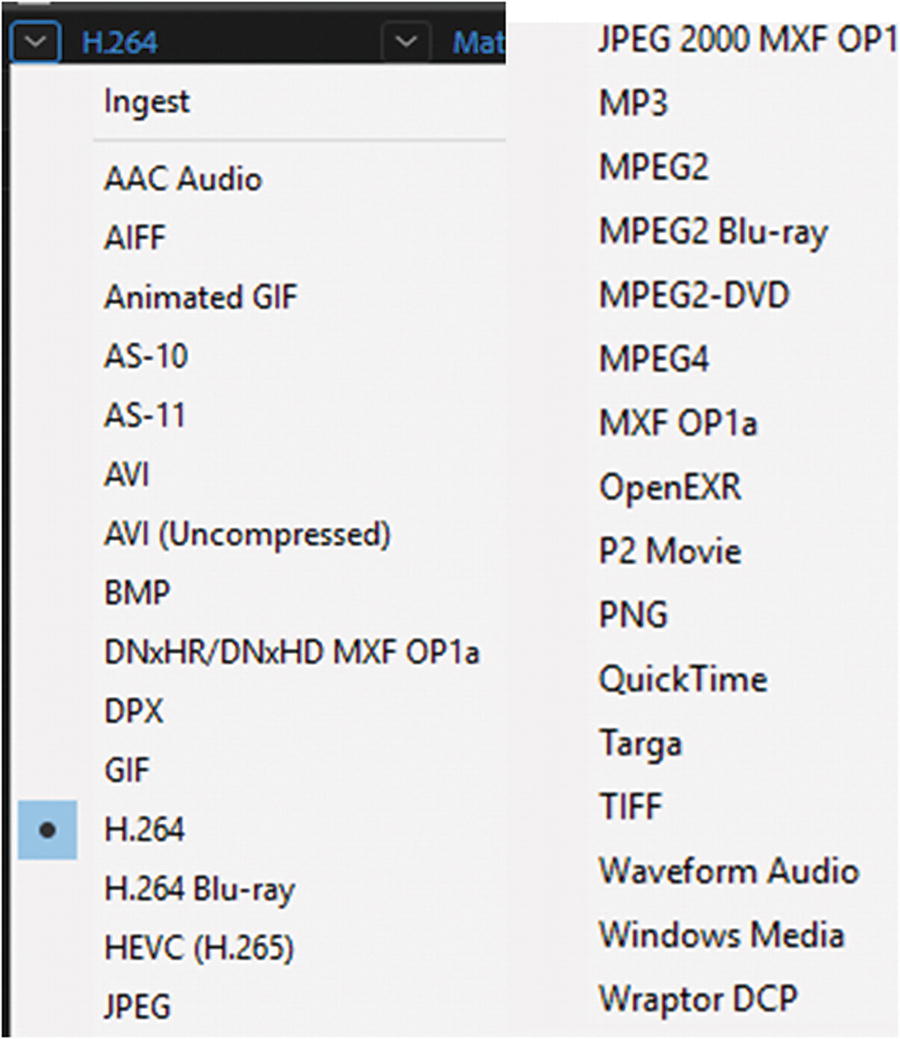
Options for the Format column in the Queue panel
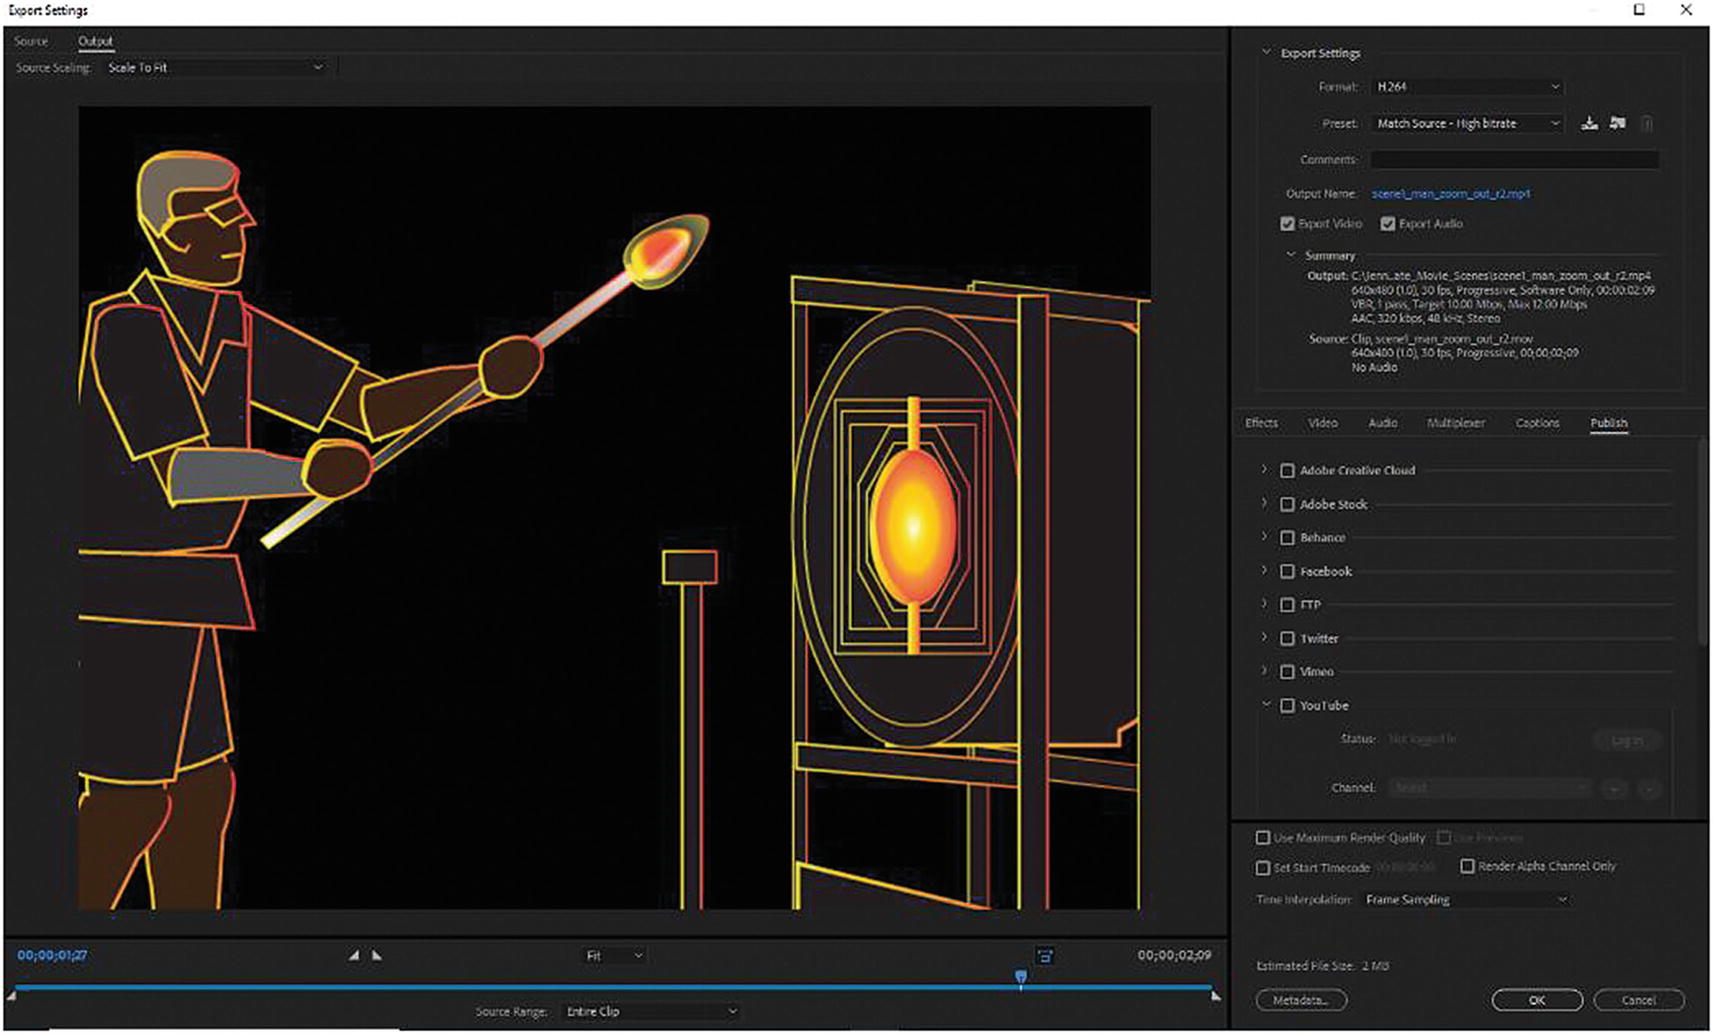
The Export Settings dialog box
This is a very advanced area that changes depending upon the format that is chosen. You look at it in more detail in Chapters 26, 27, and 28 when you export web formats.
For now, you can cancel to get out of this area and return to the Queue panel.
Preset Options
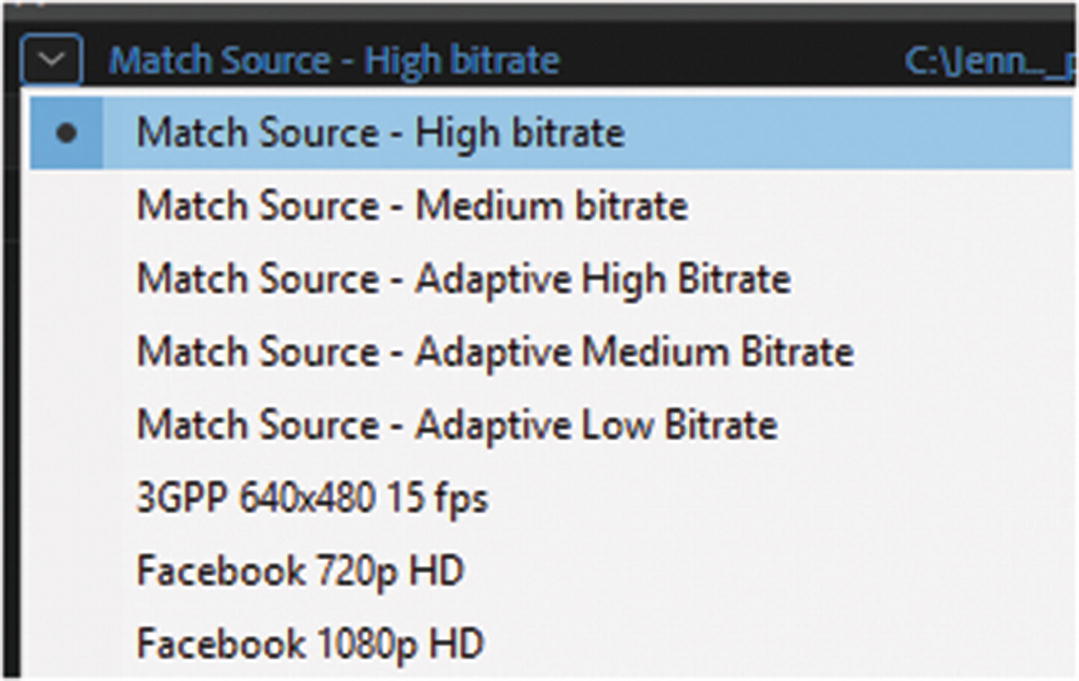
Preset options
Output File Options

Output options and Status
Status Options
The Status column states whether the file is ready to output or is done. If a file is missing from the original folder, or failed, a warning status and icon appear. Failed encoding often appears with a log explaining the error. If you have the sound on your computer enabled, you hear distinct types of alerts, like chimes.
Interpret Footage
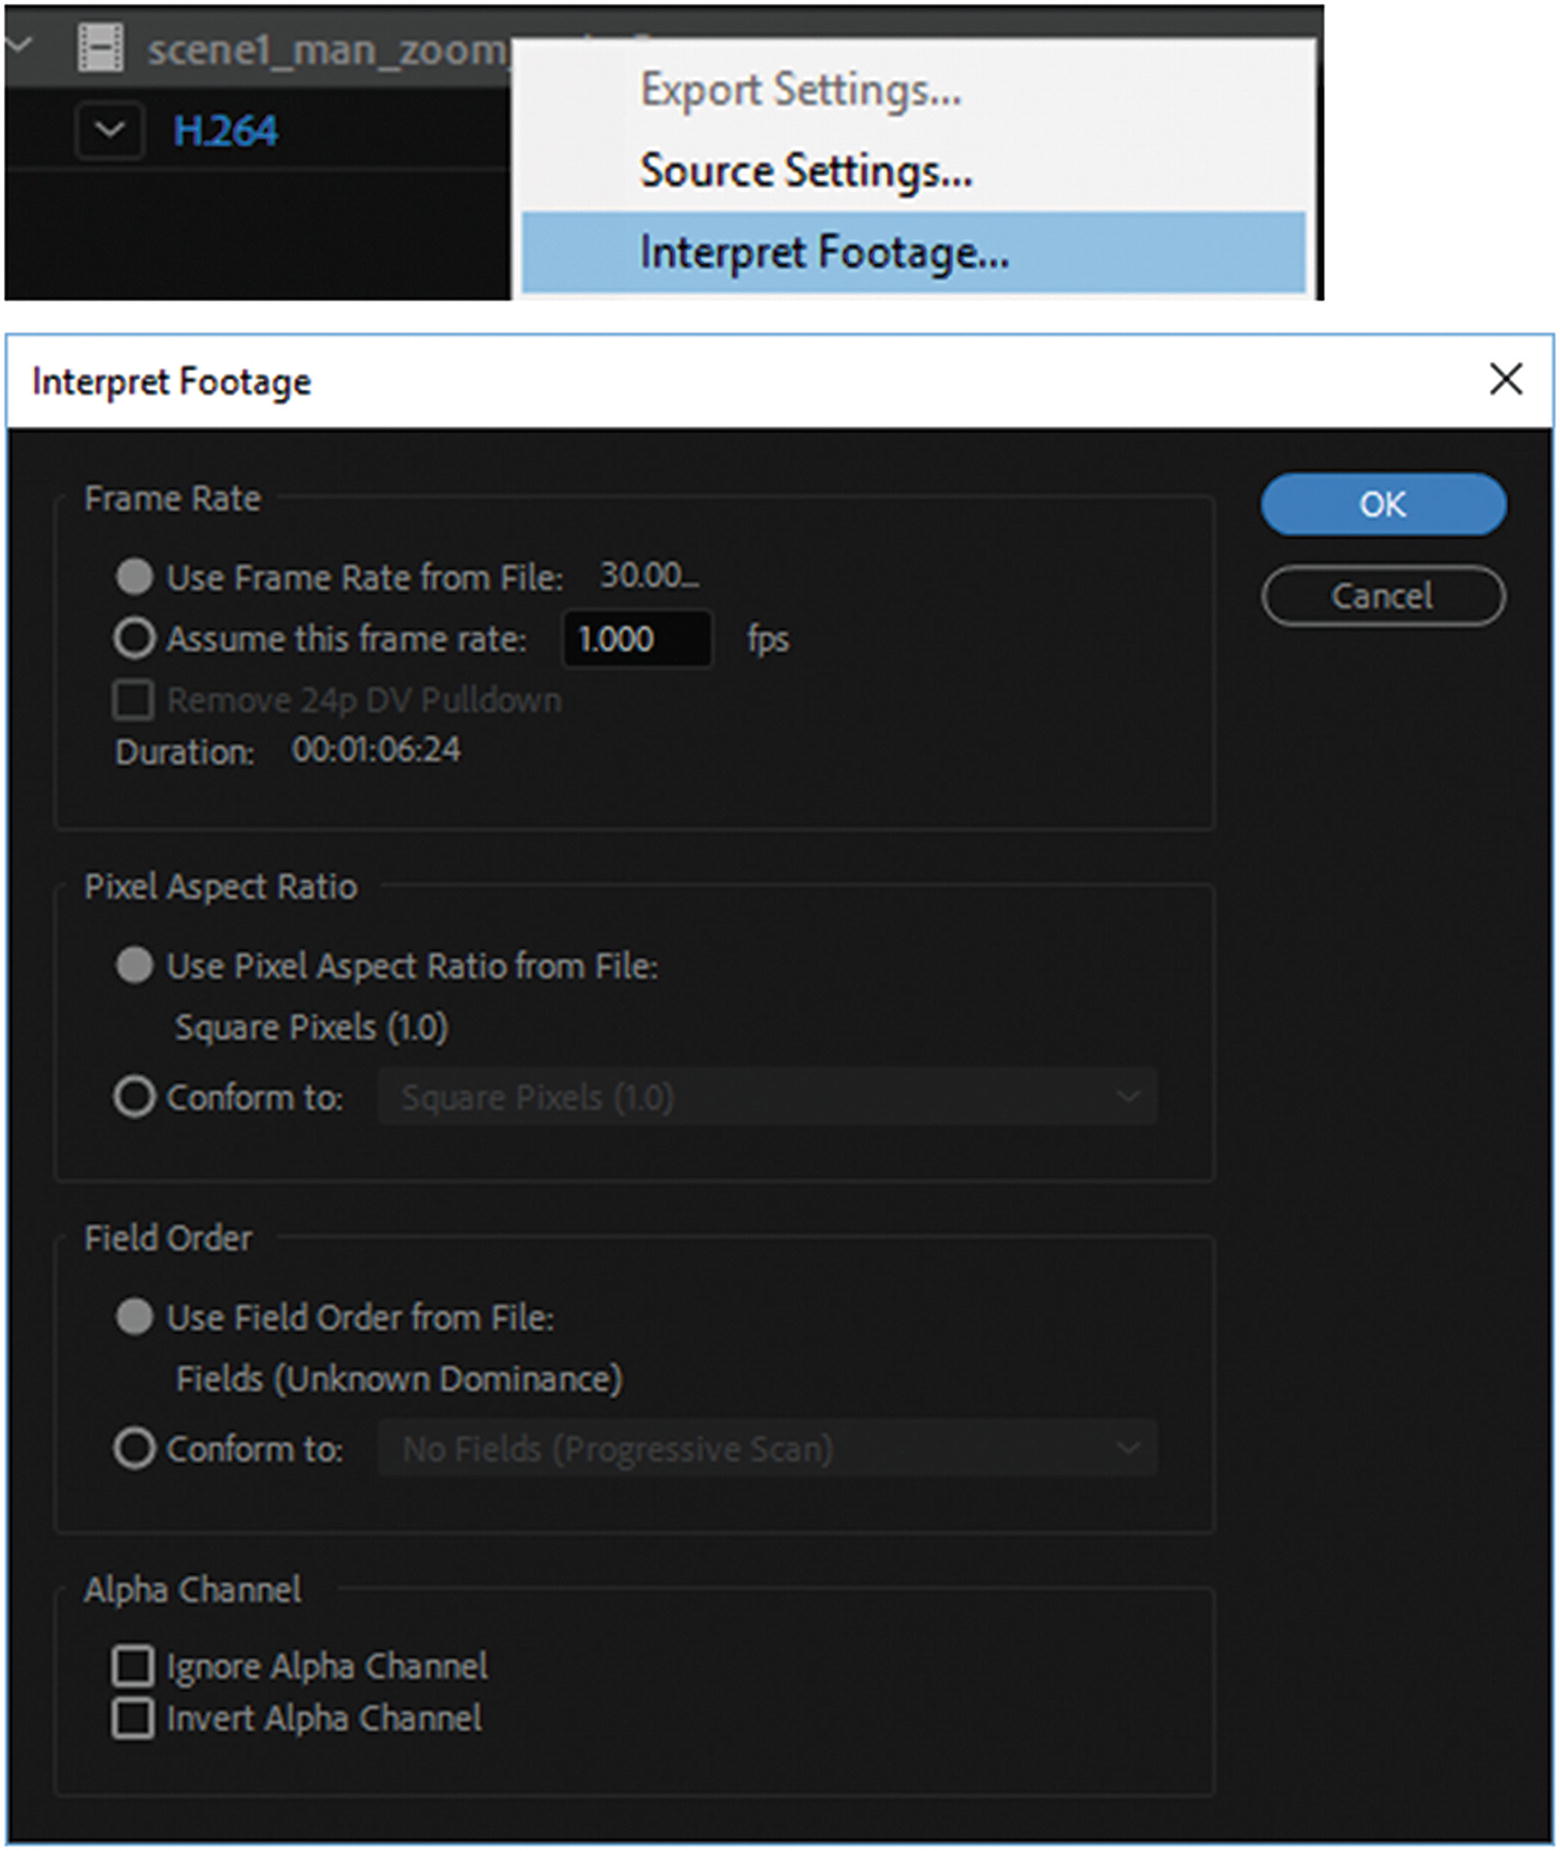
Interpret Footage dialog box
Much of this can be adjusted via the Export Settings dialog box for video, which you look at in more detail in Chapter 26. But if you need the footage to be interpreted differently because of alpha channels, you can adjust it here to match the setting of other files for your projects. Click Cancel to exit this dialog box.
Watch Folders Panel

Watch Folders panel
Media Encoder detects the files present in the folder. Here files that appear within this watched folder alert Media Encoder that they need to be added to the queue and rendered based on format, preset, and output, which were set in the Watch Folders panel. If you have a lot of video that needs similar settings, this is a good option and allows you to speed up the rendering process; however, make sure to run a test with one file before you add more. In rendering image sequences, you may get more files than you expected.
Encoding Panel

The Encoding panel
Preset Browser Panel
The Preset Browser panel lists all the presets that are currently available for Media encoder. There are many to choose from.
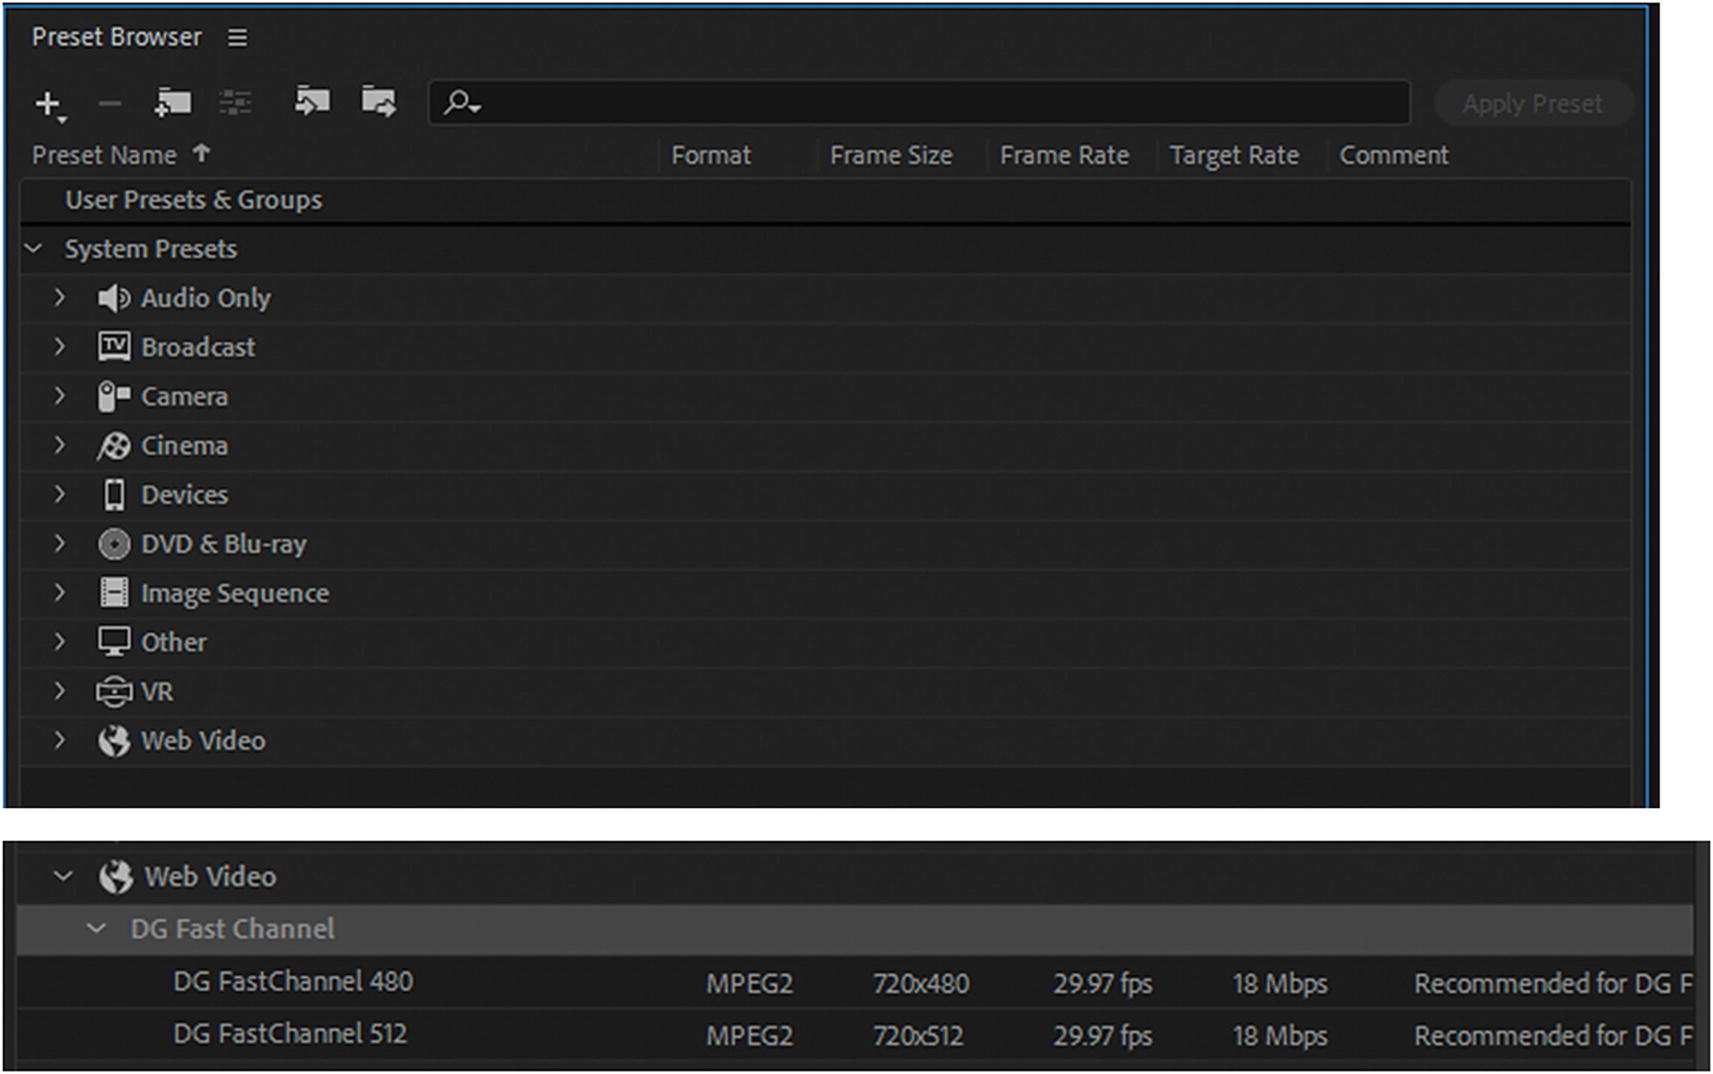
The Preset Browser panel
In this book, you focus on presets that relate to your web files. You can either expand or collapse the menus to find the correct preset you want to use, or use the search area to search by name.

Adjusting the presets in the Preset Browser panel
Once created, then you can apply the presets by selecting and clicking the Apply button. This applies presets or groups to the files in the Queue panel, usually to a duplicate output. Alt+click allows you to apply to the watch folder. You can also access this area in Preset in the main menu. Settings are saved (exported) or imported as a video preset file (.epr).
Preset Menu Options
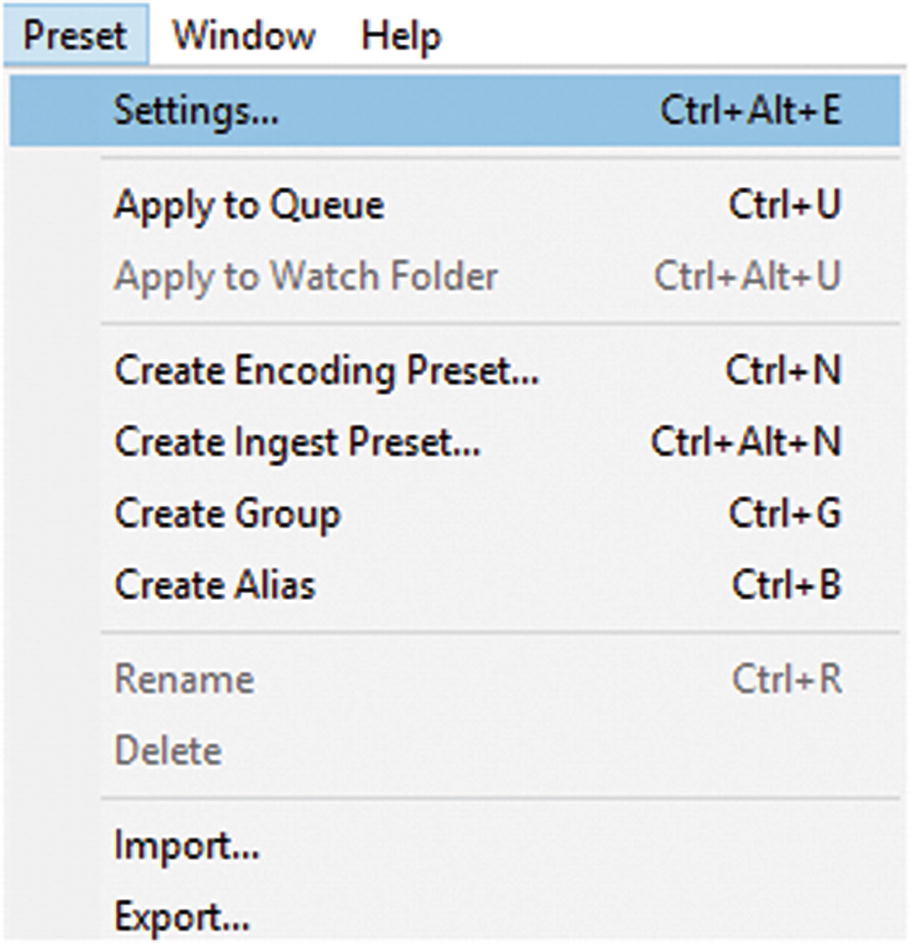
Viewing preset settings

Preset Settings dialog box for a specific file format
To exit, click Save A Copy if you want to create a duplicate, or in this case, click Cancel.
At this point, you have looked at the primary areas of Media Encoder. You can close the program (File ➤ Exit) or keep it open for the next chapter, where you start working with the video files for export and render.
Summary
This chapter was an overview of the main panels in Media Encoder. You discovered that this program’s appearance is different from Photoshop, Illustrator, and Animate, but it is still an important part of the process for getting video files ready for the web.
In the next chapter, you encode your video files (.mov and .avi) as MP4 (H.246) files and look at two other web formats.