
In this section, we will build a simple alarm system with a PIR sensor connected to the Raspberry Pi Zero. This is an important project as it can be added to the home, including other sensors, in order to monitor it.
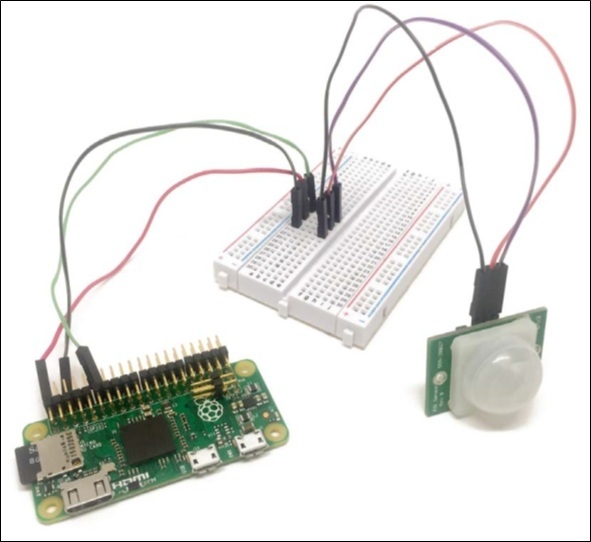
For this project we need the Raspberry Pi Zero, a motion sensor PIR, and some cables. The hardware configuration for this project will actually be very simple. First, connect the VCC pin of the motion sensor to a 3.3V pin on the Raspberry Pi. Then, connect the GND pin of the sensor to one GND pin on the Pi. Finally, connect the OUT pin of the motion sensor to the GPIO17 pin on the Raspberry Pi. You can refer to the previous chapters to find out about pin mapping on the Raspberry Pi Zero board.
The following image shows the final circuit with the connections:
You can now either copy the code inside the folder called Project1, or just get the complete code from the folder for this project:
// Modules
var express = require('express'),

// Express app
var app = express();

// aREST
var piREST = require('pi-arest')(app);
piREST.set_id('34f5eQ'),
piREST.set_name('motion_sensor'),
piREST.set_mode('bcm'),

// Start server
app.listen(3000, function () {
  console.log('Raspberry Pi Zero motion sensor started!'),
});
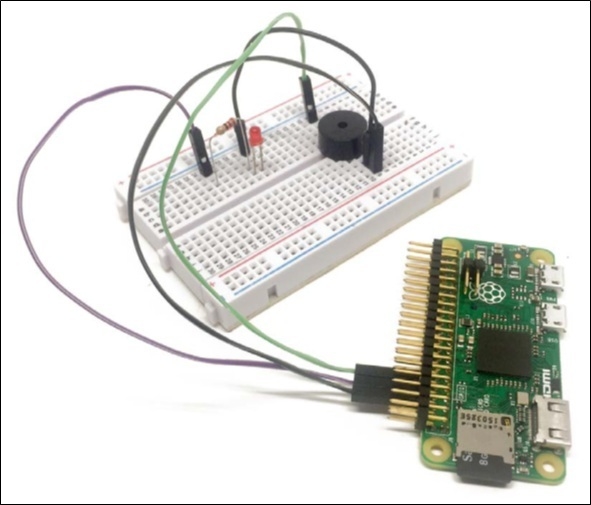
You will usually have a modules in your home that will flash a light and emit sound when motion is detected. Of course you could perfectly well connect it to a real siren instead of a buzzer to have a loud sound in case any motion is detected.
To assemble this module, first place the LED in series with the 330 Ohm resistor on the breadboard, with the longest pin of the LED in contact with the resistor. Also place the Buzzer on the breadboard. Then, connect the other side of the resistor to GPIO14 on the Pi and the other part of the LED to one GND pin on the Pi. For the Buzzer, connect the pin marked + on the buzzer to GPIO15 and the other pin on the Buzzer to one GND pin on the Pi.
Here we go with the coding details:
// Modules
var express = require('express'),

// Express app
var app = express();

// aREST
var piREST = require('pi-arest')(app);
piREST.set_id('35f5fc'),
piREST.set_name('alarm'),
piREST.set_mode('bcm'),

// Start server
app.listen(3000, function () {
  console.log('Raspberry Pi Zero alarm started!'),
});
This is the final circuit showing the connections:
First we create a central interface for the app using the following code:
// Modules
var express = require('express'),
var app = express();
var request = require('request'),

// Use public directory
app.use(express.static('public'));

// Pi addresses
var motionSensorPi = "192.168.1.104:3000";
var alarmPi = "192.168.1.103:3000"

// Pins
var buzzerPin = 15;
var ledPin = 14;
var motionSensorPin = 17;

// Routes
app.get('/', function (req, res) {
res.sendfile(__dirname + '/public/interface.html'),
});

app.get('/alarm', function (req, res) {
  res.json({alarm: alarm});
});

app.get('/off', function (req, res) {

  // Set alarm off
  alarm = false;

  // Set LED & buzzer off
  request("http://" + alarmPi + "/digital/" + ledPin + '/0'),
  request("http://" + alarmPi + "/digital/" + buzzerPin + '/0'),

  // Answer
  res.json({message: "Alarm off"});

});

// Start server
var server = app.listen(3000, function() {
    console.log('Listening on port %d', server.address().port);
});

// Motion sensor measurement loop
setInterval(function() {

  // Get data from motion sensor
  request("http://" + motionSensorPi + "/digital/" + motionSensorPin,
    function (error, response, body) {

      if (!error && body.return_value == 1) {

        // Activate alarm
        alarm = true;

        // Set LED on
        request("http://" + alarmPi + "/digital/" + ledPin + '/1'),


        // Set buzzer on
        request("http://" + alarmPi + "/digital/" + buzzerPin + '/1'),

      }
  });

}, 2000);Let's now see the interface file, starting with the HTML. We start by importing all the required libraries and files for the project:
<!DOCTYPE html>
<html>

<head>
  <script src="https://code.jquery.com/jquery-2.2.4.min.js"></script>
  <link rel="stylesheet" href="https://maxcdn.bootstrapcdn.com/bootstrap/3.3.6/css/bootstrap.min.css">
  <script src="https://maxcdn.bootstrapcdn.com/bootstrap/3.3.6/js/bootstrap.min.js"></script>
  <script src="js/script.js"></script>
  <link rel="stylesheet" href="css/style.css">
  <meta name="viewport" content="width=device-width, initial-scale=1">
</head>

<script type="text/javascript">

/* Copyright (C) 2007 Richard Atterer, richard©atterer.net
   This program is free software; you can redistribute it and/or modify it
   under the terms of the GNU General Public License, version 2. See the file
   COPYING for details. */

var imageNr = 0; // Serial number of current image
var finished = new Array(); // References to img objects which have finished downloading
var paused = false;

</script>
<div id="container">

  <h3>Security System</h3>
  <div class='row voffset50'>
  <div class='col-md-4'></div>
  <div class='col-md-4 text-center'>
      Alarm is OFF
    </div>
    <div class='col-md-4'></div>

  </div>

  <div class='row'>

    <div class='col-md-4'></div>
    <div class='col-md-4'>
      <button id='off' class='btn btn-block btn-danger'>Deactivate Alarm</button>
    </div>
    <div class='col-md-4'></div>

  </div>

  </div>

</body>
</html>