Today, most smart homes are connected to the Internet, and this allows the user to monitor their home. In this section, we are going to learn how to monitor your climate remotely. First, we are simply going to add a sensor to our Raspberry Pi Zero and monitor the measurements from a cloud dashboard. Let's see how it works.
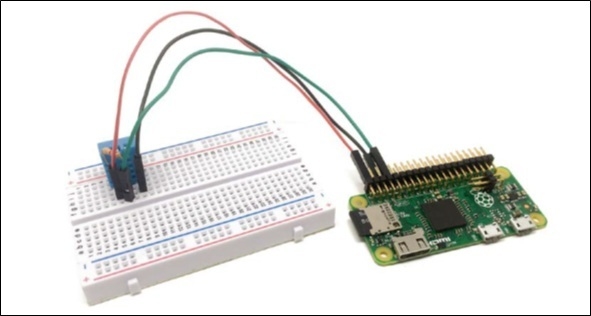
The following image shows the final connections:
var sensorLib = require('node-dht-sensor'),
var sensor = {
    initialize: function () {
        return sensorLib.initialize(11, 4);
    },
    read: function () {
        var readout = sensorLib.read();
        console.log('Temperature: ' + readout.temperature.toFixed(2) + 'C, ' +
            'humidity: ' + readout.humidity.toFixed(2) + '%'),
        setTimeout(function () {
            sensor.read();
        }, 2000);
    }
};

if (sensor.initialize()) {
    sensor.read();
} else {
    console.warn('Failed to initialize sensor'),
}
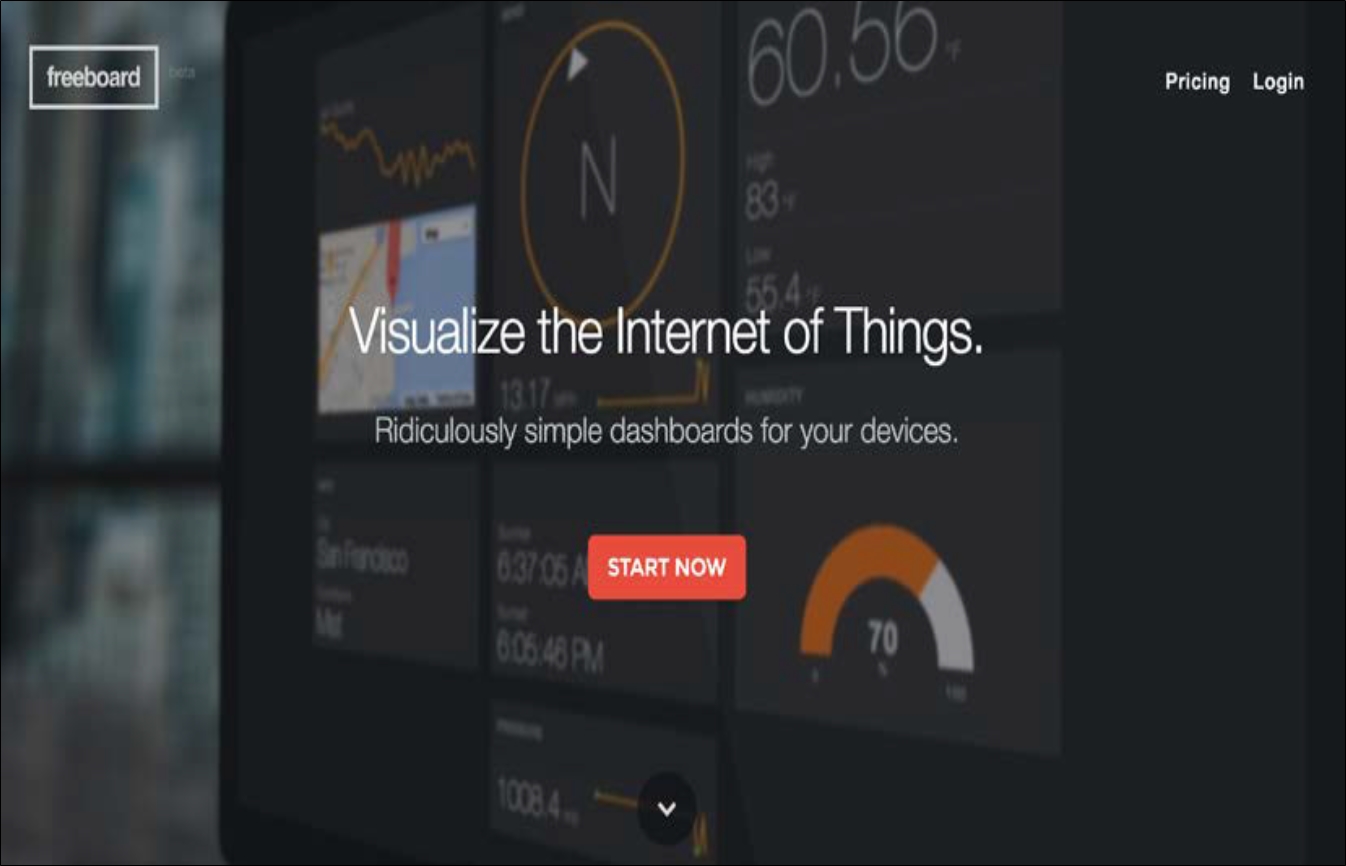
We need to go to http://freeboard.io and create an account:
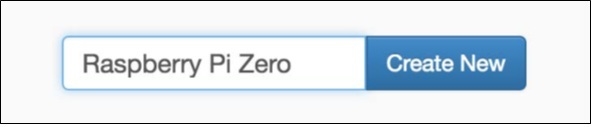
Now, we create a new dashboard to control the sensor:
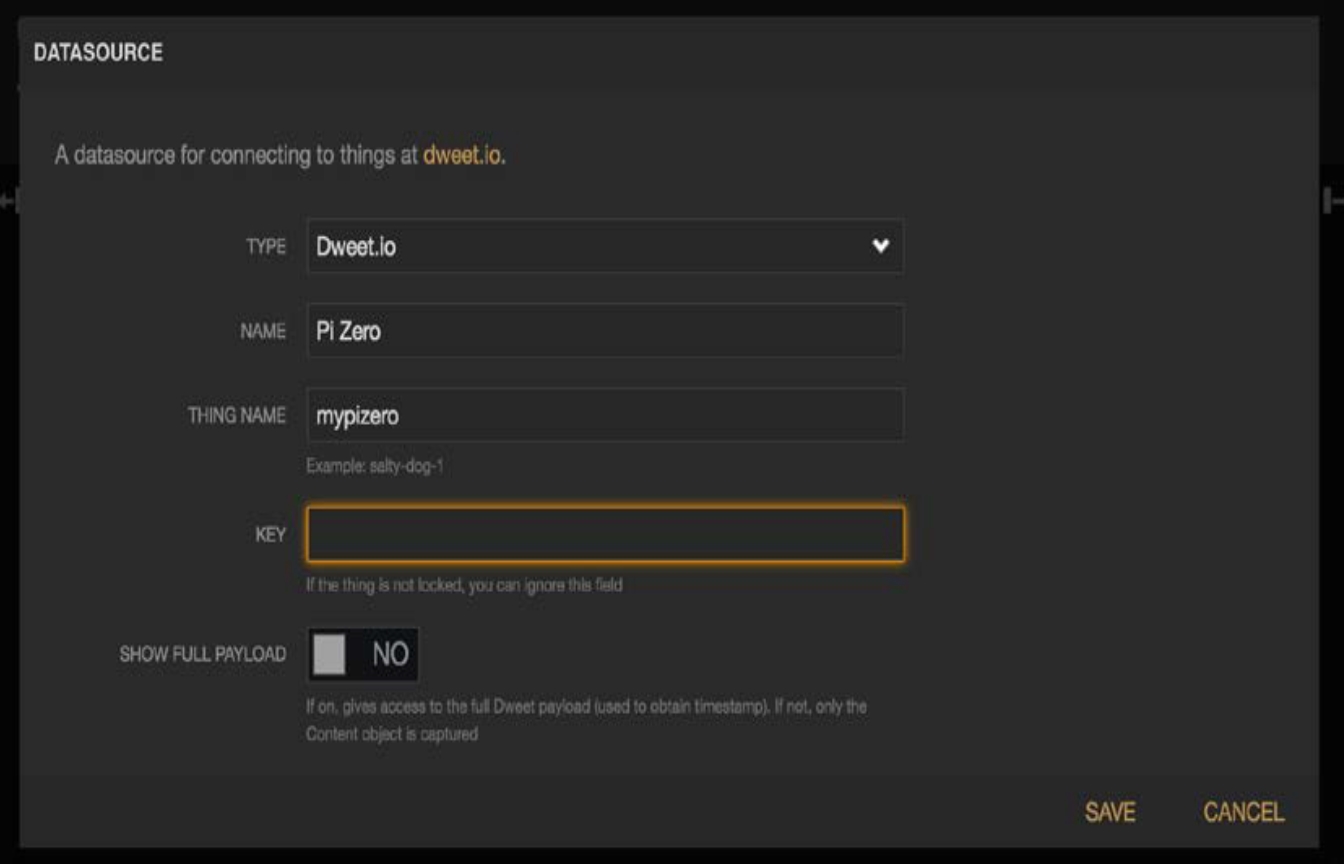
Add a new data source with the following parameters:
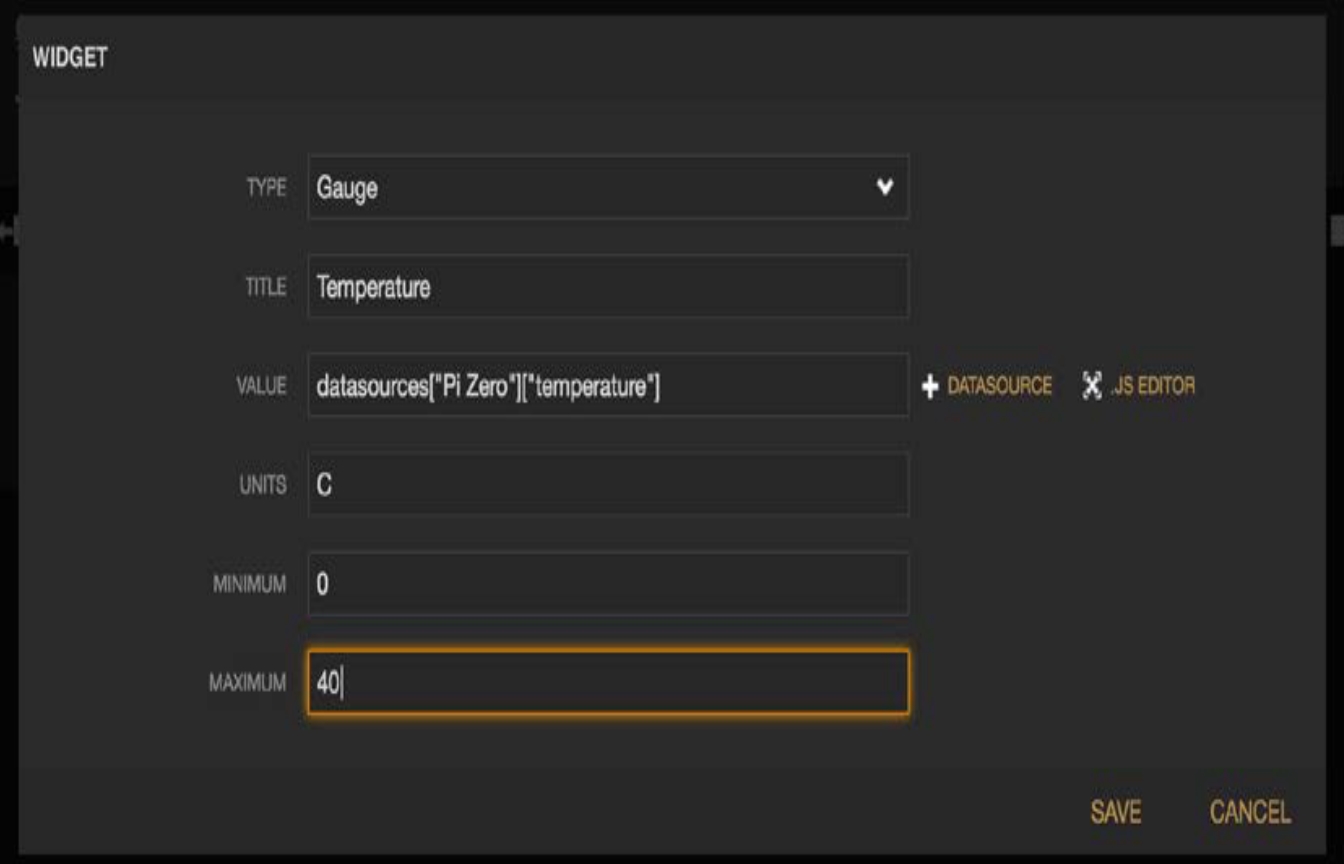
Create a new pane inside the dashboard and also create a Gauge widget for the temperature:
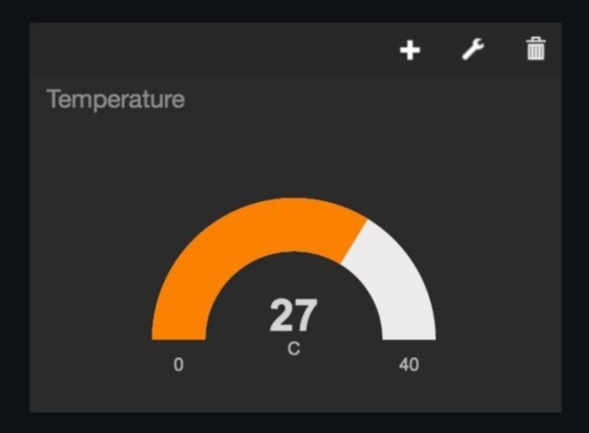
We will then immediately see the temperature in the interface:
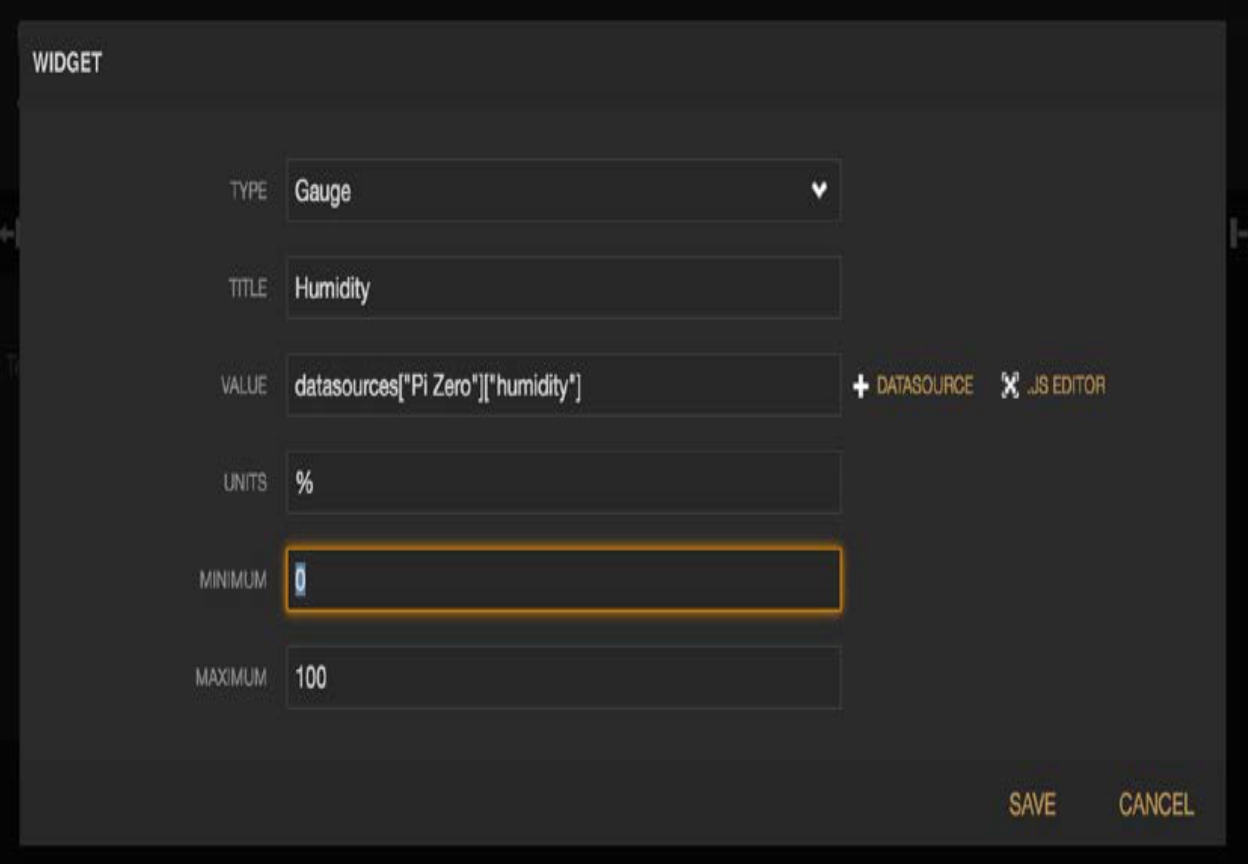
We do the same with the Humidity:
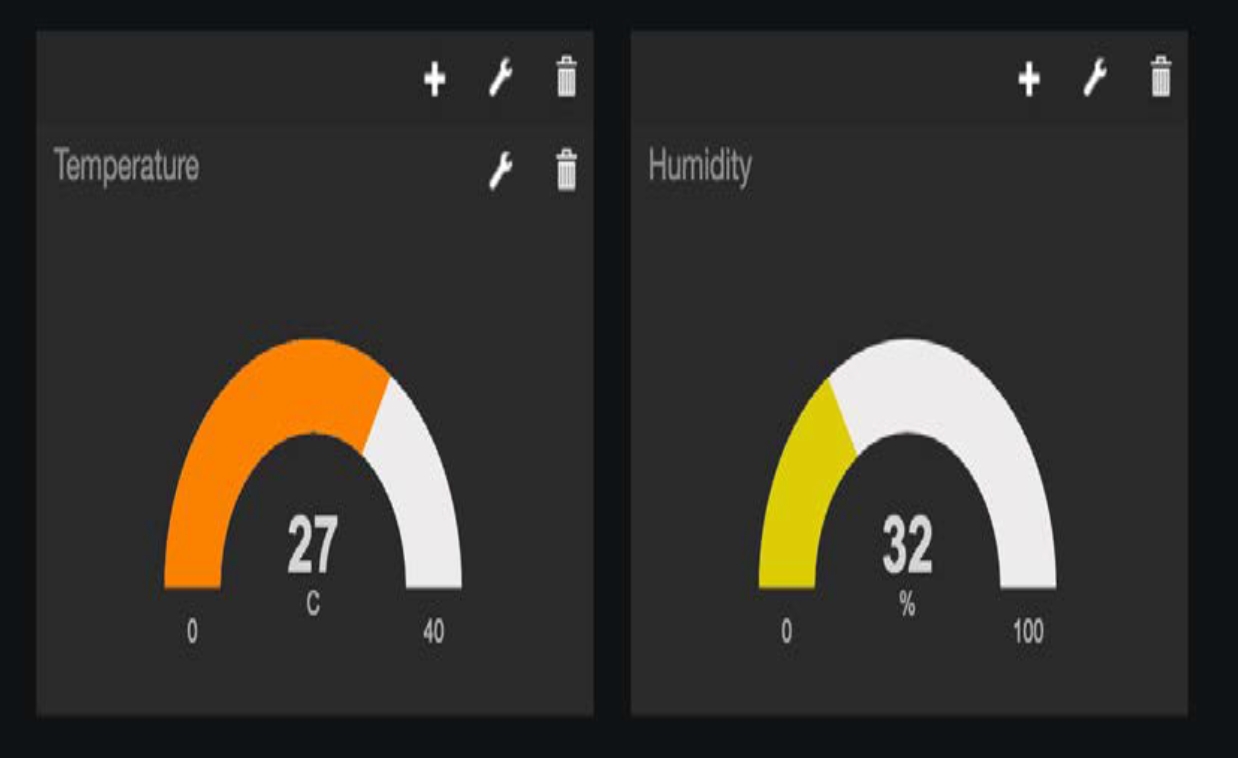
We should see the final result: