
Intent overview
Explicit and implicit Intents
Passing data between activities
Returning results from Intents
Android’s architecture is unique in the way it builds applications. It has this notion of components instead of just plain objects. And the way that Android makes these components interact is something that you can only find in the Android platform. Android uses Intents as a way for its components to communicate; it uses it to pass messages across components. In this chapter, we’ll look at Intents, what they are, and how we use them.
What Intents Are

Logical representation of an Android App
Launching an Activity isn’t as simple as creating an instance of a particular Activity class. It’s a bit more involved than that. An Activity isn’t merely an object; it’s a component, and component activation in Android requires the use of Intents.
context—Is a reference to the component that wants to initiate or launch the Intent.
target—Is a class object; this is the component you want to launch.
A typical scenario when launching an Activity (usually from the MainActivity) is when a user clicks a button or selects a menu item.

New Empty Activity
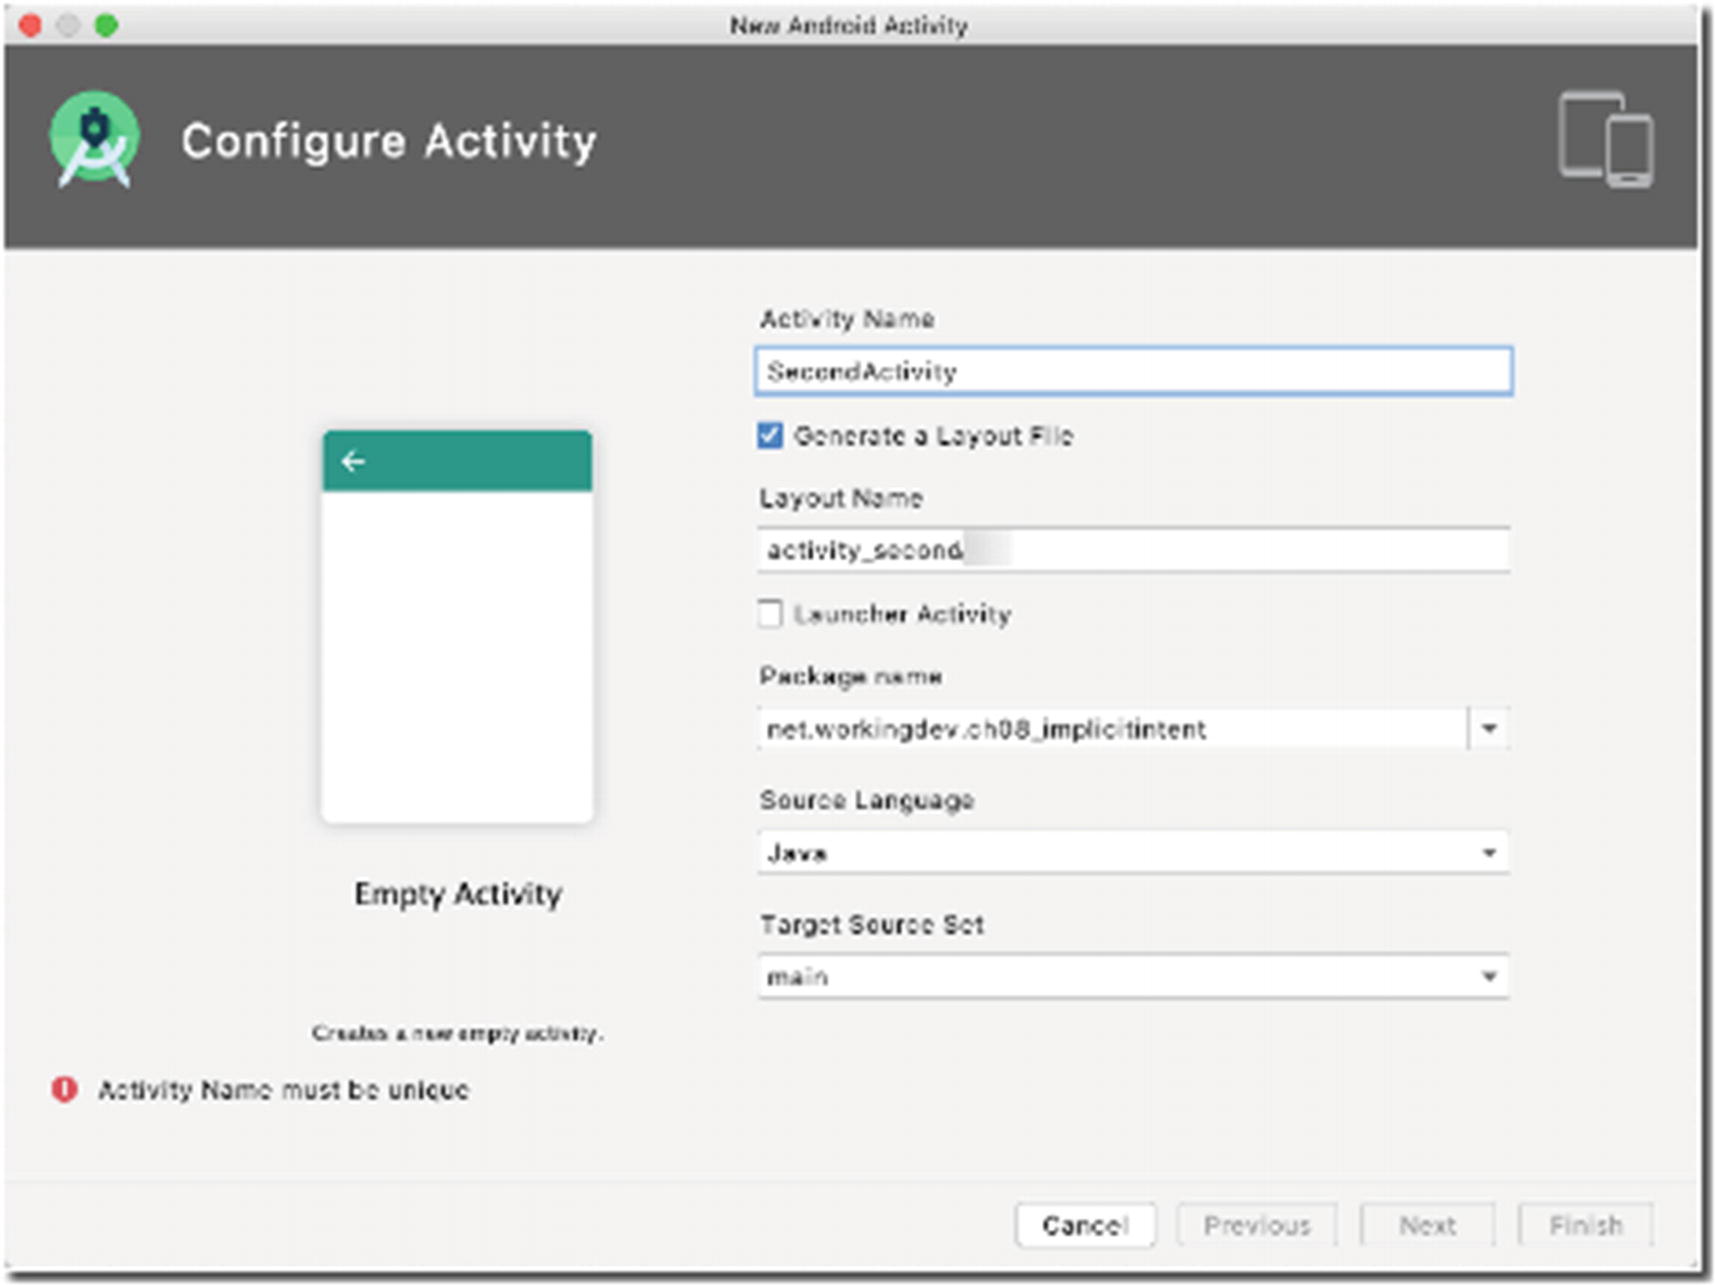
New Android Activity
app/res/layout/activity_main.xml
What I’ve done in the activity_main layout was to remove the default TextView object and replaced it with a Button View (whose id is button).
MainActivity
❶ | Let’s get a reference to the Button View. |
❷ | Create an OnClickListener object and bind it to the Button object. |
❸ | Inside the onClick() method, let’s create an Intent object. The first parameter is a Context object, which is supposed to refer to MainActivity. I wrote MainActivity.this and not merely this because currently we’re making the call inside a click handler (which is an anonymous class); this would refer to the anonymous class’ instance and not to MainActivity. To be explicit, we refer to the context of MainActivity as MainActivity.this. Alternatively, you can also pass the Application Context as the first parameter. You can get the Application Context using the method getApplicationContext() . The second parameter is the class object of the component we want to launch, which is SecondActivity; so, we pass SecondActivity.class. |
❹ | Finally, we call the startActivity() method of MainActivity, and we pass the Intent object as the parameter; this will launch the Intent. |
If you run the app now, the SecondActivity will launch when you click the Button on MainActivity. In this example, we told the Intent object what component we wanted to activate (SecondActivity). This kind of Intent object is called an explicit Intent, simply because we’re very precise on what we want to activate. Another type of Intent is called an implicit Intent, which is what we’ll discuss in the next section.
Implicit Intents
There are two kinds of Intent, an implicit and an explicit one. You can think of the two types of Intent this way; let’s imagine asking someone to buy some sugar. If we instruct “could you please buy some sugar” with no further details, this would be equivalent to an implicit Intent because that person could buy the sugar anywhere. On the other hand, if we gave instructions like “could you please go to the ABC store on third street and buy some sugar,” this would be equivalent to an explicit Intent. Our earlier example in Listing 8-2 is an explicit Intent because we told the Intent specifically which component to activate.
Implicit Intents, on the other hand, are very powerful because they allow an application to take advantage of other applications. Your app can gain functionalities that you did not write yourself. For example, you can create an Intent that opens the camera, shoots, and saves a photo, without writing any camera-specific code.
The purpose of implicit Intent is for you to use a functionality that doesn’t exist within your app, because if the feature exists within your app, you would have used explicit Intents in the first place. Using an implicit Intent is a way to ask the Android Runtime to find an application somewhere on the device that can service your request.
- 1.
Create an Intent object.
- 2.
Tell it what to do by specifying some actions, for example, “view a map,” “call a number,” “take a picture,” “view a web page,” and so on.
- 3.
Give it some information or data; for example, if we want to launch a browser and navigate to a specific web page, we need to tell the Intent the URI of the web page.
- 4.
Finally, we launch the Intent.
Example Intent to browse a web page
❶ | Create the Intent object using the no-arg constructor. |
❷ | Set the Intent action. In this example, we’d like to view something; it could be a contact, a web page, a map, a picture somewhere, and so on. At this point, the Android Runtime doesn’t know yet what you want to view. ACTION_VIEW is one of the many Intent Actions you can use. You can find other kinds of Action in the official Android’s website: https://developer.android.com/guide/components/intents-common. |
❸ | Set its data. At this point, the Android Runtime has a pretty good idea of what you want to do. In this example, the Uri is a web page. Android is pretty smart to figure out that we’d like to view a web page. |
❹ | Android will search every app on the device, which will best match this request. If it finds more than one app, it will let the user choose which one. If it finds only one, it will simply launch that app. |
Any component that can respond to this Intent does not need to be running to receive the Intent. Remember that all applications need to have a manifest file. Each application declares its capabilities in the manifest file, specifically through the <intent-filter> section. Android’s package manager has all the info of all the applications installed on the device. Android’s runtime only needs the information on the manifest file to see which among the apps are capable or eligible to respond to the Intent. The Android Runtime inspects the Intent object’s content and then compares it to the Intent filters of all components. An Intent filter is a way for Android components to declare their capabilities to the Android system.
MainActivity
❶ | Let’s override the onCreateOptionsMenu() callback; this will be called shortly after the onCreate() callback. Overriding this method allows us to build a dynamic menu programmatically. |
❷ | Add a menu item dynamically. |
❸ | Whenever the user clicks one of the Menu Items, the onOptionsItemSelected is called; this is where we will handle the menu clicks. |
❹ | The item parameter can tell us which Menu Item was clicked. We’re converting it to String to use it to route our program logic using a switch statement. |
❺ | Create an Intent and set its action and data to view the Apress website. |
❻ | Create an Intent and set its action and data to view a location. |
❼ | Create an Intent and set its action and data to call a specific number. |

Implicit Intent project, running
Summary
Intents are used for component activation.
There are two kinds of Intents, implicit and explicit ones.
Explicit Intents let us work with multiple activities. You can activate a specific Activity using an explicit Intent.
Implicit Intents extend the functionality of your application. They allow your application to do things that are outside the functionality of your app.