In the early days of Android, when it ran only on phones, and there weren’t any high-resolution screens, activities were sufficient to compose the UI and interact with the user. Then came the tablets and high-resolution displays. It became increasingly difficult to create applications that can run well on both phones and tablets. Developers were faced with hard choices. Either you choose the least capable hardware as the target and make it like the least common denominator or make the app adapt to a range of form factors by removing and adding UI elements in response to the device’s capability, which proved to be very difficult to do manually. When API 11 (Honeycomb) came out, Android solved this problem with Fragments; this is the topic of this chapter.
Introduction to Fragments
If we think of an activity as a composition unit for our UI, think of a fragment as a mini-activity—it’s a smaller composition unit. You will usually show (and hide) fragments during runtime in response to something that a user did, for example, tilting the device, switching from portrait to landscape orientation, thus making more screen space available. You may even use fragments as a strategy to adapt to device form factors. When the app is running on a smaller screen, you will show only some of the fragments.
Like an activity, a fragment comprises two parts—a Java program and a layout file. The idea is almost the same—define the UI elements in an XML file and then inflate the XML file in a program file so that all the view objects in the XML will become an object. After that, we can reference each view object in the XML using the R.class. Think of a fragment as an ordinary view object that we can drag and drop on the main layout file.
To create a Fragment, we generally do the following:
1.
Create an XML resource file and put it in the /app/res/layout folder, just like where we put activity_main.xml.
2.
Give the new resource file a descriptive name, say fragment_booktitles.
3.
Create the Fragment class; this class must inherit androidx.fragment.app.Fragment—all support libraries are now in the androidx package.
4.
Next, hook up the Fragment class with the XML resource layout. You can inflate the XML resource file in the onCreate() method of the Fragment class.
5.
Make some changes to MainActivity. The default MainActivity inherits from AppCompatActivity; this is usually fine, but we are using the Fragment class from the support library, which means we need to inherit from FragmentActivity instead of the default AppCompatActivity.
6.
Add the newly created Fragment.
Let’s do them in Android Studio. First, create a project with an empty Activity, just like all the other projects we’ve created.
Let’s create an XML resource file and put it in /app/res/layout. You can do that by right-clicking the project’s layout folder, then choosing New ➤ Layout Resource File, as shown in Figure 9-1.
Figure 9-1
New Layout Resource File
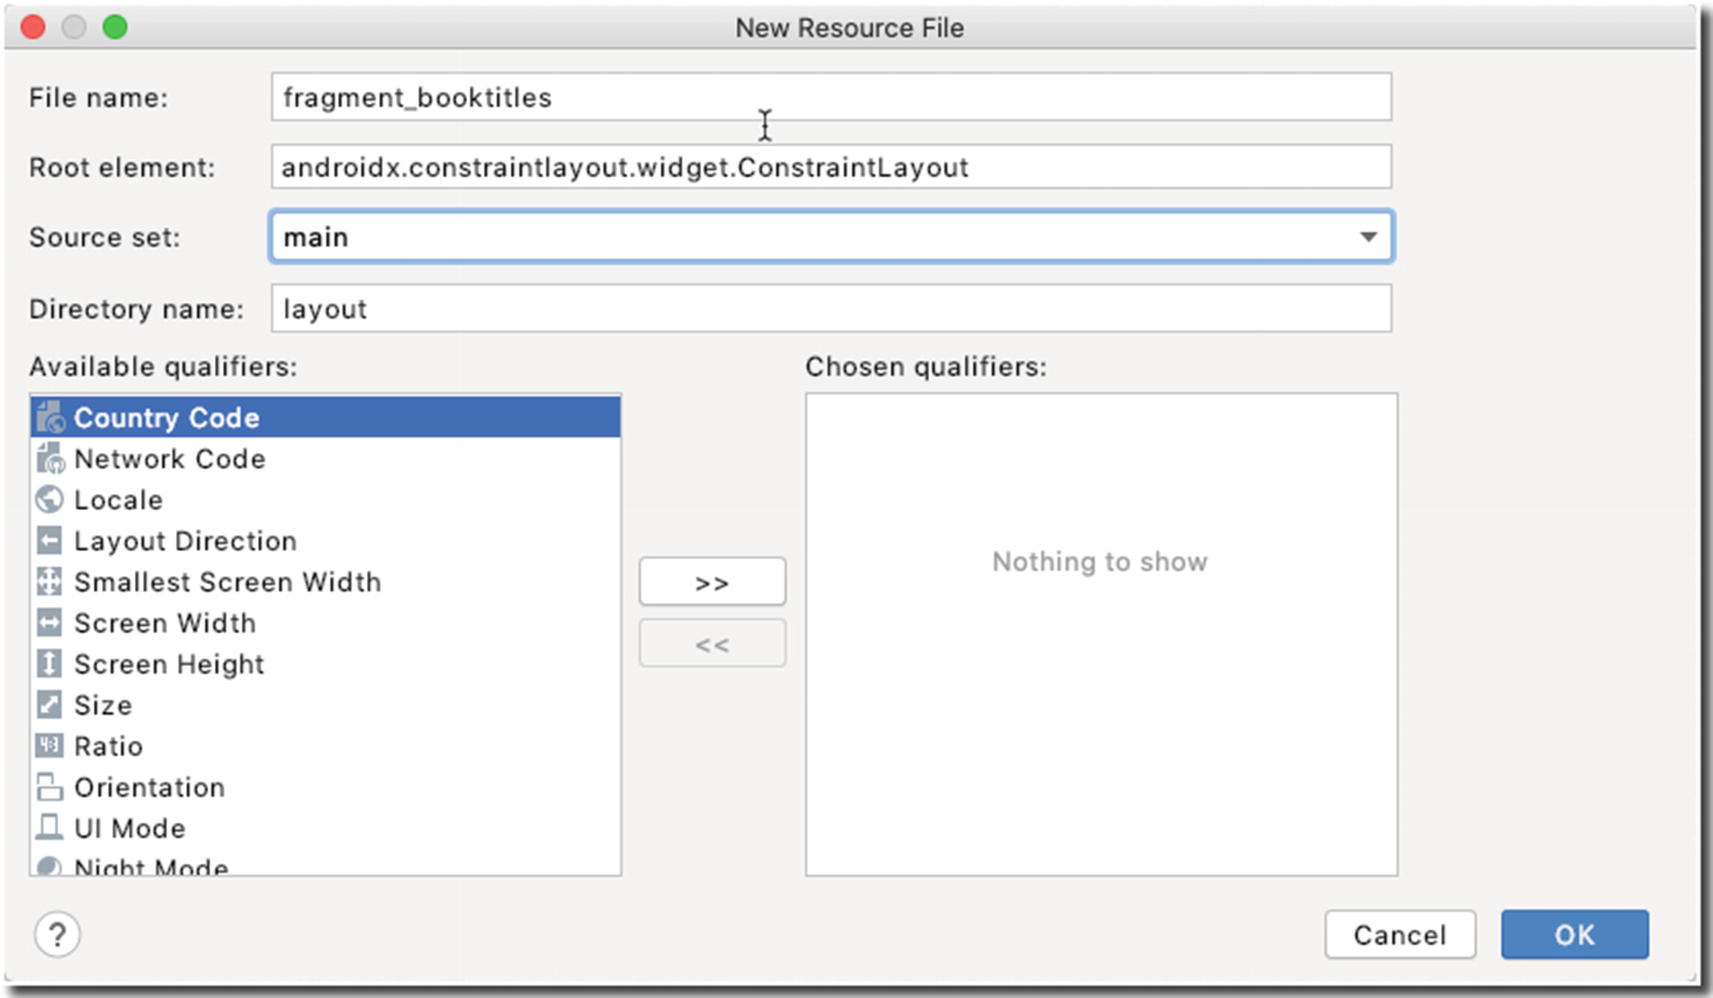
In the window that follows, type the filename of the new resource file (fragment_booktitles), as shown in Figure 9-2.
Figure 9-2
New Resource File
Next, let’s add a fragment class. To do that, add a Java class to the project by right-clicking the project’s package, then choosing New ➤ Java Class, as shown in Figure 9-3.
Figure 9-3
Add a Java class
In the pop-up window that follows, type the name of the new Java class (BookTitle), as shown in Figure 9-4.
Figure 9-4
New Java Class
Edit the fragment_booktitles layout file to match Listing 9-1. You can add whatever View component you want to add; for my purpose, I simply added a TextView object.
public View onCreateView(@NonNull LayoutInflater inflater,
@Nullable ViewGroup container,
@Nullable Bundle savedInstanceState) {
final View view = inflater.inflate(fragment_booktitles, container, false);
return view;
}
}
Listing 9-2
BookTitle class
We can associate the fragment layout file (fragment_booktitles) with the fragment class (BookTitle) by inflating the layout file and returning it from within the onCreateView() callback.
The onCreateView() callback is similar to the onCreate() method of the Activity class, but be careful not to refer to any View element here because they won’t be available just yet. If you need to refer to any View element contained in the fragment layout file, you have to do that in the onViewCreated() callback (not shown here). The reason you can’t refer to any View element inside the onCreateView() callback is because you have yet to inflate the layout resource file, so, naturally, they won’t be there just yet.
Next, let’s edit MainActivity. We need to change the parent class of MainActivity from AppCompactActivity to FragmentActivity—because we’re using Fragments. Listing 9-3 shows the code for MainActivity.
import androidx.fragment.app.FragmentActivity;
import android.os.Bundle;
import android.view.View;
import android.widget.Button;
public class MainActivity extends FragmentActivity {
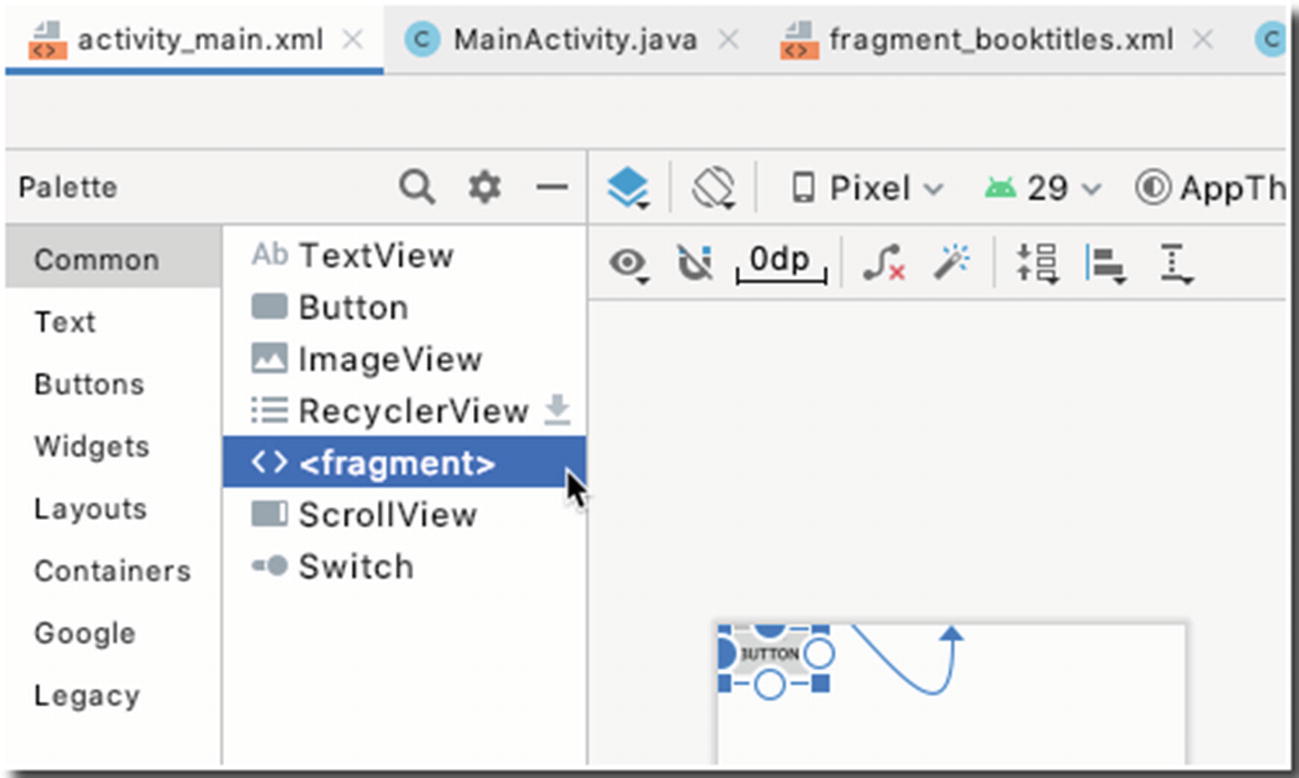
If you want to display the fragment we created, you can edit the activity_main layout file, then drag and drop the <fragment> element from the palette (as shown in Figure 9-5). When you run the app, the fragment will appear in the Activity like any other View element.
Figure 9-5
<fragment>
Alternatively, you can display the fragment programmatically. To do that, we need a placeholder for the fragment and perhaps a Button element (to serve as an action trigger for when we’re about to display the fragment). Edit activity_main.xml to match Listing 9-4.
I’ve added a Button and a FrameLayout container to activity_main. I gave the FrameLayout an id of fragplaceholder (you can give it any name you like) so I can refer to it later.
Adding a Fragment to the MainActivity (dynamically) requires the use of a FragmentTransaction object. To get a FragmentTransaction object, we also need a FragmentManager object. It’s usually done like this:
FragmentManager fm = getSupportFragmentManager();
FragmentTransaction ft = fm.beginTransaction();
Now, we can make fragment transactions. To add the BookTitle fragment to MainActivity, we need two things:
1.
An instance of BookTitle
2.
A ViewGroup which to place the fragment; this is our FrameLayout object
In code, it looks like this:
BookTitle booktitle = new BookTitle();
FragmentManager fm = getSupportFragmentManager();
FragmentTransaction ft = fm.beginTransaction();
ft.add(R.id.fragplaceholder, booktitle);
ft.commit();
To put this all in context, edit MainActivity to match Listing 9-5, which contains the complete code for our small demo app for fragments.
import androidx.fragment.app.FragmentActivity;
import androidx.fragment.app.FragmentManager;
import androidx.fragment.app.FragmentTransaction;
import android.os.Bundle;
import android.view.View;
import android.widget.Button;
public class MainActivity extends FragmentActivity {