
Overview of Android activities
Layout files
View objects
Most of the apps you will build will have a UI. In the previous chapter, we learned that to create a simple app with UI, we need (1) an Activity class, (2) a layout file for that Activity class, and (3) a manifest file. Thankfully, we get these three things from the project creation wizard.
In this chapter, we will examine the Activity component a lot closer. We will learn more about the constituent parts of an Activity, the Java class, and its related layout file.
Activity
The Activity component is responsible for what the user sees on the screen. It’s made up of an Activity class and a layout file (an XML file that contains definitions for UI elements like buttons, text fields, etc.).
Layout File

Layout file, shown as text mode and in design mode
In Figure 6-1, the picture on the left shows the activity_main layout file as in XML mode (or code mode), and the one on the right shows the layout file in design mode. You can work with the layout file visually (click the “Design” button) or as raw XML code (click the “Code” button). When you change an element by editing the XML, Android Studio automatically updates the design view’s rendition. Similarly, when you make a change in the design view, the XML file gets updated.
/res/layout/activity_main.xml
A layout file generally has two parts: a declaration of a container and the declarations of each UI element inside. In Listing 6-1, the second line, which is also the root of the XML document, is the container’s declaration. The TextView element is declared as a child node of the container. This is how containers and UI elements are arranged in a layout file.
View and ViewGroup Objects
A UI is simply a collection of user interface elements such as text input element, text label, buttons, and so on. In the example code shown in Listing 6-1, we have one UI element, the TextView. This is the element that holds the text “Hello World.” In Android speak, the TextView is called a View object; some people also refer to these as widgets, and some others with web programming background may refer to these as input elements or form elements—we’re in Android world now, so we’ll call them View objects or simply Views.
A View object is a composition unit. You build a UI by arranging one or more View objects alongside each other or sometimes embedded in each other. There are two kinds of views as the Android library defines it, a “View” and a “ViewGroup.” An example of a View object is a button or a text field. These objects are meant to be composed alongside other views, but they are not meant to contain child views; they are intended to stand alone. A ViewGroup, on the other hand, can contain child views—it’s the reason why they’re sometimes called containers.

ViewGroup class hierarchy

Android compilation process
The compiler transforms the program source files into Java byte codes. The resulting byte codes are then further converted to a DEX file. A DEX file is a Dalvik Executable; it’s the executable format that the Android Runtime (ART) understands. Before the DEX files and other resources get wrapped into an Android package (APK), it also produces as a side effect a special file named “R.class”. We use the R.class to get a programmatic reference to the UI elements defined in the layout file.
Containers
Layout managers
Layout manager | Description |
|---|---|
LinearLayout | Positions the widgets in single row or column, depending on the selected orientation. Each widget can be assigned a weight value which determines the amount of space the widget occupies compared to the other widgets |
TableLayout | Arranges the widgets in a grid format of rows and columns |
FrameLayout | Stacks child views on top of each other. The last entry on the XML layout file is the one on top of the stack |
RelativeLayout | Views are positioned relative to other views and the container by specifying alignments and margins on each view |
ConstraintLayout | The ConstraintLayout is the newest layout. It positions widgets relative to each other and the container (like RelativeLayout). But it accomplishes the layout management by using more than just alignments and margins. It introduces the idea of a “constraint” object, which anchors a widget to target. This target could be another widget or a container or another anchor point. This is the layout we will use for most of our examples in this book |
Project information for the Hello app
Project detail | Value |
|---|---|
Application name | ActivitySample |
Company domain | Use your website name |
Language | Java |
Form factor | Phone and tablet |
Minimum SDK | API 29 (Q) Android 10 |
Type of activity | Empty |
Activity name | MainActivity |
Layout name | activity_main |
There is more to learn about Views, containers, and layouts, but we know enough to create some decent projects. Let’s move on to the Activity class.
Activity Class
An Activity class must inherit from android.app.Activity, either directly or indirectly, but we usually don’t inherit from this class directly; instead, we extend the AppCompatActivity class to run the app on older versions of Android but still use modern UI elements. The “Compat” in the class name stands for “compatibility.”
MainActivity.java
❶ We inherit from AppCompatActivity, which is a child class of android.app.Activity class. All Activity classes must inherit from android.app.Activity one way or another, but as you can see, the project creation wizard gave us AppCompatActivity. This is the recommended superclass for an Activity
❷ The @Override annotation tells the compiler that we intend to override the method immediately following the annotation.
❸ onCreate() is one of the lifecycle methods of the Activity class. The Android Runtime calls this method right after the user launches the app. This is a good place to write initialization codes.
❹ We call the onCreate() method in the superclass (AppCompatActivity). This is necessary, so we don’t break the chain of calls within the onCreate methods. If we don’t call this method, the codes inside the onCreate of AppCompatActivity (which is our superclass) won’t run; that will result in errors.
➀ The setContentView method selects which View resource to display when the Activity becomes visible to the user. This method is overloaded; you can pass an integer (which points to a resource ID) or an instance of a View object. In this case, we passed a resource ID. You may recall that our layout file is named /res/layout/activity_main.xml. You may also recall that during the compilation process, an “R.class” was generated for our convenience so we can reference UI resources programmatically—R.layout.activity_main points to the file /res/layout/activity_main.xml. In this statement, we are associating MainActivity.java with activity_main.xml.
Hello World
Now that we have some working knowledge about Activities and layouts, let’s explore them in a sample project.
ActivitySample project
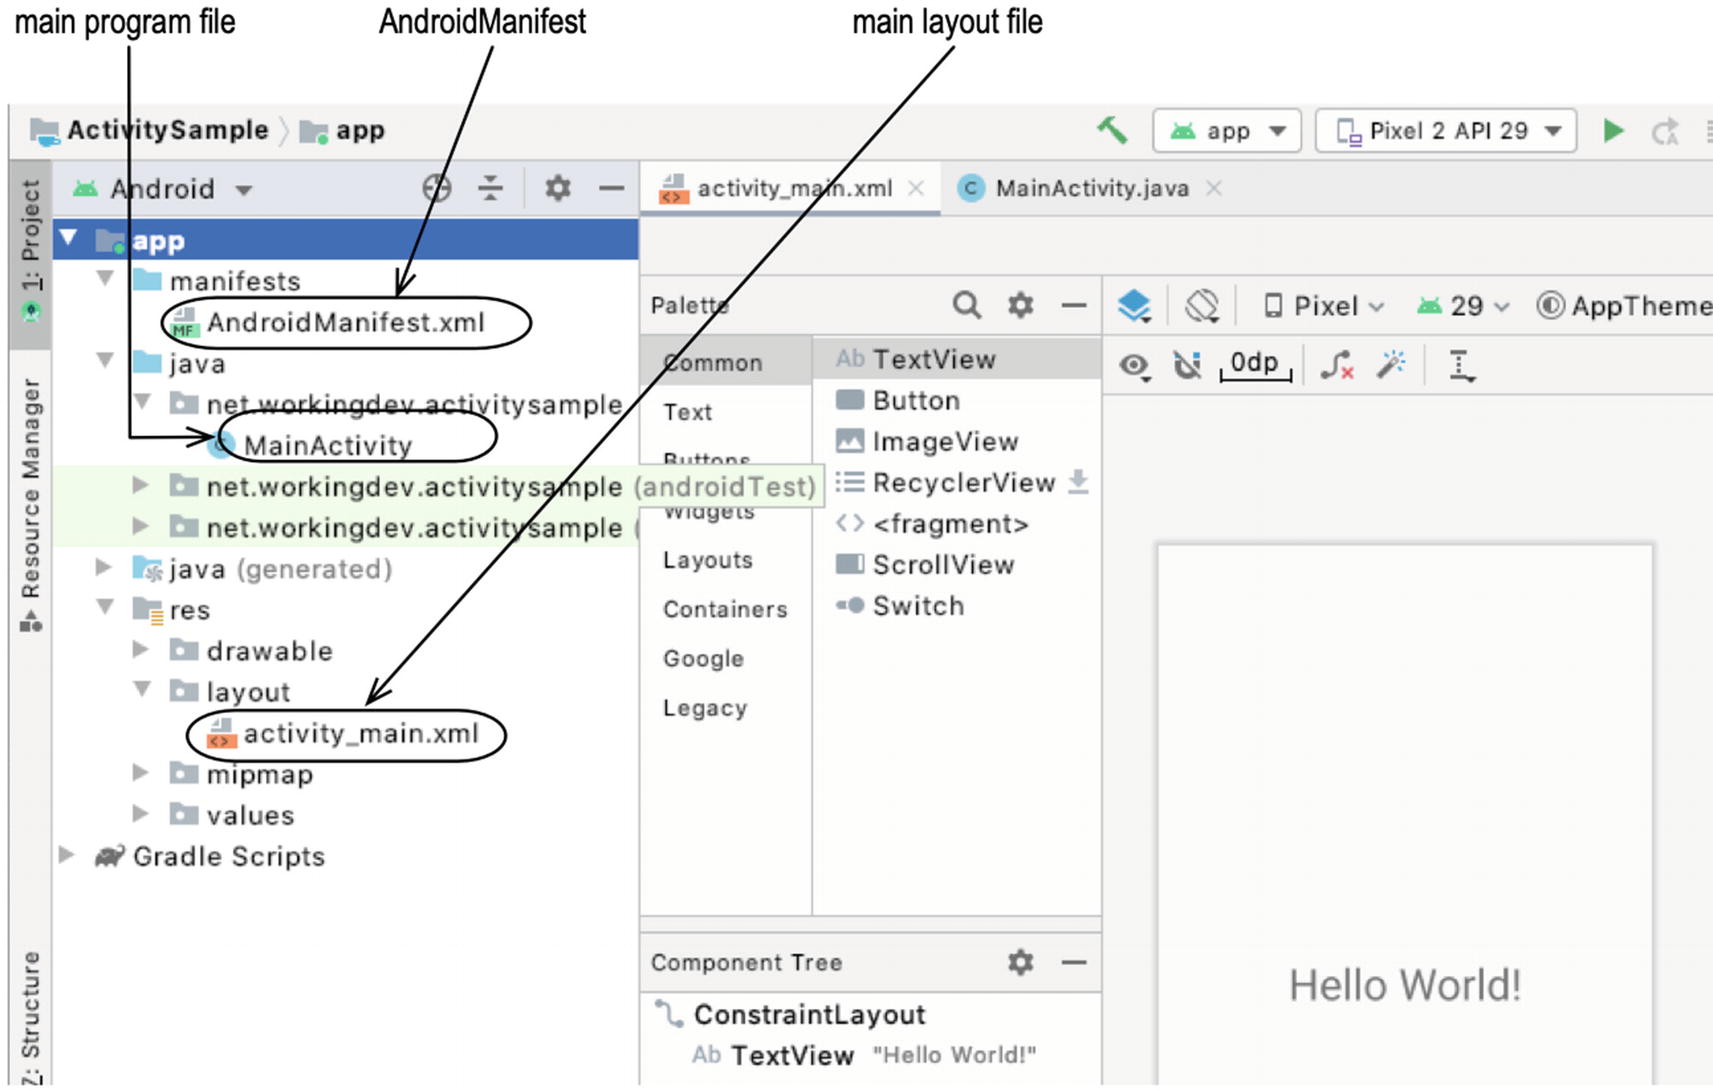
The main layout file, named activity_main.xml, is inside the app ➤ res ➤ layout folder. All user interface elements are written in an XML layout file.
The main program file, MainActivity.java, is found in app ➤ java ➤ package name folder (your package name will be different from mine). This Java file is the Activity class. If you want to do something as a reaction to a user action, like clicking a button, this is where we write that program logic.
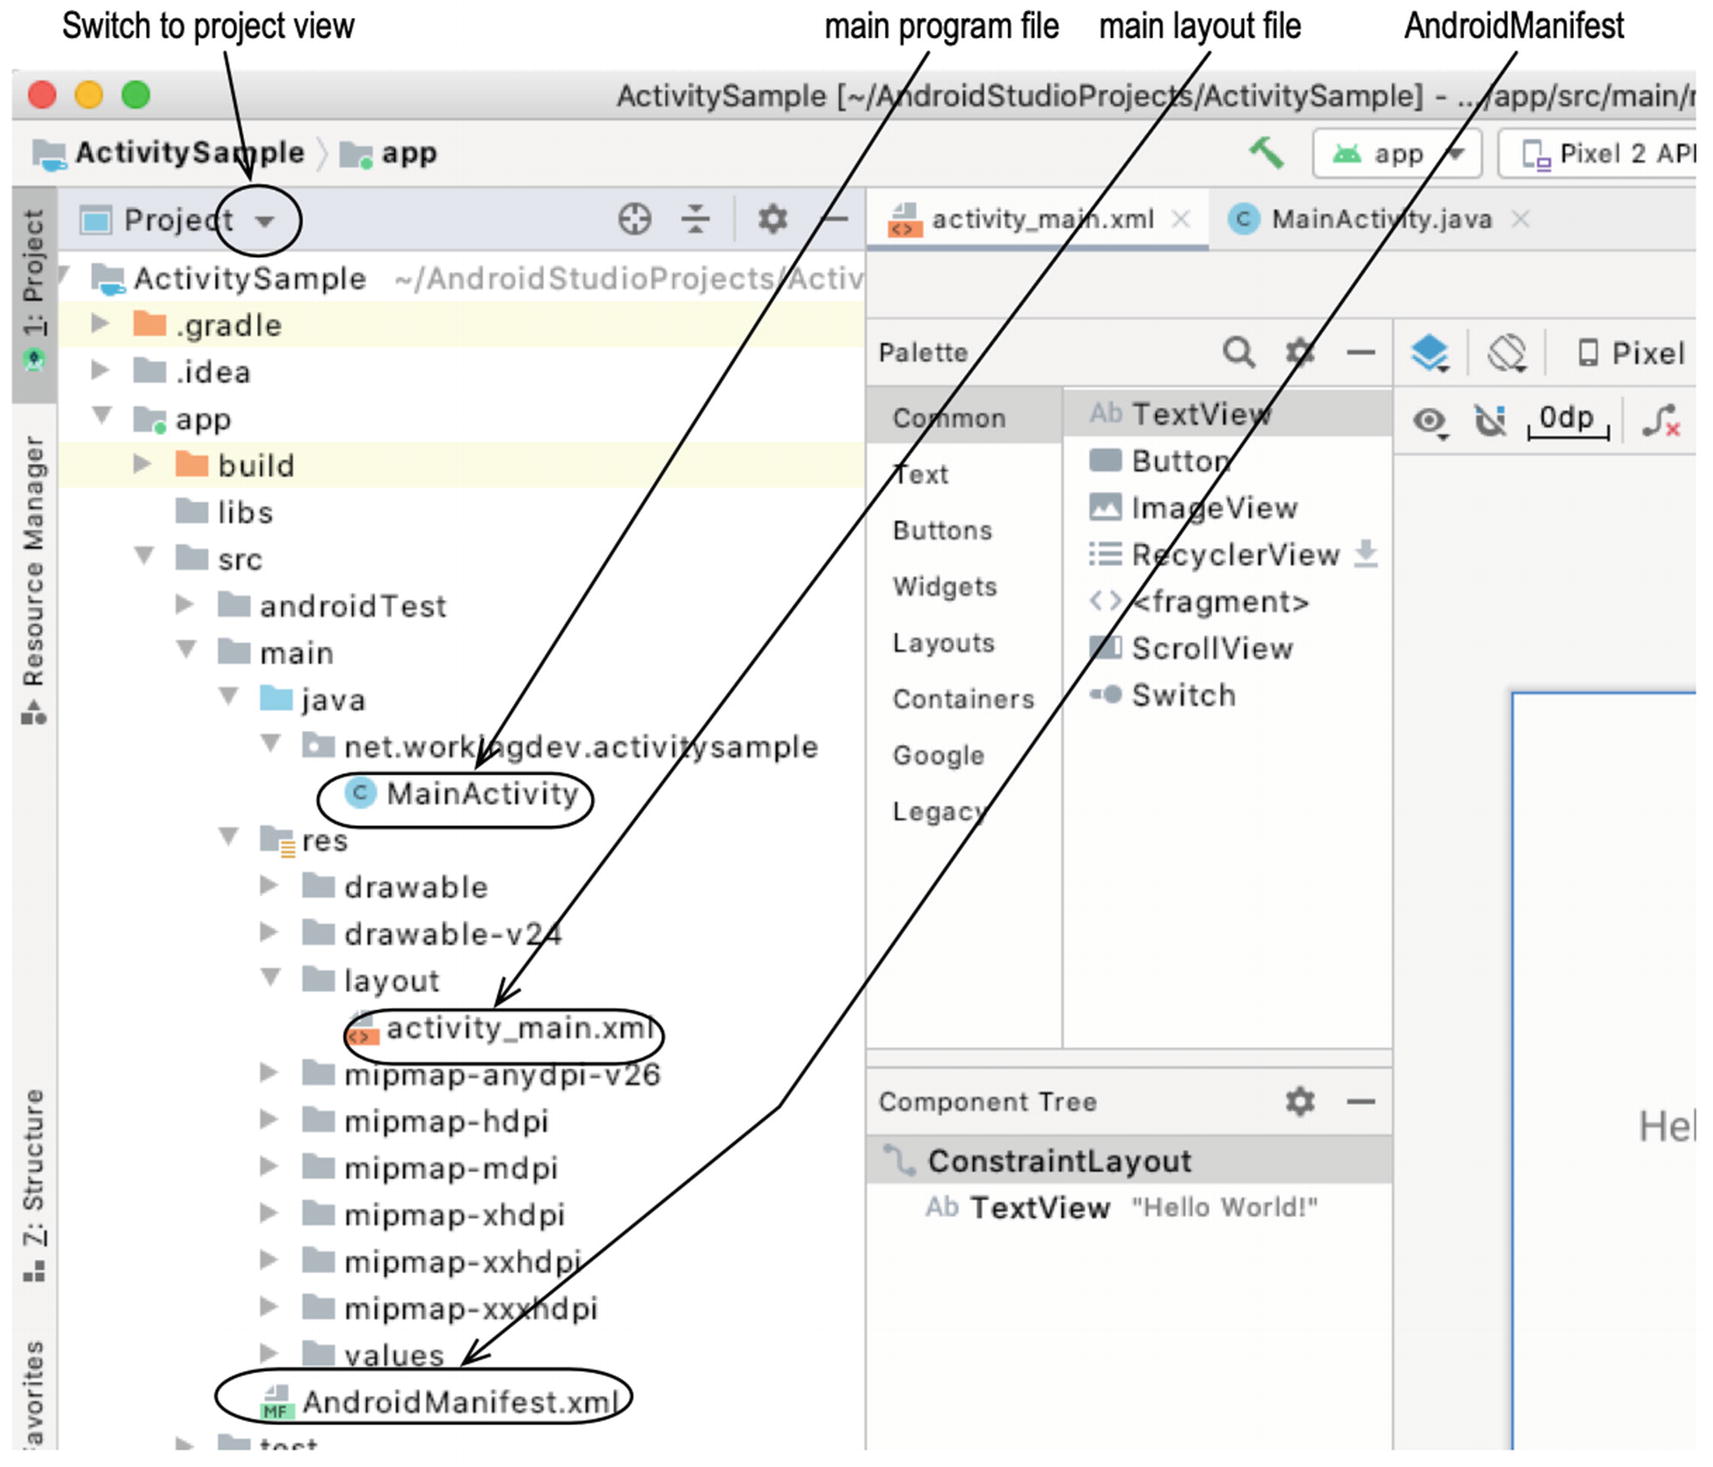
Project view
Annotated activity_main
❶ Root node of the layout file, which also declares what kind of layout manager is in effect. In this case, we are using the ConstraintLayout manager.
❷ Declaration of the TextView object. It’s a child node of the layout manager.
❸ Defines one of the constraints of the TextView object. It says, there’s an anchor point to the bottom of the TextView, and it anchored to the bottom of the container.
Try to run the project in an emulator just to make sure that nothing is broken, and then we will make some modifications.
Modifying Hello World
- 1.
Change the text in the TextView control.
- 2.
Add a Button View to the screen; we’ll place it right below the TextView.
- 3.
Add a function to the Activity. The function, when called, will increment the value of the TextView.
- 4.
We will associate the new function to the Button. Every time we click the button, the value of the TextView will change.
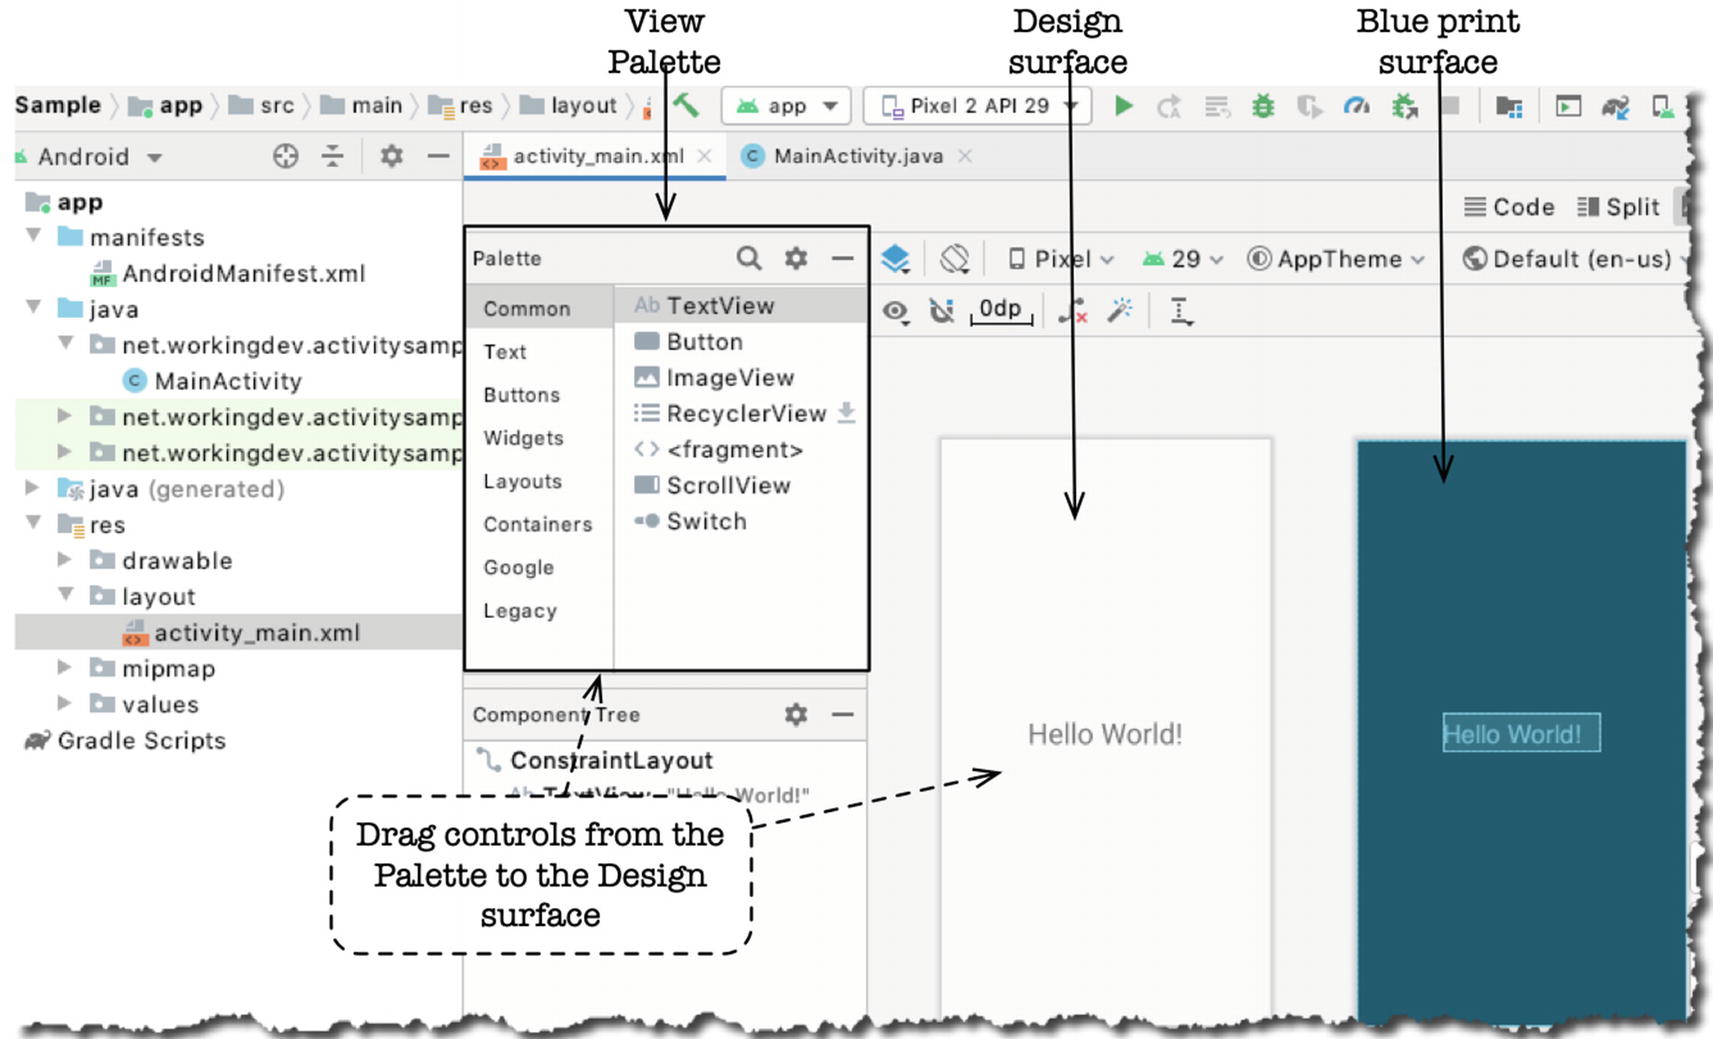
ActivitySample project shown in design view
Drag and drop controls from the View palette
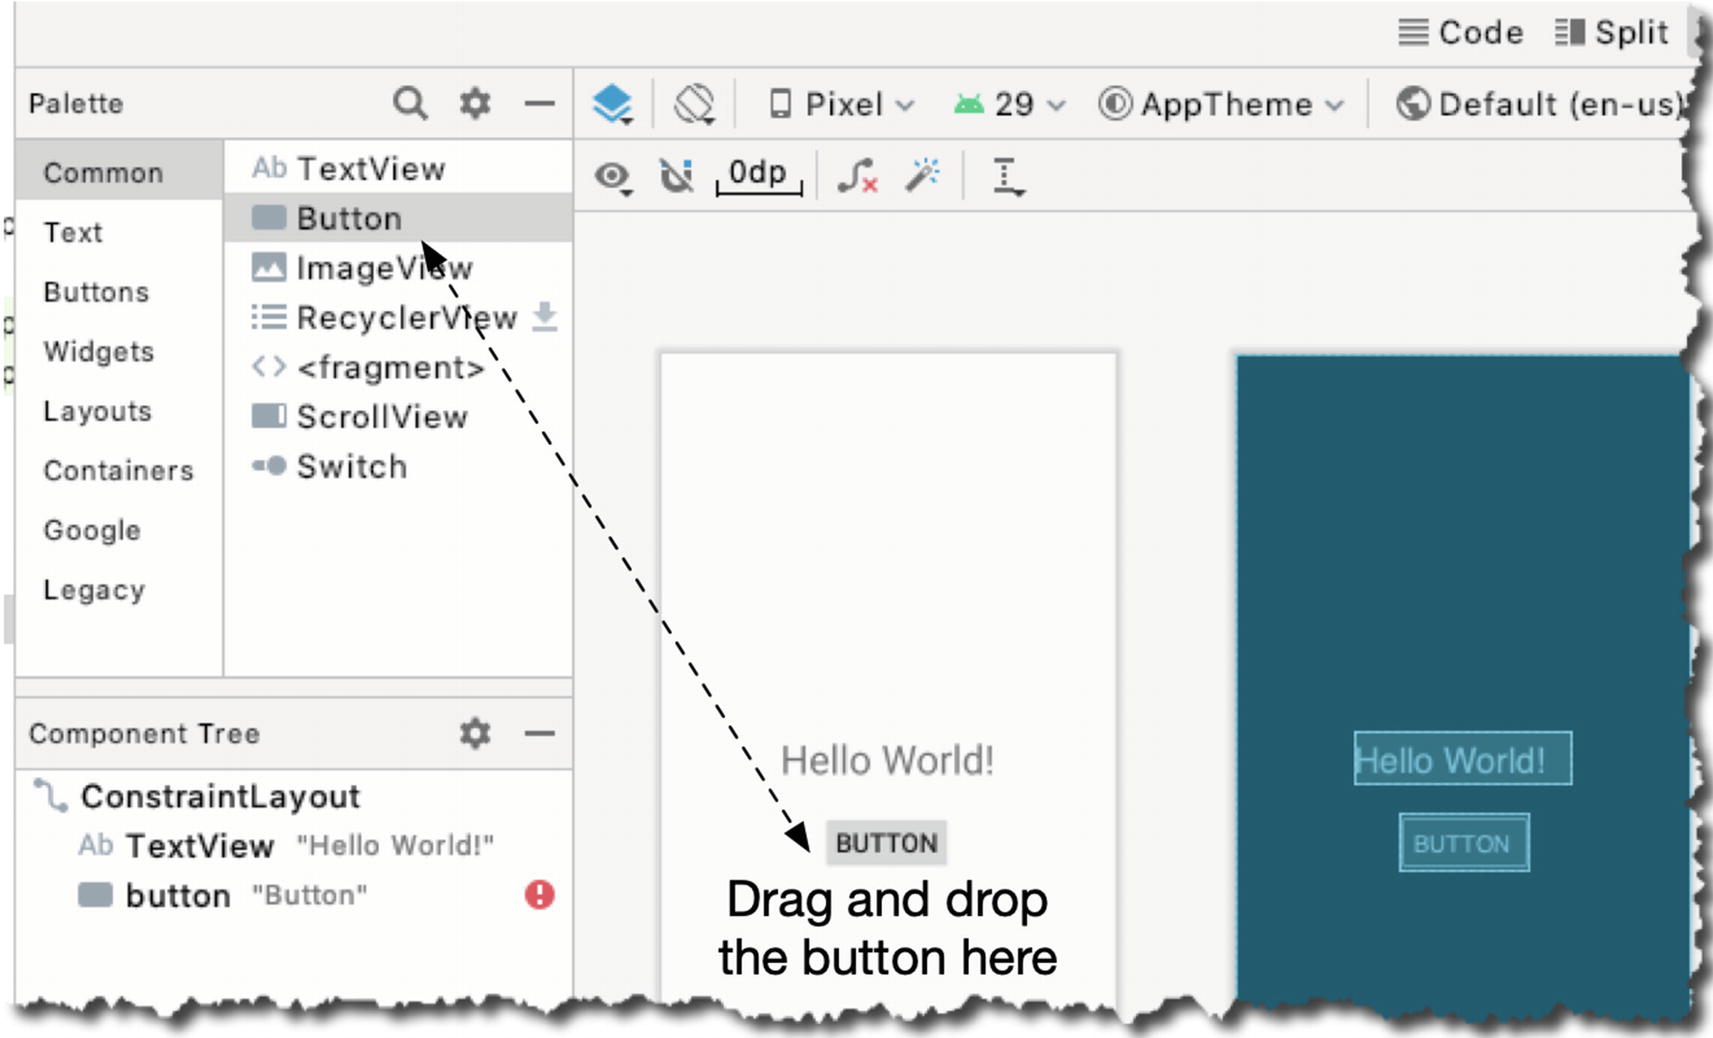
Button View without constraint
The Hello TextView is nicely centered in the screen because it has four anchor points (constraints). The Button appears right below the Hello text in design time, but in runtime, it’s on position 0,0 (top left) of the screen—this is how controls are positioned at runtime when they don’t have constraints.
The Button control doesn’t have any constraint yet because we didn’t put any. Constraints are not automatically added when you add a control to the design surface. The TextView has constraints because that was generated by the wizard when we created the project.
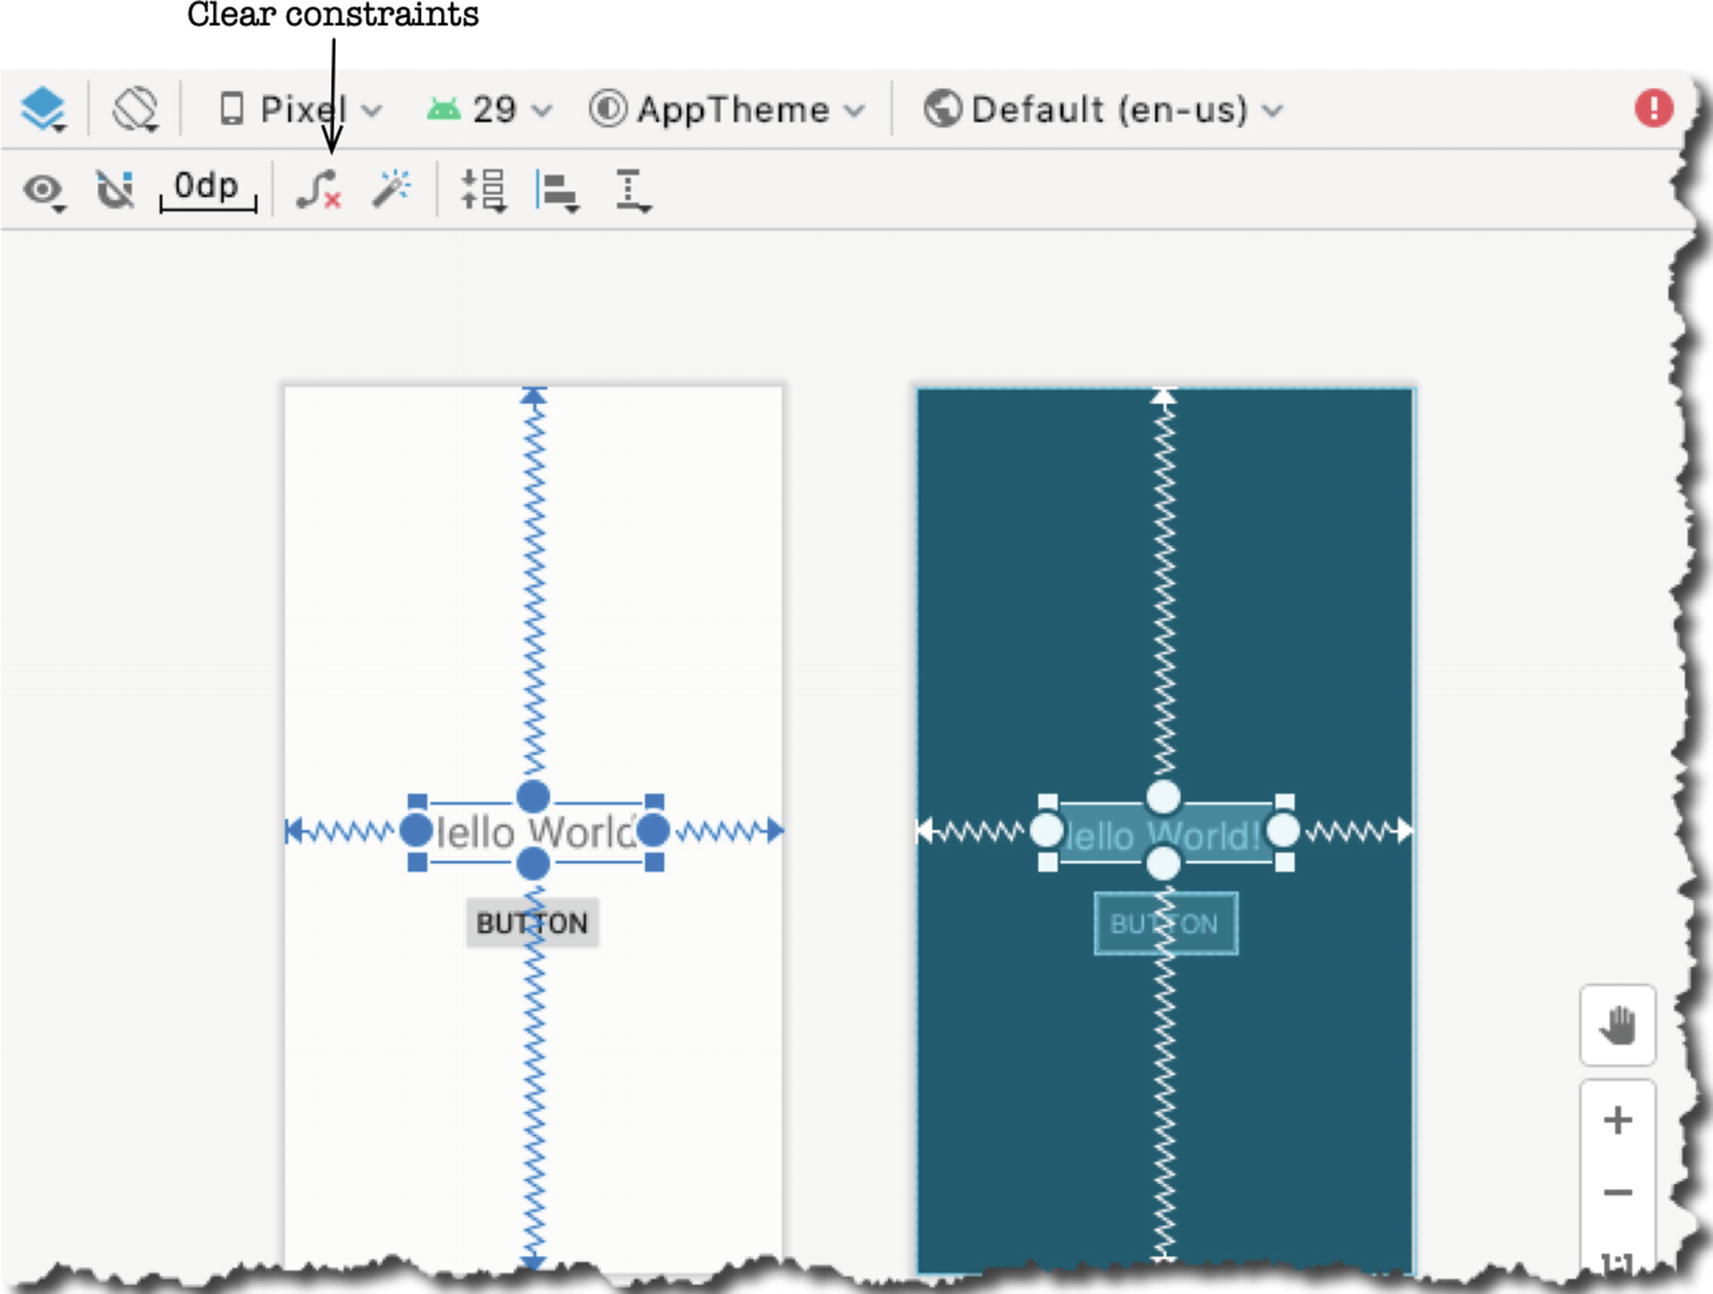
TextView with constraints
When all the constraints are removed, reposition the controls on the design surface in the way you would like them to appear during runtime. Next, select all the controls again—you can do this by clicking and dragging the mouse around the controls.
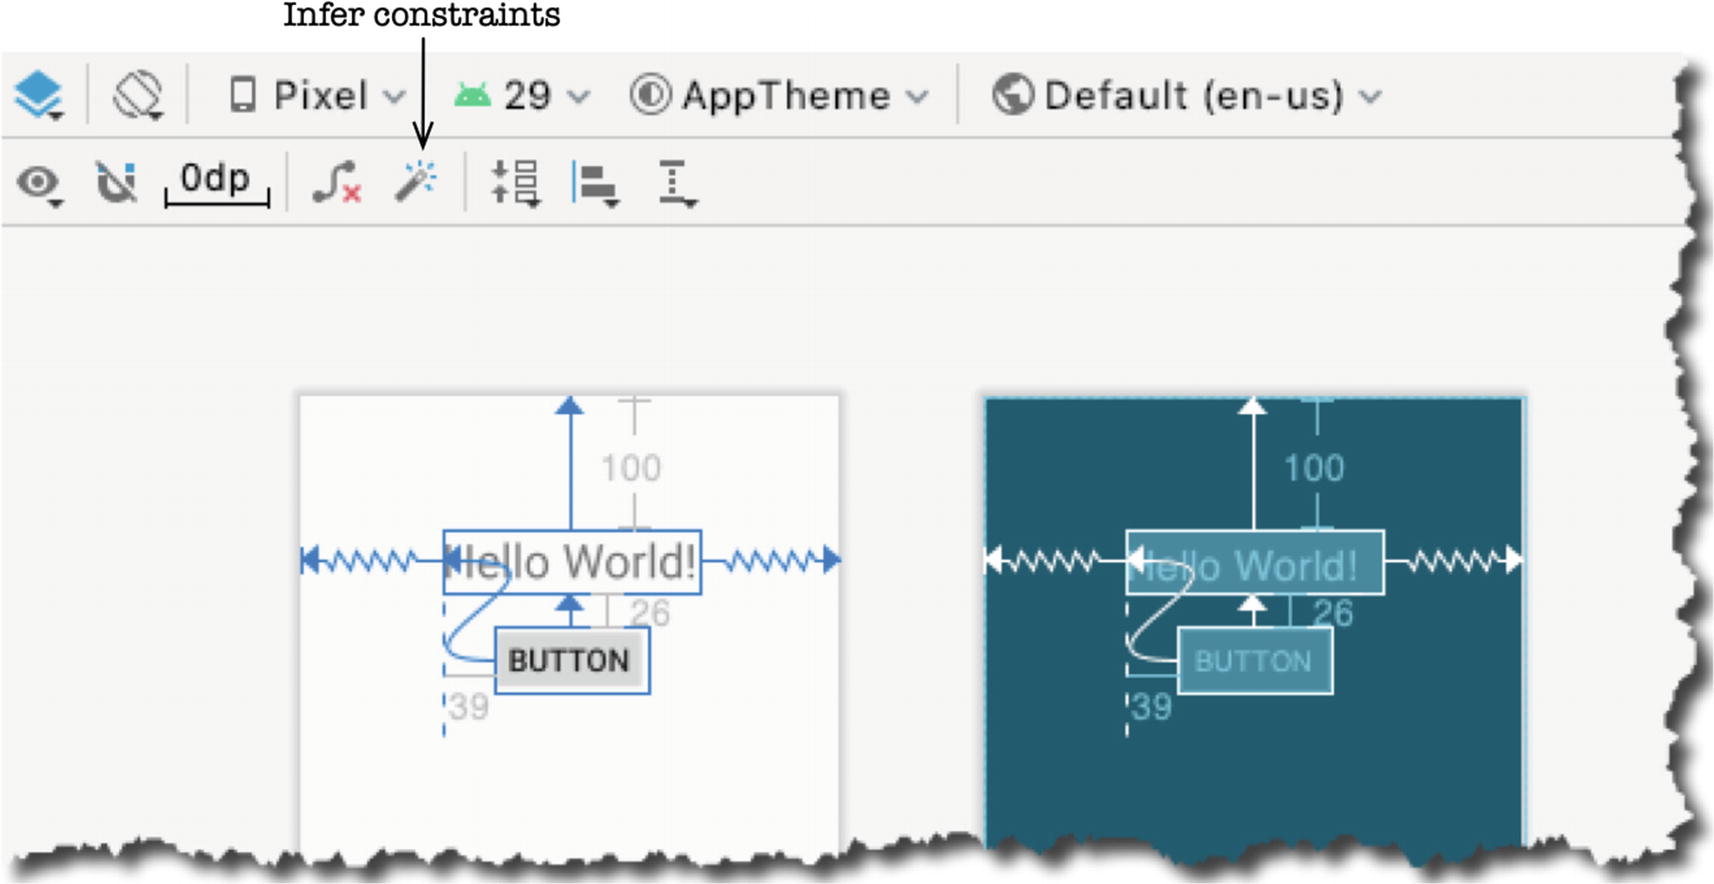
Infer constraints
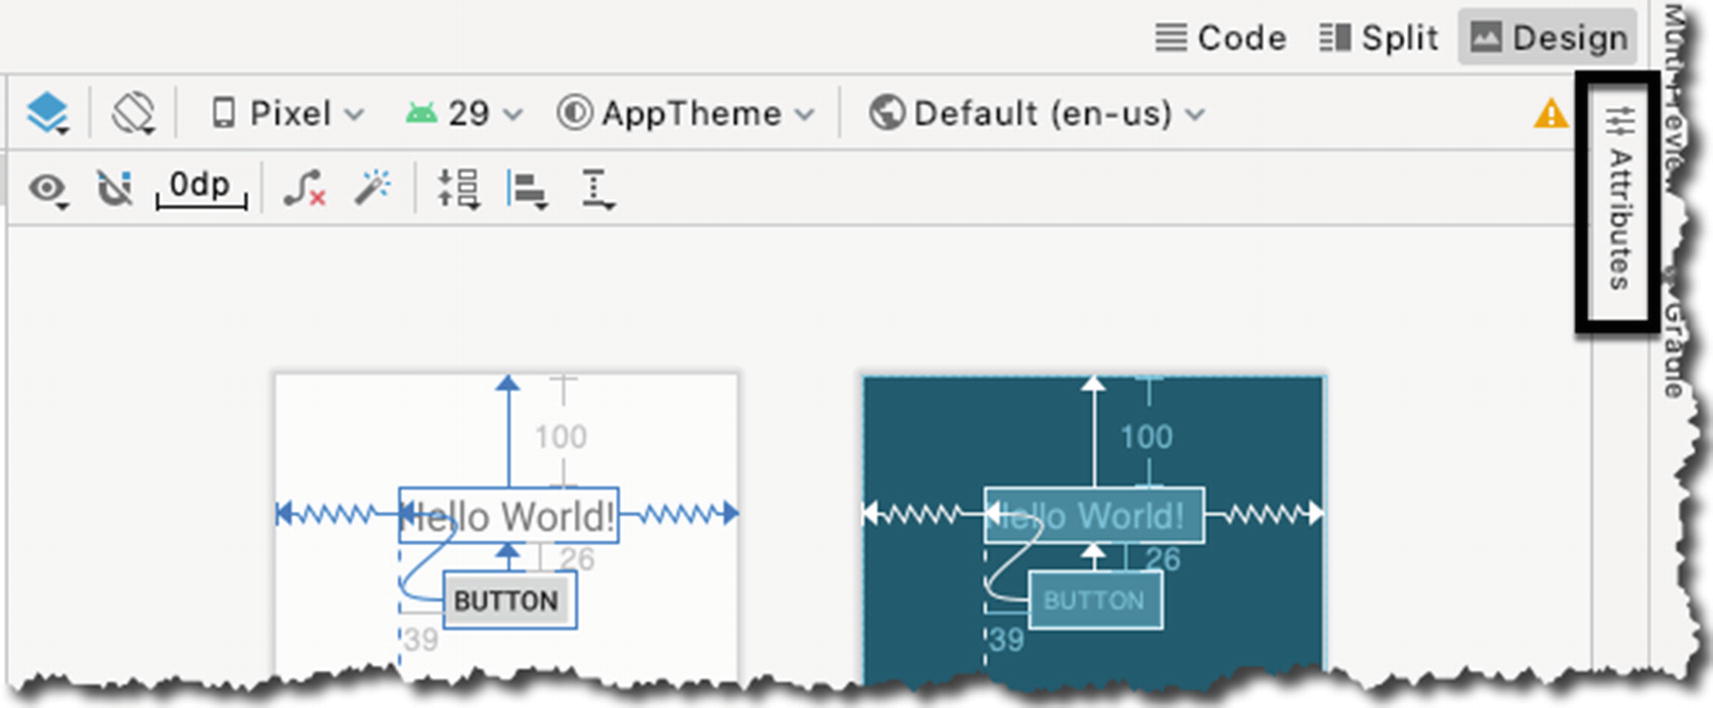
Attributes panel, collapsed
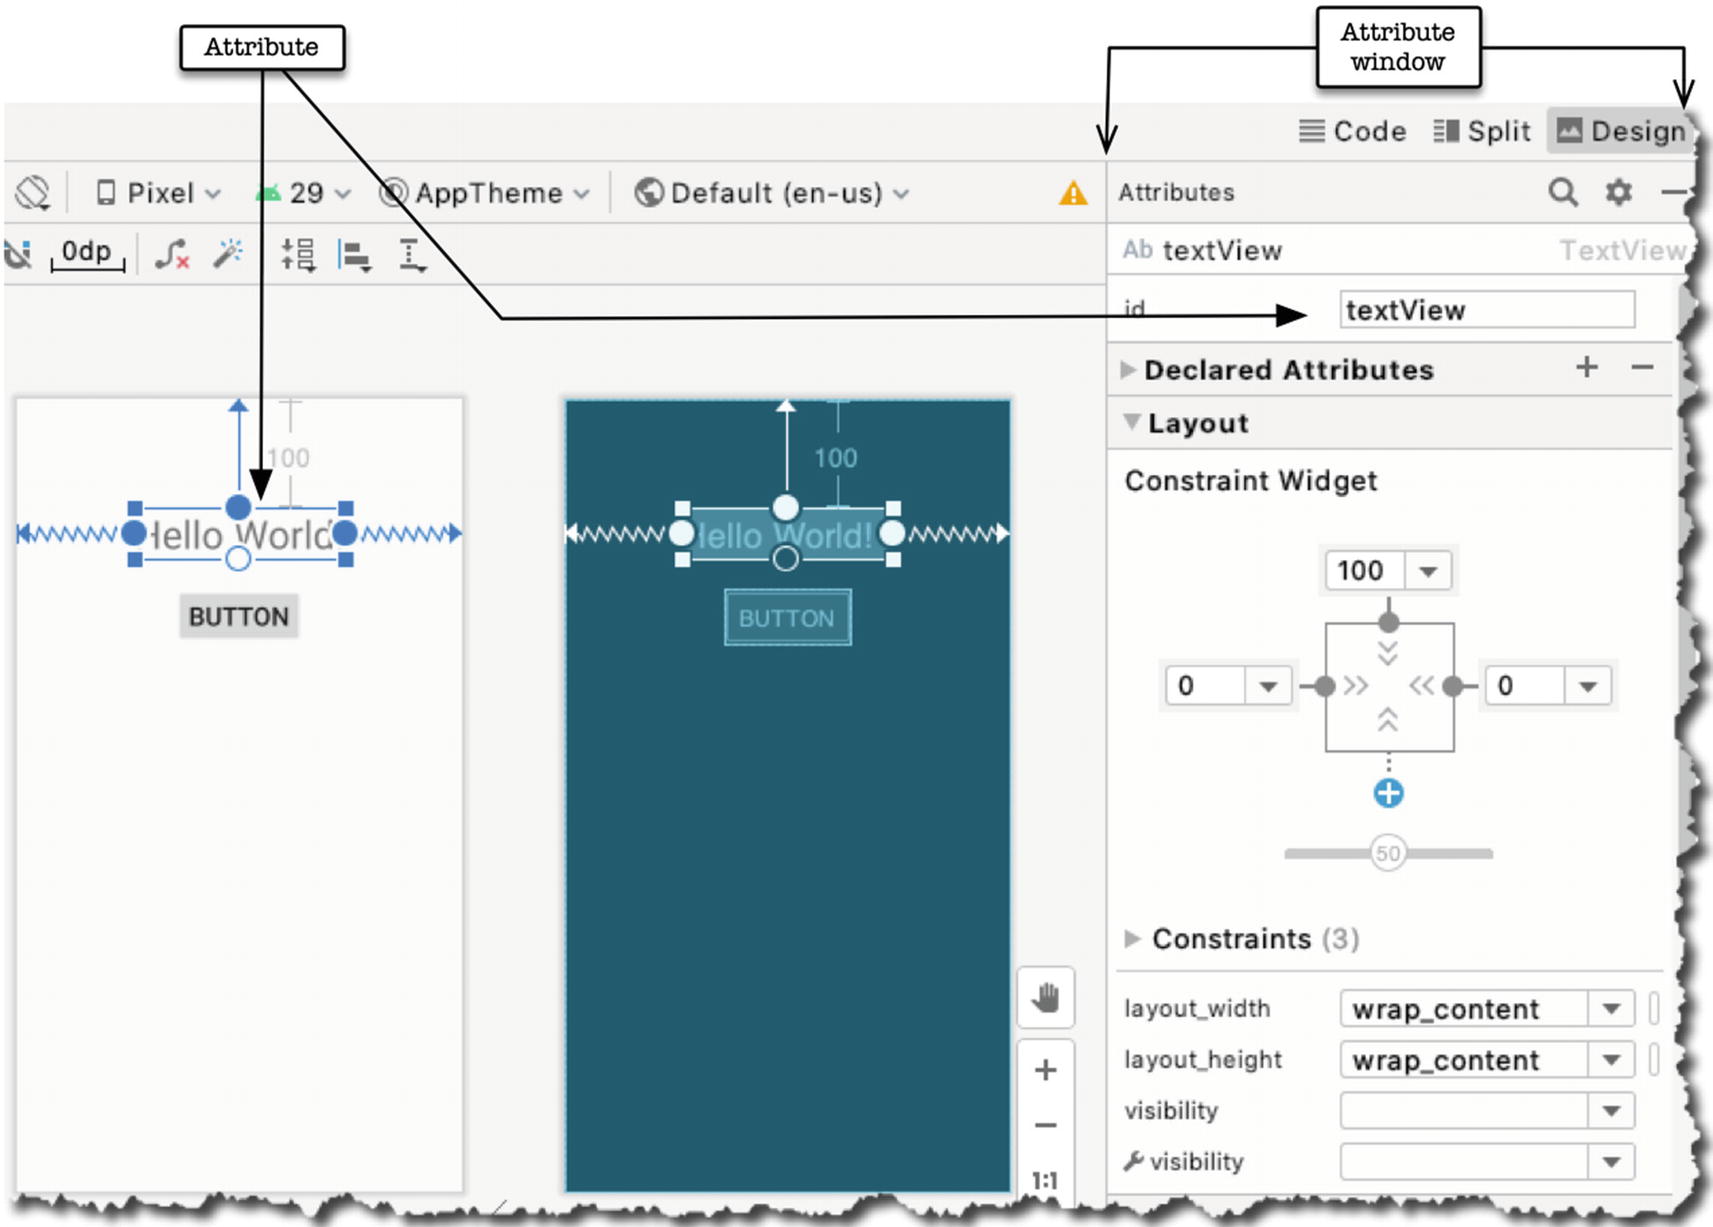
Attributes panel, open

All attributes
- 1.
Change the id property of the TextView object from textView to textHello.
- 2.
Change the textSize property of the TextView object to 36sp.
The View object’s id property is very important because we’ll refer to it later in our code (in the Activity class).
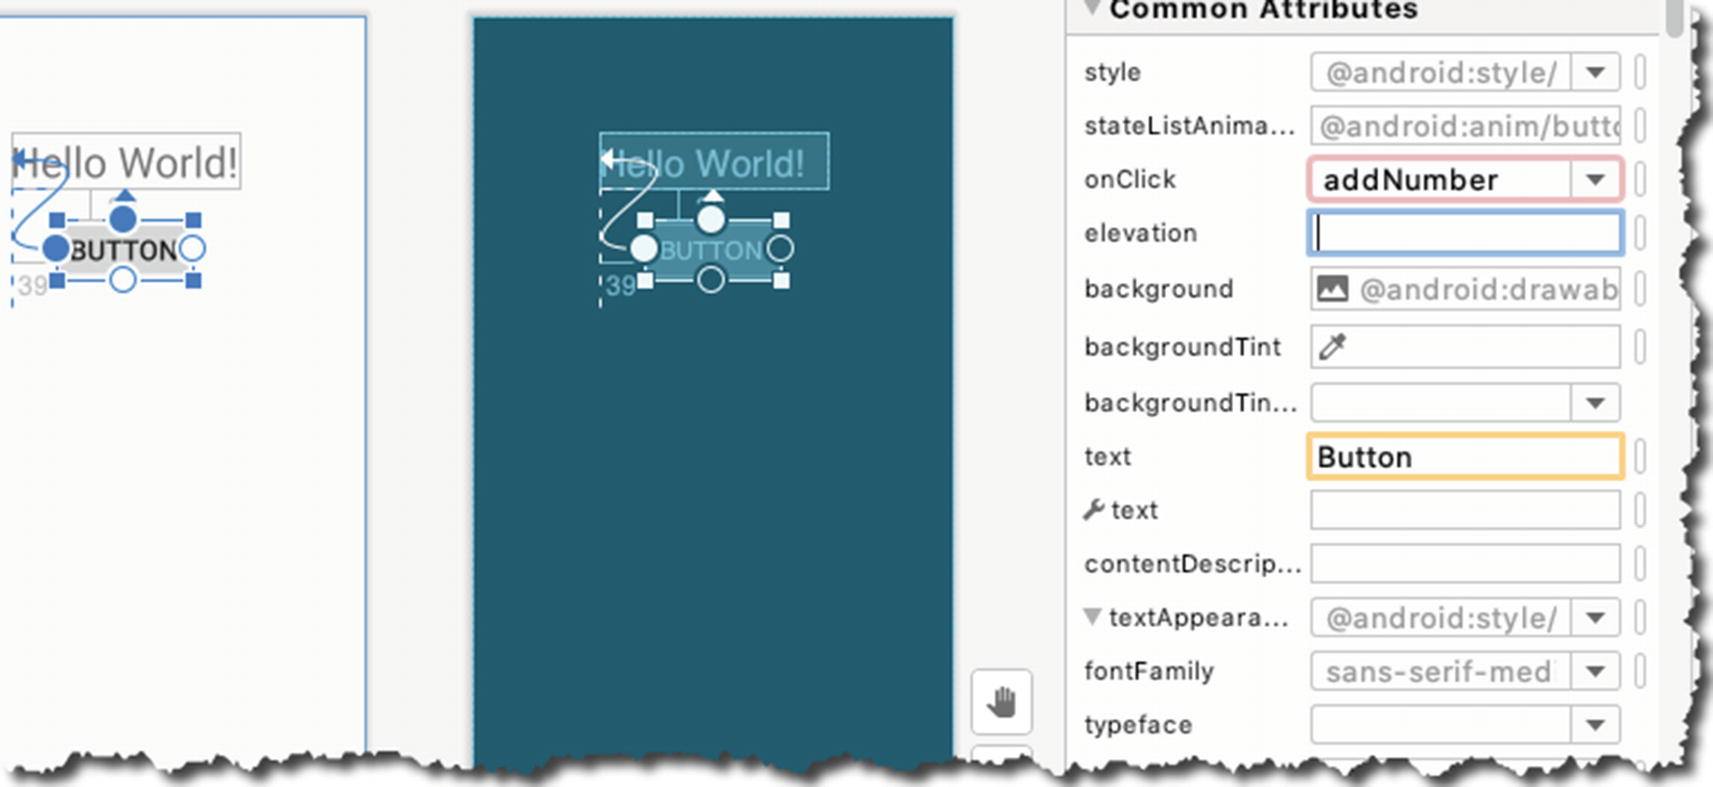
onClick property
MainActivity.java
❶ This code sets the TextView’s text value to “1”. First, we get a reference to the TextView using its id. All View objects can be referenced at runtime using the R.class, so R.id.textHello refers to the instance of the TextView object at runtime. Next, we cast it to a TextView object; then, we call the setText() method .
❷ This is the implementation of the addNumber() method ; it takes a View object as a parameter. When this method is called, the Android Runtime will pass the instance of the Button object as an argument to this method.
❸ This code gets the programmatic reference to the TextView object, the same idea as in ❶, but this time, we assign the object reference to a variable.
❹ tv.getText() gets the current value of TextView. This call returns a CharSequence; that’s why I needed to call the toString() method on it to make it workable for our purpose. The Integer.parseInt() method converts an alphanumeric digit to an integer.
➀ The setText() method sets the value of the TextView. The ++currVal + "" expression increments the current value of the currVal variable and then converts it to a String object; adding an empty String literal to any primitive data type effectively converts it to a String.
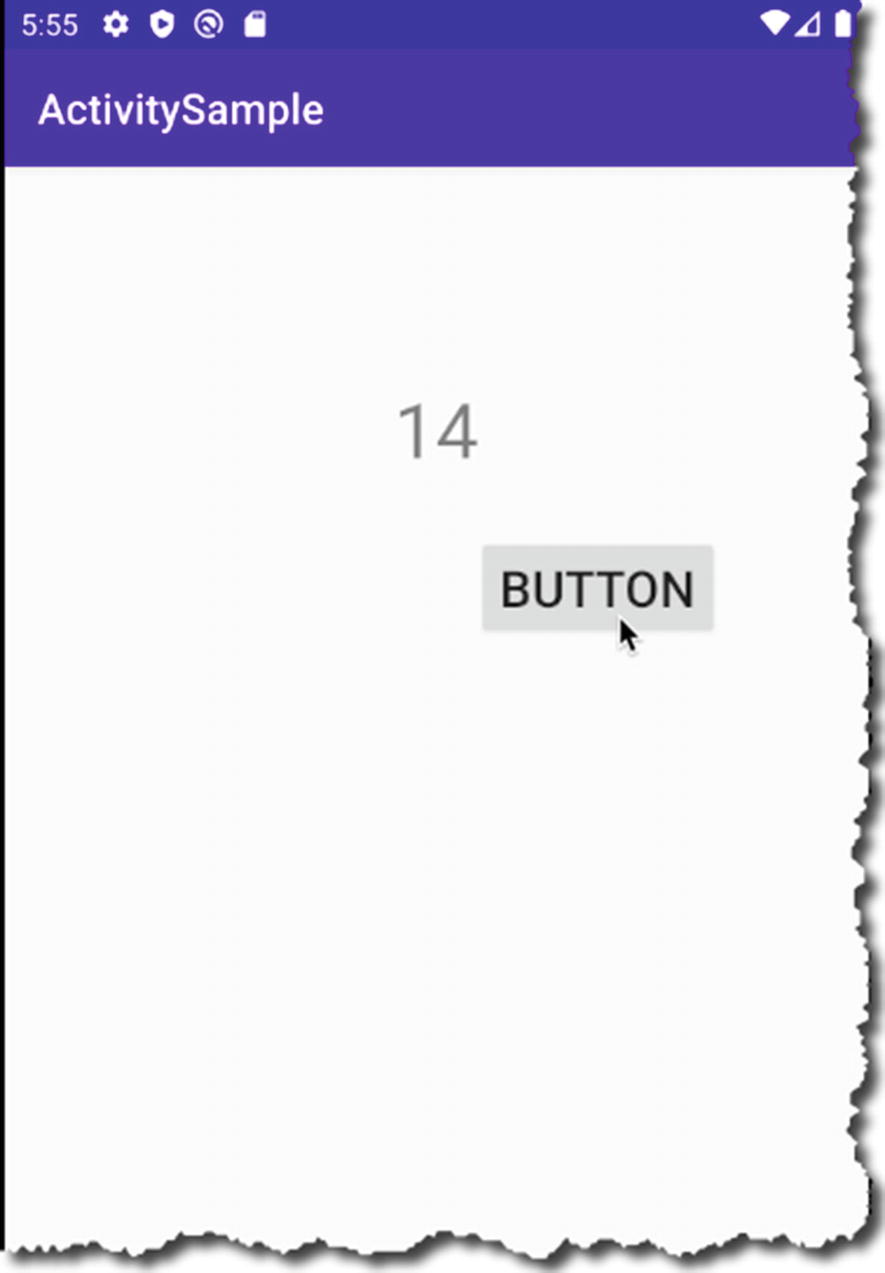
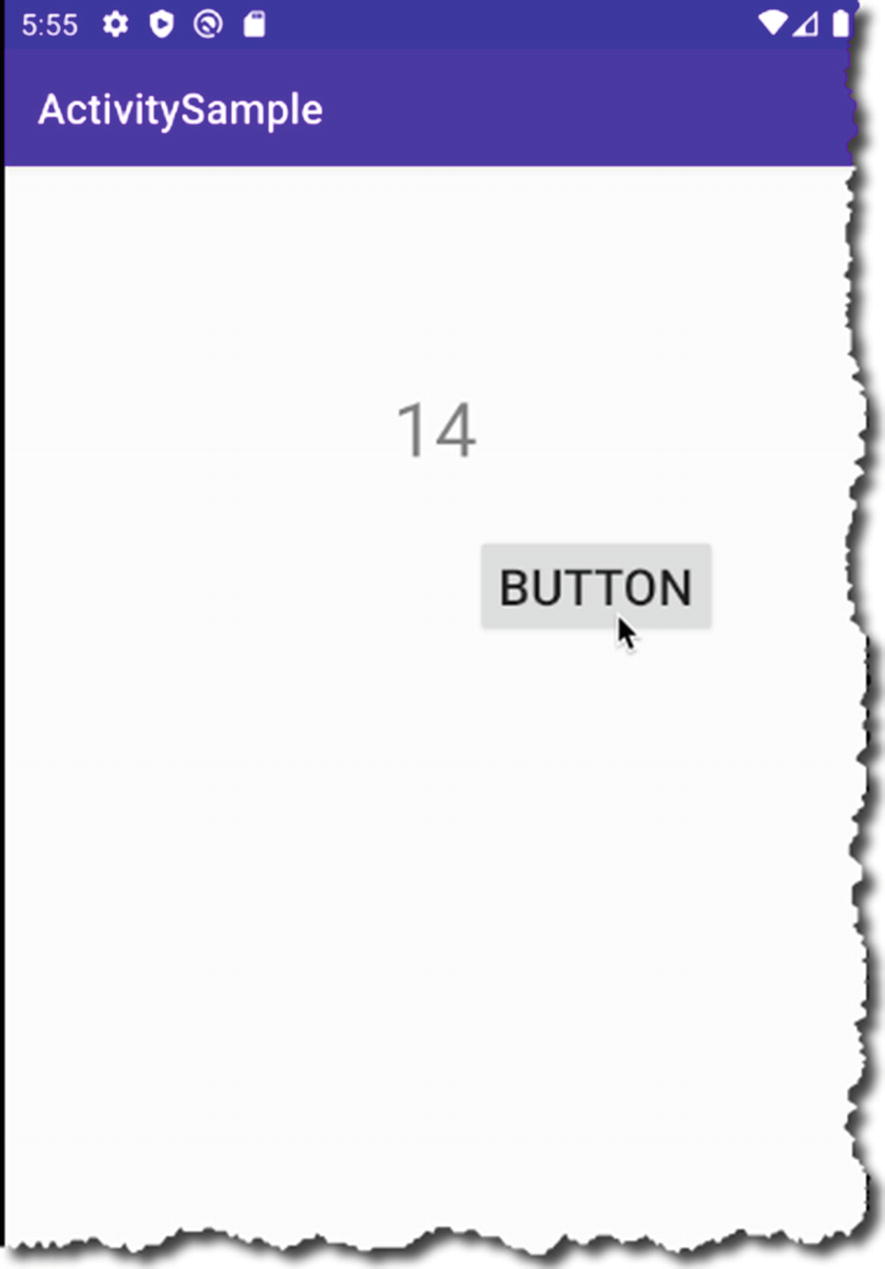
ActivitySample on the emulator
Summary
A layout file describes the UI structure in an XML file. You can work with the layout file either in design mode (WYSIWYG) or raw XML mode.
Each View element in a layout file is described as an XML node, but the XML file is inflated during runtime. The inflation process produces the object representations of the UI elements.
You can reference UI elements programmatically using the R.class.
Composite views can be constructed by inheriting from the ViewGroup class.
Layout managers provide ways to arrange UI elements on a screen. The Android SDK has plenty of prebuilt managers we can use out of the box.