
Preparing for release
Signing the app
Google Play
App bundle
You can distribute your app quite freely and without much restrictions; you can let your users download it from your website, Google Drive, Dropbox, and so on. You may even email the app directly to the users, if you wish; but many developers choose to distribute their app on a marketplace like Google or Amazon to maximize reach. Another reason to put your app on the trusted digital marketplaces is, well, they’re trusted. When an app is not downloaded from a trusted source, the apps won’t be instantly usable; they will get a notification that the app is not from a trusted source.
In this chapter, we’ll discuss the things you need to do to get your app out in Google Play.
Prepare the App for Release
- 1.
Prepare the material and assets for release
- 2.
Configure the app for release
- 3.
Build a release-ready app
Prepare Material and Assets for Release
Your code is great, and you might even think it’s clever, but the user will never see it. What they will see are your View objects, the icons, and the other graphical assets. You should polish them.
If you think the app’s icon isn’t a big deal, that could be a mistake. The icons help the users identify your app as it sits on the home screen. This icon also appears on other areas like the launcher window and the download section, and more importantly, it appears on the store where the app was published. The app’s icon holds a lot of sway when creating the first impressions about an app. It’s a good idea to put some work into this and read Google’s guidelines regarding icons; you can read about it at http://bit.ly/androidreleaseiconguidelines. While you’re at it, also visit https://romannurik.github.io/AndroidAssetStudio/—this resource will save you plenty of time when generating assets for your app.
You also need to pay attention to the graphical assets like screen captures and the text for promotional copy. Make sure you read Google's guidelines for graphical assets; you can read it here: http://bit.ly/androidreleasegraphicassets.
Configure the App for Release
- 1.
Check the package name—The app may have started as an exercise or throwaway code, and then it grew and took on a life of its own. You may want to check the package name of the app. Make sure it isn’t still com.example.myapp. The package name makes the app unique across the Google marketplace; and once you decide on a package name, you can’t change it anymore. So, give it some thought. You already know how to change this; we covered this in the Gradle chapter; remember?
- 2.
Deal with the debug information—Make sure the android:debuggable attribute in the <application> tag of the Manifest is removed; you just need to check, really, because Android Studio would have removed this automatically when you change the mode to “release.”
- 3.
Remove the Log statements—Different developers do this differently. Some would go through the code and remove the statements (painfully) manually. Some would write sed or awk programs to strip away the log statements. Some would use ProGuard and others would use third-party tools like Timber to take care of logging activities. It’s up to you which you will use; but make sure that your users won’t accidentally see the log information—if you haven’t made up your mind yet, I would really urge you to try Timber.
- 4.
Check the application’s permissions—Sometime during development, you may have experimented on some features of the application, and you may have set permissions on the manifest like permission to use the network, write to external storage, and so on. Review the <uses-permission> tag on the manifest and make sure that you don't grant permissions that the application does not need.
- 5.
Check remote servers and URLs—If your application relies on web APIs or cloud services, make sure that the release build of the app is using production URLs and not test paths. You may have been given sandboxes and test URLs during development; you need to switch them up to the production version.
Build a Release-Ready Application
- 1.
Created a debug certificate
- 2.
Assembled all your project’s assets, config files, and runtime binaries into an APK
- 3.
Signed the APK using a debug certificate
- 4.
Deployed the APK to an emulator or a connected device
All these things happened in the background; you didn’t have to do anything else but write your codes. Now, you need to take care of that certificate. Google Play and other similar marketplaces won’t distribute an app signed with a debug certificate. It needs to be a proper certificate. You don’t need a certificate authority like Thawte or Verisign; a self-signed certificate will suffice.
In the next steps, we’ll generate a signed bundle or APK. You already know what an APK is—it’s the package that contains your application. It’s what you upload to Google Play. A bundle, on the other hand, is a lot like an APK, but it’s a newer upload format. Like the APK, it also includes all your app’s compiled code and resources, but it defers APK generation. It’s a new app serving model called Dynamic Delivery. It uses your app bundle to generate and serve optimized APK for each user’s device configuration—so they download only the code and resources that are needed to run your app. You don’t have to build, sign, and manage multiple APKs anymore.
In Android Studio, the steps to generate an APK and a bundle are almost identical. In the following steps, we’ll see how to generate both the bundle and an APK.

Generate signed APK
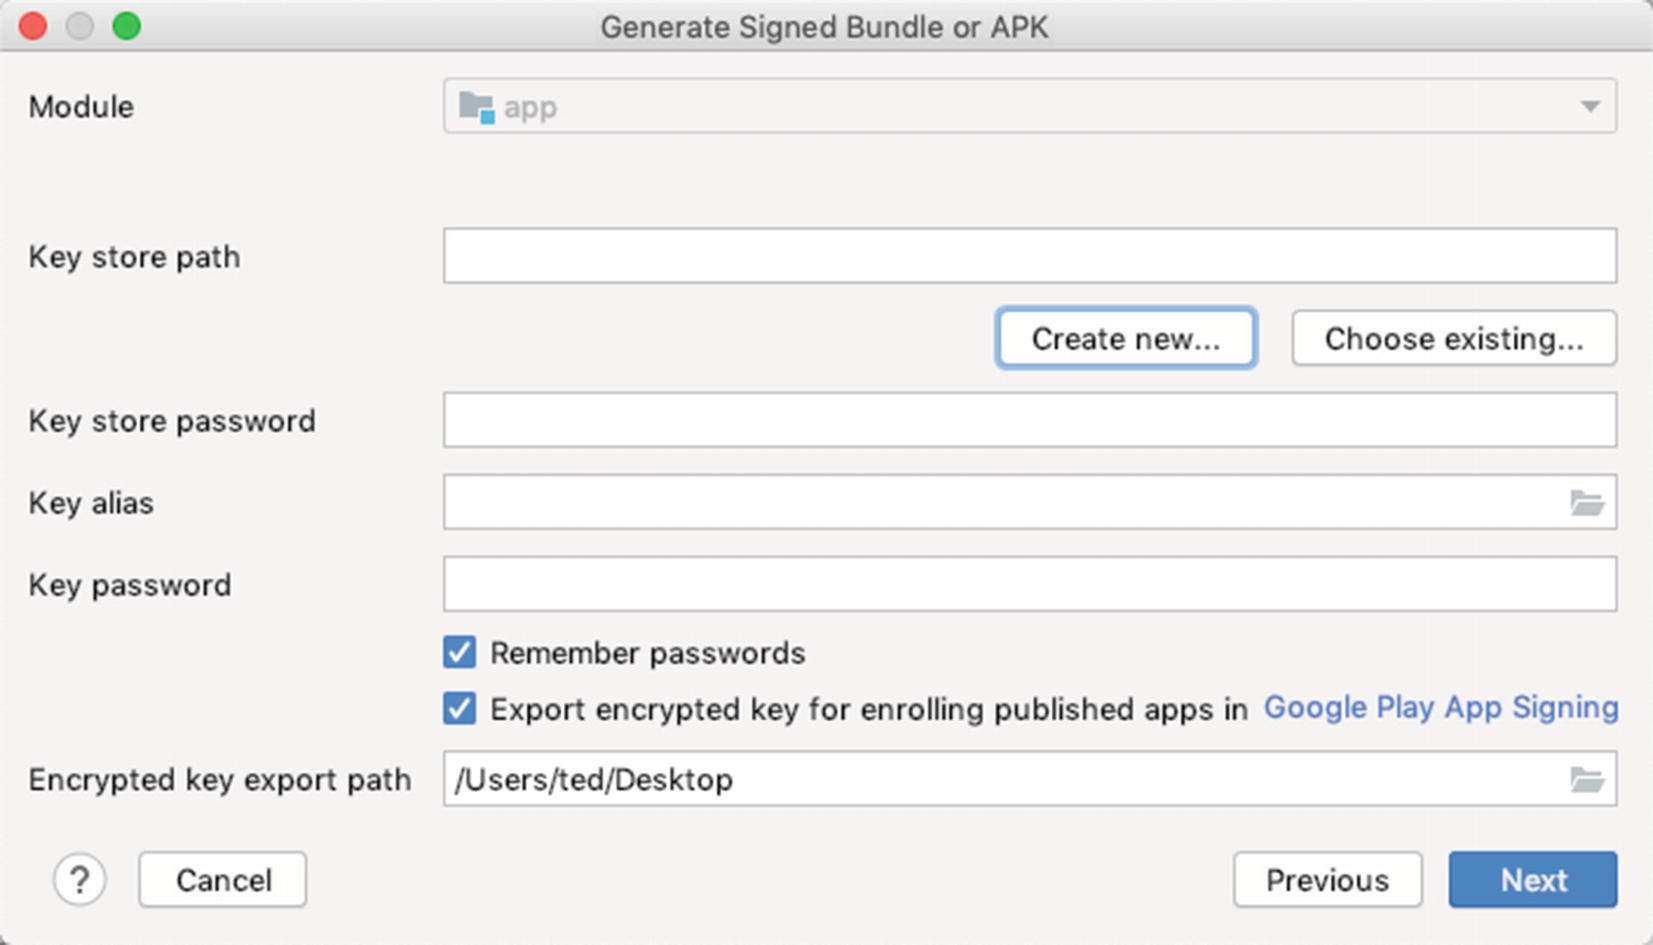
Keystore dialog
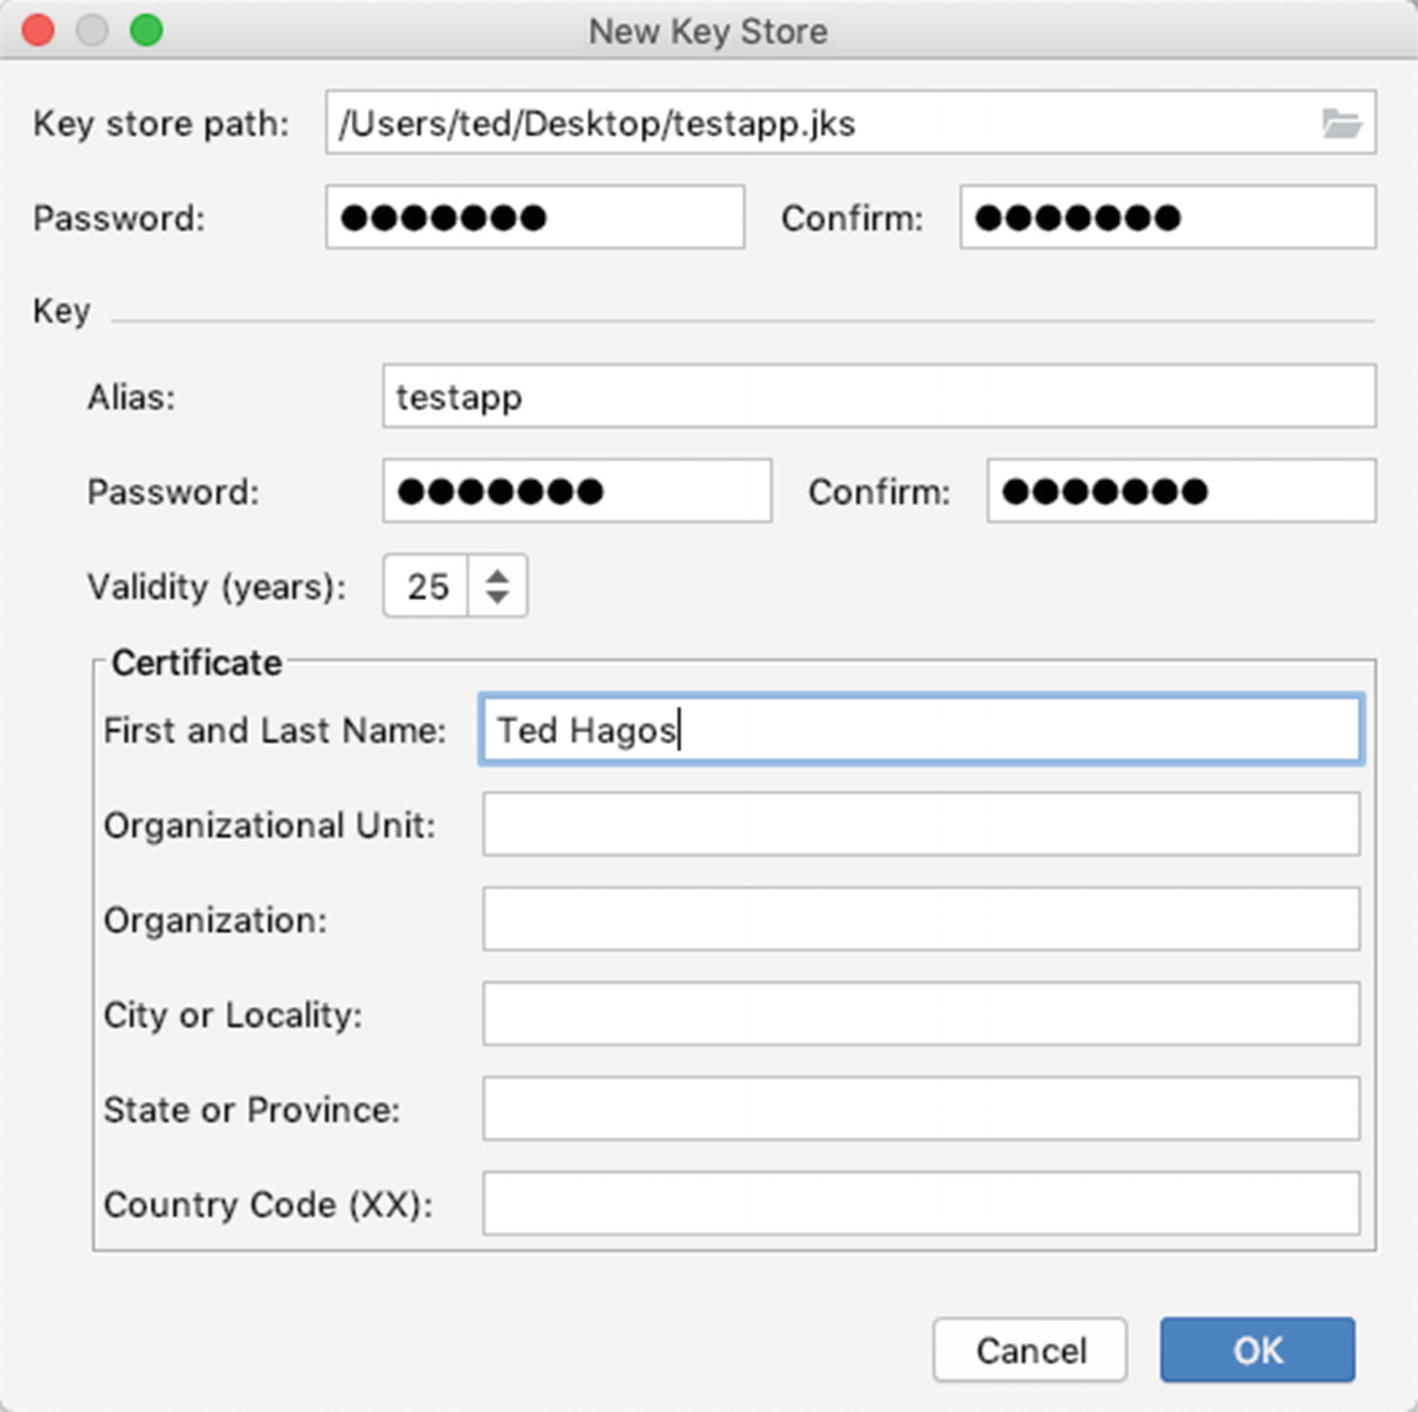
New keystore
Keystore items and description
Keystore items | Description |
|---|---|
Keystore path | The location where you want to keep the keystore. This is entirely up to you. Just make sure you remember this location |
Password | This is the password for the keystore; don’t lose this, and make sure you remember this one—otherwise, you’ll need to create another keystore file |
Alias | This alias identifies the key. It’s just a friendly name for it |
(Key) Password | This is the password for the key. This is NOT the same password as the keystore’s (but you can use the same password if you like) |
Validity, in years | The default is 25 years; you can just accept the default. If you publish on Google Play, the certificate must be valid until October of 2033—so, 25 years should be fine |
Other information | Only the first and last name fields are required |
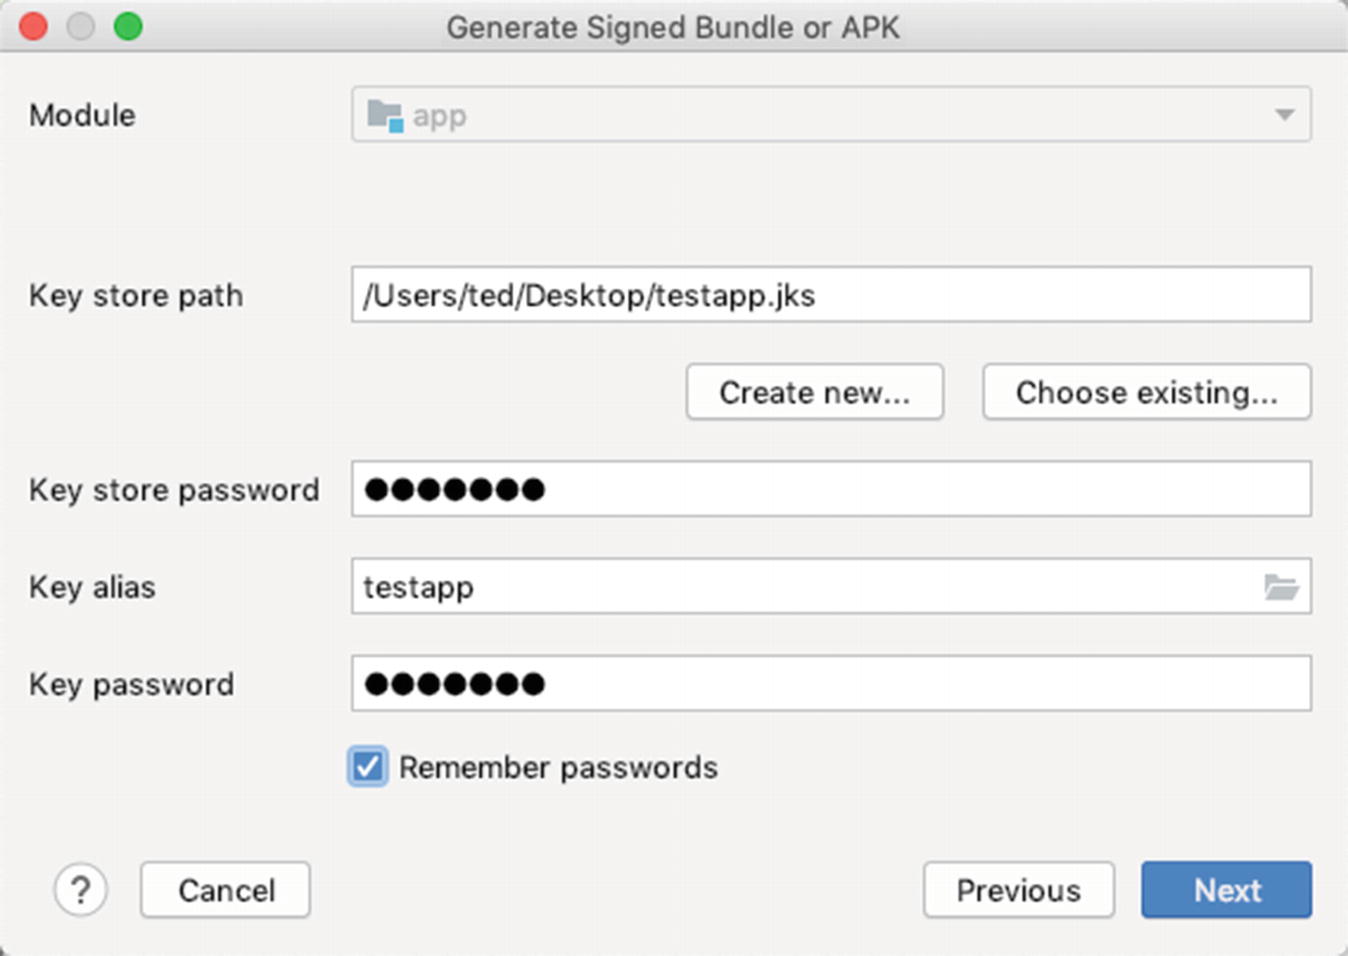
Generate Signed Bundle or APK, populated
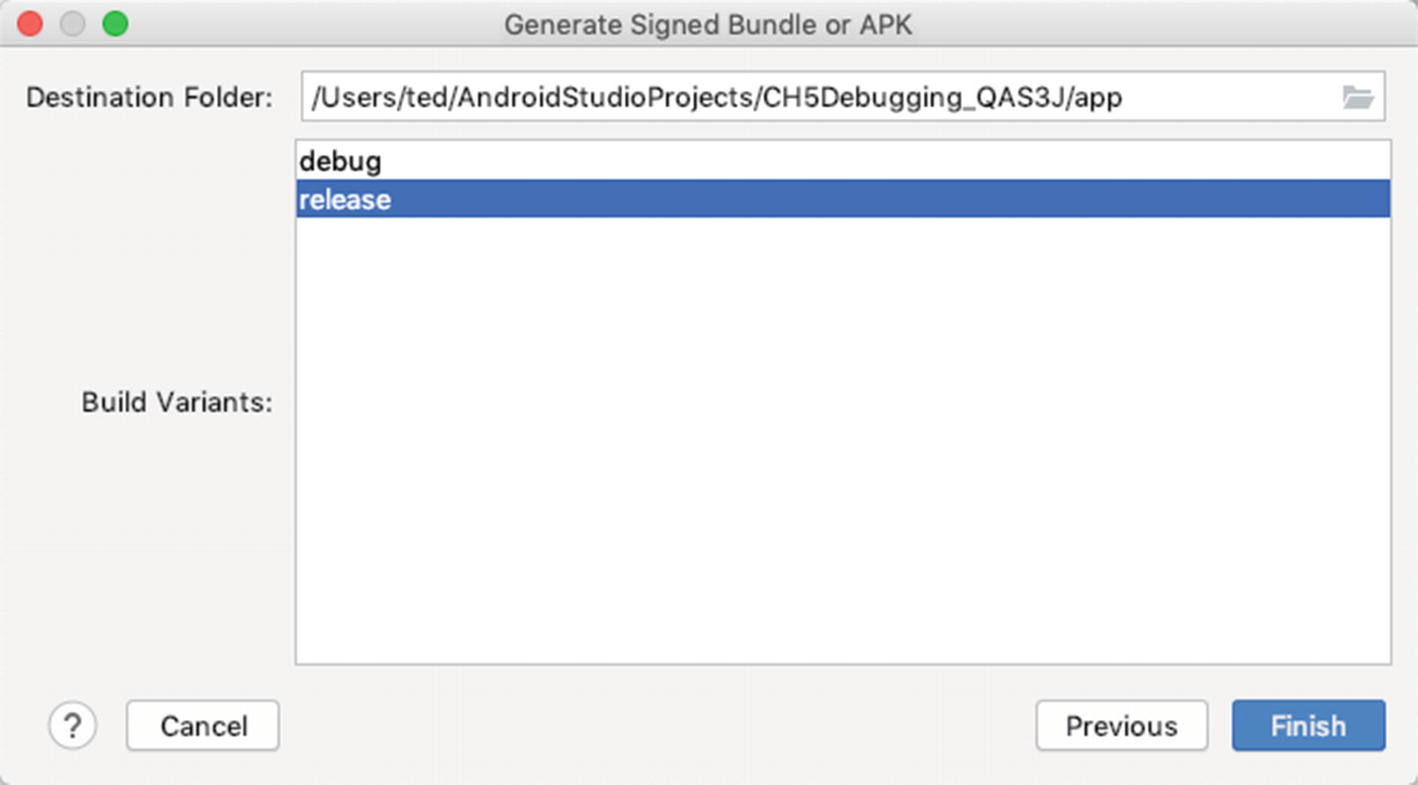
Signed APK, APK destination folder
You need to remember the location of the “Destination Folder,” as shown in Figure 17-5. This is where Android Studio will store the signed bundle. Also, make sure that the Build type is set to “release.”
When you click Finish, Android Studio will generate the signed bundle for your app. This is the file that you will submit to Google Play.
Releasing the App
- 1.
You already have a Google account (Gmail).
- 2.
You’re using Google Chrome to go to https://developer.android.com.
- 3.
Your Google account is logged on to Chrome.
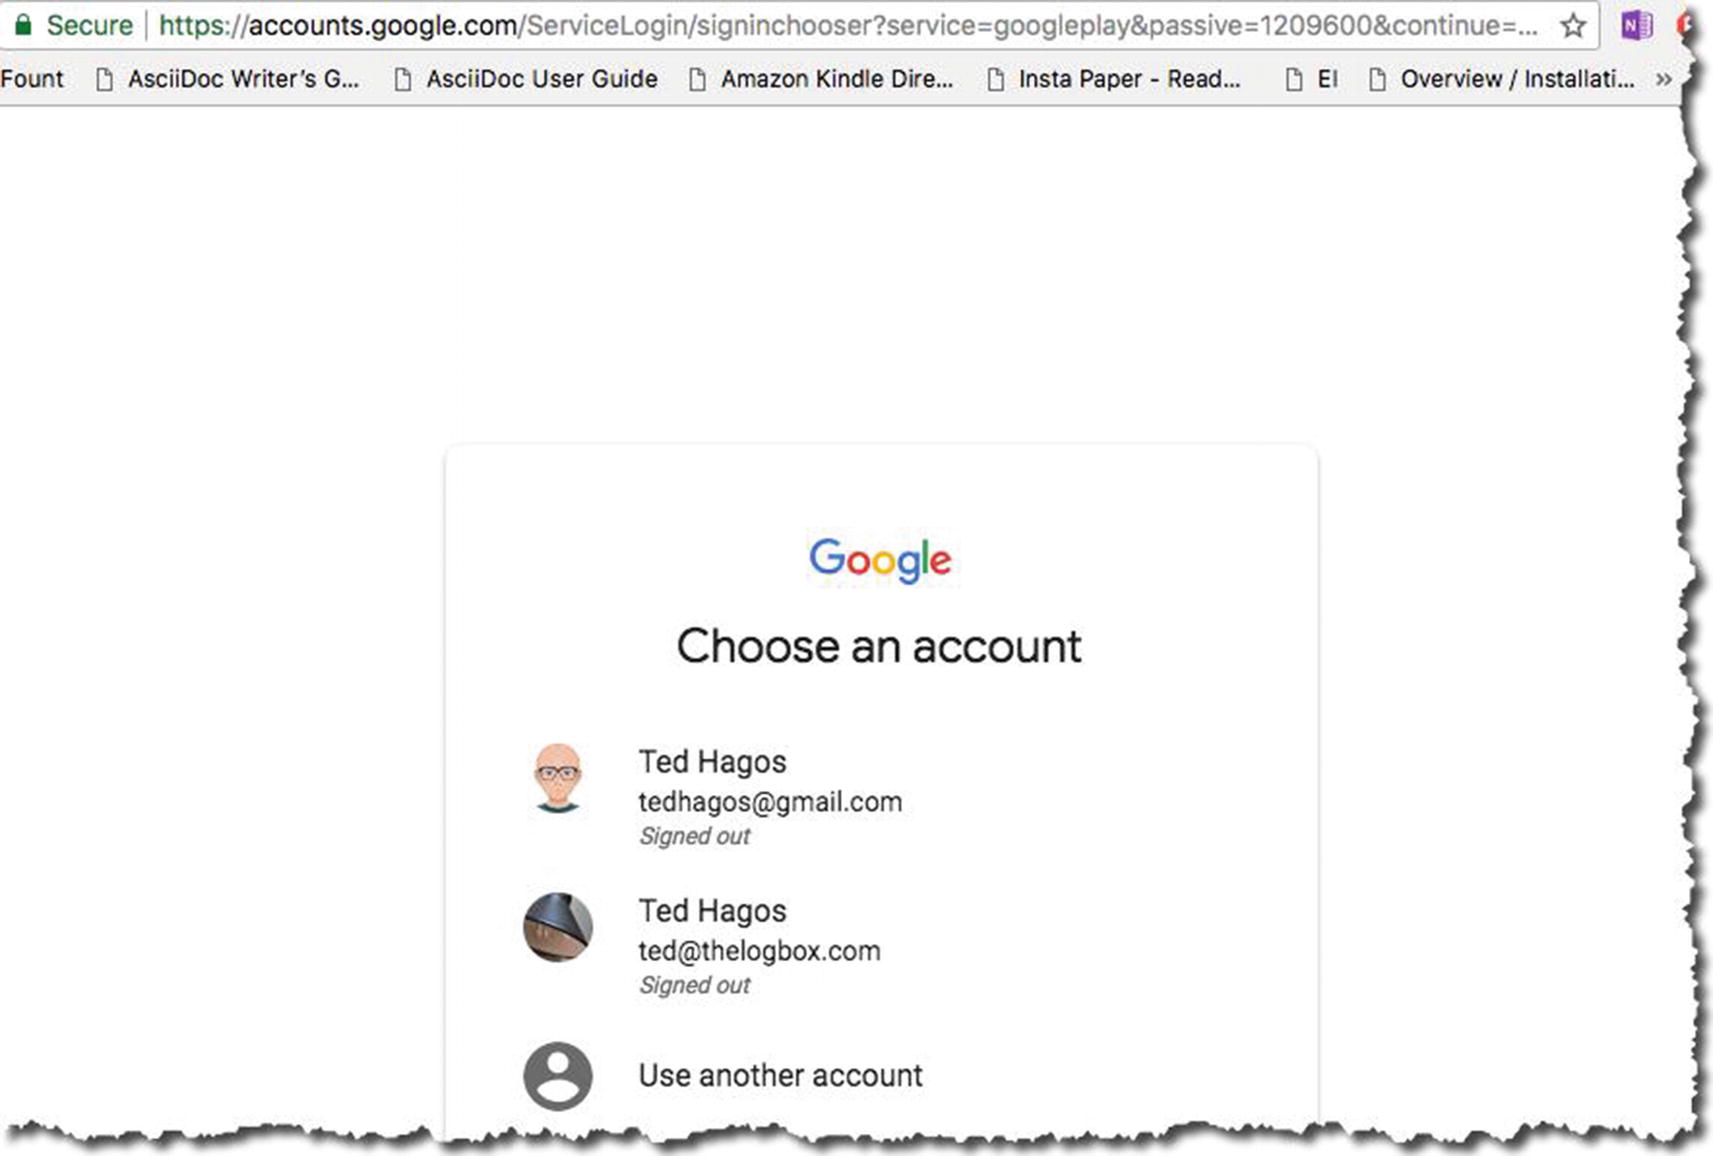
Choose an account

Android Developers website
Click Google Play, as shown in Figure 17-7.

Launch Play Console
- 1.
Sign in with your Google account.
- 2.
Accept the developer agreement.
- 3.
Pay the registration fee.
- 4.
Complete your account details.

Google Play Console, sign up
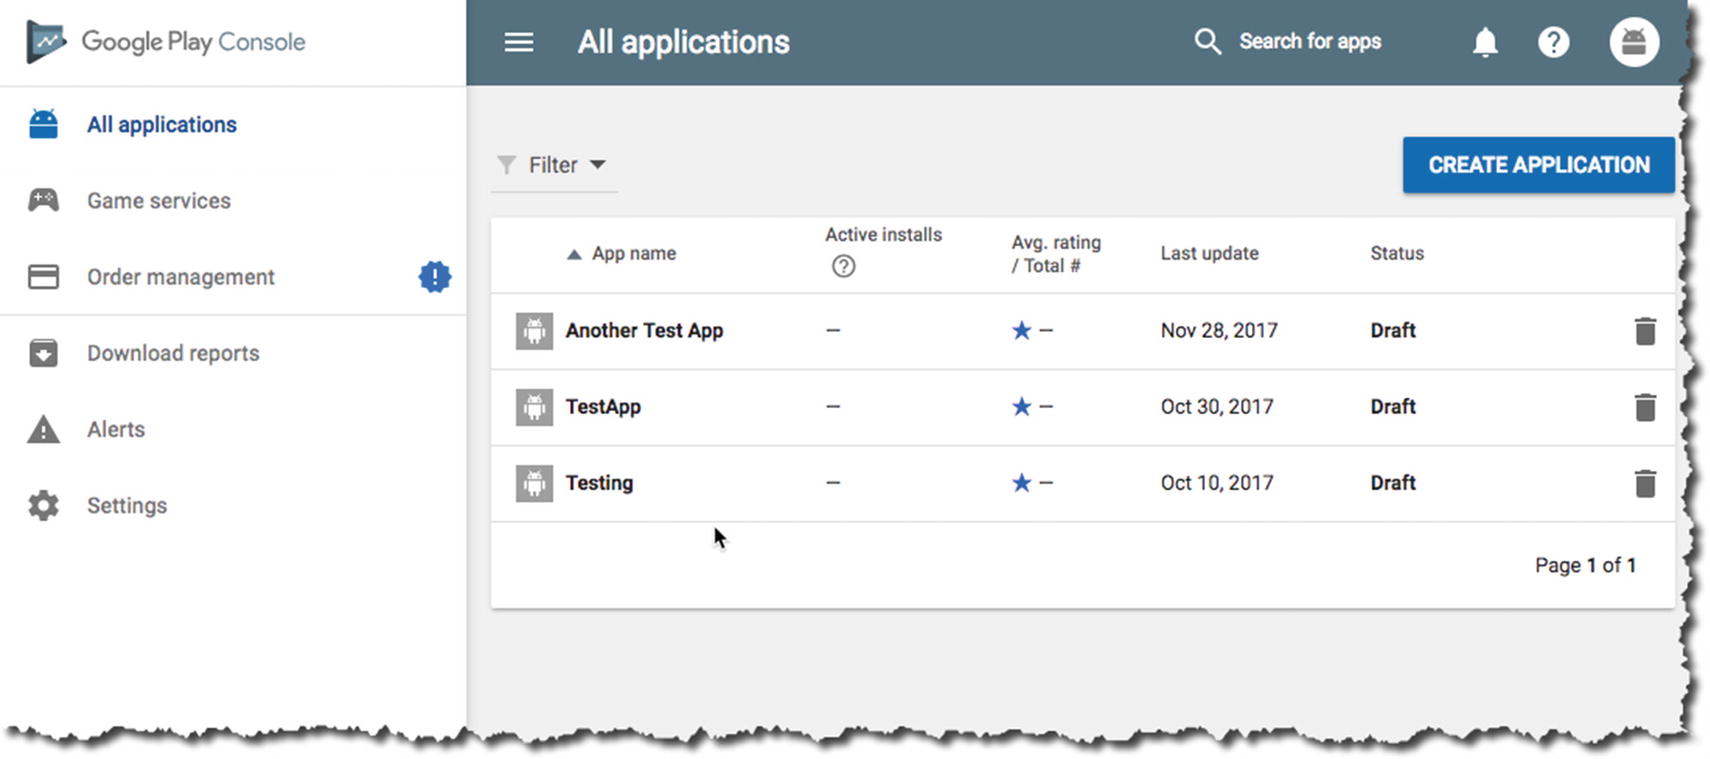
Google Play Console
This is where you can start the process of submitting your app to the store. Click the “Create Application” button to get started.
Summary
Before the users can experience your app, they will see the icons and other graphical assets first—make sure the graphical assets are just as polished as your code.
Strip your code of all debug info and log statements before you build a release.
Code review your own work. If you have buddies or other people who can review the code with you, that’s much better. If your app uses servers, RESTful URLs, and so on, make sure they are production ready and not sandboxes.
Before you can upload your app to Google Play, you need to sign your app with a proper certificate.
You’ll need a Google Play account if you want to sell your apps on Google Play. I paid a one-time fee of 25 USD, but that was a couple of years ago.
Don’t forget to test your app on a real device.