
Introduction to BroadcastReceivers
Custom and system broadcasts
Manifest and Context registered receivers
Android’s application model is unique in many ways, but what makes it stand out is how it lets you build an app using the functionalities of other apps that you didn’t make yourself—I don’t mean just libraries, I mean full apps. In Chapter 8, we learned how to use Intents to activate Activities. In this chapter, we will learn how to send and receive broadcast messages using Intents.
A broadcast is an Intent that is sent either by the Android Runtime or other apps (your apps included) so that every application or component can hear it. Most applications will ignore the broadcast, but you can make your app listen to it. You can tune in to the message so you can respond to the broadcast. That is the topic of this chapter.
Introduction to BroadcastReceivers
Android apps can send or receive broadcast messages from the Android system and other apps (including ours). These broadcasts are sent when something interesting happens, for example, when the system boots up, when the device starts charging, when a file has finished downloading. This type of messaging model is called a publish-subscribe pattern; in this pattern, senders of messages (called publishers) do not target specific receivers (called subscribers), but instead categorize messages into classes without knowledge of which subscribers may be listening (if there are any at all). Similarly, subscribers express interest in one or more classes of messages by registering to listen to them without the publishers’ knowledge.
System Broadcast vs. Custom Broadcast
android.app.action.ACTION_PASSWORD_CHANGED
android.app.action.ACTION_PASSWORD_EXPIRING
android.bluetooth.a2dp.profile.action.CONNECTION_STATE_CHANGED
android.bluetooth.a2dp.profile.action.PLAYING_STATE_CHANGED
android.bluetooth.adapter.action.CONNECTION_STATE_CHANGED
android.intent.action.BATTERY_CHANGED
android.intent.action.BATTERY_LOW
android.intent.action.BATTERY_OKAY
There are about 150+ of these listed on the documentation. You can find them on the BROADCAST_ACTIONS.TXT file in the Android SDK.
A custom broadcast , on the other hand, is something you make up. These are intents that you send to notify some of your app’s components (or other apps that are tuned in) that something “interesting” happened, for example, a file has finished downloading, or you’ve finished calculating prime numbers, and so on.
Two Ways to Register for Broadcast
If you want to follow the coding examples, you need to create a project (with an empty Activity).
To respond to broadcast, you need to listen to it, and to do that, you need to register a receiver. A receiver is a class that extends the BroadcastReceiver class; you need to add a class like this in your app to respond to a broadcast message.
There are two ways to register: via the manifest or the Context.
- 1.
Add the <receiver> element in the application’s AndroidManifest file; Listing 15-1 shows an annotated manifest file.
- 2.
Add a class (that extends the BrodcastReceiver class) to the project, then override the onReceive() method. Listing 15-2 shows a sample BroadcastReceiver class that logs and displays the contents of the broadcast. You can add a BroadcastReceiver class in either one of two ways; you can right-click the project’s package name (in the Project tool window), then choose New ➤ Java Class, as shown in Figure 15-1, and then add the necessary code to subclass BroadcastReceiver. Alternatively, you can right-click the application’s package name, then choose New ➤ Other ➤ BroadcastReceiver. Whichever method you choose to add the BroadcastReceiver class, just make sure the class name is MyReceiver, if you want to follow the code examples in Listings 15-1 and 15-2.

Create a new Java class
Manifest registration
❶ | Just like an Activity, a BroadcastReceiver needs to be declared in the manifest. You have to declare it in its node. Like an Activity declaration, it needs to be a child node of the application. |
❷ | “.MyReceiver” is the name of the BroadcastReceiver class. Presumably, there is a class in your app named MyReceiver, and it inherits BroadcastReceiver. We simply write it as “.MyReceiver” just like the Activity above it (“.MainActivity”). The complete form is actually net.workingdev.ch15_broadcast.MyReceiver, but we can use the short form because the package name is already declared earlier; look at the second line of the manifest, and you’ll find the complete name of the package. Any subsequent classes that need to be declared in the manifest can simply use the short form, like “.MyReceiver” or “.MainActivity”. |
❸ | The intent-filter is how we register. We’re telling Android that we’re interested in the events android.intent.action.BOOT_COMPLETED and android.intent.action.INPUT_METHOD_CHANGED. In case those Intents are broadcasted, our app would like to respond to it. |
BroadcastReceiver class
❶ | Extend the BroadcastReceiver class. This class’ name has to be consistent with the android:name attribute in the <receiver> node of the manifest file in Listing 15-1. |
❷ | Override the onReceive() method and implement your program logic in response to the broadcast message. In our case, we’re only displaying a Toast message. |
When you declare a BroadcastReceiver in the manifest file, the runtime will launch your app (if it isn’t already running when the broadcast is sent).
When a user installs this app on a device, Android’s package manager will register this app. The receiver then becomes a separate entry point into your app, which means the runtime can start the app and deliver the broadcast if your app isn’t currently running.
The system creates a new BroadcastReceiver component object to handle each broadcast that it receives. This object is valid only for the duration of the call to onReceive(). Once your code returns from this method, the system considers the component no longer active.
Now that we’ve seen how to register a BroadcastReceiver via the manifest, let’s see how to register a BroadcastReceiver via the Context. Context registration means registering programmatically—using either the Activity context or the Application context.
MyReceiver class
MyReceiver is very simple; it will display a “Got it” Toast message in response to a broadcast.
We’re making it a member variable because we need to refer to it from a couple of Activity lifecycle callbacks.
We want to listen to broadcast messages only while the Activity is alive. When the Activity isn’t visible to the user, we don’t want to receive the messages. We will put the registration code inside the onResume() method of MainActivity; this method is called when the Activity is visible to the user. We will put the code to unregister the receiver inside the onPause() method of MainActivity because this method is called when the user is navigating away from the MainActivity.
MainActivity
❶ | Let’s create an instance of the MyReceiver class. We’re setting it to null because we won’t instantiate here just yet. |
❷ | We create an instance of the MyReceiver class inside the onCreate() method. |
❸ | This statement is the programmatic equivalent of the <intent-filter> node we’ve seen earlier in Listing 15-1. To create an IntentFilter object, pass a broadcast action to its constructor. The broadcast action is the event you’d like to subscribe to. In this case, we’d like to be notified when the Intent whose action is com.workingdev.SOMETHINGHAPPENED is sent out; this Intent is an example of custom broadcast, not a system broadcast. As I mentioned previously, a custom broadcast action is just something you make up. As you can see in this example, the broadcast action is just a String object. |
❹ | Use the registerReceiver() method of the Activity to register the receiver. The method takes two arguments: 1. An instance of BroadcastReceiver 2. An instance of an IntentFilter |
❺ | Let’s call the unregisterReceiver() inside the onPause() callback. We don’t want to receive broadcast messages when MainActivity isn’t visible to the user. |
- 1.
Run our app in an emulator
- 2.
Send the custom broadcast message com.workingdev.SOMETHINGHAPPENED
You can put the two statements inside the click handler of a Button in an Activity class. You can put it inside the MainActivity of the current project or create a separate project for it altogether.
Secondly, we can send the custom broadcast message via the Android Debug Bridge or adb for short. It’s a command-line tool that allows you to communicate with a device (physical or emulated). The adb can do quite a range of things like installing/uninstalling APKs, displaying logs, running Linux commands on the device, simulating phone calls, and many more. For our purpose, we’ll use the adb to send a broadcast Intent. You can find the adb program inside the platform-tools folder of the Android SDK. If you’ve forgotten where your Android SDK is located, go to Android Studio’s Settings (Windows or Linux) or Android Studio’s Preferences (macOS). You can do that by pressing the keys Ctrl + Alt + S, for Windows and Linux, or Command +, (comma) for macOS; alternatively, you can also get to them using the main menu bar.
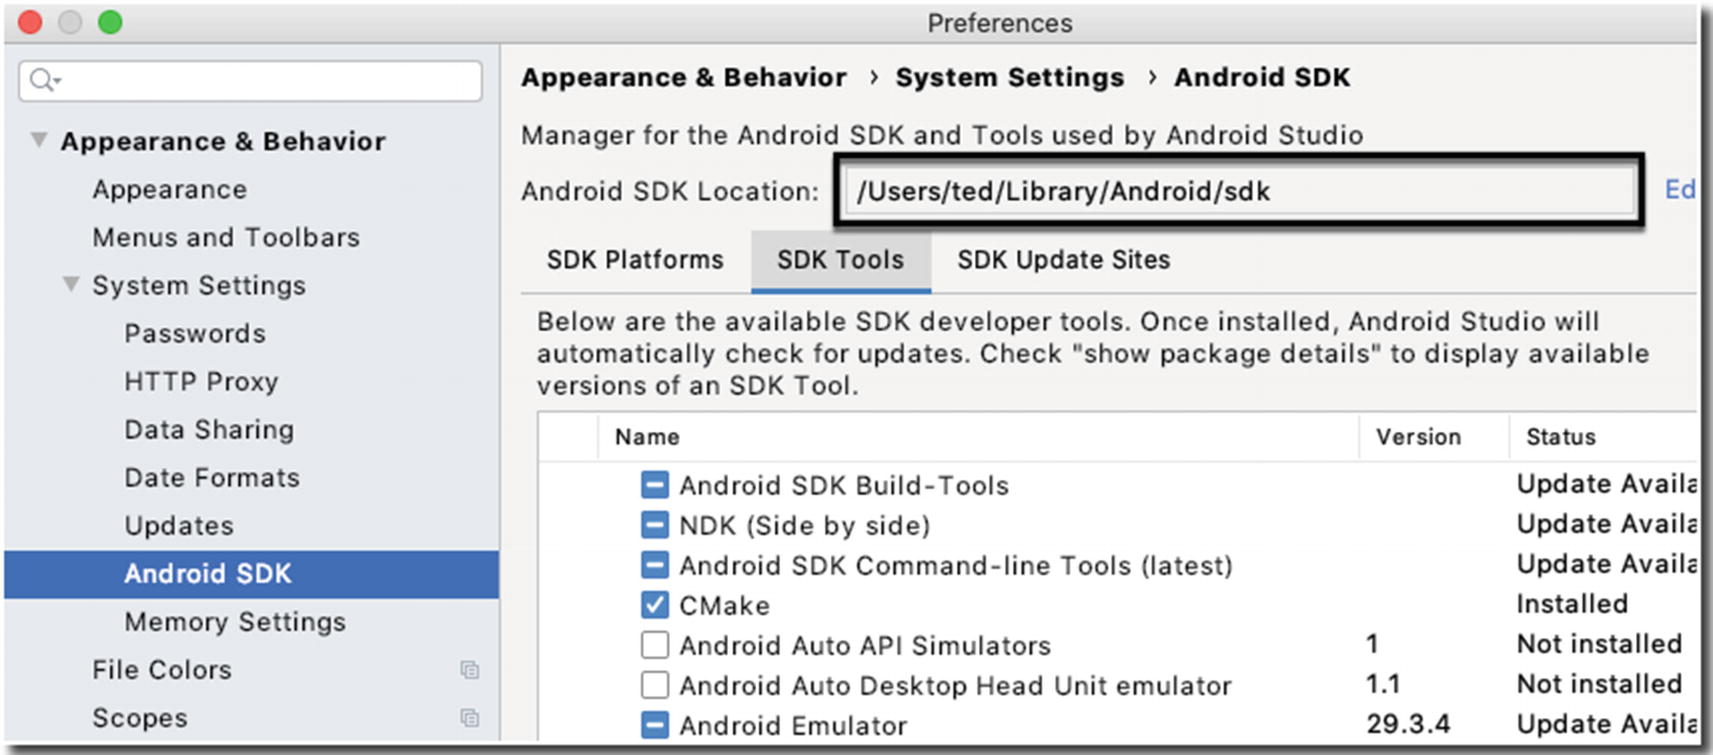
Location of the Android SDK
Summary
You can use BroadcastReceivers and Intents to create truly decoupled apps.
You can make your app listen to a specific broadcast and do something interesting when the broadcast is sent.
BroadcastReceivers can be used to route program logic in your app. You can make the app behave in specific ways as a response to the changes in the runtime environment, for example, low battery, no WiFi connection.
BroadcastReceivers can be registered via the manifest or via a Context object.