
Review of navigation techniques in Android
Navigation components from Jetpack
Navigation Before Architecture Components
How to launch an Activity
How to pass data to another Activity
It’s simple to do; just call the startActivity() method from any Activity.
The currently running Activity can be closed programmatically by calling the finish() method. The user can also close the Activity by pressing the back button.
The back stack is completely managed by the Android Runtime; see Figure 10-1.
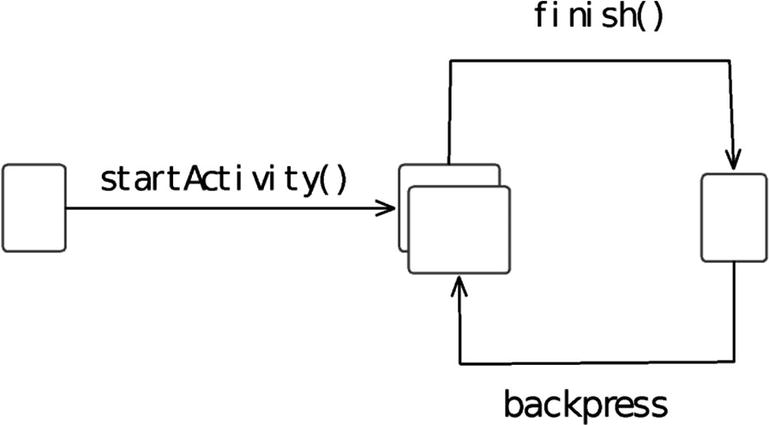
Simple activity workflow
We don’t have a clear idea which Activities are on the back stack—because we don’t manage it; here is an example of a trait being both an advantage and disadvantage at the same time.
Each screen requires a new Activity, which drains computing resources.
Each Activity was declared on the Android manifest file—which Android Studio does for you automatically each time you create an Activity using the wizards, so it’s not much of an issue; it was an issue before Android Studio came along.
It will be difficult for you to use the more modern navigation patterns like bottom navigation bar.
Because of these limitations, another way of screen navigation emerged. Sometime in 2011 when Google released Android 4.0, we got Fragments. We just dealt with Fragments in the previous chapter, so I’m sure it’s still very fresh for you; an Activity is basically a composition unit for the UI, and the Fragment is just a smaller composition unit.
A Fragment, like an Activity, is comprised of two parts—a Java or Kotlin program and a layout file. The idea is basically the same—define the UI in an XML file and then inflate the XML file during runtime so that all the UI in the XML file become actual Java objects.
Fragment snippet
With Fragments, we know exactly what’s in the navigation stack, unlike when we’re using Activity navigation; but, as you can see in Listing 10-3, it can get cumbersome because we must manually manage the navigation stack.
Thus far, we only had two options for navigation: either we use Activity-based navigation, which was easy and simple to use but we take some performance penalty and we don’t have control over the navigation stack, or we use Fragments which offered us full control of the navigation stack, but the API is cumbersome and prone to error.
Navigation component snippet
Navigation Components
Alright, that single line of code reference from the previous section probably got you excited—and relieved. But it’s not the savings of keystrokes that’s the big picture here, it’s the fact that now we can get the best of both Activity-based and Fragment-based navigation. Now, Fragment navigation also has an easy API.
But first, we need to understand a bit about Navigation components. It’s a small part of Architecture components, which is in turn a part of a bigger thing called Android Jetpack—we’re not getting into Jetpack nor Architecture components in detail here; they are large topics, but a brief background can’t hurt.
At Google I/O 2017, Google introduces the Android Architecture components. These libraries are part of a larger collection called Android Jetpack. Together with Architecture components, there were others like Foundation, Behavior, and UI.
Jetpack is a collection of Android software components. It helps us follow the best practices and lets us avoid writing too much boilerplate code. You’ll find the Jetpack codes in the androidx.* package libraries.
Here’s a brief description of the Jetpack components:
AppCompat—Lets you write code that degrade gracefully on older versions of Android
Android KTX—So you write more concise, idiomatic Kotlin code, if you’re using Kotlin
Multidex—Provides support for apps with multiple DEX files
Test—A testing framework for unit and runtime UI tests
Download manager—Lets you write programs that schedule and manage large downloads
Media and playback—Backward-compatible APIs for media playback and routing
Notifications—Provide a backward-compatible notification API with support for wear and auto
Permissions—Compatibility APIs for checking and requesting app permissions
Preferences—Create interactive settings screens
Sharing—Provides a share action suitable for an app’s action bar
Slices—Create flexible UI elements that can display app data outside the app
Animations and transitions—Move widgets and transition between screens.
Auto—If you’re working on apps that will run in vehicles’ infotainment consoles, you’ll need this. These are the components that help you build apps for Android Auto.
Emoji—Enables an up-to-date emoji font on older platforms.
Fragment—All the Fragment codes already moved here.
Layout—Layout widgets using different algorithms.
Palette—Pulls useful information out of color palettes.
TV—Components to help develop apps for Android TV.
Wear OS by Google—If you want to work with Android wearables like the watch, this is what you need.
Data binding—Declaratively binds observable data to UI elements.
Lifecycles—Manage Activity and Fragment lifecycles.
LiveData—Notify views when underlying database changes.
Paging—Gradually load information on demand from your data source; think when the user is scrolling through a list, this helps you handle the loading of data. It’s coupled with the Recycler view.
ViewModel—Manages UI-related data in a lifecycle-conscious way.
WorkManager—Manages background jobs.
Navigation—Implementation of navigation in an app. Passes data between screens. Provides deep links from outside the app.
Room—Think ORM for your SQLite database.
There’s a lot to explore in Jetpack, so make sure you check them out.
Going back to our topic, the Navigation components simplify the implementation of, well, navigation between destinations in an app. A destination is any place in your app. It could be an Activity, a fragment inside an Activity, or a custom view; and destinations are managed using a navigation graph.
A navigation graph groups all the destinations and defines the different connections between the destinations; these connections are called actions. The graph is simply an XML resource file which represents all your app’s navigation paths. You can have more than one navigation graph in your app.
Working with Jetpack Navigation

New empty project

build.gradle file (module level)
Add navigation to build.gradle
At the time of writing, the stable release of Navigation components is 2.2.2; there was also a beta release 2.3.0-beta01. By the time you read this, the version may have moved. Make sure to check the official Android Developers website for more up-to-date information: https://developer.android.com/jetpack/androidx/releases/navigation.

Add a new resource file
Filename—nav_graph
Resource type—Navigation (you must click the down arrow to select it)
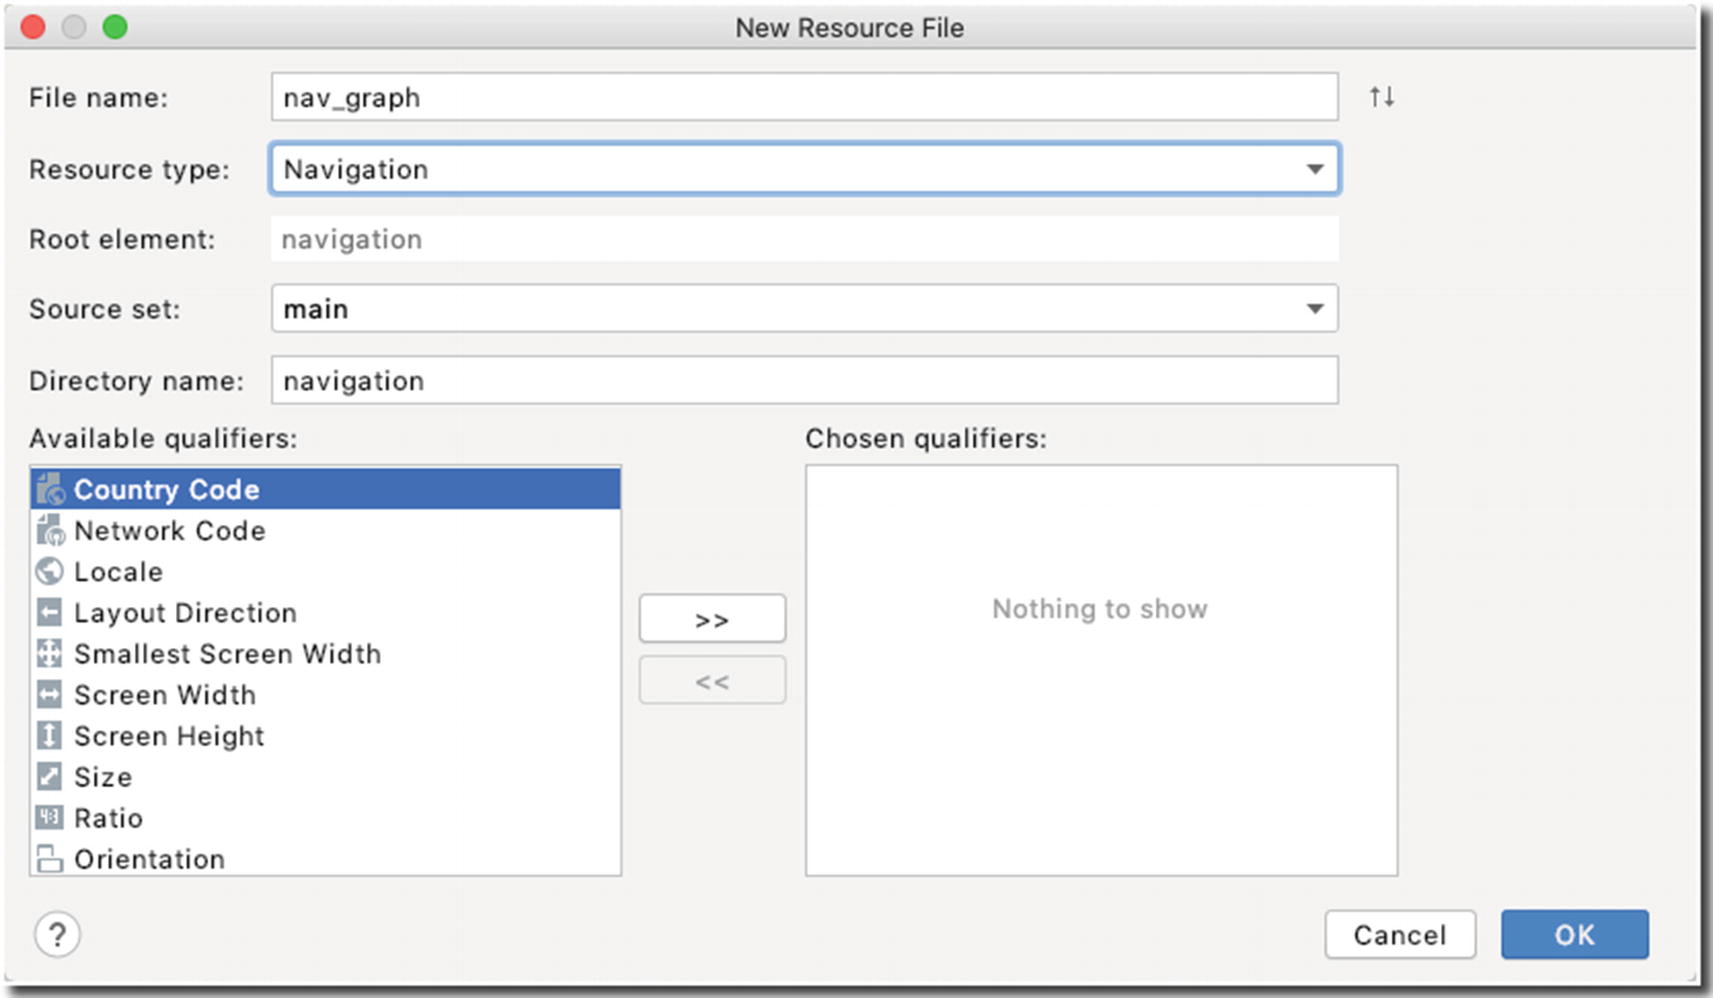
New Resource File
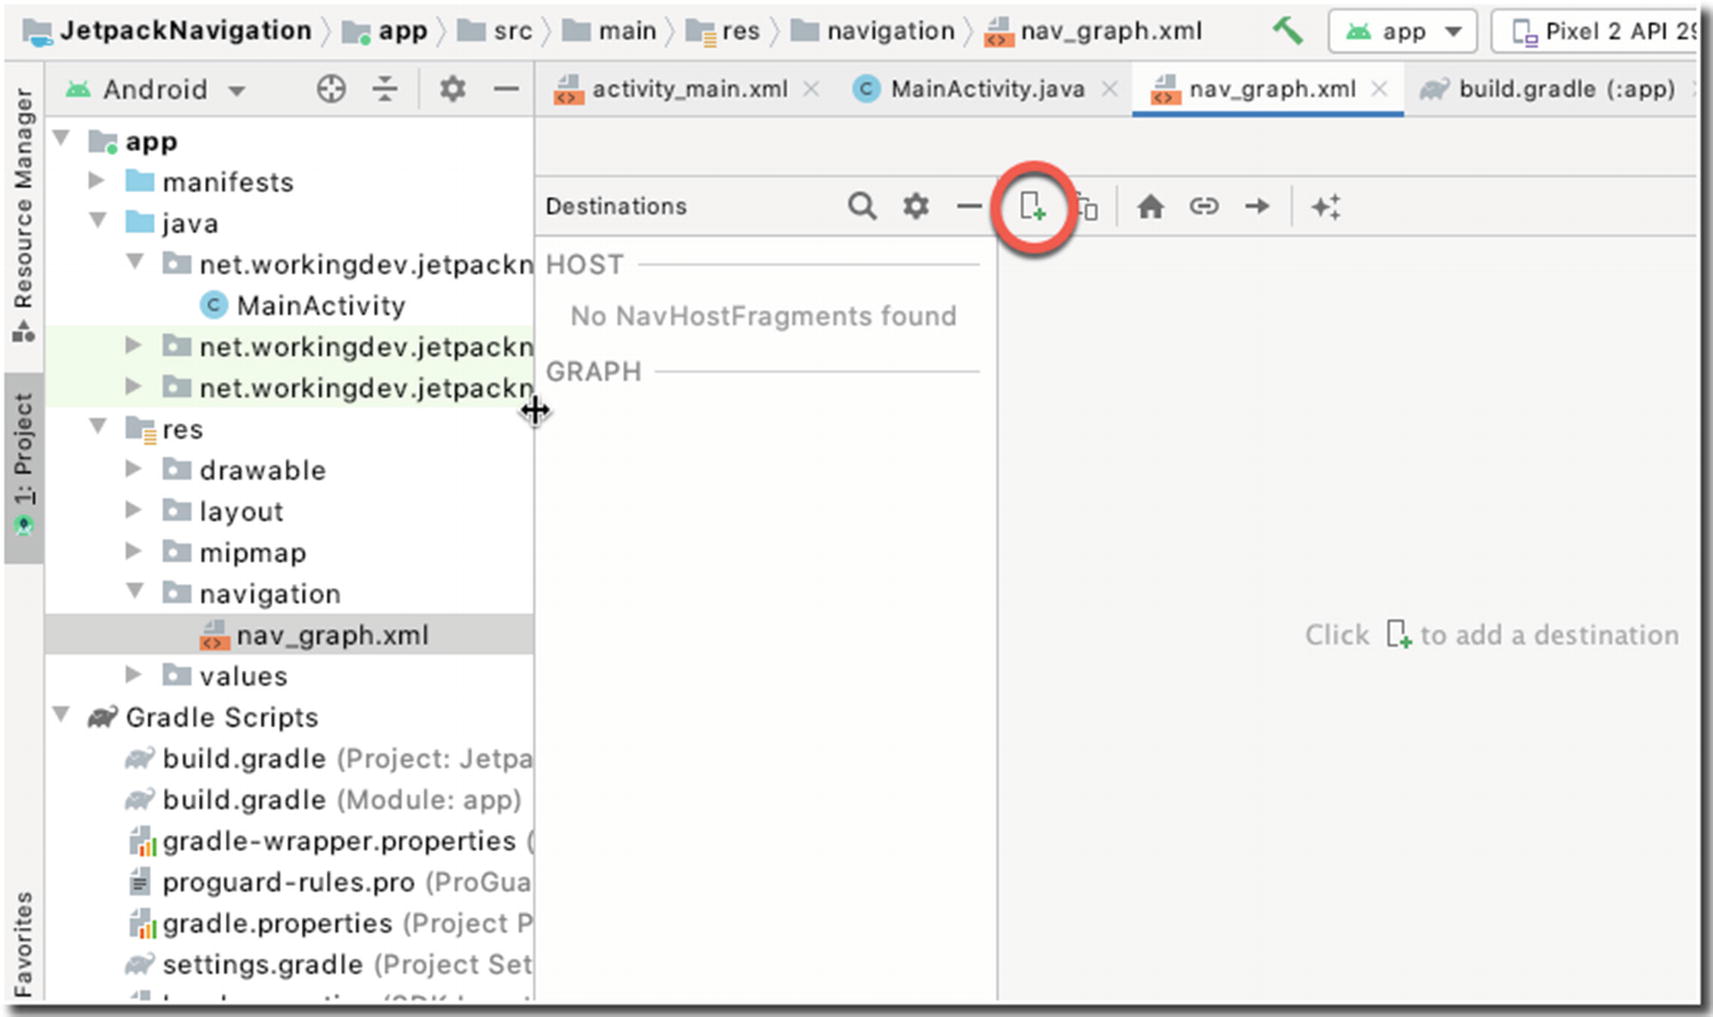
Navigation graph

Create a new destination

New Android Fragment
Fragment Name—One
Fragment Layout Name—fragment_one
Keep the source language as Java

New Android Fragment, details

Navigation editor
Notice also there are two new Java classes (One.java and Two.java) and two new layout files (fragment_one.xml and fragment_two.xml). These files were generated when we created destinations One and Two. Notice in Figure 10-10 that fragment one has the home icon beside it. This is only because we created it first. The home destination or start destination is the first screen that your users will see. You can change the start destination any time by right-clicking any destination and then clicking “Set as start destination”; but for now, we’ll keep one as the start destination.
Our navigation graph doesn’t have a NavHost yet; it needs one. A NavHost acts like a viewport for all our destinations. It’s an empty container where destinations are swapped in and out as the user navigates through the app. The NavHost needs to be in an Activity. We’re going to put the NavHost in our MainActivity.
Defining a NavHost in activity_main.xml
❶ | It needs an id, just like any other element in the resource file. I just chose nav_container for this one. You can name what you like. |
❷ | This is the fully qualified name of the NavHostFragment class. This belongs to the Navigation component, and this will be responsible for making our MainActivity the viewport for all our defined destinations. |
❸ | The app:navGraph attribute tells the runtime which navigation graph we want to host in the MainActivity. Remember that you can have more than one navigation graph in the app; nav_graph is the name we gave to the navigation graph XML resource earlier. |
❹ | When you set the defaultNavHost to true, this makes sure that the NavHostFragment intercepts the system back button; that way, when the user clicks the back button, Android will show you the previous screen in your app, and not an external app’s screen which happened to be on the back stack. |
Now it’s time to connect our two destinations. Open the navigation graph again—it’s on res/navigation/nav_graph.

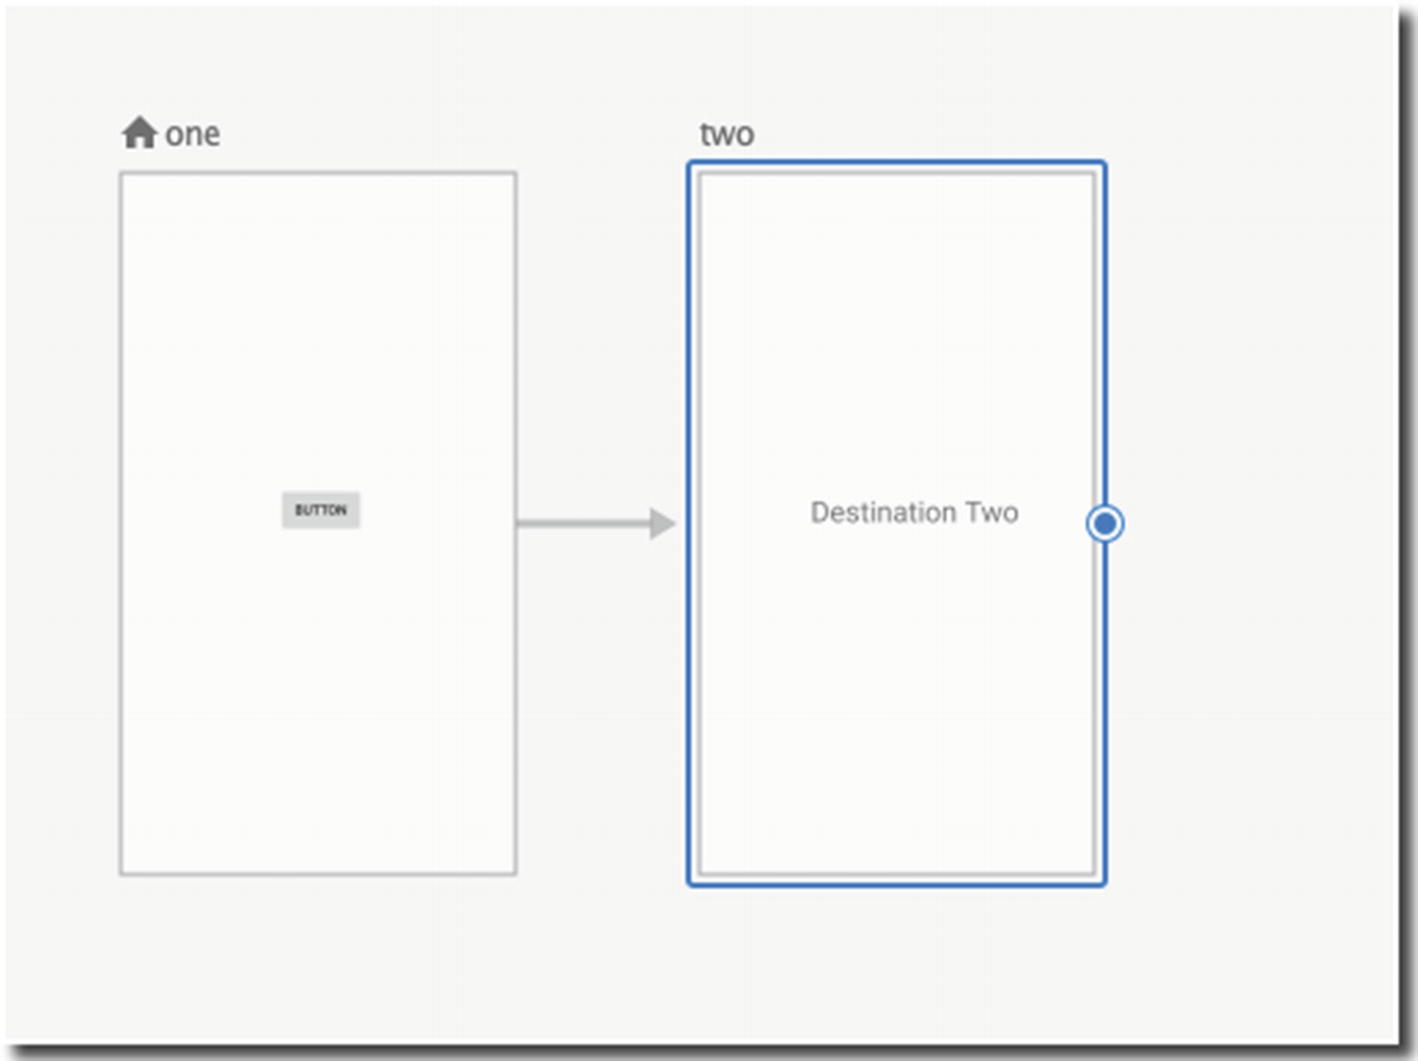
Connect one to two
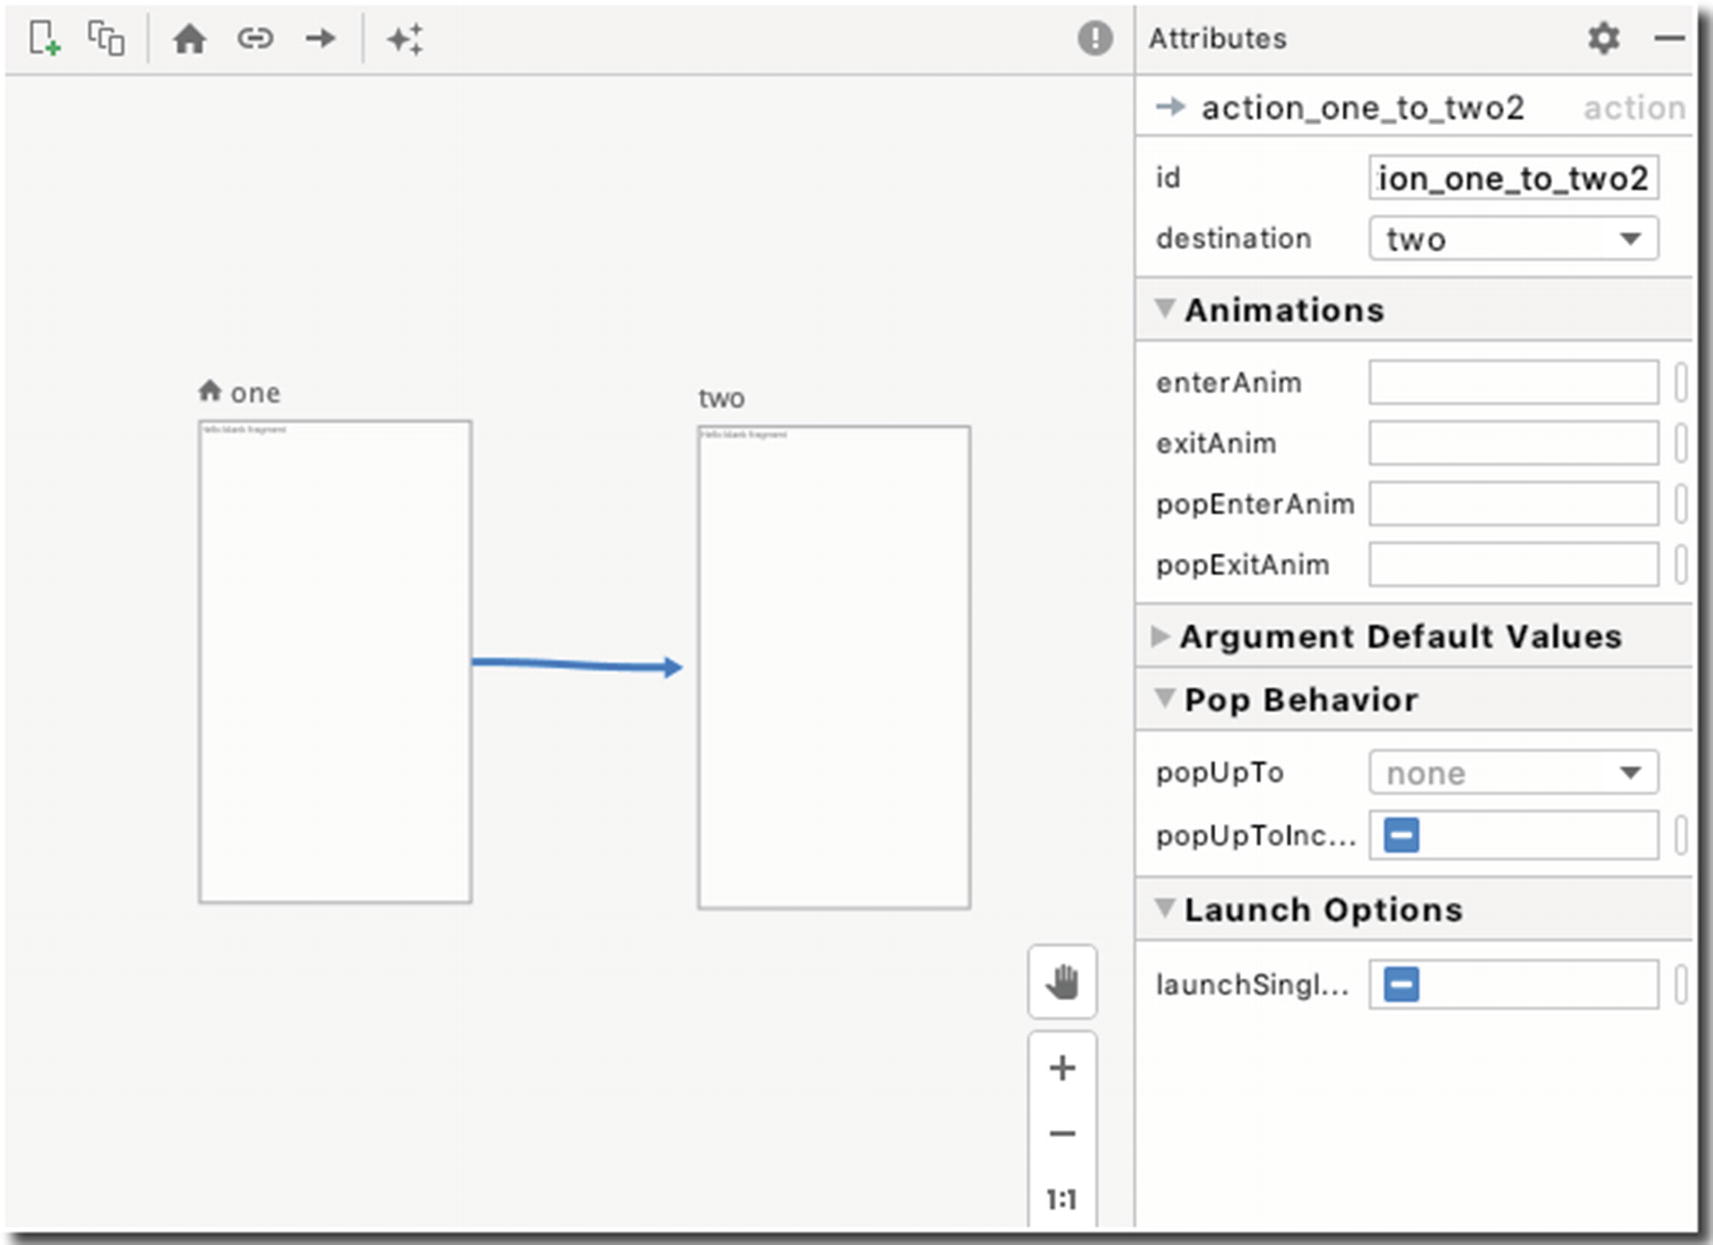
Navigation graph
To test this small app, I needed an object in the start destination that will trigger an action, like a Button (shown in Figure 10-13). I modified the layout of the two fragments as follows:
Changed the layout to ConstraintLayout, just because it’s easier to work with this kind of layout. Use the layout that’s appropriate for you.
I removed the TextView and replaced it with a button and centered it.
Like fragment_one, I also changed the layout to ConstraintLayout.
I changed the text of the TextView and centered it.
Modified Fragments
Next, we’ll add a click handler to our button, then add the code that will make fragment_one navigate to fragment_two when the button is clicked.
Navigating to a destination is done using a NavController; it’s an object that manages app navigation within a NavHost. Each NavHost has its own corresponding NavController.
A NavController lets you navigate to destinations in two ways: (1) navigate to a destination using an ID, which is what we will use here, and (2) navigate using a URI—which I will leave it up to you to explore.
Class One.onCreateView()
The most important line of code in Listing 10-7 is the navigate() method of the NavController object. We simply passed the ID of the action we created in the navigation graph as a parameter to navigate(), and that already did the trick. You can now launch the emulator and test the app.
This chapter merely scratched the surface of Navigation components; there’s a lot to discover in this area, so make sure you check them out.
Summary
You can still use Activity-based or Fragment-based navigation in your app; just remember their pros and cons.
Navigation components combine the best features of Activity-based and Fragment-based navigation; the API is easy to work with, and we have more control on the back stack.
Navigation components introduce the concept of destinations. Destinations can be Fragments, Activities, or custom views; they are what your users will navigate to.
Destinations are grouped using a navigation graph; it’s an XML resource file that contains all the actions between destinations.
Destinations are connected to each other by actions.
- The basic ideas for navigation are to
- 1.
Create a navigation graph.
- 2.
Create destinations.
- 3.
Connect the destinations; each connection becomes an action.
- 4.
Navigate programmatically from one destination to another using the NavController object. You can navigate using an ID or a URI.
- 1.