
As we have done so much theory and preparation work in the previous two chapters we can quickly make some progress on this one. We already have our bare-bones game engine coded and ready to update, draw and track time down to the nearest millisecond.
Now we can add code to the Bat and the Ball classes. By the end of the chapter, we will have a moving ball and a player-moveable bat. Although we will need to wait until the next chapter before the ball bounces off the walls and the bat, we will also code the necessary methods in the Ball class so that this last step will be very easy to achieve.
In this chapter we are going to:
- Code the
Ballclass - Implement an instance of
Ballin the game engine - Code the
Batclass - Implement a
Batinstance in the game engine - Add movement controls to the
Bat
Let's start by adding our first object to the game to bring a ball to life.
Before we start hammering away at the keyboard, let's have a think about what the Ball class will need to be and do.
The ball will be drawn in the draw method of the PongGame class by the drawRect method of the Canvas class. The ball is square shaped like the original Pong game. Therefore, the ball is going to need the coordinates and size to represent a square.
Shortly we will see a new class from the Android API which can hold the coordinates of a rectangular ball, but we also need a way to describe how we arrive at and manipulate these coordinates.
For this, we will need variables to represent width and height. We will call them mBallWidth and mBallHeight. Furthermore, we will need variables to hold the target horizontal and vertical rate of travel in pixels. We will call them mXVelocity and mYVelocity respectively.
Perhaps surprisingly, these four variables will be of type float. Game objects are plotted on the screen using integer coordinates so why then do we use floating point values to determine position and movement?
To try and explain why we use float I will point out a few more things about the code that we will cover in more detail shortly. If we were take a sneak peek a few pages ahead (don't bother doing so) we will see that we will initialize the ball's speed as a fraction of the screen height. Using height instead of width is arbitrary, the point is that the ball's speed will be relative to the number of pixels the screen has. This means that a player's experience will be nearly the same on devices with different resolutions.
As an example, a few pages ahead, we will initialize mXVelocity to the height of the screen divided by three. As mXVelocity is a measurement in pixels per second the effect of this is that the ball will travel the width of the screen in 3 seconds. This is regardless of whether the player has a super-high-resolution tablet or an old-fashioned 600 by 400-pixel phone.
Note
Size matters
It is true that in some games we will also want to take account of the physical screen size and even the ratio between width and height. After all, some small devices are high resolution and some large tablets can be a lower resolution. We will do this as we work on the final project when we learn about the topic of viewports and cameras.
If we are updating the screen around 60 times per second, then the ball is going to need to change position by fractions of one pixel at a time. Therefore, all these variables are type float. Note that when we come to draw the ball the Canvas class's drawRect method can accept either integer or floating-point values and will translate them to integer pixel coordinates for us.
The game engine is responsible for drawing the ball and detecting whether the ball has bumped into something. Clearly, it is going to need to know where the ball is and how big it is. If you think back to Chapter 8: Object-Oriented Programming, we already know a solution for this. We can make all our variables private but provide access to them using getter methods.
Considering this further might at first reveal a problem. The game engine (PongGame class) needs to know not only the size but also the horizontal and vertical size. That's at least three variables. As we know, methods can only return one variable or object at a time and we don't really want to be calling three methods each time we want to draw the ball.
The solution is to package up the ball's position, height, and width in a single object. Meet the RectF class.
The RectF class is extremely useful and we will use it in all the remaining game projects in one way or another. It has four member variables that we are interested in.
They are bottom, left, right and top. Furthermore, they are public so if we have access to the RectF object we have access to the precise position and size of the ball.
What we will do is take the size and position of the ball and pack it all away in one RectF instance. Clearly, if we know the left coordinate and the width then we also know the right coordinate.
Exactly how we will make all this work is much better to show you than try and explain. At this point, we can go ahead and declare all the member variables of our Ball class.
Now that we have a good idea what all the variables will be used for, add the highlighted member variables as well as the new import statement.
import android.graphics.RectF;

class Ball {

    // These are the member variables (fields)
    // They all have the m prefix
    // They are all private
    // because direct access is not required
    private RectF mRect;
    private float mXVelocity;
    private float mYVelocity;
    private float mBallWidth;
    private float mBallHeight;
}
In the previous code we added an import statement, so we can use the RectF class and some float member variables to track the size and position of the ball. We have also declared an instance of RectF called mRect. In the interests of good encapsulation, all the member variables are private and are not visible/directly accessible from the PongGame class.
Let's initialize some of those variables while we code the Ball constructor.
This constructor is light on code and heavy on comments. Add the constructor to the Ball class and be sure to look at the comments too.
// This is the constructor method.
// It is called by the code:
// mBall = new Ball(mScreenX);
// in the PongGame class
Ball(int screenX){

   // Make the ball square and 1% of screen width
   // of the screen width
   mBallWidth = screenX / 100;
   mBallHeight = screenX / 100;

   // Initialize the RectF with 0, 0, 0, 0
   // We do it here because we only want to
   // do it once.
   // We will initialize the detail
   // at the start of each game
   mRect = new RectF();
}
The Ball constructor is named Ball as it is required. First, we initialize mBallWidth and mBallHeight to a fraction of the number of pixels in the screen width. Take a look at the signature of the Ball constructor and you can see that screenX is passed in as a parameter. Clearly, when we call the Ball constructor from PongView later in the chapter we will need to pass this value in.
Next, we use the default RectF constructor to initialize the mRect object. Using the default constructor sets its four variables (left, top, right and bottom) to zero.
As discussed previously, we need access to the position and size of the ball from the PongGame class. This short and simple method does just that. Add the code for the getRect method.
// Return a reference to mRect to PongGame
RectF getRect(){
   return mRect;
}
The getRect method has a return type of RectF and the single line of code within it is a return statement that sends back a reference to mRect which contains everything the game engine could ever want to know about the position and size of the ball. There is no access specifier which means it is default access and therefore accessible via an instance of the Ball object used within the same package. In short, from PongGame class we will be able to write code like this:
// Assuming we have a declared and initialized object of type Ball
mBall.getRect();
The previous line of code will retrieve a reference to mRect. PongGame will have access to all the position details of the ball. The previous line of code is just for discussion and not to be added to the project.
In this method, we will move the ball. The update method in the PongGame class will call this method once per frame. The Ball class will then do all the work of updating the mRect. The newly updated mRect object will then be available (via getRect) anytime PongGame needs it. Add the code for the update method and then we will examine the code. Be sure to look at the method's signature and read the comments.
// Update the ball position.
// Called each frame/loop
void update(long fps){
   // Move the ball based upon the
   // horizontal (mXVelocity) and
   // vertical(mYVelocity) speed
   // and the current frame rate(fps)

   // Move the top left corner
   mRect.left = mRect.left + (mXVelocity / fps);
   mRect.top = mRect.top + (mYVelocity / fps);

   // Match up the bottom right corner
   // based on the size of the ball
   mRect.right = mRect.left + mBallWidth;
   mRect.bottom = mRect.top + mBallHeight;
}
The first thing to notice is that the method receives a long type parameter called fps. This will be the current frames per second based on how long the previous frame took to execute.
We saw in the previous chapter how we calculated this value, now we will see how we use it to smoothly animate the ball.
The first line of code that makes use of the fps variable is shown again next for convenience and clarity.
mRect.left = mRect.left + (mXVelocity / fps);
Now we haven't yet seen how we initially put a starting location into mRect. But if for now, we can assume that mRect holds the position of the ball, this previous line of code updates the left-hand coordinate (mRect.left).
It works by adding mXVelocity divided by fps onto mRect.left. If we say for example that the game is maintaining an exact 60 frames per second, then the variable contains the value 60. If the screen was 1920 pixels wide, then mXVelocity will hold the value 640 (1920/3 see the reset method). We can then divide 640 by 60 giving the answer 10.6. In conclusion, 10.6 will be added on to the value stored in mRect.left. We have successfully moved the left-hand edge of the ball.
The next line of code after the one we have just discussed does the same thing except it uses mRect.top and mYVeleocity. This moves the top edge of the ball.
Notice that we haven't moved the right-hand side or the bottom edge of the ball yet. The final two lines of code in the update method use the mBallWidth and mBallHeight variables added on to the newly calculated mRect.left and mRect.top values to calculate new values for mRect.right and mRect.top, respectively.
The ball is now in its new position.
Note that if the frame rate rises or falls the calculations will take care of making sure the ball still moves the exact same amount of pixels per second. Even significant variations like a halving of the frame rate will be virtually undetectable but if the frame rate were to drop very low then this would result in choppy and unsatisfying gameplay.
Also note that we take no account in this method for the direction the ball is traveling (left or right, up or down). It would appear from the code we have just written that the ball is always traveling in a positive direction (down and to the right). However, as we will see next we can manipulate the mXVelocity and mYVelocity variables at the appropriate time (during a bounce) to fix this problem. We will code these helper methods next and we will call them from PongGame when a bounce is detected.
These next two methods fix the problem we alluded to at the end of the previous section. When the PongGame class detects a collision on either the top or bottom of the screen it can simply call reverseYVelocity and the ball will begin heading in the opposite direction, the next time the update method is called. Similarly, reverseXVelocity switches direction in the horizontal when either the left or right sides are collided with.
Add the two new methods and we can look at them more closely.
// Reverse the vertical direction of travel
void reverseYVelocity(){
   mYVelocity = -mYVelocity;
}

// Reverse the horizontal direction of travel
void reverseXVelocity(){
   mXVelocity = -mXVelocity;
}
First, notice the methods are default access and therefore usable from the PongGame class. As an example, when reverseYVelocity is called the value of mYVelocity is set to -mYVelocity. This has the effect of switching the sign of the variable. If mYVelocity is currently positive it will turn negative and if it is negative it will turn positive. Then when the update method is next called the ball will begin heading in the opposite direction.
The reverse mXVelocity method does the same thing except it does it for the horizontal velocity (mXVelocity).
We want to be able to reposition the ball at the start of every game. This method does just that. Code the reset method and then we will go through the details.
void reset(int x, int y){

   // Initialise the four points of
   // the rectangle which defines the ball
   mRect.left = x / 2;
   mRect.top = 0;
   mRect.right = x / 2 + mBallWidth;
   mRect.bottom = mBallHeight;

   // How fast will the ball travel
   // You could vary this to suit
   // You could even increase it as the game progresses
   // to make it harder
   mYVelocity = -(y / 3);
   mXVelocity = (y / 3);
}
Take a look at the method signature first of all. The int variables x and y are passed in from the PongGame class and will hold the horizontal and vertical resolution of the screen. We can now use these values to position the ball. The first four lines of code in the reset method configure the left and top of the ball to x / 2 and 0 respectively. The third and fourth lines of code position the right and bottom of the ball according to its size. This has the effect of placing the ball almost dead-center horizontally and at the top of the screen.
The final two lines of code set/reset the speed (mYVelocity and mXVelocity) of the ball to -(y / 3) and (y / 3) causing the ball to head down and to the right. The reason we need to do this for each new game is that we will be slightly increasing the speed of the ball on each hit with the bat. This makes the game get harder as the player's score increases. We will code this getting harder/progression method now.
The next method we will code will add some progression to the game. The ball starts off slowly and a competent player will have no trouble at all bouncing the ball back and forth for a long time. The increaseVelocity method makes the ball go a little bit faster. We will see where and when we call this in the next chapter. Add the code now so it is ready for use.
void increaseVelocity(){
   // increase the speed by 10%
   mXVelocity = mXVelocity * 1.1f;
   mYVelocity = mYVelocity * 1.1f;
}
The previous method simply multiplies the values stored in our two velocity variables by 1.1f. This has the effect of increasing the speed by 10%.
When the ball hits the walls then we will simply reverse the horizontal or vertical velocity of the ball. This is good enough. However, when the ball hits the bat it should bounce off relative to whereabouts on the bat it collided. Even a beginner's game tutorial should provide a little detail like this. This next method will be called by the PongGame class when the ball collides with the bat. Study the code including the method signature and the comments. Add the code to your project and then we will go through it.
// Bounce the ball back based on
// whether it hits the left or right-hand side
void batBounce(RectF batPosition){

   // Detect centre of bat
   float batCenter = batPosition.left +
         (batPosition.width() / 2);

   // detect the centre of the ball
   float ballCenter = mRect.left +
         (mBallWidth / 2);

   // Where on the bat did the ball hit?
   float relativeIntersect = (batCenter - ballCenter);

   // Pick a bounce direction
   if(relativeIntersect < 0){
      // Go right
      mXVelocity = Math.abs(mXVelocity);
      // Math.abs is a static method that
      // strips any negative values from a value.
      // So -1 becomes 1 and 1 stays as 1
   }else{
      // Go left
      mXVelocity = -Math.abs(mXVelocity);
   }

   // Having calculated left or right for
   // horizontal direction simply reverse the
   // vertical direction to go back up
   // the screen
   reverseYVelocity();
}
The code determines whether the ball has hit the left or right side of the bat. If it hits the left the ball bounces off to the left and if it hits the right it goes right. It achieves this with the following steps:
- Detect the center of the bat and store it in the
batCentervariable - Detect the center of the ball and store it in
ballCentervariable - Now detect whether the ball hit on the left or the right:
- If the sum of
batCenter – ballCenteris negative it hit on the right - If the sum of batCenter – ballCenter is positive it hit on the left
- If the sum of
Therefore, the if-else block in the previous code tests whether relativeIntersect is less than zero and if it is, changes/keeps the mXVelocity variable as a positive value and the else block changes it to a negative value. The reason we couldn't simply change mXVelocity to 1 or -1 for right or left is that as the game proceeds we will be changing the speed of the ball to higher values than 1. The Math.abs method simply strips the negative but leaves the absolute value the same. This allows us to append a negative in the else part of the if-else block.
Note that the vertical velocity is simply reversed by calling the reverseYVelocity method we coded earlier.
Finally, we get to use the ball.
We already added the declarations in the previous chapter as well as declarations for the bat. We can get straight on with initializing and using the ball. As a reminder here is the line of code that declared the ball.
// The game objects
private Bat mBat;
private Ball mBall;
Therefore, our ball object is called mBall.
Add the initialization in the constructor as highlighted in the following code.
public PongGame(Context context, int x, int y) {
   // Super... calls the parent class
   // constructor of SurfaceView
   // provided by Android
   super(context);

   // Initialize these two members/fields
   // With the values passed in as parameters
   mScreenX = x;
   mScreenY = y;

   // Font is 5% (1/20th) of screen width
   mFontSize = mScreenX / 20;
   // Margin is 1.5% (1/75th) of screen width
   mFontMargin = mScreenX / 75;

   // Initialize the objects
   // ready for drawing with
   // getHolder is a method of SurfaceView
   mOurHolder = getHolder();
   mPaint = new Paint();

   // Initialize the bat and ball
   mBall = new Ball(mScreenX);

   // Everything is ready to start the game
   startNewGame();
}
All we need to do is call the constructor and pass in the screen width in pixels (mScreenX) and our new Ball class takes care of everything else. Note that we will add the bat initialization in the same place as soon as we have coded the Bat class.
As all the workings of a ball are handled by the Ball class, all we need to do is call its update method from the PongGame class's update method and draw it in the draw method and we will have our ball.
Add the call to update the ball in the update method as highlighted next.
private void update() {
   // Update the bat and the ball
   mBall.update(mFPS);
}
Our ball will now be updated every frame of gameplay.
Now we will see how we draw the ball by getting its location and size via its getRect method and using this data with the drawRect method of the Canvas class. Add this code to the draw method. The draw method is quite long so to save trees I have just shown a little extra code around the new highlighted code for context.
// Choose a color to paint with
mPaint.setColor(Color.argb
         (255, 255, 255, 255));

// Draw the bat and ball
mCanvas.drawRect(mBall.getRect(), mPaint);

// Choose the font size
mPaint.setTextSize(mFontSize);
That was easy. We simply pass the method call to getRect as the first parameter of the call to drawRect. As drawRect has an overloaded version which takes a RectF, the job is done, and the ball is drawn to the screen. Note we also pass our Paint instance (mPaint) as we always do when drawing with the Canvas class.
There is one more thing we need to do. We must call the ball's reset method to put it in an appropriate starting position relative to the screen resolution. Add this next highlighted line of code to the startNewGame method.
// The player has just lost
// or is starting their first game
private void startNewGame(){

   // Put the ball back to the starting position
   mBall.reset(mScreenX, mScreenY);

   // Reset the score and the player's chances
   mScore = 0;
   mLives = 3;
}
Now the ball will be repositioned top and center every time we call startNewGame and this already happens once at the end of the PongGame constructor. Run the game to see the ball in action- kind of.
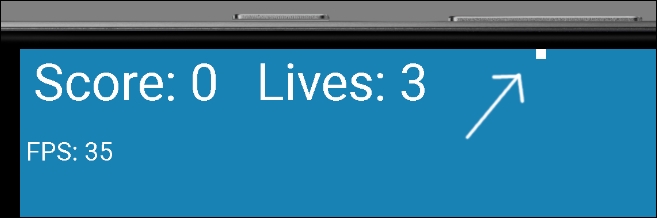
You will see a static ball at the top center of the screen. You will rightly be wondering why the code in the ball's update method isn't working its magic. The reason is that mPaused is true. Look at the relevant part of the run method again, shown next.
// Provided the game isn't paused call the update method
if(!mPaused){
   update();
   // Now the bat and ball are in their new positions
   // we can see if there have been any collisions
   detectCollisions();

}
We can see that the update method of the Ball class will not execute until mPaused is false because the update method of the PongGame class will not execute until mPaused is false. You could go and add a line of code like this:
mPaused = false;
You could add this to the startNewGame method. Feel free to try it, nothing bad can happen, however, when you run the game again, this time the ball is gone.
What is happening is that the ball is initializing, and the thread is updating many frames before the first image is drawn to the screen. The ball has long gone (off the bottom of the screen) before we get to see the first drawing. This is one of the reasons we need to control when the updates start happening.
The solution is to let the player decide when to start the game, with a screen tap. When we code the player's controls for the bat we will also add a bit of code to start the game (set mPaused to false) when the player is ready, and the game is in view.
The only other problem is that we have not learned how to detect collisions and therefore cannot call the reverseXVelocity, reverseYVelocity, and batBounce methods. We will deal with collisions in the next chapter, for now, let's code a moveable bat.