
Integrating with Office Applications
Personal computer users still spend a great deal of time working with Microsoft Office applications. By integrating SharePoint into the menus and in the context of what users are doing, Microsoft has made it much easier for users to share their content with anyone that has access to a Web browser.
Integration points between Word, Excel, Access, PowerPoint, and SharePoint 2007 surface in the following locations depending on the context of the activity:
Save and Save As: Documents can be saved directly to SharePoint document libraries via Network Places.
Edit in Microsoft (Application name): This option is available from a document saved to a SharePoint library and allows the user to edit the document directly on a SharePoint server. Any Save actions are saved on the server directly.
Publish: Blogs (Word only), Document Locations, Excel Services (Excel only), Publish Slides (PowerPoint only), and Document Workspaces can be accessed from the publish action under the Office button menu.
Server: The server option is available from the Office button when a document is opened from the server, providing access to server-based options.
Workflow and Metatagging: From the Ribbon, you can enter SharePoint metadata and edit workflows.
Saving files to MOSS and WSS 2007
Since the first version of SharePoint, Microsoft has provided the ability to treat document libraries as Microsoft Windows folders using a technology called WebDAV. The abbreviation stands for Web-based Distributed Authoring and Versioning. Microsoft’s implementation of this Web standard manifests itself in the ability to show an Explorer view of any document. Figure 13.1 is an example of a SharePoint Document Library with the standard All Documents view.

Changing to Explorer View, as in Figure 13.2, you see the WebDAV view of the same library, which allows you to copy folders and files directly into the library.

Both of these views enable you to upload or copy any document from any version of Office, and essentially any file that can be stored on a Windows machine, to a SharePoint library. Interestingly, when working for Microsoft on competitive portal engagements, this WebDAV capability was often what caused customers to choose SharePoint over other solutions. When training new users, it is very valuable to have a paradigm they are used to working with, such as Windows folders, available while they learn the new features. Over time, users will learn the benefits of working with rich document views in a SharePoint library, but adoption increases when done incrementally.
Another way to save Office files in SharePoint is to save them to a network place that points to the SharePoint location. After a network place is created, you can save documents directly to SharePoint from almost any Windows application.
Creating a network place for a SharePoint document library
To create a network place for a SharePoint document library, follow these steps:
1. | Navigate to your SharePoint Document Library and copy the URL. For example:
http://portal/SiteDirectory/office/Shared%20Documents. |
2. | On your Windows Desktop, if it is in Classic mode, double-click the My Network Places icon. If your desktop is in the newer XP mode, you can find My Network Places by clicking Start
|
3. | Click Add a network place and then click Next when the Welcome to the Add Network Place Wizard opens. |
4. | Click Next. |
5. | Select Choose another network location and then click Next. |
6. | In the dialog box, paste the URL to your list or library and click Next. |
7. | Depending on your network configuration, you may be prompted to login. Otherwise, you should be prompted to name the network place. Do so and click Next. |
8. | Click Finish to complete the wizard. |

Saving an Office document to your network place
Now that the network place is created, you can save documents from any Office application to the library from the save dialog boxes in your Windows applications.
To save a Word document to a network place:
1. | Open or create a document and then select Office Button
|
2. | Click My Network Places on the left side of the Save As dialog box. |
3. | Click your SharePoint library. Click Save. |
Note
A faster way to save a document to a SharePoint Library and create a network place is to simply select Save as from the menu and paste the URL to the library in front of your document name like this: http://portal/SiteDirectory/office/TestLib/document-name.doc. The document library will automatically be added to your network places where you can access it again later.
Check-in, check-out, and metadata capture
Capturing metadata and the ability to check documents in and out are core document management features that have been enhanced in the 2007 releases of SharePoint and Office. The integration with Office makes these tasks easier and more intuitive by including the options at the right time, place, and context. The example below uses Word, but also applies to the other Office applications.
Check-in/check-out
To explore this functionality, open a SharePoint document library in your browser and upload a document to use in this example:
1. | Position your mouse pointer over a document name and click to open the document actions menu. Select Check Out. |
2. | Open the pull-down menu again and choose the option to Edit in Microsoft Office Word. |
3. | Make some changes, save the document, and then click the X in the upper right-hand corner of Word to close the document. Because you are in the context of editing a checked-out document in Word, a dialog box appears. |
4. | Click Yes to check the document in. The Version Comments dialog box appears, as in Figure 13.4. Figure 13.4. The Version Comments dialog box.
|

Your document has now been checked in and is available for other users to edit.
Metadata capture
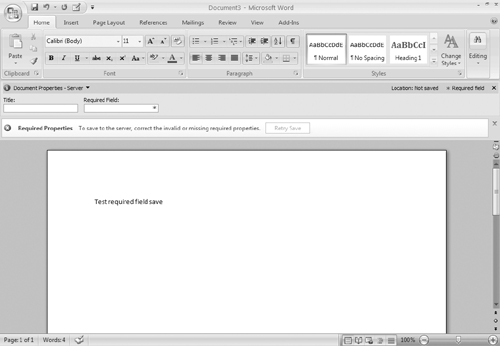
As mentioned earlier, many of the integration behaviors are context-sensitive and will surface when needed. For example, if you have a document library with two custom columns and neither of the columns are required fields, it is possible to create a new document from Word 2007 and choose the URL as the save location without being prompted to enter metadata. Simply changing one of those fields to be required in the document library settings and repeating the same operation opens the dialog box shown in Figure 13.5.

Click the Go to Document Information Panel button and Word 2007 presents the fields below the Ribbon, as in Figure 13.6.
Integrating the capture of metadata into the application makes it easier and faster for users to complete the form. The biggest challenge of document management systems is often the user participation in the capture of business data. If it is too hard, users will find ways around the system or simply enter useless default data to get past an annoying dialog box. By adding the feature inside the application and providing developers the ability to customize the Ribbon using InfoPath, Microsoft has increased the likelihood of user participation in this process.
Publishing documents to MOSS and WSS 2007
Making the publishing of content from the Office applications easy was a design goal of the Office 2007 team. This section discusses the options available in Word, Excel, Access, and PowerPoint for getting around publishing content to SharePoint. Some of the options are available in all four applications and others are specific to augment custom application features—this section describes those also.
Word, Excel, Access, and PowerPoint, all have a Publishing option available from the Office button for the publishing of files to a Document Management Server, allowing other users to access those files. Publishing to a Document Management Server shows the network places configured on your workstation. See the first section of this chapter for instructions on how to configure a network place.
Word, Excel, and PowerPoint also have a Create a Document Workspace sub-option under Publishing for collaborating on the review of a document. The following examples illustrate the publishing integration.
Publishing — Create a Document Workspace
To create a document in Workspace, do the following.
1. | From a Word, Excel, or PowerPoint, file, click the Office Button
|
2. | The Document Workspace task pane opens on the right side of the screen, as shown in Figure 13.7. Figure 13.7. Document Management task pane
|
3. | Name the document workspace and select a location from the Location for new workspace drop-down menu. You can also select (Type new URL) from the pulldown and enter a team site on which to create the new workspace. For example: http://portal/SiteDirectory/office. |
4. | The document workspace is created and the task pane view changes to show the status of the document and the other available tabs and actions. The new Document Management workspace was created as a sub-site to the URL you input during setup. |
5. | Open your new workspace by clicking Open site in browser in the task pane. Your new site will be similar to Figure 13.8. |


Now you can send a URL out to other reviewers and collaborate on the new document smug with the knowledge that you saved keystrokes by creating a workspace directly from your productivity application!
Publishing blogs from Word
One of the publishing options unique to Word is the ability to publish a blog. The term blog comes from combining “Web log.” Blogs typically provide commentary on a subject published on a schedule and sorted by most recent posting.
Cross-Ref
For more information on creating a blog in SharePoint see Chapter 3.
Create your blog prior to walking through the following example. To publish your blog, follow these steps:
1. | Create a new document in Word 2007. |
2. | Click the Office button to display the document publishing options as in Figure 13.9. Figure 13.9. Office button options
|
3. | Click Publish
|
4. | If you have not registered a blog account, you will be prompted to register. |
5. | Click the Register Now button. |
6. | Select SharePoint Blog from the Blog Provider list and click Next. |
7. | Enter the URL to the SharePoint blog and click OK. |
8. | A warning may appear; click Yes to continue. |
9. | Enter your SharePoint login credentials if prompted. |
10. | An “Account registration successful” message should appear; click OK. |
11. | Word will now be open with a Blog Post ribbon tab on the top of your document. |
12. | When you have finished creating your entries, click Publish. |
13. | Your screen should be similar to Figure 13.10, and your blog entry should have successfully posted to your SharePoint blog. |


Publishing — PowerPoint to slide library
One of the great new collaborative features of PowerPoint 2007 is the integration with SharePoint slide libraries. Slide libraries allow you to share and reuse slide content by storing the individual slides in a centrally located server.
The slide library allows users to easily select and reuse just the slides they need for their presentations, as well as making sure that everyone has access to the most current versions of the core slides. When a change is made to one of the slides, SharePoint timestamps the slide and checks it out. The versioning capability of SharePoint is also used to track the history of changes to a slide. PowerPoint 2007 automatically stores the locations of multiple slide libraries, making it easy to locate them in the future.
Let’s walk through an example that uses this feature:
1. | Create a new slide library on a team site. Go to any team site and click View All Site Content. |
2. | Click Create, and then under Libraries click Slide Library. |
3. | Give your library a name and description and then click Create. |
4. | Open PowerPoint and create a sample slide deck or open a slide deck that you already have. |
5. | Click the Office Button
|
6. | Click the slides you would like to add to the library individually, or click Select All to pick all slides. |
7. | Paste the URL to your slide library into the Publish to field. For example: http://portal/SiteDirectory/office/PowerPoint%20Slide%20Library. |
8. | Click Publish; you should see the Publishing Slides indicator at the bottom of the screen showing the status. |
9. |


Access integration
Access has always been a popular application in the Microsoft Office suite of products. Access allows a novice user to create useful database applications for tracking anything from sales opportunities to inventory. The limitation with Access has been allowing multiple users share the data in various Access databases, providing enterprise scale and server-based backup and restore, as well as discovering which databases are available to them.
The integration with SharePoint allows Access users to create a copy of their data on a SharePoint site. The Access database has a live connection to that SharePoint data, and as information in the offline Access copy is updated, it can be updated on the SharePoint site in real time. Once the data is available on the site, anyone in the organization can interact with the data, and those changes are synchronized back down to the access database. Offline access is another strong point because the Access client can have a copy of SharePoint data, changes can be made, and the data can be synchronized on the server.
Think of Access as a rich client front end for data and SharePoint as the back end. This scenario can be reversed, too. An existing SharePoint list can be copied to Access and connected, allowing a user to create rich Access views and provide offline access to the data while still keeping the information in sync with a central SharePoint list.
Connecting data to SharePoint
In this short tutorial, you will create a new Sales Opportunity Pipeline application that can be accessed via SharePoint by everyone in the organization as well as completely customized in Access to provide the views and reporting that may be required by management.
1. | Open Access 2007. Notice that Access has a new Getting Started page to make it easy for the novice access user (see Figure 13.13). |
2. | Click Sales Pipeline, and click the Download button on the right-hand side to download the template. Access opens to the Open Opportunities List. |
3. | Open the Navigation Pane by clicking the >> on the left side. |
4. | Click the arrow to the right of Sales Pipeline Navigation and choose Object Type as the sort option. Your screen should now look like Figure 13.14. |
5. | To prepare to connect this list to a SharePoint site, populate your Customer and Employees tables with the sample data in the Northwind 2007 sample access database available on
http://office.microsoft.com. This is an optional step because you can simply add a couple of rows of date for testing. |
6. | Create a SharePoint site to synchronize your Access application with. Create a site with any name you want. The steps to create a site are detailed in Chapter 3. I’ve created a new site called Sales Opportunities. |
7. | From Access, click External Data above the Ribbon. |
8. | Click Move to SharePoint in the SharePoint Lists section. |
9. | In the Move to SharePoint Site Wizard enter the URL to your site, as in Figure 13.15, uncheck Save a copy of my database, and click Next. You will receive a warning about issues encountered. A log is created in your application that references items such as referential integrity not being supported in SharePoint Lists. We will use Access for those relationships, and SharePoint allows other users to populate the data. You can disregard the warning and click Finish. |
10. | Go to your SharePoint site and click View All Site Content to see the new lists that were created by Access. |


Testing the new Access data connection to SharePoint
To test the Access data connection, follow these steps:
1. | From the View All Site Content page, click the Opportunities list. |
2. | Add a couple of new opportunities. I’ll add Opportunities 1 and 2 to my list. Note: The ID field will be filled in by the system. |
3. | Go back to Access and click the Refresh All button on the Home Ribbon. The opportunities you entered in SharePoint should now show up in Access. |