Chapter 7. Inside the Security & Compliance Center: Alerting, threat management, and reporting
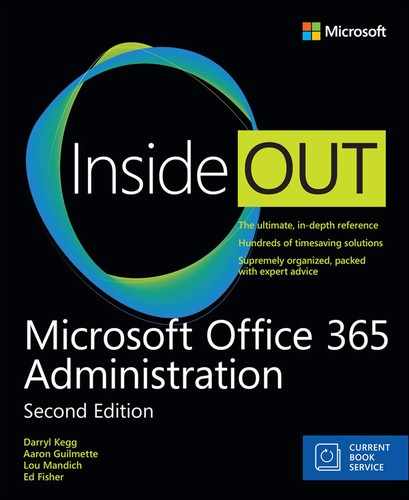
The Security & Compliance Center, shown in Figure 7-1, is the hub for security reporting, discovery, and data protection across all the products and services in the Office 365 suite. Many options are available in the Security & Compliance Center—several of them only available with optional products and services. The standard features are available in service plans up to Enterprise E3. The advanced features, designated here with an asterisk (*), under Alerts, Data Loss Prevention, Threat Management, and Search & Investigation, are accessible after you have activated service plans that include Advanced Threat Protection or Advanced eDiscovery.
This chapter discusses the features in the following sections of the Security & Compliance Center.
- Alerts
- Permissions
- Threat Management
- Reports
- Service Assurance
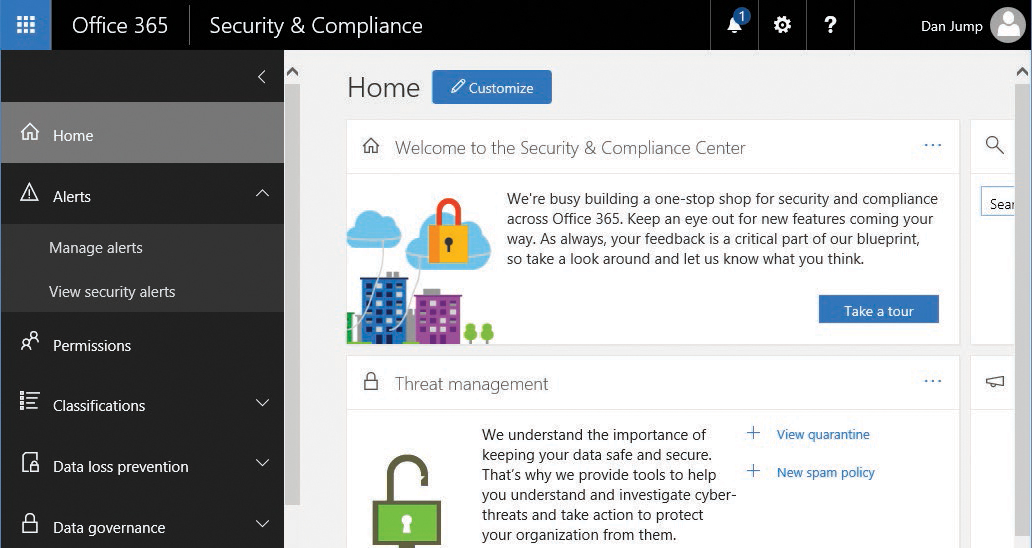
Figure 7-1 Security & Compliance Center
Alerts
You can configure alerts to notify you when certain types of activities or behaviors are detected in your environment. Alerts can be triggered by a variety of things, including suspicious logon activity or changes in roles or permissions.
Dashboard*
The Alerts Dashboard, one of the features available with an Enterprise E5 subscription, initially presents you with an option to configure analytics. The Alerts Dashboard is shown in Figure 7-2.
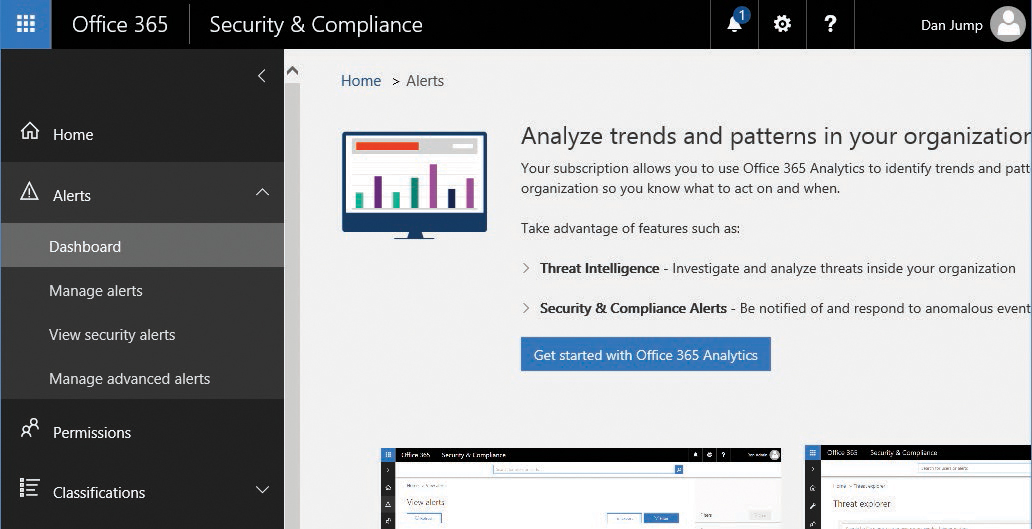
Figure 7-2 Alerts Dashboard page
To get started with with analytics, follow these steps.
- To configure analytics, select Get Started With Office 365 Analytics.
- On the Threat Explorer page, click Next.
- On the Threat Dashboard page, click Next.
- On the Alerts page, click Enable Office 365 Analytics.
- Review the updated dashboard under Alerts. See Figure 7-3.
Figure 7-3 Updated Alerts dashboard after enabling Office 365 analytics

View alerts*
If you have licenses that include Advanced Security Management, the View Alerts menu replaces View Security Alerts. View Alerts (Figure 7-4) enables you to filter the list of alerts shown as well as export them to a comma separated values (CSV) file for further analysis.

Figure 7-4 Filter alerts
Manage alerts
To start generating alerts on activities, enable recording of activities in the Security & Compliance Center. Click Start Recording User And Admin Activities (Figure 7-5) to enable the collection of auditable activities. After you turn auditing on, you can begin creating activity alerts.

Figure 7-5 Enabling activity alerts
If you have an Enterprise E5 or Advanced Security Management SKU, Manage Advanced Alerts And Alert Policies replaces Manage Alerts. You can still access the standard Manage Alerts and View Security Alerts pages by navigating to Alerts | Dashboard and selecting Activity Alerts or View Security Alerts, as shown in Figure 7-6, in the Other Alerts section. When you select Activity Alerts, you then have access to the Start Recording User And Admin Activities link.

Figure 7-6 Office 365 Alerts Dashboard
After you enable recording, confirm the action by clicking Turn On. See Figure 7-7.
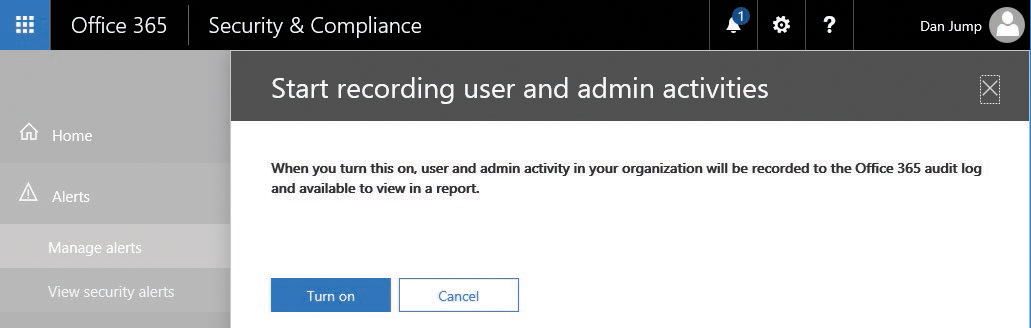
Figure 7-7 Confirming the enabling of security auditing
A dialog box might appear to update your organization settings. This is the same as running Enable-OrganizationCustomization from Windows PowerShell. Click Yes to allow the update. Depending on the number of objects in your tenant, it might take a while to run. See Figure 7-8.

Figure 7-8 Enable-OrganizationCustomization preparing the environment
Get-Mailbox -ResultSize Unlimited -Filter {RecipientTypeDetails -eq “UserMailbox“} | Set-Mailbox -AuditEnabled $true
When the organization update is complete, you can begin creating policies for alerts. To create a new policy, follow these steps.
- Launch the Security & Compliance Center and navigate to Alerts | Manage Alerts. If you have an Office 365 E5 subscription, navigate to Alerts | Alert Policies.
The wizard steps and interface might be slightly different, depending on whether you are creating your policy in a tenant with an E3 or an E5 subscription.
- Click +New Alert Policy.
- Type a name for the policy and a description.
- Expand Send This Alert When.
- Under Activities, select the events that you want to audit. See Figure 7-9.
For a complete list of auditable activities, see https://support.office.com/en-us/article/Search-the-audit-log-in-the-Office-365-Security-Compliance-Center-0d4d0f35-390b-4518-800e-0c7ec95e946c?ui=en-US&rs=en-US&ad=US#auditlogevents&PickTab=Audited_activities.
Figure 7-9 Creating an alert
- Under Users, type individual users whose activities you want to audit or leave blank to configure the alert for all users.
- By default, the user who is creating the alert is added to the notification list. To change who is alerted, expand Send This Alert To and then update Recipients with the appropriate alert recipients.
- Click Save to create the alert.

You can also use the New-ActivityAlert and Set-ActivityAlert cmdlets when connected to the Security & Compliance Center PowerShell endpoint. If you create an alert through PowerShell that contains activities not included in the New Alert Policy Wizard or SMTP recipients not available in the global address list, a message appears on the Properties page of the alert, stating that it contains custom operations not listed in the picker.
View Security Alerts
View Security Alerts shows you the two types of alerts available in a standard Office 365 subscription: Account Protection and Spam Submission.
For each alert displayed, you see information regarding the level of risk, type of alert, and available actions. For example, if an account has been disabled or locked out, an action you might take would be to review the alert and unlock the account.
Alert policies*
After you enable Office 365 Analytics under the Alerts Dashboard (for Enterprise E5 or Advanced Security Management SKUs), you can refresh the security portal and see that a number of default alert policies have been created. See Figure 7-10.

Figure 7-10 Alert policies.
Manage Advanced Alerts*
If you have an Enterprise E5 or Advanced Security Management SKU, Manage Advanced Alerts has replaced Manage Alerts. You can access the advanced alerts by turning on Advanced Security Management. See Figure 7-11.

Figure 7-11 Manage Advanced Alerts page
After turning on Advanced Security Management, you are redirected to the Office 365 Cloud App Security portal, as shown in Figure 7-12.

Figure 7-12 Cloud App Security portal
You can configure activity or anomaly detection policies to alert on behaviors. You can also view the built-in templates, create policies from them, and conduct investigations on audited activities or apps.
Permissions
The Office 365 Security & Compliance Center enables you to grant permissions to users who perform Security & Compliance tasks such as device management, data loss prevention, data labeling, retention, and discovery.
Users can perform only the tasks for which they are granted access. To access the Security & Compliance Center, users must be an Office 365 global administrator or a member of one or more Security & Compliance Center role groups.
The Permissions page enables you to assign a set of permissions or rights to users to perform certain actions. Each of the built-in permissions is made up of individual roles.
Each of the 29 built-in roles grants a specific right, as listed in Table 7-1.
Table 7-1 Security roles and capabilities
Roles |
Capabilities |
Audit Logs |
Enables users to turn on and configure auditing for their Office 365 organization. This role also enables users to view the organization’s audit reports and then export these reports to a file. If you want users to be able to search the Exchange audit logs as well, assign the permissions in Exchange Online. This is because the underlying cmdlet used to search the audit log is an Exchange Online cmdlet. |
Case Management |
Enables users to create, edit, delete, and control access to eDiscovery cases in the Security & Compliance Center. |
Compliance Administrator |
Enables users to view and edit settings and reports for compliance features. |
Compliance Search |
Enables users to run the Content Search tool in the Security & Compliance Center to search mailboxes and public folders, SharePoint Online sites, OneDrive for Business sites, Skype for Business conversations, Office 365 groups, and Microsoft teams. This role enables a user to get an estimate of the search results, but additional roles are needed to perform actions such as previewing, exporting, or deleting search results. This role also enables users to perform searches across mailboxes and get an estimate of the results. |
Device Management |
Enables users to view and edit settings and reports for device management features. |
Disposition Management |
Controls permissions for accessing Manual Disposition in the Security & Compliance Center. |
Enables users to view and edit settings and reports for data loss prevention (DLP) policies. |
|
Export |
Enables users to export the results of a content search to a local computer. It also enables them to prepare search results for analysis in Advanced eDiscovery. |
Hold |
Enables users to place content in mailboxes, public folders, sites, Skype for Business conversations, and Office 365 groups on hold. When on hold, a copy of the content is stored in a secure location. Content owners can still modify or delete the original content. When content is on hold, content owners can still modify or delete the original content, but the content will be preserved until the hold is removed or until the hold duration expires. |
Manage Alerts |
Enables users to view and edit the settings and reports for alerts. |
Organization Configuration |
Enables users to run, view, and export audit reports and manage compliance policies for DLP, devices, and preservation. |
Preview |
Enables users to view a list of items that were returned from a content search. They can also open and view each item from the list to view its contents. |
Record Management |
Enables viewing and editing configuration and reports for the Record Management feature. |
Retention Management |
Enables users to manage retention policies. |
Review |
Enables users to see and open the list of the cases on the eDiscovery page in the Security & Compliance Center of which they are members. They can’t perform any other case management tasks. This role also enables users to use Office 365 eDiscovery or Advanced eDiscovery to track, tag, analyze, and test documents that are assigned to them. |
RMS Decrypt |
Enables users to decrypt RMS-encrypted email messages when exporting search results or preparing search results for analysis in Advanced eDiscovery. |
Role Management |
Enables users to manage role group membership and create or delete custom role groups. |
Search And Purge |
Enables users to perform bulk removal of data matching the criteria of a content search. |
Security Administrator |
Enables viewing and editing configuration and reports for security features. |
Security Reader |
Enables viewing configuration and reports for security features. |
Enables users to access the Service Assurance section in the Office 365 Security & Compliance Center. Users can download the documents available in the Service Assurance section. Content includes independent auditing and compliance documentation and trust-related guidance for using Office 365 features to manage regulatory compliance and security risks. |
|
Supervisory Review Administrator |
Enables users to create and manage the policies that define which communications are subject to review in an organization. |
View-Only Audit Logs |
Enables users to view and export their organization’s audit reports. Because these reports might contain sensitive information, this role should only be assigned to those with an explicit need to view this information. If you want users to be able to search the Exchange audit logs as well, you have to assign the permissions in Exchange Online, because the underlying cmdlet used to search the audit log is an Exchange Online cmdlet. |
View-Only Device Management |
Enables viewing configuration and reports for the Device Management feature. |
View-Only DLP Compliance Management |
Enables users to view the settings and reports for data loss prevention (DLP) policies. |
View-Only Manage Alerts |
Enables viewing configuration and reports for the Manage Alerts feature. |
View-Only Recipients |
Enables users to view information about users and groups. |
View-Only Record Management |
Enables viewing configuration and reports for the Record Management feature. |
View-Only Retention Management |
Enables viewing configuration and reports for the Retention Management feature. |
Compliance administrator
The Compliance Administrator role has management permissions within the Office 365 Security & Compliance Center and Exchange Admin Center as well as access to read audit logs. The compliance administrator can also manage settings for device management, data loss prevention, reports, and preservation.
eDiscovery manager
The eDiscovery Manager role group has two subgroups—eDiscovery Manager and eDiscovery Administrator. Members of this role group (either manager or administrator) can create and manage eDiscovery cases. They can add and remove members to a case, place content locations on hold, create and edit content searches associated with a case, export the results of a content search, and prepare search results for analysis in Advanced eDiscovery.
eDiscovery manager
Members of the eDiscovery Manager subgroup can view and manage the eDiscovery cases they create or are a member of, but not cases that other eDiscovery managers create if they are not added as a member of the case. This applies to both eDiscovery and Advanced eDiscovery.
eDiscovery administrator
Members of the eDiscovery Administrator subgroup can perform all case management tasks that an eDiscovery manager can do for any eDiscovery case, including those to which they are not currently members. To manage cases for which they are not a member, they must first add themselves as a member. eDiscovery administrators can also perform administrative tasks in Advanced eDiscovery.
Organization management
Members of the Organization Management role can control permissions for accessing features in the Security & Compliance Center and grant permissions to other users. Members can manage settings for device management, data loss prevention, reports, and preservation. Global administrators are automatically added as members of this role group.
Reviewer
The Reviewer role has the most restrictive eDiscovery-related permissions. Members of this group can see and open only the list of the cases on the eDiscovery page in the Security & Compliance Center that they are members of and have been granted access to view. Reviewers cannot create or modify cases, searches, or holds. They can’t export search results or prepare results for Advanced eDiscovery. However, members can access cases to which they’ve been added in Advanced eDiscovery to perform analysis tasks.
Security administrator
Membership in the Security Administrator role group is synchronized across services. This role group is not manageable through the administrator portals. Members of this role group can include cross-service administrators as well as external partner groups and Microsoft Support. By default, this group is not assigned any roles. However, it is a member of the Security Administrators role group and inherits the capabilities of that role group.
Security reader
Members of the Security Reader role group have read-only access to a number of security features of the Identity Protection Center, Privileged Identity Management, Monitor Office 365 Service Health, and Office 365 Security & Compliance Center.
Service assurance user
Users who are members of the Service Assurance User role can review the Service Assurance documents in the portal, such as information regarding Office 365 service audits and certifications.
Supervisory review
Users who are granted the Supervisory Review role can create and define supervision policies, which can be used to capture communications for internal or external review.
Threat management
The Threat Management menu collects, displays, and provides analytics about threats detected in your Office 365 environment and enables you to configure policies to manage message security further.
Dashboard*
If you have licenses that include Advanced Threat Protection, you have access to the Threat Management dashboard.
The first time you launch the dashboard, if you have not already enabled Office 365 Analytics elsewhere, click Get Started With Office 365 Analytics, as shown in Figure 7-13.
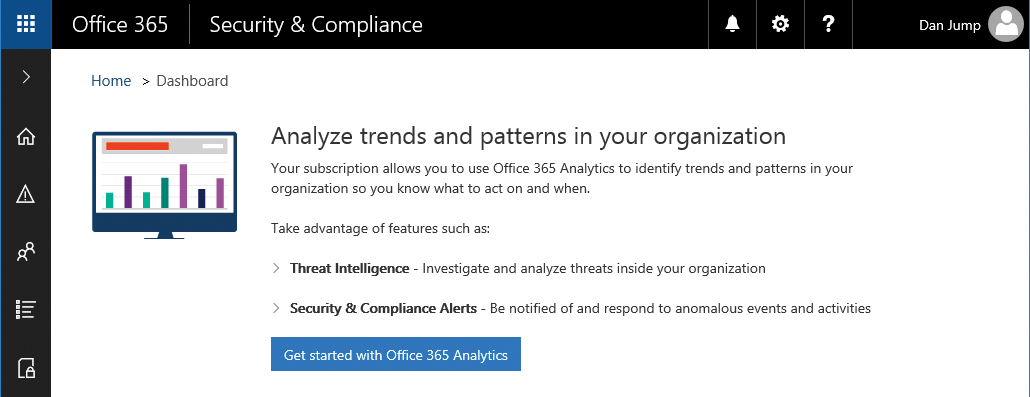
Figure 7-13 Threat Management dashboard
After clicking the Get Started With Office 365 Analytics button, you click through a few informational fly-outs that highlight some of the features of Threat Analytics. See Figure 7-14.

Figure 7-14 Office 365 Analytics informational page for Threat Explorer
On the final page, you are prompted to enable the feature. Click Enable Office 365 Analytics to complete the initial configuration, as shown in Figure 7-15.

Figure 7-15 Enabling Office 365 Analytics
When Office 365 Analytics has been enabled, you are redirected to the Threat Management dashboard shown in Figure 7-16.

Figure 7-16 Threat Management Dashboard page after Office 365 Analytics has been enabled
The dashboard contains both informational and actionable items. You can view reports and trend lines for threats detected or blocked in your environment. The dashboard also has shortcuts to create and manage alert policies (which link to the Alerts | Alert Policies page).
Threat Explorer*
The Threat Explorer feature enables you to review details about individual threats in your organization. You can create and filter your search based on many message attributes. Figure 7-17 shows Threat Explorer.

Figure 7-17 Threat Explorer dashboard
If you are investigating or experiencing an attack against your Office 365 environment, you can use Threat Explorer to analyze threats; it shows you the attacks over time, and you can analyze this data further by threat families.
The Threat Explorer view in Figure 7-18 shows malware families detected.
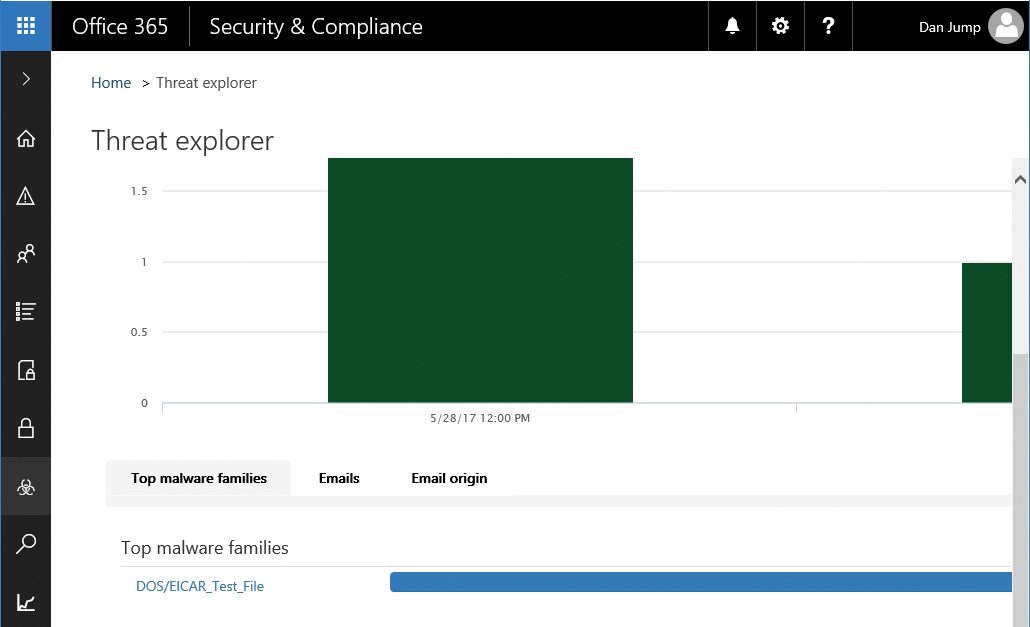
Figure 7-18 Threat Explorer top malware families
The Threat Explorer page has tabbed links for Top Malware Families, Emails, and Email Origin. Clicking the Emails tab displays information about the individual messages that triggered the alerts. You can also mark any suspicious email for follow-up. Marked emails shows up on the Incidents page. The Email Origin tab shows where messages are coming from geographically, based on information contained in the message headers.
To create an incident, select one or more messages from the list and click +Add Mails To Incident. See Figure 7-19.
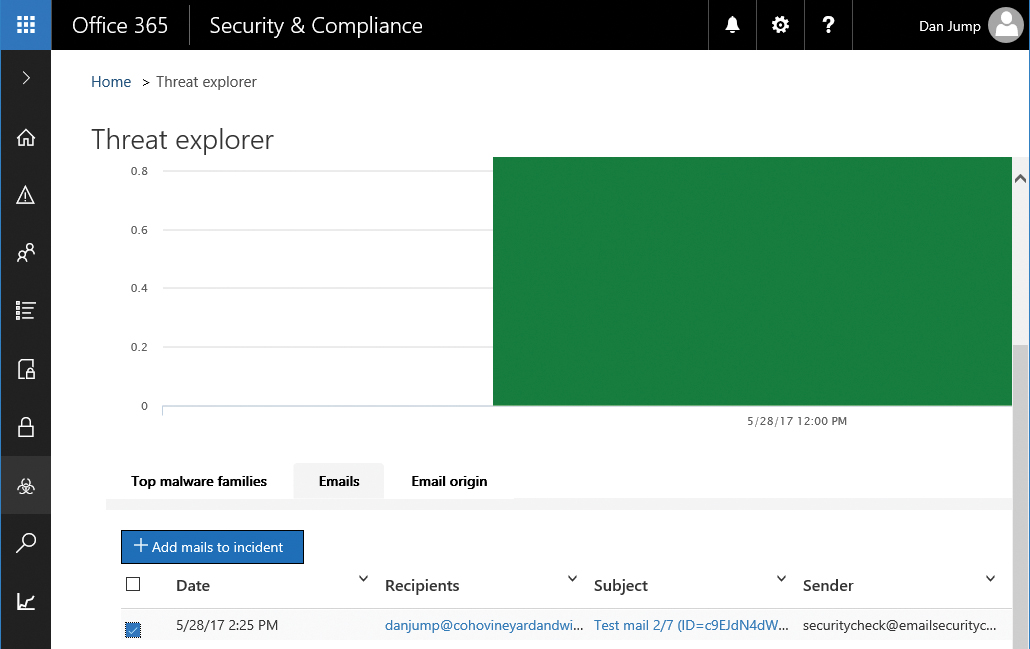
Figure 7-19 Add Mails To An Incident
You can either create a new incident based on the selected emails or, if you are already tracking an incident, add the selected emails to that. After clicking +Add Mails To Incident, you are prompted, as shown in Figure 7-20.

Figure 7-20 Creating an incident or updating an existing incident
You can provide a name and severity ranking for the incident. See Figure 7-21.

Figure 7-21 Entering a name for the incident
After you have created the incident, you can review and manage the incident on the Incidents dashboard.
Incidents*
Incidents are used to track activities in the Threat Management application. After adding messages to an incident, you can explore the open incidents on the Incidents dashboard. Incidents can be viewed, as shown in Figure 7-22, by navigating to Threat Management | Incidents.

Figure 7-22 Incidents dashboard
If you click an incident, an informational fly-out appears. You can edit the details of the incident or delete it. Clicking the details of a mail submission opens another fly-out (Figure 7-23) with the individual messages related to the incident. From there, you can perform actions on the individual messages such as removing them, placing them in the user’s Junk mail folder, removing the attachments, or allowing the messages to be delivered.

Figure 7-23 Reviewing details of message submissions on the Incident fly-out
Mail filtering
Mail filtering in the Security & Compliance Center configures many of the same options in Exchange Online Protection that you can configure through the Exchange Admin Center. If you have a subscription that includes Advanced Threat Protection, you have additional options for spoof intelligence. Spoof intelligence enables you to create allow and block lists of senders that might be spoofing your domain.
Anti-spam settings, shown in Figure 7-24, are set to Standard by default. You can configure custom settings by turning the toggle for Standard Settings to Off or by selecting the Custom tab and turning the toggle for Custom Settings to On.

Figure 7-24 Anti-spam Settings page
Although many of the default policies are always set to On, you can edit them to tune them specifically to your organization or industry. See Figure 7-25 for additional settings that you can configure.

Figure 7-25 Anti-spam Custom Settings enabled
You can create new spam filtering policies and apply them to custom lists of users, groups, or domains.
Anti-malware
The Anti-malware page (Figure 7-26) enables you to configure the Exchange Online Protection anti-malware settings. Like Mail filtering, the default policy cannot be removed or disabled, although some of its settings can be modified (such as email notifications and whether to delete only affected attachments or the entire message).
Anti-malware policies can be scoped and applied to individual users or groups. You can also configure common attachment-blocking filters, shown in Figure 7-27, to discard attachments of known file types automatically.
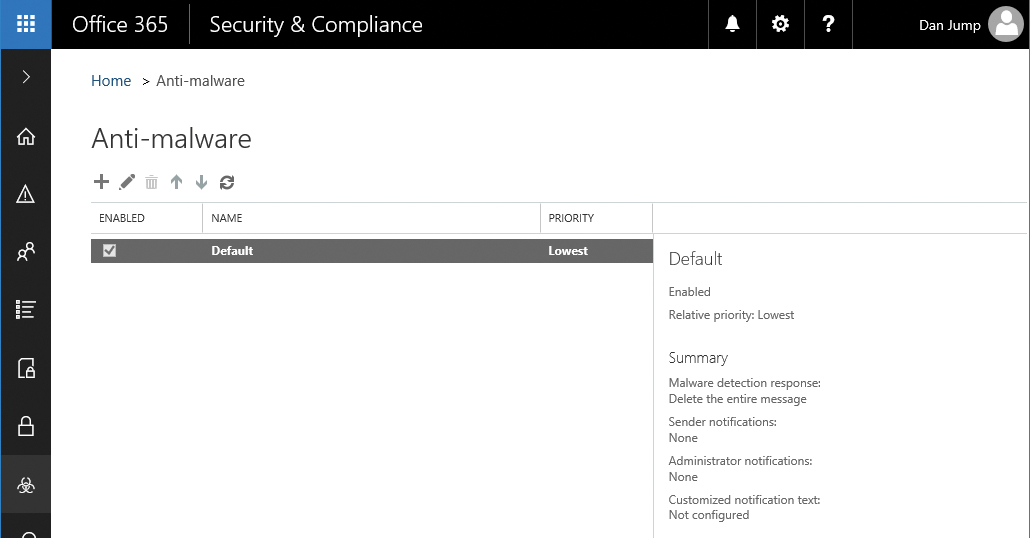
Figure 7-26 Anti-malware dashboard

Figure 7-27 Anti-malware policy settings
If you have licenses for Advanced Threat Protection, more configuration options for attachment and link handling are available under the Safe Attachments and Safe Links menus.
DKIM
DKIM, or DomainKeys Identified Mail, is an authentication process designed to protect you against forged email. DKIM signatures are used to verify message authenticity by verifying that the messages originated from your organization and users.
DKIM requires configuring DNS CNAME records for each domain that you want to have signed and then enabling DKIM signing for your domains in Office 365.
The first step in configuring DKIM is to ensure that you have the required records in DNS. Office 365 performs automatic key rotation based on these CNAME values.
The format of the records is shown in Table 7-2.
Table 7-2 DKIM DNS record format
Host name |
selector1._domainkey.<domain> |
Value |
selector1-<domainGUID>._domainkey.<InitialDomain> |
TTL |
3600 |
Host name |
selector2._domainkey.<domain> |
Value |
selector2-<domainGUID>._domainkey.<InitialDomain> |
TTL |
3600 |
The value for <domainG> is the value used in your customized MX record for Office 365. For example, if your domain is cohovineyardandwinery.com, your MX record would be cohovineyardandwinery-com.mail.protection.outlook.com, and the domainGUID value would be cohovineyardandwinery-com. InitialDomain refers to the tenant domain name registered when you first set up Office 365.
Using that format, you can create the selector records for DKIM shown in Table 7-3.
Table 7-3 Sample DKIM DNS records for cohovineyardandwinery.com
Host name |
selector1._domainkey.cohovineyardandwinery.com |
selector1-cohovineyardandwinery-com._domainkey.cohovineyeardandwinery.onmicrosoft.com |
|
TTL |
3600 |
Host name |
selector2._domainkey.cohovineyardandwinery.com |
Value |
selector2-cohovineyardandwinery-com._domainkey.cohovineyeardandwinery.onmicrosoft.com |
TTL |
3600 |
When you have published the DKIM CNAME records in your organization’s DNS, you’re ready to enable DKIM in Office 365.
- From the Security & Compliance Center, navigate to Threat Management | Dkim.
- Select the domain for which you wish to enable DKIM signing (Figure 7-28) and click Enable.
Figure 7-28 DKIM enabled

If you do not have the CNAME records published, you receive an error that says:
CNAME record does not exist for this config. Please publish the following two CNAME records first. selector1-<domainGUID>._domainkey.<InitialDomain> selector2-<domainGUID>._domainkey.<InitialDomain>
You can also enable DKIM signing through Exchange Online PowerShell by running:
New-DkimSigningConfig -DomainName <domain> -Enabled $true
Safe Attachments*
The Safe Attachments menu is only available if you have purchased licenses that include Advanced Threat Protection.
Advanced Threat Protection (ATP) helps you prevent zero-day malware attacks in your email environment. ATP can be used to protect either Office 365 Exchange Online environments or on-premises environments. ATP provides a way for you to create policies that help ensure that your users access only links in emails or attachments to emails that have passed additional layers of inspection.
Safe Attachments uses Dynamic Delivery to ensure that users can continue working with email while attachments are being scanned. Dynamic Delivery replaces attachments with a placeholder attachment notifying the recipient that the attachment is still being scanned. If the attachment passes scanning, it is reattached to the message in the recipient’s mailbox. If ATP detects that the attachment is malicious, it is blocked.
To configure a safe attachments policy, follow these steps.
- From the Security & Compliance Center, navigate to Threat Management | Safe Attachments.
- Click + to create a new policy.
- Type a name for the policy and configure the options desired, as shown in Figure 7-29.
Figure 7-29 Configuring a safe attachments policy
For Replace and Block actions, messages are not delivered to the recipients until scanning has finished.
If you have selected Dynamic Delivery, it will work only with mailboxes hosted in Office 365. If you have selected Dynamic Delivery and the mailbox is on-premises, the policy falls back to Replace, and the message won’t be delivered until the scan has completed.
The policy also can be configured to redirect the blocked, monitored, or replaced attachment to another mailbox for administrator review.
- Select recipients to whom the policy will apply.
- Click Save.

Safe Links*
The Safe Links menu is presented only if you have purchased licenses that include Advanced Threat Protection. Safe Links helps prevent users from following links in email that link to websites recognized as malicious. For messages in HTML, Safe Links identifies any link that uses the <href> attribute; for messages that are delivered in plaintext, Safe Links identifies URL construction and attempts to verify the links.
Safe Links also includes reporting that enables you to see which users have followed potentially malicious links.
When you purchase Advanced Threat Protection, a default Safe Links policy setting object is deployed for your entire organization. See Figure 7-30.

Figure 7-30 Safe Links dashboard
The default policy has tracking disabled and blocks links to malicious sites when clicked through Outlook Web App or Outlook 2016. It is not applied to users, however.
You can edit the organization-wide default Safe Links policy to specify URLs that you always want to block as well as to enable Safe Links behaviors for other Office 2016 desktop apps (Word, Microsoft Excel, Microsoft PowerPoint, and Microsoft Visio). Safe Links is not currently supported in Office Online applications or on Office for Mac, iOS, or Android.
To get protection for your users, you must create a new policy and then apply it to users, using the conditions in the policy. In addition, users must have an Advanced Threat Protection license for Safe Links to work.
Quarantine
Quarantine holds messages that were blocked due to bulk mailing, spam, phishing, or transport rules. Quarantine is shown in Figure 7-31.

Figure 7-31 Quarantine page
You can review the items in quarantine by navigating to Threat Management | Quarantine in the Security & Compliance Center.
You can filter the quarantined messages based on type (Bulk, Spam, Transport Rule, Phish) and scope (All Messages, Only My Messages). If messages appear here, you can select them and release them to users when you’ve determined they’re safe.
Advanced Threats*
The Advanced Threats page is available only if you have an Advanced Threat Protection license. From the Advanced Threats page, you can schedule reports for threats and usage of advanced threat protection features in your environment. Threats are shown in Figure 7-32.
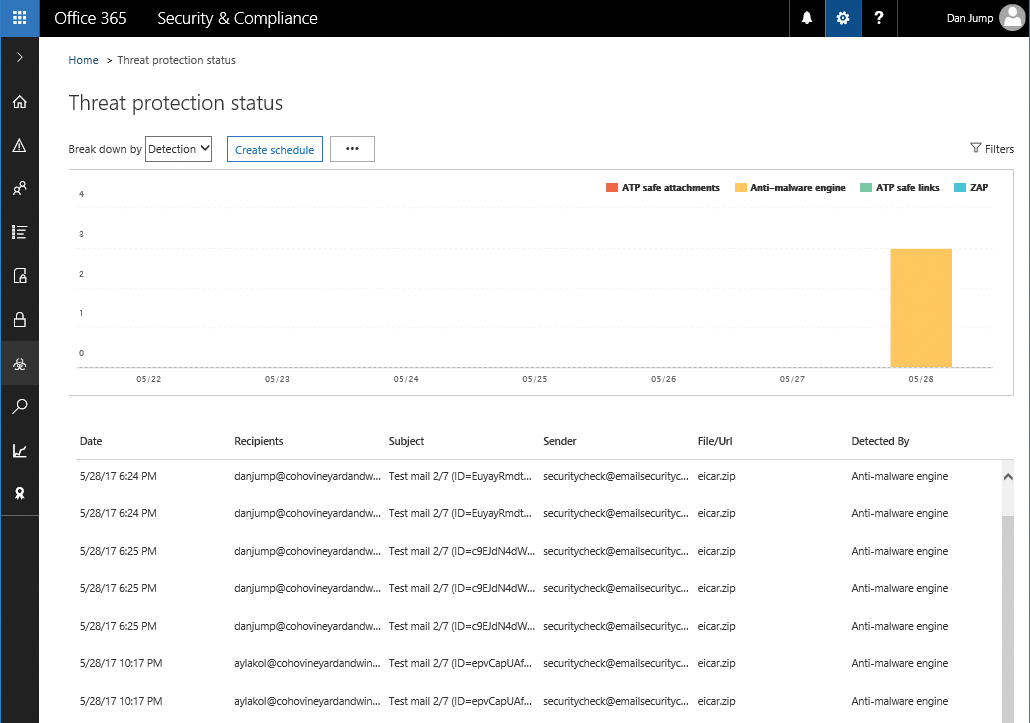
Figure 7-32 Advanced Threats Threat Protection Status dashboard
Reports
The Reports section of the Security & Compliance Center enables you to view, download, and, in some cases, schedule automatic reports.
Dashboard
The Reports dashboard, shown in Figure 7-33, displays interactive widgets for a number of common reports.

Figure 7-33 Reports dashboard.
Clicking the ellipsis (…) for a widget opens a pop-up menu to pin it to the Security & Compliance Center home page dashboard. Clicking the data portion of the widget displays additional detail about the report.
Inside the report view (Figure 7-34), you can view a graph, filter the items based on a number of criteria, or sort the data. Depending on the report, you might be able to download data to a CSV or create a scheduled report.

Figure 7-34 Detail of Sent And Received Email Report
Manage schedules
For reports that support scheduling, you can view and edit the scheduled reports. Report schedules are shown in Figure 7-35.

Figure 7-35 Manage Schedules page for scheduled reports
By selecting a report, you expose the report fly-out menu, which enables you to edit the schedule and report options.
Reports for download
Items that you have requested an additional report for (by selecting Report in a report’s widget) show up under Reports For Download. See Figure 7-36.

Figure 7-36 Reports For Download dashboard
Clicking a report opens the detail fly-out, shown in Figure 7-37, with a summary and link to download the report.

Figure 7-37 Custom report fly-out
Service assurance
Service assurance is a collection of reports and documents that you can use to provide compliance officers and auditors with information regarding audited controls and certifications for the Office 365 environment.
Dashboard
The Service Assurance dashboard, shown in Figure 7-38, provides an overview and description of the documents available under the various sections of the Security & Compliance portal. Users need to be granted the Service Assurance role to view these documents.
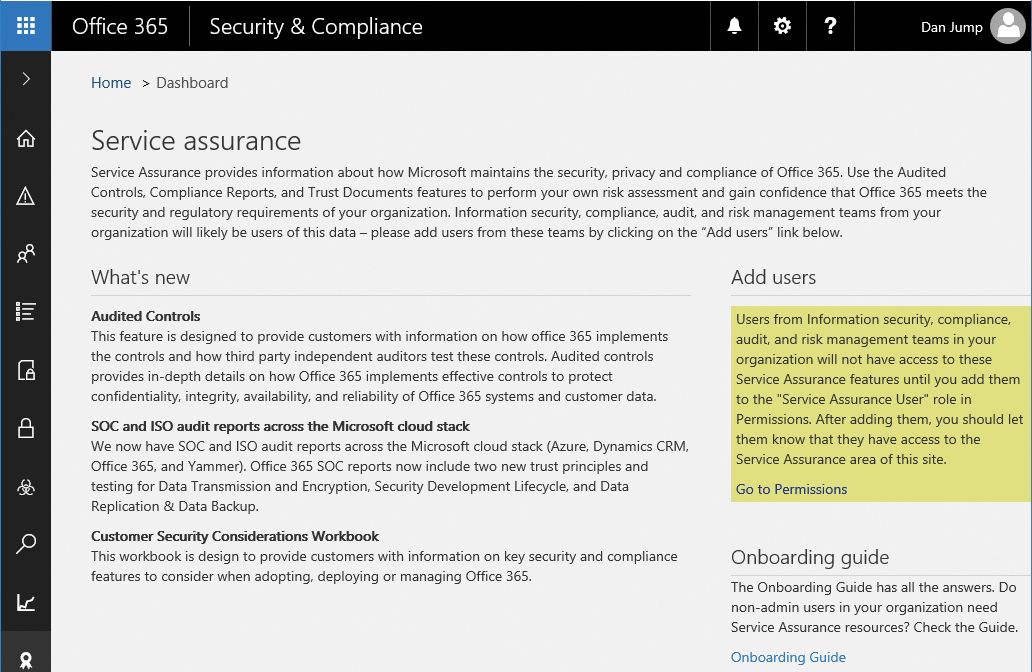
Figure 7-38 Service Assurance dashboard
Compliance reports
The Compliance Reports page shows a number of audit and certification reports available for download. See Figure 7-39.

Figure 7-39 Service Compliance Reports page
Trust documents
Trust documents (Figure 7-40) display general information documents that outline how Microsoft protects your data in cloud services and meets compliance regulations.

Figure 7-40 Trust documents
Audited controls
The Audited Controls page shows the standards that Office 365 services have been audited and tested against. From this page, you can select which documents you want to download. See Figure 7-41.

Figure 7-41 Audited controls reports
Settings
On the Service Assurance | Settings page, shown in Figure 7-42, you can select which types of assurance documents you want displayed in the portal, based on your region and industry. You can select multiple industries and regions. After updating your selection, click Save. Your view will be filtered the next time you return to view documents.
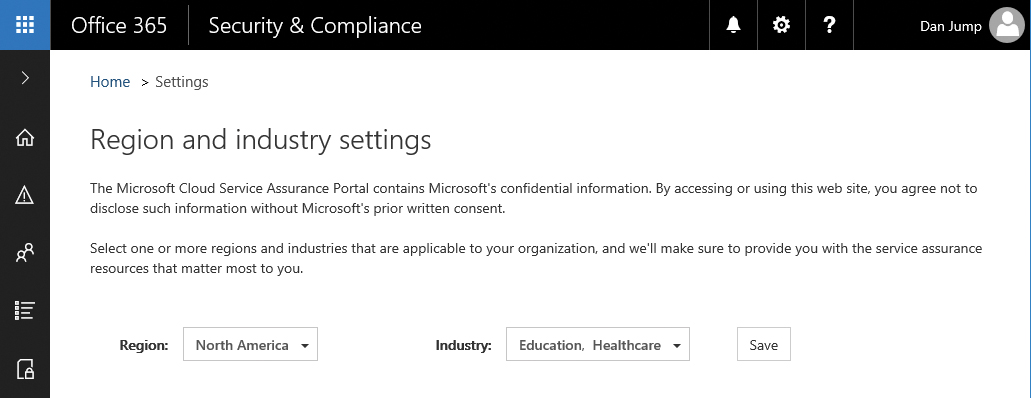
Figure 7-42 Settings for region and industry selections
Summary
This chapter reviewed the monitoring and reporting aspects of the Security & Compliance Center, as well as some of the threat management capabilities. Other features of the Security & Compliance Center are covered in Chapter 8, “Inside the Security & Compliance Center: Data Classification, Loss Prevention, Governance, and Discovery.”