
Workflows are associated with either a document in a library, a list item in a list, or a Site workflow. The steps to create these workflows are the same.
In this section, we are going to look at creating pre-built workflows with libraries, lists, and sites.
Scenario: A user creates a document, and then that document is routed to the appropriate parties for some type of approval prior to being accepted as an authentic organizational artifact. It usually contains an approval/rejection decision, along with a comments section indicating why the particular decision was made.
The approval workflow is typically the most common workflow found in an organization as most simple approvals only require a 'Yes, this is fine' level of approval.
To create an approval workflow, the following steps should be applied:
- Open a document library.
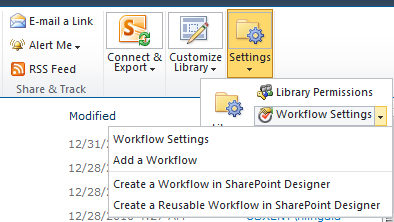
- Select the Library tab and look to the right-hand corner of the Ribbon.
- Select the Workflow Settings drop-down and select Add a Workflow.
- Select Approval - SharePoint 2010 workflow. Give the workflow a name.
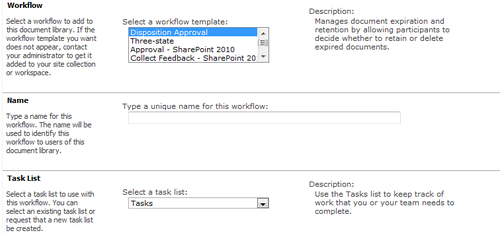
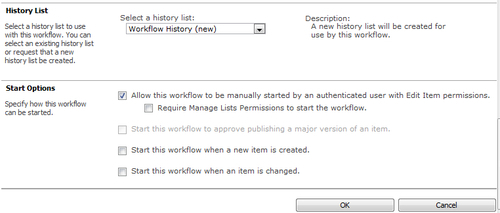
- Keep the Task List and History List default settings.
- Uncheck the selected checkbox under Start Options, and select the checkbox for Start this workflow when a new item is created. The workflow will start automatically each time a new document is created in this library.
- Click Next.
- Select an approver for the document (you can select one or more serial approvers). These approvers will always be the approvers for this workflow in this library.
- Type in a message for the approver(s).
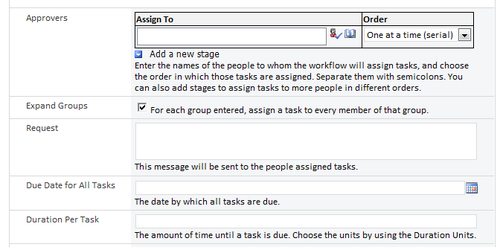
- Enter an appropriate due date for the approval task.
- Enter an appropriate duration for the approval task.
- Select the duration units.
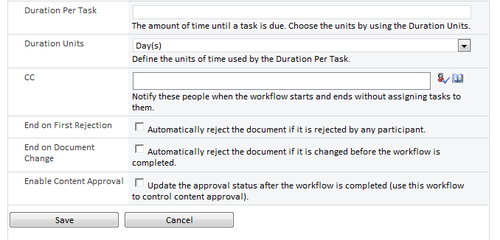
- Decide whether or not to CC anyone during the approval process.
- Select options for First Rejection, Document Change, and Content Approval.
- Click Save.
The next time that a document is created in this document library this workflow will start an approval task for the approver(s) you specified. The workflow will continue, based on all of the options you selected previously, until it reaches its logical conclusion: Approved or Rejected.
The instructions stated previously define the workflow to be started when the item is created in a library or list. In step 6, there was an option to start a workflow manually. This workflow trigger is useful when a workflow process is more ad hoc. To start a workflow manually:
- Click the downward menu arrow on the document/item.
- Select Workflows
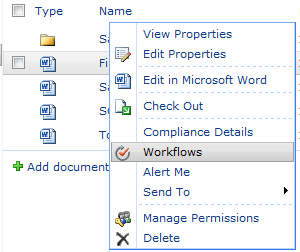
- Choose a workflow associated with the list.
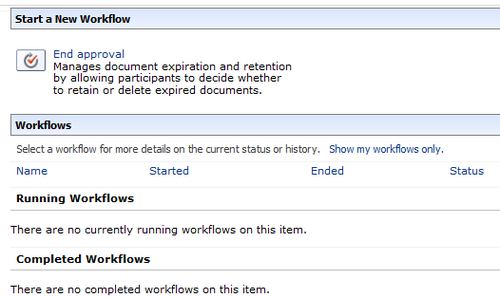
The other predefined workflows can be created by following the steps of the preceding instructions. These workflows are discussed later in this chapter.