
The major difference between adding content to a library and to a list is that the content can be created outside the SharePoint environment and then uploaded into the library for SharePoint functionality to be applied, such as workflows, version control, and notifications.
We do not think there is one correct approach for creating a document inside or outside SharePoint. Typically, the approach depends on the individual and the content of the document. However, the team collaboration benefits of SharePoint can only be achieved by storing the document in a library.
There are a number of ways to upload documents to a library; each way has its benefits.
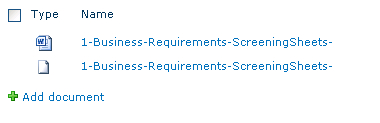
To upload a document or create a document within a library you can navigate using the Ribbon, or you can click on the Add document link. Either way is efficient; it is simply a personal preference.
There are a number of ways that documents can be created in a library, including from the Ribbon and the Explorer view. The type of document that is available to create is dependent on the template used on the list. To create a new Word document with the ribbon, the following steps should be applied:
- Click the Document tab in Library Tools and then click on New Document.
- This will open up a Windows Internet Explorer warning window.
- Click OK.
- The associated application such as Word opens and you can work on the newly created document.
- To save the document into the library, click Save and you will be able to name the document. The file will automatically be saved into the library.
- To upload a document, click Add Document located at the bottom of the list.
- This will display an Upload dialog Window.
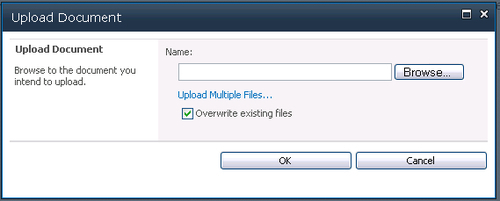
- Click on the Browse button and select the file that you want to upload.
The file will be uploaded to the library.
- In the preceding screenshot is the text Upload Multiple Files. This displays the following figure:
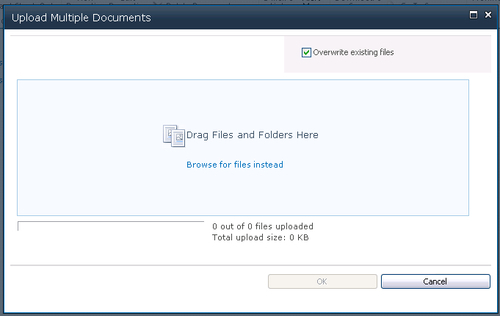
You now have the ability to drag files from your desktop onto this window and click OK to upload the files to the Library.
Note
For multiple uploads, there may be PC configurations that prevent the user from uploading multiple files. These could be settings in the browser that disable Active X controls or JavaScript running. These setting are in the Tools | Internet Options of your browser.
You can also select individual files to be uploaded at once by clicking on Browse for files instead.
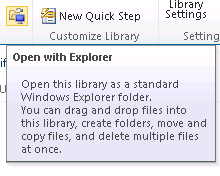
Documents can also be uploaded by clicking the Upload Document icon on the Ribbon or by clicking on the Open with Explorer icon on the Ribbon.
There are four ways to edit an uploaded document in a library; each leaves you with a different user experience.
Click on the check mark of the document in the view and click on the Edit Document icon on the Ribbon.
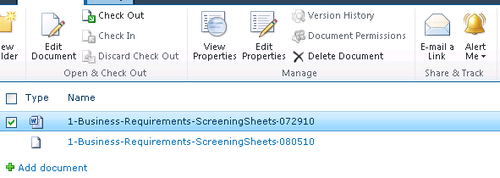
This will open the document in edit mode.
Click on the downward arrow menu of the document in the view and select Edit In Microsoft Word.
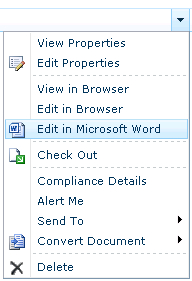
With this method you have the ability to Edit and view the document in the browser. This functionality is discussed further in Chapter 7.
You can click on the document and the following figure is displayed. Then, choose either to Open in Word or Edit in browser.

Managing content in a library is very similar to managing content in a list. Libraries includes alerts, the ability to e-mail a link of the document library to someone else, Permissions Datasheets, RRS feeds, changing views, and workflows. Main functionalities in a library that are not in a list include:
The Send To functionality allow you to copy or link a document in a library to another destination. To use this feature, click on the downward arrow of an item in the library.
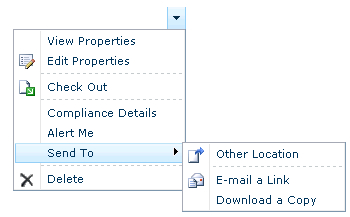
Select the Other Location to copy the file to another SharePoint library.

Type in the URL of the library and click OK.
There is an option to remind the author to send a copy of this file to the other locations when it is checked in.
Note
The Send To | Other Location feature is useful when there is a single document such as a policy document that has been copied to multiple sites, so when a change to this document occurs, the change is replicated in the other locations.
For this activity to occur, you will need access to the destination location.
Note
A useful feature of the Send To | Other Location functionality can be employed when you need to copy a file to another site collection, such as a public-facing SharePoint site. The scenario would be that a document is approved in the intranet site collection and then copied to another site collection that is public-facing using the Send To | Other Location.
If you want to e-mail a link to the document, select E-Mail a Link and your e-mail client will open a new memo with the document URL link pasted into the memo's body. This can be sent to any user that has access to this library.
Note
In your browser, there is an e-mail client setting that may be required to be set; it identifies your e-mail client.
The advantages of this method of sending files to a team member rather than as an attachment is that the link will always open the latest version of the file in the document library. Alternatively, with attaching a document to an e-mail approach, if there are any changes to the document after the memo is sent, another e-mail needs to be sent out.
Tip
A way to prevent users from editing the document in the library is to Check Out the document that the e-mail link points to, so only reader access is available to other users. This is useful if you do not have access rights to change the permissions of a document.
This functionality is also available via the Ribbon by selecting the checkbox of the document in the view and selecting E-mail a Link on the Ribbon.
In a document library there is the ability to create a site from a document within a library. This is useful with collaboration activity performing tasks that only relate to this particular document. To create a document workspace:
- Click on the dropdown menu on the document.
- Point to Send To, and then click Create Document Workspace.
- Click OK.
For the most part, Picture libraries are very similar to document libraries' functionality with the ability to upload pictures, create, and modify view and alert subscriptions. However, there are a few subtle differences:
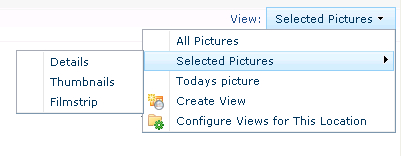
- Details: Displays the file like a standard view with the file icon and columns
- Thumbnails: A thumbnail version of the picture is displayed in the library
- Filmstrip: Displays a row of all the images in the library, and when you click on an image the full-sized image is displayed
There are checkboxes next to each image; if you select these and leave the library (or even the site) and return to this library and select the Selected Pictures view, the previously selected images are displayed.
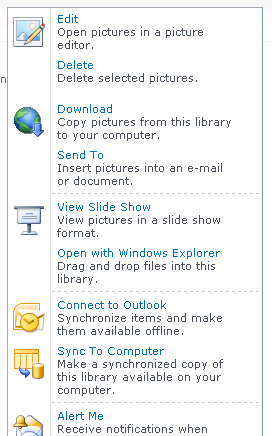
From the Actions menu on the library, pictures can be managed.
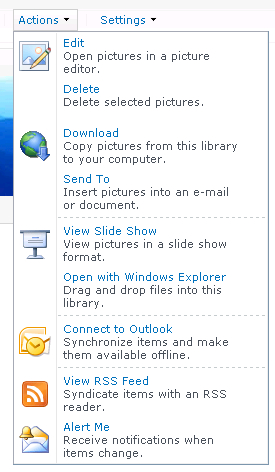
These activities are explained in the following sections.
This functionality allows you to edit a picture using the Microsoft Picture Manager software installed on your computer. The types of editing that can be done include cropping, rotating, and resizing the image.
To edit a picture, checkmark the checkbox to the corresponding picture and click the Edit Link on the Actions menu on the toolbar, and Microsoft Picture Manager will open with the selected images.
The picture can be saved back into the library by selecting File and Save in the application.
The delete function will delete the image. The image is moved to the recycle bin that can be found on the Quick Launch navigation, where it can be recovered if necessary.
The Picture Libraries download function allows you to download the image Full Size, Preview, or Thumbnail size.
If you click on the Set Advanced download options, there is the ability to save the file in different file formats and ratio sizes.
The Send To functionality of a Picture Library is unique when compared to other libraries as it allows you to copy the selected image(s) to an e-mail, Word, Excel, or PowerPoint document.

This functionality launches Windows Explorer and allows you to click through images like a slideshow with the ability to pause, rewind, and fast forward.
The other actions of the picture library such as folders, Windows Explorer, Connect to Outlook, Alert Me, and View RSS Feedback are the same as a Document Library.
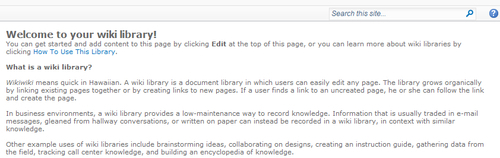
Wiki libraries are different to other libraries because files cannot be stored in them, files cannot be uploaded into them, and views are more for editing of content rather than navigational. When a wiki library is created, it is populated with two wiki pages. These are for presentational purposes.
Tip
For a short overview of how to use a wiki in SharePoint, click on the How To Use This Library link on the Quick launch. This link to a wiki page in the library explains how to create and edit pages and create wiki links.
One of the advantages of a wiki is that it keeps a version history of previously entered content, and because the information is centrally stored, multiple user collaboration is easy. This is useful for knowledge base activity because in order to understand a final version of a page, there is often a need to see previous releases of content and who created these versions.
There are two ways to add a wiki page.
The wiki page Agenda Items will create the next item when the link on this page is clicked. It is possible to see that the page has not been created yet because the Agenda Items text has dashed underlines.
Tip
The second way of creating pages does not link the page to other pages. This has to be done by typing in the page name inside double square brackets. We recommend the first way when creating wiki pages.
It is possible to confirm if a page is linked to other pages by clicking the Incoming Links icon on the Page Ribbon. This will display any pages that link to the open page.
Wiki pages can be edited either while the page is being displayed, or by clicking on the View All Pages icon on the Page Ribbon that will then display all the pages in the wiki library.
Because the purpose of a wiki is to allow multiple people to contribute to the content of the library, there may be situations where a previous version of a wiki page is required to be restored to the published page.
This can be done when you:
- Open a wiki page that you wish to view previous page versions.
- Click on the Page History icon on the Page Ribbon.
- View a list of previous versions of this page displayed by the Quick launch.
- Select the page that you wish to restore.
- Click on Restore this version on the top of the page.

- This page will now be restored.
Throughout the previously described navigation steps you have the ability to delete and view the version history of pages.
A wiki library has other library functions associated with it, such as data sheet, alerts, workflow, and permissions. These are discussed in Chapter 3, SharePoint Team Sites, Chapter 6, Workflows Fundamentals, and Chapter 10.
There are two content types in this library.
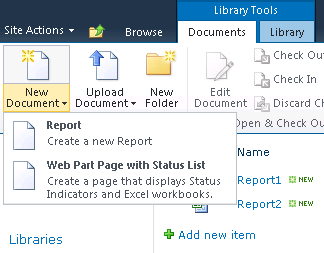
Both of these content types are available from the New Document icon on the Ribbon, but in the library on the Add new item link the Report is the only option.
This content type stores Excel files that can be published as a web page. This function is discussed in Chapter 7, Office Integration with SharePoint and Chapter 13.
This content type is discussed further in Chapter 15.
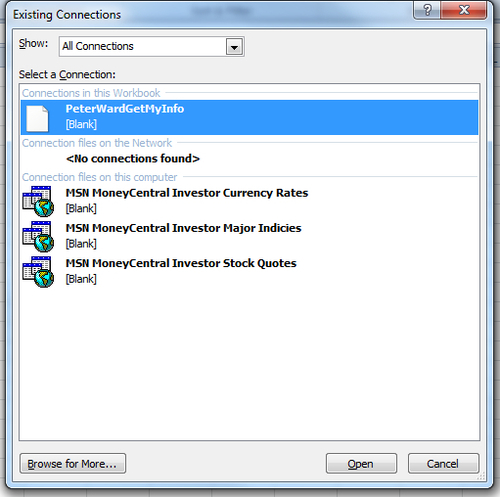
A Data Connection Library contains two kinds of data connections: an Office Data Connection (ODC) file or a Universal Data Connection (UDC) file. Excel 2010 uses data connections that comply with the ODC file schema and typically have the *.xml file name extension. Data sources described by these data connections are stored on the server and can be used with Excel 2010.
The instructions below list the steps for creating a data connection file to an established data source, which in this case is an Excel file:
- Open Excel 2010, click on the Data tab, click Connections, and then click Add.
- In the Data Connection Wizard, click Create a new connection to | Receive data | Next.
- Choose the SharePoint library as the data source that you are connecting to and then click Next.
- Complete the remaining steps in the Data Connection Wizard to configure your data connection and then click Finish to return to the Data Connections dialog box.
- In the Data Connections dialog box, click Convert to Connection File.
- In the Convert Data Connection dialog box, enter the URL of the data connection library that you previously copied (delete
Forms/AllItems.aspxand anything following it from the URL), enter a name for the data connection file at the end of the URL, and then click OK. It will take a few moments to convert and save the data connection file to the library. - Confirm that the data connection was converted successfully by examining the Details section of the Data Connections dialog box while the name of the converted data connection is selected.
- Browse to the SharePoint data connection library, click the drop-down next to the name of the data connection, click Approve/Reject, click Approved, and then click OK to enable the data connection.
Every time this Excel file opens a connection is established to the data source and data from the source is displayed in the Excel file.
Tip
If multiple users are creating different reports from the same data connection, the data connection can be simplified further by creating an Excel document library and using the Excel file that is connecting to the source file as the library template.
Data connections can be edited and managed like any other SharePoint list item.
To use this functionality you must have PowerPoint 2007 or a later edition installed on your computer.
To add slides from a PowerPoint presentation to the slide library, the following steps should be applied:
- From the library select the Publish Slide menu option from the Upload toolbar menu.

- The PowerPoint application will open. Select a saved PowerPoint file that is saved on your desktop or network drive.
- In a dialog box, each slide of the PowerPoint deck is displayed.
- Next to each slide is a checkbox. Check the slides that you want to copy into the library and click Publish. Each selected slide will be saved into the library. You do need to refresh the browser for the uploaded slides to be displayed.
Tip
The above steps can be performed from PowerPoint, with the Publish slides functionality in the Save & Send category.
To copy slides in a library to a presentation:
- Select the slides that you wish to use in a presentation by checking the slides checkbox and click the Copy Slides to Presentation button on the menu. This will display the following prompt box:
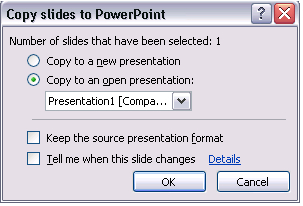
- You can either copy the slides to a new presentation or an existing one.
- If you want the slides to maintain their current theme and formatting, select Keep the source presentation format. If you are adding slides to an existing presentation, this option may not be required because you may only want to copy the content of the slide.
- . If you wish to be notified if there is a change to the slides in the library that now reside in your PowerPoint deck, select Tell me when this slide changes. Each time you open a PowerPoint file that has had Slides copied to it you are prompted to check for updates.
Slides can be edited just like any uploaded file in a library or list. For editing purposes, you should view each slide as a unique single slide presentation.
Slide Libraries have the same functionality as other libraries, such as check in, version control, and views.
Tip
Using folders in a Slide Library can be a good method to organize slides of presentations into categories. However, if you require slides from different folders to be copied into a presentation, you will need to perform the Copy Slide to Presentation process multiple times because this copy method only works on a per view basis. A better method of organizing data is to create a keyword column in the library so you can filter on keywords to perform the copy action in a single click.
The Asset Library is similar to the Picture Library with the ability to store video and audio files and do not have the non-2007 Ribbon interface.
Both libraries have the same column names in the views—Title, Preview, Keywords, Comments, Date Picture Taken, Picture Size fields, and Show Thumb Nails in Views.
The differences between the Asset and Picture library are as follows:
- The Picture Library uses the Picture Content Type, which has the Preview Image URL ability, and the Asset Library uses the Image Content Type that has the Author and Copyright field additions.
- To preview media in the asset Libraries you will need Microsoft Silverlight and Windows Media Player installed on your PC. Both of these are free to download from the Microsoft site.
All media files, such as MPEG, should be stored in the Asset Library.
The functionality of a library can be very broad, so it is difficult to specify exact best practices that can apply for every situation. However, the following points should be considered and understood:
- If multiple users are editing documents, require Check Out to be enforced in the library setting. This will prevent users overwriting different versions of files.
- Add the Checked Out By column to the default view of the library so users can see who has a document checked out. If you hover over the Checked Out icon, the person's username who has checked out the document is displayed.
- Decide whether versioning is appropriate for the functionality of the library. Remember that the more versions you have, the greater the disk space required. The decision as to whether versioning is appropriate will depend on the value of the content.
- If it is an important report that has multiple users editing it, or a document that requires auditing and compliance, then versioning is appropriate.
- If the library contains documents that are of interest, but not essential, then versioning may not be appropriate.
- As a half-way house approach, versioning can be limited to a set amount of documents.
- Use folders only if you need to scope unique permissions on documents or if you are required to make a subset of documents easily available offline in Microsoft Outlook.
- If a library has more than 2,000 items, remove the out of the box default view, which shows all items. The default view should be filtered so the page can load in a reasonable amount of time.
- Content Types for documents are an excellent way to have multiple file types in the same library. There are several scenarios that this is useful in:
- Business reports: If there is a report library that contains multiple reports, each report should be a separate content type in the list. This will keep reports together in a single library.
- Centralization Management: Because content types can be centrally managed, if the report changes, only the content type changes in a single instance, not in each library where the report is being used.
- Multiple contents sources: Often there is a requirement to store multiple content types; not just as a document, but as a contact or a link. If the library contains vendor information then it would be useful to have a link to their site, a document on their terms, and contact information all in the same library. The content types in this scenario might be a Word document, URL link, or a contact.
Train users on the above library functionalities—check out, workflows, and versions. This is not a best practice; rather an adoption approach to functionality of practices.