In this chapter, we have discussed record management and the process of marking a document as a record for legal and compliance reasons. Information Management Policies is the procedure of applying these processes as a set of rules that govern the record management policies to be correctly applied across a site.
These policies enable administrators to control retention, auditing, labels, and barcodes of content, and how effectively people are complying with the policy. The most common creators and enforcers of policy are compliance officers, records managers, IT staff, and others who are responsible for managing risk.
SharePoint Server 2010 has several out of the box policy features that you can customize for your needs across the SharePoint technology. The advantages of using polices is that you can set and manage the rules for a content type from a single location, including both client side policy features such as document deletion by a user and server side policy features such as expiration dates.
A policy is a collection of instruction sets for one or more policy features. Each policy feature provides a specific kind of content management functionality. You can assign a policy to:
Note
Policies require little involvement from end users because corporate policies are automatically and transparently followed.
There are four information management policy features to help you manage your content: expiration, auditing, document labels, and document bar codes.
With an expiration in a policy there is the ability to retain information for fixed periods of time and manage the lifecycle of content. This is done at the end of the content's life. The expiration policy feature can dispose of content in a consistent way that can be tracked and managed. For example, you can set content that is assigned a specified content type to expire on a specific date, within a certain amount of time after the document was created or last modified, or based on a workflow activity or some other event.
After the document expires, you can determine the actions that the policy control takes. For example, the policy can delete the document, or define a workflow to have SharePoint Server 2010 route the document for permission to destroy it. In addition, the expiration policy feature provides the capability for you to build and use a custom plugin action to be performed on the item after it reaches its expiration date, such as a web service to move the document to another site collection.
It is not uncommon in an organization to have a separate site collection that only contains expired content of a live site. There are a number of benefits to this approach:
To apply expiration to a content type in a Library or list, the following steps should be taken:
- In the Library or list, click on the ListLibrary Settings on the Ribbon.
- In the General Settings section of the Document Library Settings page, click Advanced Settings.
- In the Content Type section click Yes.
- Click OK.
To apply another content type to this listlibrary you will need to perform the following steps in the library to create another unique content type:
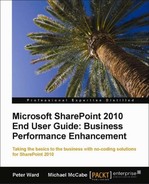
- On the Document Library Setting page, click on Information Management Policy Settings link.
You will now see the content types for this library.
- Please note that there are now two content types associated with this library.
- Click on the Document link.
The Edit Policy page is where the expiration, auditing, document labels, and document bar codes policy features can be applied.
- Click on the Enable Retention checkbox.
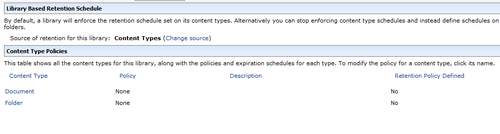
- Click on the Add a retention stage link.
- Set the time period of when you want this policy to be activated.
- Set an action for this policy.
- Click OK.
An expiration policy has been set up on this content type.
Content is not just about creation, but also management, deletion, and re-submission. Organizations always have initiatives to create information such as policies and procedures, but from a user’s standpoint what really undermines these initiatives, is when this information becomes outdated and perhaps inaccurate. So, by applying expiration rules when moving updated content, or triggering workflows to content, owners' accountability to the content can be assigned and old content can be removed from a live site.
For corporate websites where the customers make decisions on published content, inaccurate or even wrong information can be expensive to the organization.
Typically, time sensitive information on a corporate website would include product information, executive bios, and vacant jobs, which would be associated with content owners' departments. By applying expiration policies, the content owners will be notified to renew or remove content.
In the scenario stated previously, the benefit to the business is that responsibility is now with the content owners, product managers, and HR who actually work in the departments that benefit the most from the published information, rather than the webmaster, who may not be involved with the intimate details of the published information.
This is a good example of SharePoint enterprise content approval and teamwork, where the webmaster can set up the policies for the content owners to act on.
By using expiration, content can now have lifecycle stages applied to it, such as pending expiration review, expired, and expired do not use. This is useful for users to know the credibility of content, if it is time sensitive.
SharePoint 2010's auditing is all about the activities around both a document, or item, or Site during its lifecycle. It is the classic who, where, when, what, and how of activities.
SharePoint 2010's item-level auditing capabilities have the ability to report on who opened, edited, checked in, checked out, moved, copied, or downloaded the document or item.
Note
The Site-level activity is useful as it shows security changes and when metadata associated with content was changed. This is a powerful compliance feature.
Only administrators can see the details of the audited information. This information cannot be edited through the SharePoint interface.
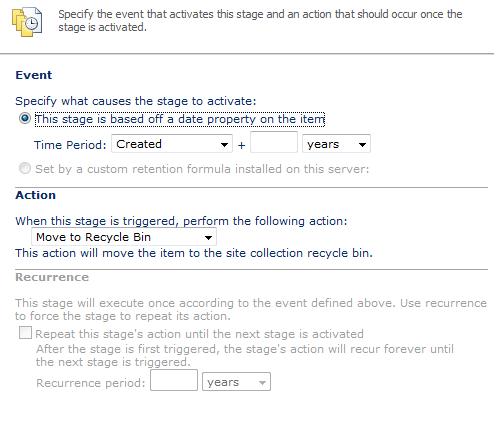
To set up Site Collection Auditing, apply the following steps:
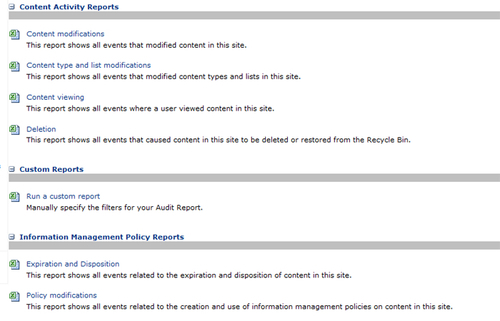
Now the auditing functionality is activated, you will need to run audit reports on the collected audited information. To do this, follow these steps:
Tip
We have two suggestions:
- Create a library in the Site collection called Audit Reports and save all the desired reports in this library. This makes it easier to find reports.
- On the Audit Log Reports page there is the ability to create up to nine reports. We suggest that you create all of the log reports because, over time, when there is more user activity on the sites, content owners begin to request audit activity information.
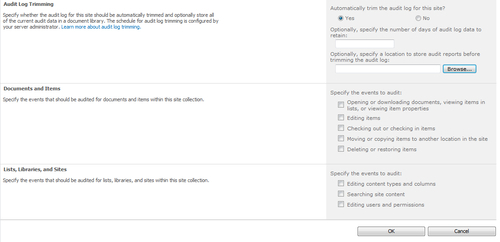
In the View Auditing Reports page there is a Custom Report option section. Click on the Run a custom report link.
You will be presented with the following screenshot:
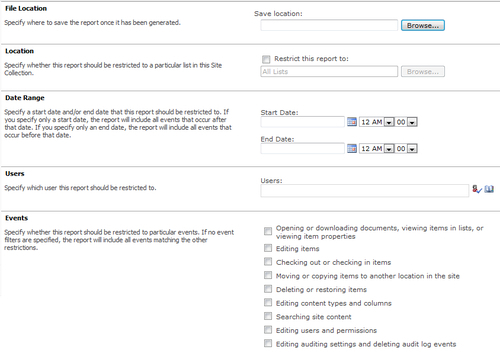
There is the ability to select date ranges of the auditing, security restrictions, and auditing events.
The document label feature and the bar code feature are designed to assist you in organizing your documents for systematic storage and retrieval. You can use either feature to assign a unique label to a document, whether the document is a physical copy or electronic file, which enables you to track it.
Document labels are text labels that you can have SharePoint Server 2010 generate automatically based on a content type's metadata. For example, a law firm might want to attach a document label consisting of client name, subject matter, and date assigned to each document of a given content type.
You can print and affix document labels to a physical copy of the document, or insert them as images into a Microsoft Office 2010 document.
To apply document labels to a content type in a listlibrary, follow the steps outlined for an expiration policy and select the Enable Labels checkbox.
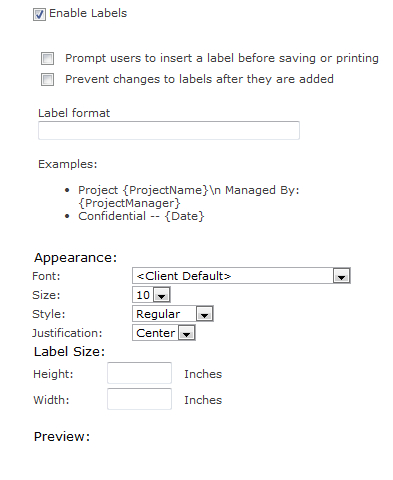
Apply the desired labeling requirements.
Document bar codes are similar to document labels, but instead of text they are a generated unique ID, which is linked, but separate to, the document ID (this is a number generated at random so uniqueness cannot be guaranteed). You can print and affix the bar code to a physical copy of the document, or insert it as an image into an Office 2010 document. You can also extend and customize the format of the bar code.
This feature is useful if you are printing documents and have a bar code reader. If you are looking for a document unique identifier, the Document ID may be more appropriate as this is searchable, and if the document is moved, the ID stays with it.
We recommend when you plan your policies, first determine your organization-wide policy needs. Then, design Site Collection policies to meet those needs and distribute those policies for inclusion in the Site Collection Policy galleries of all relevant site collections.
A single Site Collection policy is designed to be applied to all product specifications so that they are consistently audited and retained. After defining the Site Collection policy and testing it, it can be exported and then imported to Site Collection Policy galleries of other site collections in which product specifications are stored. It is then associated with all product specification content types in the various site collections to impose the policy on all products.
This should be coordinated with the SharePoint administrator.