
If you need to set up an email account that isn’t from one of the more popular providers, you’ll need to type some additional information such as your incoming and outgoing mail server settings. (If you have no idea what these settings are, you’ll need to get them from your email provider or your Internet service provider.)
To set up an email account manually, follow these steps:
From the Home screen, tap Settings. The Settings screen appears.
Tap Mail, Contacts, Calendars. The Mail, Contacts, Calendars settings screen appears (shown earlier in Figure 13-1).
Tap Add Account. The Add Account screen appears (shown earlier in Figure 13-2).
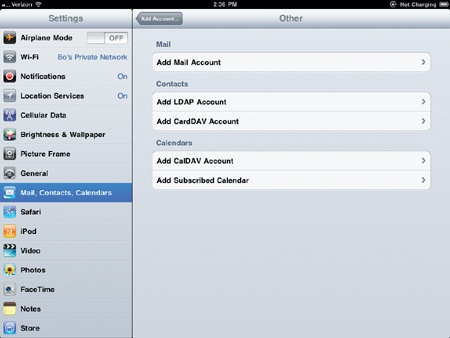
Tap Other. The Other screen appears, as shown in Figure 13-5.
Tap Add Mail Account. A New Account window appears with the virtual keyboard.
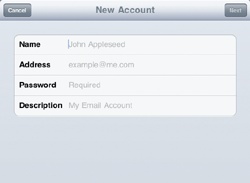
Type your name, email address, password, and description of your email account, and tap Next. The New Account window appears, as shown in Figure 13-6.
Scroll down and type your host name, username, and password for your incoming and outgoing mail servers.
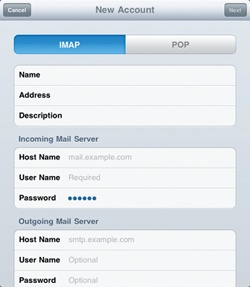
Tap Save. A New Account window appears where you can type information for your incoming and outgoing mail server, as shown in Figure 13-7.
Tap the IMAP or POP tab.
Type the Incoming Mail Server and Outgoing Mail Server information.
Press the Home button. The Home screen appears.
Tap Mail. If you’re currently connected to the Internet, your iPad will retrieve any messages for that email account.
Note
You may later want to set up a Contacts and Calendars account with your email account so you can keep track of appointments and contact information. Just repeat steps 1–4 of Setting Up an Email Account Manually on page 90. Then instead of tapping Add Mail Account, tap one of the Contacts or Calendars options, such as Add CardDAV Account or Add CalDAV Account.