
The OpenCV library is an extensive library aimed at providing real-time computer vision processing across multiple platforms. Essentially, if you want to do any serious image processing, object recognition, or analysis, then OpenCV is a perfect place to get started.
Fortunately, the latest release of OpenCV (version 3) has added support for interfacing via Python 3. Although performing real-time video processing can often require a computer with a powerful CPU, it will run on relativity limited devices such as the original Raspberry Pi (version 1). Using the more powerful Raspberry Pi 2 is highly recommended for the following recipes.
The concepts and underlying methods behind image and video processing can get rather complicated. This first recipe shall demonstrate how to work with OpenCV and most importantly provide an easy way to visualize various stages that may be used for processing images.

When performing tests with the camera ensure you have suitable test subjects available
The OpenCV library is written in C++ and needs to be compiled before we can use it on the Raspberry Pi. To do this, we will need to install all the required packages and then download a release from the OpenCV Git repository. OpenCV can require around 2.5 GB of space while it compiles; however, a standard installation of Raspbian from NOOBS can use around 5.5 GB. This means there may be insufficient space available on an 8 GB SD card. It may be possible to squeeze OpenCV onto a smaller SD card (by installing a custom Raspbian image or utilizing a USB flash device); however, to avoid complications, it is recommended you use at least a 16 GB SD card to compile and install OpenCV on.
Additionally, while the majority of recipes in this book can be run using SSH and X11-forwarding over a network connection, the OpenCV display window appears to function far more effectively if you are connected to a local screen (via HDMI) and controlled directly with a local input devices.
Installing OpenCV is quite a long process, but I feel the results are well worth the effort:
- Ensure that the Raspberry Pi is as up to date as possible, using the following commands:
sudo apt-get update
sudo apt-get upgrade
sudo rpi-update
- And perform a reboot to apply the changes:
sudo reboot - Before we compile OpenCV, we need to install a number of dependencies to support the build process:
sudo apt-get install build-essential cmake pkg-config
sudo apt-get install python2.7-dev python3-dev
- We also need to install a number of supporting libraries and packages used by OpenCV (we may not use all of these, but they form part of the build process). These will also provide support for a wide range of image and video formats from within OpenCV:
sudo apt-get install libjpeg-dev libtiff5-dev libjasper-dev libpng12-dev
sudo apt-get install libavcodec-dev libavformat-dev libswscale-dev libv4l-dev
sudo apt-get install libxvidcore-dev libx264-dev
sudo apt-get install libgtk2.0-dev
- We can also install NumPy, which is very useful when manipulating image arrays within OpenCV, Automatically Tuned Linear Algebra Software (ATLAS), and GFortran for additional mathematic functionality:
sudo apt-get install python3-numpy
sudo apt-get install libatlas-base-dev gfortran
- Now that we have the supporting packages, we can download OpenCV and OpenCV Contributed (extra modules) directly from GitHub. We will also create a build location ready for the next step:
cd ~
wget -O opencv.zip https://github.com/Itseez/opencv/archive/3.0.0.zip
unzip opencv.zip
wget -O opencv_contrib.zip https://github.com/Itseez/opencv_contrib/archive/3.0.0.zip
unzip opencv_contrib.zip
cd opencv-3.0.0
mkdir build
cd build
Note
Note: You can download the latest version using the following links and selecting a specific release tag; however, you may find you require additional dependencies or modules for the package to compile successfully. Ensure you select the same release for OpenCV and the contributed modules.
- The
makefile can be created using the following commands. This takes around 10 minutes to finish (see the following screenshot):cmake -D CMAKE_BUILD_TYPE=RELEASE -D CMAKE_INSTALL_PREFIX=/usr/local -D INSTALL_C_EXAMPLES=ON -D INSTALL_PYTHON_EXAMPLES=ON -D OPENCV_EXTRA_MODULES_PATH=~/opencv_contrib-3.0.0/modules -D BUILD_EXAMPLES=ON ..

Ensure that the Python 2.7 and Python 3 sections match this screenshot
- We are now ready to compile OpenCV; be warned this will take a considerable amount of time to complete. Fortunately, if you have to stop the process or if there is a problem, you can resume the
makecommand, checking and skip ping any components that have already been completed. To restart themakefrom the start, usemake cleanto clear the build and start afresh.
The build can take almost three hours to complete. If you have the Raspbian desktop loaded or you are running other tasks in the background, it is recommended you log out to the command line and stop any additional jobs, otherwise the process may take even longer to complete.
For a Raspberry Pi 1, use a single-threaded make job with the following command:
make
For a Raspberry Pi 2, enable up to four simultaneous jobs by using the following command:
make -j4
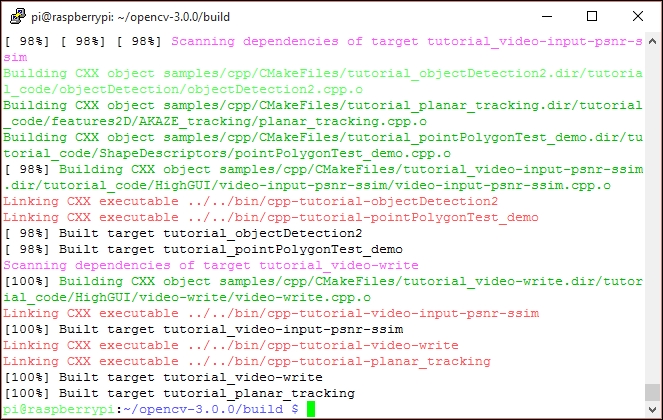
A completed build should look like this
With OpenCV compiled successfully, it can be installed:
sudo make install
Now that is all completed, we can quickly test that OpenCV is now available to use with Python 3. Run the following command to open the Python 3 terminal:
python3
At the Python 3 terminal, enter the following:
import cv2
cv2.__version__
This will display the version of the OpenCV you have just installed!
Note
Note: The OpenCV library is updated regularly, which can cause problems with the build process. Therefore, if you have issues, the Py Image Search website (http://www.pyimagesearch.com) is an excellent resource that contains the latest guides and video tutorials for installing OpenCV on the Raspberry Pi.
For our first OpenCV test, we will use it to display a captured image. Create the following openimage.py file:
#!/usr/bin/python3
#openimage.py
import cv2

# Load a color image in grayscale
img = cv2.imread('testimage.jpg',0)
cv2.imshow('Frame',img)
cv2.waitKey(0)
cv2.destroyAllWindows()
Ensure before you run the script, that you capture an image to display using the following command:
raspistill -o testimage.jpg -w 640 -h 480
Run the script with the following command:
python3 openimage.py
The simple test program starts by importing OpenCV (cv2) and loading the image using cv2.imread(). We then use cv2.imshow() to display our image (img) in an image box with the title 'Frame'. We then wait for a press of any key (cv2.waitKey(0)) before closing the display window.

The image is displayed in a standard frame as a grayscale image