
Chapter 13 Progressing with Videos
In This Chapter
After having encoded videos in Chapter 12, “Encoding Videos with Expression Encoder,” the next step is to publish them on the Internet and place the viewer on web pages, to make your videos available to many users.
The solutions commonly available for online video publishing are often not very satisfying. By publishing your videos on any of the normal online video providers, you pretty much give away your content to this firm. Your videos will be resized and converted to a lower quality. Additionally, they will often add their own logo on your video, which is annoying.
Silverlight video, on the other hand, is fully in your possession. You decide in which quality your movies must be delivered, and which look and feel the player should have. You are the sole owner of your content.
Why Streaming?
First, it is important to remember what we studied before: Silverlight runs on the client; that is on the user’s computer, and not on the web server. Even when we publish a Silverlight video application on a web server, the user must download the Silverlight application and any additional files (including videos) to his computer. The application sends a request to the web server. In response, the server sends the first bytes of the video. Often, however, the user decides that the video is not what she wants and stops the player after a few seconds.
Here lies the critical difference between streaming a video and downloading it: When a server sends a video for download, it sends the whole file, no matter what. If the user stops the video after just a few seconds, the rest of the file gets sent anyway to the client, and that is a waste of bandwidth.
On the other hand, if the server is streaming, it sends small packets after small packets, and can interrupt the transmission if the video player is not interested anymore.
Note that with modern video players (including Silverlight), progressive download is supported. This term simply means that the player can play the video as soon as enough content has been downloaded. Users often mistake progressive download for streaming, because it’s hard to tell the difference without checking what’s really going on under the hood.
There are a few differences between streaming and downloading:
![]() If a video is streamed, it is not saved on the client. It requires less disk space, but it also means that it cannot be viewed offline.
If a video is streamed, it is not saved on the client. It requires less disk space, but it also means that it cannot be viewed offline.
![]() If a video is downloaded, even if progressive download is supported, the user cannot simply skip ahead to a portion of the movie. The player must wait until the file download reaches this portion to be able to display it. On the other hand, if the video is streamed, the server can skip ahead and start sending the corresponding parts.
If a video is downloaded, even if progressive download is supported, the user cannot simply skip ahead to a portion of the movie. The player must wait until the file download reaches this portion to be able to display it. On the other hand, if the video is streamed, the server can skip ahead and start sending the corresponding parts.
![]() For live video broadcast (live webcast, live TV shows, and so on), the video must obviously be streamed.
For live video broadcast (live webcast, live TV shows, and so on), the video must obviously be streamed.
![]() Streaming servers can optimize the transmission based on a number of parameters (connection speed, capability of the player, and so on). Download servers, on the other hand, simply send packets as fast as possible. If a big number of clients connects simultaneously, this can lead to “traffic jams.”
Streaming servers can optimize the transmission based on a number of parameters (connection speed, capability of the player, and so on). Download servers, on the other hand, simply send packets as fast as possible. If a big number of clients connects simultaneously, this can lead to “traffic jams.”
![]() Last but not least: Renting streaming server space costs more money than regular server space.
Last but not least: Renting streaming server space costs more money than regular server space.
The Silverlight video players support both progressive download and streaming, so it’s up to you to choose the best solution for your application.
Publishing on Your Own Website
You might be surprised to see no XAP or C# files in the output created by Expression Encoder. The reason is simple: It targets Silverlight 1! The video playing capabilities of this Silverlight version are absolutely sufficient to support all the functionalities of the players created by Expression Encoder. It means that we will deal mostly with XAML and JavaScript files in this chapter.
Copying the Files
Publishing a Silverlight video on your own website is easy. You just need to upload some files, and you’re set. Let’s review the procedure in the following steps:
1. For information about setting up your web server and installing and setting up the FTP client, check Chapter 7, “Deploying to a Web Page.”
2. Start your FTP client and connect to your web server.
3. Create a new folder for your video on the server.
4. On the client side, navigate to the folder in which the encoded video and all the output files are placed.
5. Copy all the files to the web server.
Expression Encoder creates the following files:
![]() ExpressionPlayer.js, MicrosoftAjax.js, player.js, Silverlight.js, SilverlightControl.js, SilverlightMedia.js—Contain application files for the Silverlight player. Do not modify these files, or your Silverlight player could stop working correctly.
ExpressionPlayer.js, MicrosoftAjax.js, player.js, Silverlight.js, SilverlightControl.js, SilverlightMedia.js—Contain application files for the Silverlight player. Do not modify these files, or your Silverlight player could stop working correctly.
![]() PlayerString.js—Contains messages for the user. If needed, these can be translated.
PlayerString.js—Contains messages for the user. If needed, these can be translated.
![]() StartPlayer.js—This script file is created especially for your video. This is the file in which we will work later to customize your application.
StartPlayer.js—This script file is created especially for your video. This is the file in which we will work later to customize your application.
![]() Marker thumbnails—These files are the thumbnails you specified for chapters. Their name varies according to your movie name, the time in the movie at which the corresponding chapter is placed, and the format you choose for the image—for example: skiing_7.369.jpg.
Marker thumbnails—These files are the thumbnails you specified for chapters. Their name varies according to your movie name, the time in the movie at which the corresponding chapter is placed, and the format you choose for the image—for example: skiing_7.369.jpg.
![]() Any other image file— Depending on the video player you choose, additional image files are created. For example, some video players use a file named buffering.jpg to display an animation when the video content is being downloaded.
Any other image file— Depending on the video player you choose, additional image files are created. For example, some video players use a file named buffering.jpg to display an animation when the video content is being downloaded.
![]() player.xaml—This XAML file contains the video player’s user interface.
player.xaml—This XAML file contains the video player’s user interface.
![]() Default.html—This HTML file is a test page where the Silverlight video player is displayed in full size. You can upload this file to your web server if you want to test the video without integrating it in your own page first, or if you want to point an HTML
Default.html—This HTML file is a test page where the Silverlight video player is displayed in full size. You can upload this file to your web server if you want to test the video without integrating it in your own page first, or if you want to point an HTML iframe to it.
![]() MediaDefinition.xml—This XML file contains information about the video and its chapters. It is not strictly needed on the web server, however, because this information is also encoded in the video file, but it doesn’t harm uploading it.
MediaDefinition.xml—This XML file contains information about the video and its chapters. It is not strictly needed on the web server, however, because this information is also encoded in the video file, but it doesn’t harm uploading it.
Adding an Overlay
Adding an overlay to a video can be a great way to give an identity to such a file, for example, with a company logo.
However, don’t forget that everything you’re doing here will be “burned” into the video file. It might not be an appropriate way to display a message that must change often, such as an advertisement. In that case, a better solution would be to set your Silverlight application so that the advertisement is displayed on top of the media element in which the video is playing. A nice touch is also to resize the media element while the advertisement plays, so that it is not covered by the ad, which would reduce the user experience.
Overlays are well suited, on the other hand, when you want to mark the video with your print, either for branding, to add disclaimers, or for copyright purposes. Since the overlay is burned into the video file, it is not possible to remove it.
Adding an Icon or a Video
One type of overlay is a “static” image or even a video file. You can add one with the following steps:
1. Open Expression Encoder and prepare a video for encoding like we did in Chapter 12.
2. In the Overlay category of the Enhance panel, check the Add Overlay check box.
3. Using the File controls, click on the “…” button to display a file dialog.
4. In the Open dialog, select Files of Type, Media Files.
5. Select an image or a video file for the overlay. Do not worry about the size; you can resize it in Encoder.
6. You should now see the overlay in the Viewer panel. Move it to the desired location. You can also resize it using the green border, or the corresponding section in the Overlay category of the Enhance panel.
7. You can make the overlay partly transparent using the Opacity control.
8. If your media overlay has a solid color background, you can ask Expression Encoder to remove it. Simply check the Use Transparent Background check box.
9. Note that a video overlay is always muted.
Setting Advanced Properties
As usual in Encoder, an advanced section is also available for the overlay. To display it, open the expander located under the Overlay category in the Enhance panel. The following properties are available in the advanced section:
![]() Specify whether the overlay should apply to the whole video or to parts of it:
Specify whether the overlay should apply to the whole video or to parts of it:
![]() Main Video Only—The overlay will be visible during the whole video, but not during a leader or trailer sequence.
Main Video Only—The overlay will be visible during the whole video, but not during a leader or trailer sequence.
![]() Whole Sequence—The overlay will always be visible.
Whole Sequence—The overlay will always be visible.
![]() Custom—Allows you to specify a start and end time for the overlay. You can move the yellow playhead to a position in the video where the overlay should appear. Click the Update button next to the Start text box. Then move the playhead again and do the same for the End position.
Custom—Allows you to specify a start and end time for the overlay. You can move the yellow playhead to a position in the video where the overlay should appear. Click the Update button next to the Start text box. Then move the playhead again and do the same for the End position.
![]() If the overlay is a video, it will play in a loop if the Loop Overlay check box is checked.
If the overlay is a video, it will play in a loop if the Loop Overlay check box is checked.
![]() If you checked the Loop Overlay check box, you can also specify a gap between the loops. During the gap, the video overlay will be hidden. After the gap is expired, the video overlay will appear and play again.
If you checked the Loop Overlay check box, you can also specify a gap between the loops. During the gap, the video overlay will be hidden. After the gap is expired, the video overlay will appear and play again.
![]() Instead of letting the overlay appear aggressively, use the Fade In and Fade Out boxes to specify a smoother transition. You can also use the playhead and the Update button!
Instead of letting the overlay appear aggressively, use the Fade In and Fade Out boxes to specify a smoother transition. You can also use the playhead and the Update button!
You can test the result directly in Encoder by positioning the playhead and using the Play/Pause button.
Adding an XAML Overlay
The ability to use a static icon or a video for an overlay is already pretty exciting, but let’s see now how to add XAML to the picture—literally! Note that in addition to being used as an overlay, a XAML file like we create here can also be added as a leader or a trailer for a video. This is great to create animated titles or credits, for example. Follow the steps:
1. Start Expression Blend.
2. Select File, New Project from the menu.
3. Select the first option: WPF Application (.exe). We are not really going to create a WPF application here, but we will use Blend to create a XAML animation that we can import into Expression Encoder.
4. Set the location where this (temporary) application must be saved, give it a name and click OK.
5. Add an image to the Grid named LayoutRoot. Remember you can simply drag and drop an image file from Windows Explorer. Typically, you can add your company’s logo, for example.
6. Make sure that the Image is selected in the Objects and Timeline category.
7. Set the following properties:
![]()
HorizontalAlignment and VerticalAlignment: Center
![]()
Margin: 0 0 0 0
![]()
Stretch: Uniform
8. Select the Window in the Objects and Timeline category, and reset its Height and Width to Auto. Of course you can also add other XAML elements if you want, such as texts, shapes, etc…
9. Add a storyboard and name it LogoStoryboard.
10. Using what you learned in previous chapters, create an animation with your logo. Use ScaleTransform, RotateTransform, or any other animation.
11. Save all your files. Then, right-click on the Solution and select Edit in Visual Studio.
12. In Studio, select the menu File, New, File and add a new text file to the project.
13. Copy the whole XAML markup from Window1.xaml to the next text file you just added.
14. Save the text file under the name Animation.xaml. Make sure that the file is saved in the same folder as all the other project files, including the picture you’re displaying in your animation.
15. Remove from the markup the properties x : Class, x : Name, and Title.
16. Everywhere in the markup, replace the word Window with Grid. Expression Encoder cannot use a Window as the top-level element. By replacing with a Grid, we allow Encoder to load the XAML markup. Then save all your files.
17. Change to Expression Encoder and create a new job. Import a video.
18. In the Overlay category of the Enhance panel, follow the same procedure as before to add an overlay, but instead of choosing a video overlay, select the XAML file we saved (and edited) before (Animation.xaml).
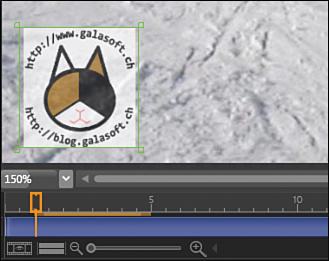
19. All other parameters can be set just like the video overlay’s parameters. The animation runs like a video. You can set it to loop, to fade in and out, and you can specify for how long it should run. In the end, you have an XAML overlay as shown in Figure 13.1.
Figure 13.1 Video with XAML overlay. The orange bar indicates the duration of the overlay.
Letting Your Users Choose the Player
Given the number of player templates available in Expression Encoder, and thanks to the possibility to edit their source code, it is fairly easy to let your users choose which player they want to use.
Copying the Files
The first action is to get the template files from Encoder, and to copy them to a location where we can edit them. Follow the steps:
1. On your PC, create the following structure:
[root]
VideoPlayer
MyVideo
Templates
script
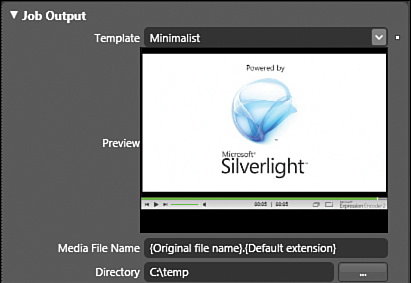
2. In Expression Encoder, in the Output panel, select any template—for example, Minimalist.
3. Using the small white arrow located on the right of the Template combo box (see Figure 13.2), open the context menu and select Open Template Location.
Figure 13.2 Minimalist Silverlight video player template
4. From the Minimalist template folder, go up one level in Windows Explorer. You should see a collection of folders, one for each installed template.
5. Copy Minimalist and CorporateSilver from the folder Microsoft ExpressionEncoder 2Templatesen to the folder VideoPlayerTemplates that we created earlier.
Modifying the Files
The rest of the work happens on the files we just copied. Make sure you don’t delete or modify the original files! If you delete files from the original template location, you won’t be able to use this template in Encoder anymore.
1. Some files are common to all the players, and we will move them from the Minimalist folder into the script folder: ExpressionPlayer.js, MicrosoftAjax.js, Silverlight.js, SilverlightControl.js, and SilverlightMedia.js.
2. You can delete these files from the CorporateSilver folder too.
3. Other files are not needed anymore. In the Minimalist folder and in the CorporateSilver folder, you can delete the files Default.html, MediaDefinition.xml, and StartPlayer.js.
4. We need some additional “intelligence” to be able to switch between the templates. For this, create a new text file in the script folder, and name it MyVideoPlayer.js. Then, open this file in a text editor and copy Listing 13.1 to this file.
Listing 13.1 Selecting a Video Template with JavaScript
// MyVideoPlayer.js - Selecting a Silverlight video template
1 if (window.MyVideoPlayer = = null)
2 window.MyVideoPlayer = { };
3
4 MyVideoPlayer.TEMPLATE_PARAMETER = ″template″;
5 MyVideoPlayer.templateName = ″Minimalist″;
6
7 if (window.location != null
8 | | location.search != null
9 | | location.search.indexOf(MyVideoPlayer.TEMPLATE_PARAMETER) > 0)
10 {
11 // Remove the ″?″
12 var searchString = location.search.substring(1);
13 // Separate the queries
14 var queries = searchString.split(′&′);
15
16 for (var index = 0; index < queries.length; index++)
17 {
18 var query = queries[index].split(′=′);
19 if (query[0] = = MyVideoPlayer.TEMPLATE_PARAMETER)
20 {
21 MyVideoPlayer.templateName = query[1];
22 }
23 }
24 }
25
26 document.writeln(″<script type=′text/javascript′ src=′../Templates/″
27 + MyVideoPlayer.templateName
28 + ″/PlayerStrings.js′></″ + ″script>″);
29 document.writeln(″<script type=′text/javascript′ src=′../Templates/″
30 + MyVideoPlayer.templateName
31 + ″/player.js′></″ + ″script>″);
![]() After creating a namespace, we define one constant
After creating a namespace, we define one constant TEMPLATE_PARAMETER and a static variable templateName.
![]() The constant is just a value that we will use in a few places, so it makes sense to define it once. It should not be modified by the code. The variable will receive the template name. By default, it is initialized to Minimalist, so this is the template we’ll use if nothing else is specified.
The constant is just a value that we will use in a few places, so it makes sense to define it once. It should not be modified by the code. The variable will receive the template name. By default, it is initialized to Minimalist, so this is the template we’ll use if nothing else is specified.
![]() In fact, JavaScript doesn’t have constants. Any variable can be modified in the code (other programming languages can mark a variable as constant, and so prevent any modification). By convention, we use capitals to name constants (or pseudoconstants like here) and to notify other developers that they should not modify the value of this member.
In fact, JavaScript doesn’t have constants. Any variable can be modified in the code (other programming languages can mark a variable as constant, and so prevent any modification). By convention, we use capitals to name constants (or pseudoconstants like here) and to notify other developers that they should not modify the value of this member.
![]() At lines 7 to 24, we check the built-in object
At lines 7 to 24, we check the built-in object location to see whether the user entered a query string in the URL. The query string comes after a “?” in the page’s URL. You can use it to pass parameters to a JavaScript application, for example. We use the built-in function indexOf to check whether the string “template” is found in the query string. This method returns -1 if the string is not found, or it returns the index at which the string is found. This code would work with a URL like http://www.mydomain.com/player?template=Minimalist.
![]() At line 12, we remove the leading “?” from the query string, using the built-in function
At line 12, we remove the leading “?” from the query string, using the built-in function substring. We take everything except the first character (the one with index 0).
![]() Between lines 16 and 23, we use a
Between lines 16 and 23, we use a for loop to split the query string and find the value of the parameter template. We use this code because we don’t know whether the query string contains additional parameters. This brings flexibility and extensibility.
![]() After this work is done, we use the built-in method
After this work is done, we use the built-in method document.writeln to dynamically include the script files according to the chosen template.
Creating the Video
Now that our script is ready, we can prepare to encode a video and modify the generated HTML file to handle multiple players with the following steps:
1. In Expression Encoder, create a Silverlight video application as we did in Chapter 12, choosing any template. Then, from the output folder, copy the following files into the MyVideo folder that we created before: Default.html, MediaDefinition.xml, the WMV output file, all the JPG thumbnails, and StartPlayer.js.
2. If you use one template that uses additional images (such as buffering.jpg), you must also copy these to the MyVideo folder.
3. Open the file Default.html in a text editor, and modify it as shown in Listing 13.2.
Listing 13.2 File Default.html for Multiple Video Templates
<!DOCTYPE HTML PUBLIC ″-//W3C//DTD HTML 4.01 Transitional//EN″
<!DOCTYPE HTML PUBLIC ″-//W3C//DTD HTML 4.01 Transitional//EN″
″http://www.w3c.org/TR/1999/REC-html401-19991224/loose.dtd″>
<html xmlns=″http://www.w3.org/1999/xhtml″>
<head>
<script type=′text/javascript′
src=″../Templates/script/MicrosoftAjax.js″></script>
<script type=′text/javascript′
src=″../Templates/script/Silverlight.js″></script>
<script type=′text/javascript′
src=″../Templates/script/SilverlightControl.js″></script>
<script type=′text/javascript′
src=″../Templates/script/SilverlightMedia.js″></script>
<script type=′text/javascript′
src=″../Templates/script/ExpressionPlayer.js″></script>
<script type=″text/javascript″
src=″../Templates/script/MyVideoPlayer.js″></script>
<script type=′text/javascript′ src=″StartPlayer.js″></script>
<title></title>
<style type=″text/css″>
html, body { margin: 0; padding: 0; height:100% }
#divPlayer_0 { min-height: 100%; height:100%; }
</style>
</head>
<body style=″background-color:black;margin:0,0,0,0;overflow:auto″>
<div id=″divPlayer_0″>
<script type=′text/javascript′>
var player = new StartPlayer_0( );
</script>
</div>
</body>
</html>
4. Finally, in the same folder, open the file StartPlayer.js in a text editor. Locate the function StartPlayer_0 and modify it like Listing 13.3:
Listing 13.3 Modified Function StartPlayer_0
function StartPlayer_0(parentId) {
try {
eval(′document.body.style.backgroundColor="#000000″′);
} catch(e){ }
this._hostname ExpressionPlayer.Player._getUniqueName(″xamlHost″);
Silverlight.createObjectEx( { source: ′../Templates/′
+ MyVideoPlayer.templateName
+ ′/player.xaml′,
parentElement: $get(parentId ||″divPlayer_0″),
id:this._hostname,
properties:{ width:′100%′,
height:′100%′,
version:′1.0′,
background:rgbToHex(document.body.style.backgroundColor),
isWindowless:′false′,
inplaceInstallPrompt:true },
events:{ onLoad:Function.createDelegate(this, this._handleLoad) } } );
this._currentMediainfo = -1;
}
We almost didn’t modify the function: We simply refer to the attribute MyVideoPlayer.templateName to set the correct XAML file as the source parameter.
How Does It Work?
Once all this is done, you can test the player in a web browser: If you simply double-click the file Default.html, the Minimalist player will be used. If you want to use another player, call the URL with a query string—for example:
file:///C:/VideoPlayer/MyVideo/Default.html?template=CorporateSilver
or
www.mysite.com/VideoPlayer/MyVideo/Default.html?template=CorporateSilver
The script we wrote in the file MyVideoPlayer.js reads the template name from the URL and dynamically includes the correct JavaScript files (those in the CorporateSilver folder, or those in the Minimalist folder). Because of the way the JavaScript and XAML files are structured, it is sufficient to include the correct script files in the HTML page to change the video player’s look and feel.
If you want to include more player templates in your video player, simply repeat the steps we entered under “Copying the Files” earlier in this chapter. With a little additional work, you can construct a nice flexible video application for your users, and even save their preference in a cookie.
To add more videos, encode them and repeat the steps listed in the section “Creating the Video,” earlier in the chapter. Copy the files into another folder, for example MyOtherVideo instead of MyVideo. You can create multiple videos, all using the same players.
Publishing on Microsoft Silverlight Streaming Servers
We explained before the advantage of publishing video from a streaming server. However, one major issue was also mentioned: Renting space on a streaming server can be expensive, and less attractive for a private user.
Thankfully, to promote the use of Silverlight, Microsoft launched a service called Silverlight Streaming (http://silverlight.live.com). This service is still in beta, meaning that the exact terms of use are not final yet.
At the moment, the following restrictions apply:
![]() The encoded file may not be longer than 10 minutes.
The encoded file may not be longer than 10 minutes.
![]() The encoded file must have a maximum bit rate of 1.4Mbps.
The encoded file must have a maximum bit rate of 1.4Mbps.
![]() The encoded file may not be bigger than 105MB.
The encoded file may not be bigger than 105MB.
This service does not replace a professional streaming host, but can be useful for private use. Additionally, the Silverlight applications are copied to a vast array of mirror servers worldwide, so that the viewer has the best viewing experience possible.
Additionally to videos, you can also copy nonvideo Silverlight applications to the streaming servers and enjoy the benefit of the mirror servers! As the service grows more mature, it will offer unlimited conditions with advertising, or against a nominal fee.
Signing Up
Before you can publish a Silverlight streaming application, you need to create an account with the following steps:
1. Navigate to http://silverlight.live.com and click the Get It Free button (see Figure 13.3).
Figure 13.3 The Get it Free button
![]()
2. Follow the website’s directions to sign up for the service.
After you are signed up, you need to write down two IDs:
![]() Your account ID.
Your account ID.
![]() Your account key.
Your account key.
These two IDs can be found on the page Manage Account, after you are logged in to the Microsoft Silverlight Streaming website.
Installing, Setting Up the Plug-in, Publishing
Microsoft created a plug-in for Microsoft Encoder, which makes publishing the videos on the streaming web server even easier! This plug-in can be downloaded from the Microsoft Expression web page, at www.microsoft.com/expression. Click on the link labeled “Silverlight Streaming plug-in for Expression Encoder 2” to reach the download page and install the plug-in. Then, follow the steps:
1. Start Expression Encoder.
2. On the Output panel, you should see a new category named Publish, as shown in Figure 13.4.
Figure 13.4 Publish from Encoder
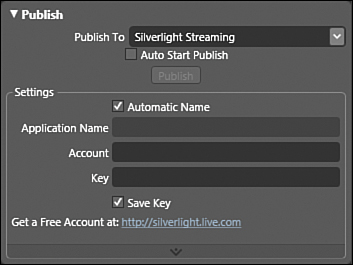
3. Select Silverlight Streaming from the Publish To combo box.
4. Under Settings, enter your account ID in the Account text box, and your account key in the Key text box.
5. If you want, click the Save Key check box to save your key and avoid having to enter it every time you run the application.
6. Encode an application as we did in Chapter 12, including a Silverlight template of your choice.
7. If you want, enter a name for your application. You need to uncheck the Automatic Name check box first.
8. When everything is ready, click the Publish button.
9. After the video has been successfully published, you can see the result using the Preview screen. Notice that thanks to the magic of Silverlight, all the buttons are fully operational even in the small preview screen!
Testing the Output
To test the output, you have multiple possibilities. The easiest one is simply copying and pasting a URL in your web browser with the following steps:
1. Under the Publish category, click on the Code tab (next to the Preview tab).
2. The snippet typically looks like this (the SILVERLIGHT_URL is actually a URL depending on your account ID and the application name):
<i frame
src=″SILVERLIGHT_URL″
scrolling=″no″
frameborder=″0″
width=″1024″
height=″508″></iframe>
This snippet creates an HTML iframe, which can be used to display content from a web server in a page located on a different server. It can be copied and pasted into an existing web page if you want. In the next section, “Adding the Application in an Existing Web Page,” we see how to use this markup, but for the moment we only want to test.
3. Copy the URL to your Silverlight application (the one in the src attribute, in place of the SILVERLIGHT_URL) to your web browser. This should automatically start the video from the streaming web server.
Alternatively, you can manage and test all your applications from the Silverlight Streaming home page with the following steps.
1. Navigate to http://silverlight.live.com and sign in to the service.
2. After you’re signed in, click on Manage Applications.
3. Locate the new application you just created in the list, and click on its name.
4. To test the application, click on the Launch Application Test Page link.
5. After you successfully test the video stored on the server, you can safely delete the local output to save space on your computer.
The Application Properties page also allows you to update your application or delete it. We use the rest of the page (under “Add this Application to a Web Page”) later when we integrate the video into our existing web pages.
Adding the Application in an Existing Web Page
After your movie and its Silverlight player are published, either on Microsoft’s streaming servers or on your own web space, you have one more step to fulfill to integrate the video in your own web pages. As mentioned earlier, Silverlight content created by Expression Encoder targets version 1 of the framework. There is no XAP file to be included. You can decide between two strategies:
![]() Using an
Using an iframe to embed the HTML application page with a minimal impact on your own web page
![]() Adding the content directly to your page with JavaScript and a so-called Live Control.
Adding the content directly to your page with JavaScript and a so-called Live Control.
This decision should be based on the level of control that you have over the page in which you want the application to run. If the web page belongs to you, it is preferable to use the second method, which offers a better user experience. In the case of a community website, a blog, and so on, you may have to use the iframe method instead.
Using an iframe
The iframe markup you need to include in your HTML page is the one we got from the Publish category earlier (see the section “Testing the Output” earlier in the chapter). If you forgot to write down that markup, you can retrieve it by performing the following steps:
1. Under Publish, set the Publish To combo box to Silverlight Streaming.
2. Expand the Advanced Properties under the Publish category. You should see an Applications list.
3. If the list is empty, click on the Refresh button. Note that you must be online to execute this function, and you must have published at least one application!
4. Select the application for which you need the iframe markup.
5. Copy the iframe markup to your HTML page, for example, in a div, a table cell, or any other container you choose for the movie.
6. You can also get the iframe markup from the Silverlight Live website. Follow the steps in the next section, “Using JavaScript and a Live Control,” and you’ll find this markup!
The iframe’s src attribute points to the test page, which is automatically created by Expression Encoder. Note that the video player automatically fills the whole iframe, so that you can change its size (for example, with CSS, or even dynamically with JavaScript), and the video will automatically be resized.
This iframe markup can be copied to Windows Live Writer and included in a blog article, for example. Copying and pasting the iframe markup is a simple process to add rich content to your blog!
James Clarke of the Expression Encoder team published a plug-in for Windows Live Writer named Jet Fuel. This plug-in makes it even easier to encode and publish videos using Silverlight on your blog. Jet Fuel can be found at www.clarkezone.net.
Using JavaScript and a Live Control
The Silverlight streaming administration web page gives you the code needed to include a Silverlight video application directly in your website using a so-called Live Control with the following steps:
1. As before, navigate to http://silverlight.live.com and sign in to the service.
2. Click on Manage Applications.
3. Select the application you want to integrate.
4. Under Add this Application to a Web Page, you’ll find the steps required. Simply follow the indications on the page.
Firing Script Commands (and Catching Them)
As we saw in Chapter 12, you can use the Script Commands category in Expression Encoder to embed caption texts in the video. The same mechanism can also be used to fire events that JavaScript (or C#) can catch and handle. This can be useful if you need to synchronize an action with a certain scene in the video, or if you want to parameterize a method based on the video that is currently played.
In this example, we change the color of the HTML page containing the video player based on a command saved in the video movie. This way, you can modify the color based on the movie’s mood: Dark red for suspense, pastel colors for a love scene, and so on. Follw the steps:
1. In Expression Encoder, prepare a video for encoding as we did previously. From the Job Output tab, select the Clean template.
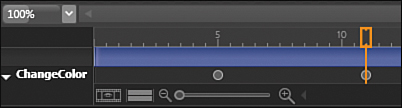
2. Before you encode, select a scene in the video and add a script command (just as we added a caption earlier). As Type, enter ChangeColor, as shown in Figure 13.5.) As Command, enter #FF0000 (this is a bright red).
Figure 13.5 ChangeColor commands
3. If you want, add more commands at various times, with the same type, but a different color.
4. Encode the video locally.
5. After the video is encoded, locate it on the disk, and open the file StartPlayer.js in a text editor or in Visual Studio
6. Find the call to the method Silverlight.createObjectEx, and replace it with the code in Listing 13.4:
Listing 13.4 Modified Method Silverlight.createObjectEx
Silverlight.createObjectEx( { source: ′player.xaml′,
parentElement: $get(parentId | |″divPlayer_0″),
id:this._hostname,
properties:{ width:′100%′,
height:′100%′,
version:′1.0′,
background:″Transparent″,
isWindowless:′true′,
inplaceInstallPrompt:true },
events:{ onLoad:Function.createDelegate(this, this._handleLoad) } } );
7. Find the lines where the event handlers (such as mediaEnded and mediaFailed) are added, and modify this code to look like Listing 13.5.
Listing 13.5 Modified Event Handlers
{ // event handlers
markerReached: Function.createDelegate(this, this._onMarkerReached),
mediaEnded: Function.createDelegate(this, this._onMediaEnded),
mediaFailed: Function.createDelegate(this, this._onMediaFailed),
playPreviousVideo: Function.createDelegate(this, this._onPlayPreviousVideo),
playNextVideo: Function.createDelegate(this, this._onPlayNextVideo)
},
8. Then create the event handler _onMarkerReached just before _onMediaEnded (see Listing 13.6).
Listing 13.6 Event Handler _onMarkerReached
_onMarkerReached: function(sender, eventArgs) {
if (eventArgs._marker.Type = = ″ChangeColor″)
{
document.body.style.backgroundColor = eventArgs._marker.Text;
}
},
We need a minor adjustment in the file player.xaml. This is just a cosmetic change only:
1. Open the file player.xaml.
2. On line 2 of this file, set the Background property of the Canvas element to Transparent.
Finally, we make the video player a little bit narrower to make the change in the background color of the page more obvious:
1. Open the file Default.html in a text editor, and modify the div of the player to look like this:
<div id=″divPlayer_0″ style=″margin: 0 50px 0 50px″>
2. Open the file Default.html in a web browser: The video starts, and you see the background color change according to the saved markers.
This simple example shows how a video file can communicate with its host by sending script commands.
Modifying the Player Template in Blend
One great feature of Silverlight, especially when you use it to play videos, is the ability to go full screen. All the video players support this feature, but sometimes it is not very well documented: In the Expression video player, you must double-click the video screen to make it go full screen. In this section, we add a Full Screen button to this template in Expression Blend.
Adding a Full Screen Button
Since the player is made of XAML, you can edit it in Blend. Here we will add a button to the player with the following steps. Silverlight 1 (which is what Expression Encoder creates) doesn’t have controls; the button is simulated using a Canvas to stay in line with the rest of the player’s controls.
1. Prepare a video for encoding; then in Expression Encoder, in the Output panel, select the Expression template.
2. Using the small white arrow located on the right of the Template combo box (refer to Figure 13.2), open the context menu and select Edit Copy in Expression Blend.
3. Give a name to the copy of the template you want to edit—for example, ExpressionFullScreen. Click OK. Expression Blend starts and opens the file player.xaml.
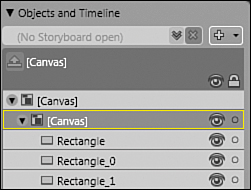
4. Expand the top Canvas, and make sure that the Canvas directly underneath is selected with a yellow border as shown in Figure 13.6 (double-click on that Canvas until this occurs).
Figure 13.6 Canvas selected
5. In the top-right corner, add a new button. To do this, add a small Canvas and set its Width to 18 and Height to 15.
6. Line the new button up with the existing ChapterToggleButton (Top = 27.5743) and set its Left property to 598.
7. Name this Canvas FullScreenToggleButton.
8. Set its Cursor property to Hand.
9. Select FullScreenToggleButton until it gets a yellow border, and then add a rectangle with the following:
![]() The same width and height as the button’s canvas (18x15)
The same width and height as the button’s canvas (18x15)
![]()
Fill = #FF555355
![]()
Stroke = #FFAAAAAA
![]()
StrokeThickness = 1.33
![]()
RadiusX =RadiusY = 1
10. In the same Canvas, on top of the background rectangle, add two small rectangles, as shown in Figure 13.7.
Figure 13.7 Full Screen button in Blend

11. Right-click on the Canvas FullScreenToggleButton and select View XAML. This command is visible only in Design mode. If you set Blend in Split mode, the XAML editor automatically displays the XAML markup corresponding to your selection.
12. In the Canvas’s XAML markup, add the following event handler:
MouseLeftButtonDown=″ToggleFullScreenButton_MouseLeftButtonDown″
Handling the Event in Script
We need to make a few changes to the JavaScript code to toggle the full screen mode. In fact, Microsoft planned that you would want to modify the existing templates, and provides a player.js file where you can add your own code with the following steps:
1. Back in Expression Encoder, click on the small white arrow next to the Template. Select Open Template Location.
2. Open the file player.js in a text editor.
3. Modify the constructor ExtendedPlayer.Player. We need to save a reference to the instantiated player for further use, as in Listing 13.7:
Listing 13.7 Modified Constructor ExtendedPlayer.Player
ExtendedPlayer.Player = function(domElement) {
ExtendedPlayer.Player.initializeBase(this, [domElement]);
ExtendedPlayer.Player.instance = this;
}
4. Finally, implement the event handler declared in the XAML markup for the FullScreenToggleButton. This event handler uses the instance of Player that we just saved and calls its method _onToggleFullScreen.
Listing 13.8 Event Handler ToggleFullScreenButton_MouseLeftButtonDown
function ToggleFullScreenButton_MouseLeftButtonDown(sender, args)
{
if (ExtendedPlayer.Player.instance != null)
{
ExtendedPlayer.Player.instance._onToggleFullScreen( );
}
}
To keep it simple, we didn’t create a different look for the “mouse over” state or the “pressed” state. The point of this section is to show that a Silverlight video player is in no way different from any other Silverlight application, and that the XAML file can be edited in Blend just like any other XAML-based content.
You can learn a lot about the Silverlight 1 video players created by Expression Encoder by opening the XAML and JS files of the other templates. Even though the code looks a bit “messed up” sometimes, using other templates as examples will help you creating your own video players for Expression Encoder!
Testing the Result
To test the result, save everything, and then encode a video using the newly created template ExpressionFullScreen. Any change you just made to the XAML and JavaScript will be applied when you use this template. Once the player is displayed, click on the new button to show the video in full screen.
Summary
In this chapter, we learned how to take advantage of Expression Encoder 2 to create customized videos and to enhance the viewing experience. Expression Encoder has other advanced features that we didn’t study here—for example, the capability to stream live events directly to Silverlight players.
One attractive thing about Expression Encoder is that it is really easy to get a result, fast. Once this is done, you can spend hours refining the result (especially if you are as obsessed with details as this author).