
Chapter 14 Letting .NET and JavaScript Talk
Interoperability is a vast and complex subject in the history of software development. Many technologies are available and “letting them talk” is crucial and sometimes difficult.
Over time, JavaScript has grown to be a key component of the web client. It is present in all the major web browsers, it is mostly enabled, and it is mostly standardized. Silverlight 1 relies heavily on JavaScript to create and interact with all the Silverlight controls in the web page. In Silverlight 2, JavaScript is less crucial to the operation, but communication between Silverlight and JavaScript opens a world of possibilities.
Making .NET Available to JavaScript
Interoperability in Silverlight goes in both directions, as we will see in the course of this chapter. Let’s start by considering how JavaScript can directly interact with the .NET environment in Silverlight.
Using the ScriptableMember Attribute
Attributes in .NET are used to decorate classes, methods, or other elements to add information without modifying their body or their signature. For example, we need to signal the Silverlight framework that some of the methods, properties, and events in our .NET objects are “scriptable”—that is, that they can be used from JavaScript.
To make a public .NET member scriptable, simply add [ScriptableMember] before the member’s declaration as in Listing 14.1:
Listing 14.1 ScriptableMember
public class AnyObject
{
[ScriptableMember]
public int Index
{
get;
set;
}
}
Similarly, any method, event, or property that you want to make available to JavaScript must also be marked with the ScriptableMember attribute.
Registering the Object
In addition to using the ScriptableMember attribute, you must register the .NET object with the Silverlight application as in Listing 14.2.
Listing 14.2 Call to RegisterScriptableObject
public Page( )
{
InitializeComponent( );
AnyObject myObject = new AnyObject( );
HtmlPage.RegisterScriptableObject(″MyObject″, myObject);
}
The first parameter of the RegisterScriptableObject method is a name that can be used in JavaScript to address the object. We see an example in the next section.
Handling .NET Events in JavaScript
We saw in Chapter 10, “Progressing with .NET,” how to create and raise events, and how a .NET object can subscribe to events raised by another .NET object. Now we will see how we can raise events in .NET and catch them in JavaScript! This enables an elegant oneway communication (a bit later we see how to communicate back from JavaScript to .NET).
Preparing the scriptable Class
Let’s create a new Silverlight class that will be used to communicate with JavaScript with the following steps:
1. Start by creating a new Silverlight 2 application in Visual Studio. Name it JavaScriptDotNet.
2. In the Add Silverlight Application dialog (refer to Figure 9.2), select the Add a New Web to the Solution option, and select Web Site as the Project Type.
3. Open the file Page.xaml.cs. Under the Page class, create a new class deriving from EventArgs. We use this class to pass additional information about the event. Because we want to access the CounterValue from JavaScript, we need to decorate this property with the ScriptableMember attribute. This class (see Listing 14.3) must be placed inside the namespace JavaScriptDotNet.
Listing 14.3 Class CounterTickedEventArgs
public class CounterTickedEventArgs : EventArgs
{
[ScriptableMember]
public int CounterValue
{
get;
internal set;
}
}
4. Under the CounterTickedEventArgs class, create a delegate specifying the signature of the CounterTicked event handler:
public delegate void CounterTickedHandler(object sender,
CounterTickedEventArgs e);
Let’s take care of the Page class itself now (see the code in Listing 14.4):
1. Declare the CounterTicked event and mark it as a ScriptableMember.
2. Implement the OnCounterTicked method.
3. In the Page constructor, register the Page object with the Silverlight application. We simply use the name Page as an identifier for JavaScript.
4. After you enter the code, build your application to check if everything is fine.
Listing 14.4 JavaScriptDotNet Application, Page Class
public partial class Page : UserControl
{
[ScriptableMember]
public event CounterTickedHandler CounterTicked;
public void OnCounterTicked(CounterTickedEventArgs e)
{
if (CounterTicked != null)
{
CounterTicked(this, e);
}
}
public Page( )
{
InitializeComponent( );
HtmlPage.RegisterScriptableObject(″Page″, this);
}
}
Raising the Event
We will raise the CounterTicked event every time the user clicks five times on a button. Implement this with the following steps:
1. First, let’s add the button (Listing 14.5) in Page.xaml, inside the LayoutRoot:
Listing 14.5 New Button
<Button x:Name=″CounterButton″
Width=″80″ Height=″40″
Content=″Count″ Click=″CounterButton_Click″
HorizontalAlignment=″Left″
Margin=″100,20,0,0″ />
2. In the Page class in Page.xaml.cs, declare a private attribute for the counter value. This attribute will be incremented every time the button is clicked (see Listing 14.6).
3. In addition to incrementing the counter, the event handler CounterButton_Click will check the value. If it is a multiple of 5, the CounterTicked event will be raised. This uses the modulo operator $$$ that we introduced in Chapter 9, “Understanding .NET.” You can build the application again.
Listing 14.6 Event Handler CounterButton_Click
private int _counter = 0;
private void CounterButton_Click(object sender, RoutedEventArgs e)
{
_counter++;
if ((_counter $$$ 5) = = 0)
{
// true every time the counter is a multiple of 5
CounterTickedEventArgs args = new CounterTickedEventArgs( );
args.CounterValue = _counter;
OnCounterTicked(args);
}
}
Subscribing to the Event on the JavaScript Side
Now comes the time of interoperability. We will implement a JavaScript class that will call subscribe to the Silverlight event we created with the following steps.
1. Open the test page JavaScriptDotNetTestPage.html.
2. Enter the code shown in Listing 14.7 in the script section, right under the function onSilverlightError.
Listing 14.7 JavaScriptDotNet Application, JavaScript Code
1 JavaScriptDotNet = function(page)
2 {
3 page.CounterTicked
4 = JavaScriptDotNet.createDelegate(this,
5 this.handleCounterTicked);
6 }
7
8 JavaScriptDotNet.createDelegate = function(instance, method)
9 {
10 return function( )
11 {
12 return method.apply(instance, arguments);
13 }
14 }
15
16 JavaScriptDotNet.prototype =
17 {
18 handleCounterTicked : function(sender, e)
19 {
20 alert(″Counter ticked: ″ + e.CounterValue);
21 }
22 }
23
24 var jsDotNetInstance;
25 function onSilverlightLoaded(sender, args)
26 {
27 jsDotNetInstance
28 = new JavaScriptDotNet(sender.getHost( ).Content.Page);
29 }
![]() On lines 1 to 6, we define a constructor for our new JavaScript object. Note that it takes a parameter called
On lines 1 to 6, we define a constructor for our new JavaScript object. Note that it takes a parameter called Page. This parameter is the “gateway” to the Page object that we registered on the .NET side when we called the method HtmlPage .RegisterScriptableObject.
![]() On lines 3 to 5, we register a JavaScript method for the .NET event
On lines 3 to 5, we register a JavaScript method for the .NET event CounterTicked. That’s right, we can cross the language boundaries this easily!
![]() Lines 8 to 14 define the method
Lines 8 to 14 define the method createDelegate that we studied earlier (in Chapter 8, “Programming Silverlight with JavaScript”). It is defined as a “static” method.
![]() Lines 16 to 22 define the object’s prototype. It has only one method, called
Lines 16 to 22 define the object’s prototype. It has only one method, called handleCounterTicked. This method creates a JavaScript alert every time it is called.
![]() Notice how the parameter
Notice how the parameter e is a JavaScript representation of the CounterTickedEventArgs instance that we created on the .NET side: You can access the property CounterValue, because we marked it as a ScriptableMember.
![]() Lines 24 to 29 define a global function named
Lines 24 to 29 define a global function named onSilverlightLoaded. Due to the Silverlight event model, this method has to be global. It is as simple as possible: It creates a new instance of the class JavaScriptDotNet, saves it in a global variable, and lets it do the rest of the work.
![]() Notice the complicated syntax to get the
Notice the complicated syntax to get the Page control that we registered earlier:
![]()
sender.getHost() returns the instance of the Silverlight control. This is in fact a reference to the object tag in the HTML page.
![]() This “host” has a property named
This “host” has a property named Content that is the entry point on the XAML page and all the objects registered for JavaScript, as we see in the next section.
Finally, we need to “hook” the global function onSilverlightLoaded to the onload event of the Silverlight object. Simply add the following parameter in the HTML page, in the object tag, under the other event handler named onerror:
<param name=″onload″ value=″onSilverlightLoaded″ />
Testing the Code
And now comes the exciting part, testing what we just implemented. Follow the steps:
1. Right-click on the website JavaScriptDotNetWeb and select Set As StartUp Project.
2. Right-click on the file JavaScriptDotNetTestPage.html and select Set As Start Page.
3. Press Ctrl+F5 to run it.
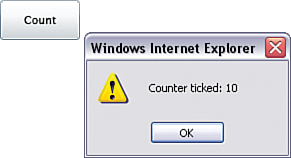
4. Click five times on the button. This raises the .NET event and triggers the alert. If you click OK and then click on the button five more times, the alert will be triggered again (see Figure 14.1).
Figure 14.1 .NET event handled in JavaScript
Calling JavaScript Methods from .NET
In addition to raising events from .NET to JavaScript, you can also simply call JavaScript methods from the .NET code with the following steps:
1. Modify the JavaScriptDotNet object prototype as follows. We now only declare a second method with Listing 14.8.
Listing 14.8 Method saySomething
JavaScriptDotNet.prototype =
{
handleCounterTicked : function(sender, e)
{
alert(″Counter ticked: ″ + e.CounterValue);
},
saySomething : function(message1, message2, message3)
{
alert(message1 + ″/″ + message2 + ″/″ + message3);
}
}
2. In Page.xaml, add a new button under the one we added before (see Listing 14.9):
Listing 14.9 Another Button
<Button x:Name=″SaySomethingButton″
Width=″80″ Height=″40″
Content=″Say″ Click=″SaySomethingButton_Click″
HorizontalAlignment=″Right″
Margin=″0,20,100,0″ />
3. and in Page.xaml.cs (Listing 14.10):
Listing 14.10 Event Handler SaySomethingButton_Click
private void SaySomethingButton_Click(object sender,
RoutedEventArgs e)
{
ScriptObject instance
= HtmlPage.Window.GetProperty(″jsDotNetInstance″) as ScriptObject;
instance.Invoke(″saySomething″,
new object[ ] { ″Hello″, ″World″, DateTime.Now });
}
![]() The class
The class HtmlPage is a useful entry point from .NET to the HTML and JavaScript realm. With its two static properties Window and Document, you can access most of the JavaScript and HTML elements of the page hosting the Silverlight application.
![]() Remember how we saw (in Chapter 8) that a global variable is actually a property of the global object? And that the global object is the
Remember how we saw (in Chapter 8) that a global variable is actually a property of the global object? And that the global object is the Window? Well, here is a practical use for this knowledge: We access the global variable jsDotNetInstance by using the method GetProperty on the Window!
![]() Finally, calling the
Finally, calling the Invoke method on any ScriptObject will try to call the corresponding JavaScript method. In our case, we call Invoke on the instance we just fetched. If you have a global method, you can Invoke it on the HtmlPage .Window!
![]() Even though our JavaScript method expects strings, we can pass it a
Even though our JavaScript method expects strings, we can pass it a DateTime object. The method ToString will automatically be called on this object. Since .NET types and JavaScript types are not equivalent, a conversion must take place. In Chapter 21, we talk more about type conversions and the ScriptObject type.
After you made these changes, run the application and test it by clicking on the new button.
Calling .NET Methods from JavaScript
Now that we saw how to handle .NET events in JavaScript and to call JavaScript methods from .NET, the opposite way is straightforward: To call .NET methods from JavaScript code, simply use the following syntax:
[control].Content.[objectname].[methodname]([parameters]);
![]()
[control] is the Silverlight control added in the HTML markup. You can get a reference to that using the sender.getHost() in the JavaScript function handling the onload event (as we did before).
![]() Another way to get a reference to the Silverlight control is to set an ID in the
Another way to get a reference to the Silverlight control is to set an ID in the object tag:
<object data=″data:application/x-silverlight,″
type=″application/x-silverlight-2″
width=″100$$$″ height=″100$$$″
id=″SilverlightControl″>
and then
var silverlightControl = document.getElementById(″SilverlightControl″);
silverlightControl.Content.Page.DoSomething( );
![]()
[objectname] is the name you gave when you used the method HtmlPage .RegisterScriptableObject in the .NET code.
![]()
[methodname] is the name of the scriptable method you want to call.
![]()
[parameters] is the list of parameters to be passed to the .NET method.
Adding a “Login” Dialog to the Thumbnails Application
Let’s extend our Thumbnails application (we edited it last in Chapter 11, “Progressing with Animations”) by adding a login dialog. We will ask the user to enter a username and password. For the moment, we handle the password in the web client, since we don’t know how to communicate with the web server yet. Later, we implement server-side logic to handle the passwords.
Extending the User Object
Remember that we created a User class before? We will extend it with the needed functionality in this section. Again, it is nice to work with objects, as the changes will be limited to a couple of classes only.
User Properties
Let’s extend our User class with two additional properties: A user name and a password.
1. Open the Thumbnails application in Visual Studio.
2. Open the file Data/User.cs and add two properties as in Listing 14.11:
Listing 14.11 Two New Properties
public string Name
{
get;
internal set;
}
public string Password
{
get;
internal set;
}
The property LastVisit remains unchanged.
Serializing
The basic infrastructure we need to save the data to the data file is available already and must merely be extended. As mentioned previously, the DataFile class must not be modified at all, because the User class is responsible for delivering a string representing itself.
Let’s modify the User’s ToString method to save all the properties in a tab-separated format (Listing 14.12):
Listing 14.12 Overriden Method ToString
public override string ToString( )
{
string result = Name + ″ ″ + Password + ″ ″;
if (LastVisit != null)
{
result += LastVisit.ToString( );
}
return result;
}
The modified ToString method creates a string with the user’s name, a tab, the password, another tab, and finally the date and time of the last visit. To make sure that you didn’t make a typo, build the application but don’t try to run it yet.
Constructing the Object
We also need to modify the constructors to fit with the new property and the new data format. After you copy the updated code in Listing 14.13, build your application again (this is something you should do often).
Listing 14.13 Constructors of User Class
1 public User( )
2 {
3 Name = ″″;
4 Password = ″″;
5 LastVisit = null;
6 }
7 public User(string line)
8 {
9 try
10 {
11 char[ ] splitCharacters = new char[1] { ′ ′ };
12 string[ ] elements = line.Split(splitCharacters);
13 Name = elements[0];
14 Password = elements[1];
15 LastVisit = DateTime.Parse(elements[2]);
16 }
17 catch (ArgumentNullException)
18 {
19 LastVisit = null;
20 }
21 catch (FormatException)
22 {
23 LastVisit = null;
24 }
25 }
![]() The default constructor (lines 1 to 6) simply initializes the properties
The default constructor (lines 1 to 6) simply initializes the properties Name and Password to an empty string.
![]() The second constructor (lines 7 to 25) splits the line, cutting it at every tab character (Line 12). The syntax of the
The second constructor (lines 7 to 25) splits the line, cutting it at every tab character (Line 12). The syntax of the Split method is a little complex:
![]() The only parameter of the
The only parameter of the Split method is an array of characters. The input string will be cut every time one of these characters is found. In our case, we need only one “cutting” character: the Tab character ’ ’”. This is the array we construct at line 11.
![]() The
The Split method returns an array of strings. For example, if the input string is Laurent HelloWorld 12.02.2008 21:47:05, then the first cell of the array will contain Laurent, the second cell HelloWorld, and the third cell 12.02.2008 21:47:05.
![]() In lines 13 to 15, we assign the elements of the split string to the
In lines 13 to 15, we assign the elements of the split string to the Name, Password, and LastVisit properties.
Comparing Two Users
We want to be able to compare one User instance with another User instance. We saw earlier that the operator == does exactly this. But this operator is not defined for the User class. We add this functionality to our class now.
The operator == is defined in the object class. It means that you can always compare two objects, whatever their type is. However, the equality operator defined in the object class is not sufficient for our needs and we must redefine it. In the User class, add the code in Listing 14.14:
Listing 14.14 Redefining the Equality Operators
public static bool operator = =(User user1, User user2)
{
if (object.Equals(user1, null))
{
return (object.Equals(user2, null));
}
if (object.Equals(user2, null))
{
return (object.Equals(user1, null));
}
return (user1.Name = = user2.Name
&& user1.Password = = user2.Password);
}
public static bool operator !=(User user1, User user2)
{
return !(user1 = = user2);
}
![]() The keyword
The keyword operator defines a new meaning for a given operator. In our case, we redefine the equality operator == and the inequality operator !=. These two should always be defined as a pair (it makes no sense to have equality without inequality). Our definition of equality is: If a User’s Name and Password are equal to another User’s Name and Password, then both Users are considered equals.
![]() We handle explicitly the case where one (or both) of the parameters is
We handle explicitly the case where one (or both) of the parameters is null. This allows us to use the == operator even if one of the operands is null, which is very handy.
If you compile this code now, you see two warnings in the Output tab of Visual Studio.
![]()
’Thumbnails.Data.User’ defines operator = = or operator != but does not override Object.Equals(object o)
![]()
’Thumbnails.Data.User’ defines operator = = or operator != but does not override Object.GetHashCode( )
Should the Output tab be hidden, you can display it by selecting View, Output from the menu. You might need to scroll up a little in this panel to see the warnings I am talking about.
Warnings are not as critical as errors, and the application may run even if you don’t correct your code to remove them. However, it is good practice to take care of all warnings before releasing your application. In this case, it is easy enough. Simply add the following two methods to the User class (Listing 14.15):
Listing 14.15 Methods Equals and GetHashCode
public override bool Equals(object obj)
{
return (this = = (User) obj);
}
public override int GetHashCode( )
{
return Name.GetHashCode( );
}
![]() The first overriden method
The first overriden method Equals has the same functionality as the equality operator. It is defined by the object class (the basis class for all .NET objects). To suppress the warning, we compare this (the current instance) to the object passed as a parameter by using our redefined == operator.
![]() The method
The method GetHashCode is used by certain collections (Hashtable, Dictionary) that use specific algorithms to sort and retrieve items. Since a username must be unique, we decide that the User’s hash code is the same as the Name’s hash code.
If you compile the application now, you’ll see that the two warnings are gone.
Handling Multiple Users
Our application will handle multiple users now, so we need to modify the DataFile class accordingly with the following steps:
1. Open the file DataFile.cs.
2. To avoid conflicts with the previous data file (which used a different format), we will use a different file name:
private const string DATA_FILE_NAME = ″ThumbnailsData.2.txt″;
3. Add an attribute to store the list of all users. To allow retrieving a user easily, we store them in a Dictionary that you declare below the line we just added.
private Dictionary<string, User> _users;
A Dictionary (like a List) is a generic class containing a collection of items. However, a Dictionary also contains a key for each item and allows retrieving the corresponding item easily.
Because it is a generic class, you must specify the type of the key (string) and the type of the item (User). We will talk about generics in Chapter 20, “Taking Silverlight 2 One Step Further.”
Loading the Users
Modify the method LoadUser as in Listing 14.16. Note that we renamed it to LoadUsers (plural). Instead of loading and returning a single user, it will load all the users and store them in the _users Dictionary. A new User is created and added to the list every time a line is read from the data file (using a do…while loop).
Listing 14.16 Methods LoadUsers
internal void LoadUsers( )
{
_users = new Dictionary<string, User>( );
using (IsolatedStorageFile store
= IsolatedStorageFile.GetUserStoreForApplication( ))
{
if (store.FileExists(DATA_FILE_NAME))
{
using (IsolatedStorageFileStream streamRead
= store.OpenFile(DATA_FILE_NAME, FileMode.Open))
{
using (StreamReader reader = new StreamReader(streamRead))
{
string line;
do
{
line = reader.ReadLine( );
if (line != null)
{
User newUser = new User(line);
_users.Add(newUser.Name, newUser);
}
}
while (line != null);
}
}
}
}
}
Saving the Users
Rename SaveUser in SaveUsers and modify it as in Listing 14.17. Here too, we must work with the Dictionary of users instead of a single User instance.
Listing 14.17 Methods SaveUsers
internal void SaveUsers( )
{
using (IsolatedStorageFile store
= IsolatedStorageFile.GetUserStoreForApplication( ))
{
using (IsolatedStorageFileStream streamWrite
= store.OpenFile(DATA_FILE_NAME, FileMode.OpenOrCreate))
{
using (StreamWriter writer = new StreamWriter(streamWrite))
{
foreach (User user in _users.Values)
{
writer.WriteLine(user.ToString( ));
}
}
}
}
}
The Dictionary class contains two interesting properties: Keys contains all the keys for the items stored in the Dictionary, and Values contains all the items. Our foreach loop wants to access all the items and must therefore use the Values property.
Note that if you compile the application now, you will get errors because we renamed the methods LoadUser and SaveUser. We will take care of this in a moment.
Adding a New User
An important new functionality in our Thumbnails application is adding new users to the “database.” The DataFile class will support this feature.
A new method AddUser is added to the DataFile class (Listing 14.18):
Listing 14.18 Method AddUser
internal void AddUser(User newUser)
{
if (newUser.Name = = null
|| newUser.Name.Length = = 0)
{
throw new Exception(″Name may not be empty″);
}
if (_users.ContainsKey(newUser.Name))
{
throw new Exception(″This name already exists″);
}
_users.Add(newUser.Name, newUser);
SaveUsers( );
}
![]() If the name is empty or if it is already taken, the method throws an exception with an error message.
If the name is empty or if it is already taken, the method throws an exception with an error message.
![]() If the new user is valid, it is added to the
If the new user is valid, it is added to the Dictionary.
![]() Eventually, the users are saved by a call to the
Eventually, the users are saved by a call to the SaveUsers method.
Validating a User’s Password
The DataFile class must also check whether a given user/password combination is valid. A new method ValidateUser takes care of this (Listing 14.19). It takes a user as input and returns true if the name/password combination exists in the data file.
Listing 14.19 Methods ValidateUser
1 internal bool ValidateUser(User inputUser)
2 {
3 if (inputUser = = null)
4 {
5 // Refuse to validate null users
6 return false;
7 }
8 User existingUser = GetUser(inputUser.Name);
9 return (existingUser = = inputUser);
10 }
![]() On line 9, we use the new
On line 9, we use the new == operator we created previously in the User class.
![]() If equality is found, the method returns
If equality is found, the method returns true.
![]() Note that if a user is
Note that if a user is null, we simply return false. This is a way to protect the method from errors.
Getting a Saved User
The DataFile class’s last task is to get a saved User according to its name. We need the saved User instance to read the LastVisit property, and to set the user interface accordingly.
The method GetUser (in Listing 14.20) checks whether the name passed as parameter exists in the collection. If it does, the corresponding User instance is returned.
internal User Get User(string name)
{
if (_users.ContainsKey(name))
{
return _users[name];
}
else
{
return null;
}
}
Modifying the Page Class
Now we will modify the Page class and make our application “buildable” again with the following steps:
1. Open the file Page.xaml.cs.
2. Add a private attribute in the class Page. It stores an instance of the class DataFile, which will be used throughout the application’s runtime.
private DataFile _dataFile;
3. In the Page constructor, remove the code starting with DataFile dataFile = new DataFile ( ); and ending with dataFile.SaveUser(user);
4. Instead, use the following code:
_dataFile = new DataFile( );
_dataFile.LoadUsers( );
As a consequence of these changes, LastVisitTextBlock will not display anything until a user logs in. The application can be compiled again though, so you can make sure that you didn’t make mistakes when typing the code.
Since the Page is the “gateway” between JavaScript and .NET, we need to add two methods that JavaScript will call when an action in .NET needs to be performed.
1. To handle adding new users to the database, add the method in Listing 14.21 to the Page class:
Listing 14.21 Method AddUser in Page Class
[ScriptableMember]
public string AddUser(string name, string password)
{
try
{
User newUser = new User( );
newUser.Name = name;
newUser.Password = password;
newUser.SetLastVisit( );
_dataFile.AddUser(newUser);
}
catch (Exception ex)
{
return ex.Message;
}
LastVisitTextBlock.Text = ″(″ + name + ″, this is your first visit)″;
return null; // success
}
![]() It creates a new user, sets all its properties, and attempts to add it to the
It creates a new user, sets all its properties, and attempts to add it to the DataFile class.
![]() If this fails (for example, if the user name is taken already), an exception is caught, and the error message (created by the
If this fails (for example, if the user name is taken already), an exception is caught, and the error message (created by the DataFile class) is returned to JavaScript.
![]() If it succeeds,
If it succeeds, LastVisitTextBlock displays a message, and null is returned to JavaScript.
2. In the page, we need to validate a name and a password passed from JavaScript. Add the method in Listing 14.22 to the Page class:
Listing 14.22 Method ValidateUser in Page Class
[ScriptableMember]
public string ValidateUser(string name, string password)
{
User inputUser = new User( );
inputUser.Name = name;
inputUser.Password = password;
if (_dataFile.ValidateUser(inputUser))
{
User savedUser = _dataFile.GetUser(name);
LastVisitTextBlock.Text = ″(″ + name + ″, your last visit was: ″
+ savedUser.LastVisit.Value.ToShortDateString( )
+ ″ ″ + savedUser.LastVisit.Value.ToLongTimeString( ) + ″)″;
savedUser.SetLastVisit( );
_dataFile.SaveUsers( );
return null; // success
}
else
{
return ″Invalid user/password combination″;
}
}
![]() A test
A test User is created and its Name and Password are set according to the user input.
![]() The
The DataFile’s method ValidateUser is called.
![]() If the user name and password are found in the data file, the method returns
If the user name and password are found in the data file, the method returns true and the corresponding user can be fetched.
![]() The
The LastVisitTextBlock is set according to the saved user. Then the saved User’s LastVisit property is updated.
![]() If on the other hand the
If on the other hand the DataFile’s method ValidateUser returns false, an error message is displayed.
Here too, you can compile the application and even run it. No error should occur, even though the login is not functional yet.
Adding a “Login” Label
We now modify the XAML user interface to add a “login” link. When the label is clicked, the Silverlight application raises an event. Follow the steps:
1. Open the file Page.xaml and scroll down until you find a TextBlock named LastVisitTextBlock.
2. Remove the TextBlock and replace it with the markup in Listing 14.23. We add a control named HyperlinkButton, which looks like a hyperlink and has a Click event just like a button. Because of the StackPanel, the Login hyperlink will always appear neatly next to the LastVisitTextBlock, whatever the length of that TextBlock is.
Listing 14.23 TextBlock and HyperlinkButton
<StackPanel Orientation=″Horizontal″>
<TextBlock x:Name=″LastVisitTextBlock″
Margin=″10,10,0,10″ FontSize=″14″
VerticalAlignment=″Bottom″/>
<HyperlinkButton Content=″(login)″
x:Name=″LoginLink″ Margin=″10,10,0,10″
Click=″LoginLink_Click″ FontSize=″14″
VerticalAlignment=″Bottom″ />
</StackPanel>
3. In Page.xaml.cs add the following event in the Page class. We don’t need any special information for this event, so we use the generic EventHandler delegate. Also, the event is made scriptable because JavaScript must subscribe to it:
[ScriptableMember]
public event EventHandler LoginClicked;
4. Still in the Page class, add a method (Listing 14.24) to raise the LoginClicked event (for example under the method ValidateUser that we added before):
Listing 14.24 Method OnLoginClicked
public void OnLoginClicked(EventArgs e)
{
if (LoginClicked != null)
{
LoginClicked(this, e);
}
}
5. Always in the Page class, handle the MouseLeftButtonDown event of the “login” TextBlock (Listing 14.25):
Listing 14.25 Event Handler LoginLink_Click
private void LoginLink_Click(object sender, RoutedEventArgs e)
{
EventArgs args = new EventArgs( );
OnLoginClicked(args);
}
6. Finally, we need to register the Page class with the web application. Add the following code in the Page constructor, under the call to _dataFile.LoadUsers( ):
HtmlPage.RegisterScriptableObject(″Page″, this);
Let’s summarize shortly:
![]() When the user clicks the “login”
When the user clicks the “login” HyperlinkButton, the method OnLoginClicked is called.
![]() If any object (including the JavaScript application) registered for this event, it will be raised.
If any object (including the JavaScript application) registered for this event, it will be raised.
![]() No additional information is passed to the event subscriber: The only information is that the link has been clicked.
No additional information is passed to the event subscriber: The only information is that the link has been clicked.
Adding a Web Project
So far, we have always executed our Thumbnails application with the default HTML test page. In Chapter 9, we saw how to create a Silverlight application with a website to test it. Now we add a new website next to an existing Silverlight application with the following steps:
1. Select the menu File, Add, New Web Site.
2. Make sure that ASP.NET Web Site is selected, and use the name Thumbnails.Web. This new folder should be placed in the same folder as the file Thumbnails.sln and the Thumbnails folder with the Silverlight application. Then click OK.
This creates a new project in the same Solution as the Silverlight application. Remember that this project will run on the web server, while the Silverlight application will run on the web client!!
Now we add a link to the Silverlight application, so that our website can deliver the Silverlight content to the web client when needed.
1. Right-click on the project you just added. Select Property Pages.
2. In the Property Pages dialog, select Silverlight Applications and click on the Add button.
3. Select Use an Existing Silverlight Project in the Solution and make sure that the Thumbnails project is chosen. You can leave all the other options at their default. Then close both dialogs.
4. In the Solution Explorer, rename the file ThumbnailsTestPage.html to index.html. This will be the file we work in for now.
Checking the Media Files’ Build Action
We need to make sure that the media elements (images and videos) are copied to the website together with the Silverlight application. For the moment, the media elements belong to the Thumbnails project. This is not ideal, because we cannot easily add media elements after the application has been deployed to the web server. We will correct this later, in Chapter 19, “Creating User Controls and Custom Controls.”
You can control what the compiler does with the files by setting the Build Action property.
1. In Studio, click on the image pic1.png and press F4. This opens the Properties dialog.
2. Make sure that the Build Action is set to Resource (it should be the case already). Also, the Copy to Output Directory property should be set to Do Not Copy.
The following values are available:
![]() None: No action is taken for this element. It will not be touched by the compiler.
None: No action is taken for this element. It will not be touched by the compiler.
![]() Content: The element will be copied to the output directory (for example bin/Debug). Note that this value depends on the value of the Copy to Output Directory property, which should be set to Copy if Newer (or Copy Always).
Content: The element will be copied to the output directory (for example bin/Debug). Note that this value depends on the value of the Copy to Output Directory property, which should be set to Copy if Newer (or Copy Always).
![]() Resource: The element will be embedded into the DLL.
Resource: The element will be embedded into the DLL.
There are other possible values for Build Action, but these three are the ones we use in Silverlight for elements that are referenced by Image, MediaElement or such controls.
We just saw that the images’ Build Action is set to Resource. It means that they will be copied into the Thumbnails DLL, and will automatically be available on the web server too.
The movie’s Build Action, however, is set to Content. The movie is available into the bin/Debug directory (you can see it there) but will not be copied to the web server automatically. To solve this, you can either copy the file mov1.wmv to the folder ClientBin in the website Thumbnails.Web, or you can change the file’s Build Action to Resource (and handle it the same way as the images).
Adding the HTML Login Dialog
In this book we really work with a number of different technologies. In fact, this is to be expected in a heterogeneous environment like the Web. After creating Silverlight, JavaScript, and CSS code, let’s do a little HTML with the following steps:
1. Open the file index.html and add the HTML markup in Listing 14.26 under the silverlightControlHost div element. We use the LoginDialogStatus element to display messages to the user in case of error. For the moment, this line displays nothing.
Listing 14.26 HTML Login Dialog
<div id=″LoginDialog″>
<form action=″index.html″>
<input type=″text″ id=″NameTextBox″ />
(user name)<br />
<input type=″password″ id=″PasswordTextBox″ />
(password)<br />
<input type=″button″ class=″button″ value=″submit″
onclick=″thumbnails.handleSubmitClicked( )″ />
<input type=″button″ class=″button″ value=″new user″
onclick=″thumbnails.handleNewUserClicked( )″ />
<input type=″button″ class=″button″ value=″cancel″
onclick=″thumbnails.handleCancelClicked( )″ />
</form>
<div id=″LoginDialogStatus″></div>
</div>
2. We need CSS to make this HTML element look nicer. In the head section, under the #silverlightControlHost CSS style, add the CSS code in Listing 14.27:
Listing 14.27 CSS Rules
#LoginDialog
{
position: absolute;
top: 20em;
left: 3em;
padding: 1em;
background-color: #6699FF;
font-family: Sans-Serif;
border: solid 2px black;
display: none;
}
.button
{
width: 6em;
margin: 1em 0.5em 0 0;
}
These changes add an HTML login dialog positioned on top of the Silverlight application. For the moment, however, the dialog is hidden (display: none). We now use JavaScript to show the dialog when the “login” label is clicked in XAML.
Blending the Silverlight Application with HTML
Remember the windowless attribute from Chapter 7, “Deploying to a Web Page.” It specifies how the Silverlight “real estate” interacts with the HTML page. If you set it to false (that’s the default value), the Silverlight content appears on top of the HTML content in all circumstances.
In our case, we want to set it to true to allow the login dialog to be displayed on top of the thumbnails gallery.
1. In index.html, in the object tag, add the windowless parameter and set it to true.
<param name=″windowless″ value=″true″ />
2. While we are at it, let’s set the Silverlight application’s background to Transparent. This allows it to “blend” even better with the HTML page.
<param name=″background″ value=″Transparent″ />
Catching the .NET Event
As we saw previously, catching a .NET event involves a few modifications in the JavaScript application. Use the following steps:
1. Add a new JavaScript file to the Thumbnails.Web website (right-click on the Project, then choose Add New Item and choose a JScript file). Name this file Thumbnails.js.
2. Add a constructor for the Thumbnails object. This constructor accepts a reference to the Page element (this is the Silverlight page we registered earlier). It gets references to some HTML elements for later. Finally, we register for the LoginClicked event that the Silverlight application raises when the corresponding HyperlinkButton is clicked (Listing 14.28).
Listing 14.28 Thumbnails Constructor
Thumbnails = function(page)
{
this._loginDialog
= document.getElementById(″LoginDialog″);
this._nameTextBox
= document.getElementById(″NameTextBox″);
this._passwordTextBox
= document.getElementById(″PasswordTextBox″);
this._loginDialogStatus
= document.getElementById(″LoginDialogStatus″);
this._page = page;
this._page.LoginClicked
= Thumbnails.createDelegate(this, this.handleLoginClicked);
}
3. The famous method createDelegate also needs to be added, below the constructor (Listing 14.29):
Listing 14.29 Method createDelegate
Thumbnails.createDelegate = function(instance, method)
{
return function( )
{
return method.apply(instance, arguments);
}
}
4. Define a new prototype for the Thumbnails object as in Listing 14.30.
Listing 14.30 Thumbnails Prototype
Thumbnails.prototype =
{
handleLoginClicked : function( )
{
this._loginDialog.style.display = ″block″;
},
handleCancelClicked : function( )
{
this.cancel( );
},
handleSubmitClicked : function( )
{
},
handleNewUserClicked : function( )
{
},
checkErrorMessage : function(errorMessage)
{
if (errorMessage = = null)
{
// success
this.cancel( );
}
else
{
this._loginDialogStatus.innerHTML = errorMessage;
}
},
cancel : function( )
{
this._loginDialog.style.display = ″none″;
this._nameTextBox.value = ″″;
this._passwordTextBox.value = ″″;
this._loginDialogStatus.innerHTML = ″″;
}
}
![]()
handleLoginClicked is the event handler for the LoginClicked event coming from Silverlight. It uses the login dialog’s CSS style to display it.
![]()
handleCancelClicked is handling the Cancel button. It simply calls the cancel method.
![]()
handleSubmitClicked and handleNewUserClicked will be implemented in just a minute and will handle the events raised by both HTML buttons in the Login dialog.
![]()
checkErrorMessage is a utility that accepts a string as a parameter. If the string is null (meaning that there are no errors), the method cancel is called. If there is an error message, however, the message is displayed in the status line.
![]()
cancel is a utility method, called by the handleCancelClicked event handler and by the checkErrorMessage method. It hides the login dialog and resets its state.
Wiring Up the Scripts
To get the JavaScript to work, we need to add the file Thumbnails.js to the page index.html. Then, we “wire” the code together with the following steps.
1. In index.html, before the existing script block, include the file Thumbnails.js.
<script type=″text/javascript″ src=″Thumbnails.js″></script>
2. Add the following global variable and event handler to the existing script block (below onSilverlightError):
var thumbnails;
function onSilverlightLoaded(sender, args)
{
thumbnails = new Thumbnails(sender.getHost( ).Content.Page);
}
3. “Wire” the event handler we just declared to the onload event of the Silverlight application:
<param name=″onload″ value=″onSilverlightLoaded″ />
At this stage, we can test the application. As we did earlier (with the JavaScriptDotNet application), set the project Thumbnails.Web as StartUp Project and the page index.html as StartUp Page. Then press Ctrl+F5. In the web page, click on the login HyperlinkButton (see Figure 14.2).
Figure 14.2 HTML login dialog on top of Silverlight application

Handling the HTML Events
The last remaining task is to “fill” the JavaScript methods handleSubmitClicked and handleNewUserClicked and to call the corresponding .NET methods in the Page class with the following steps:
1. In Thumbnails.js, replace the existing handleSubmitClicked method with the code in Listing 14.31:
Listing 14.31 Event Handler handleSubmitClicked
handleSubmitClicked : function( )
{
var name = this._nameTextBox.value;
var password = this._passwordTextBox.value;
var errorMessage
= this._page.ValidateUser(name, password);
this.checkErrorMessage(errorMessage);
},
![]() The name and password are read from the HTML form.
The name and password are read from the HTML form.
![]() The .NET method
The .NET method ValidateUser is called. The returned error message is saved.
![]() The JavaScript method
The JavaScript method checkErrorMessage is called. If there were no errors, the login dialog will be closed.
2. Replace the method handleNewUserClicked with the code in Listing 14.32:
Listing 14.32 Event Handler handleNewUserClicked
handleNewUserClicked : function( )
{
var name = this._nameTextBox.value;
var password = this._passwordTextBox.value;
var errorMessage
= this._page.AddUser(name, password);
this.checkErrorMessage(errorMessage);
},
![]() Here too, the name and password are read from the HTML form.
Here too, the name and password are read from the HTML form.
![]() The .NET method
The .NET method AddUser is called, and the returned error message is saved.
![]() The JavaScript method
The JavaScript method checkErrorMessage takes care of the rest.
Test the application now: Press Ctrl+F5 to run it, and then press the login link. In the dialog, enter your name and password, and play with the Submit and New user button to see how the application reacts.
Summary
In this chapter we demonstrated how to enable .NET to JavaScript and JavaScript to .NET communication. We also honed our .NET skills and learned a great deal about organizing an application in objects, overloading operators, raising and handling events, serializing and deserializing objects, and interacting with the web page.