
We’ve come a long way in these first chapters and have already discussed plenty of details about authentication. But we have applied each of these new details individually. It is time to put together what we learned in a more complex project. This hands-on example helps you to have a better overview of how all the components we discussed so far work together in a real application.
6.1 Project requirements and setup
In this section, we implement a small web application where the user, after successful authentication, can see a list of products on the main page. You can find the complete implementation with the provided projects in ssia-ch6-ex1.
For our project, a database stores the products and users for this application. The passwords for each user are hashed with either bcrypt or scrypt. I chose two hashing algorithms to give us a reason to customize the authentication logic in the example. A column in the users table stores the encryption type. A third table stores the users’ authorities.
Figure 6.1 describes the authentication flow for this application. I have shaded the components that we’ll customize differently. For the others, we use the defaults provided by Spring Security. The request follows the standard authentication flow that we discussed in chapters 2 through 5. I represent the request in the diagram with arrows having a continuous line. The AuthenticationFilter intercepts the request and then delegates the authentication responsibility to the AuthenticationManager, which uses the AuthenticationProvider to authenticate the request. It returns the details of a successfully authenticated call so that the AuthenticationFilter can store these in the SecurityContext.

Figure 6.1 The authentication flow in the hands-on web application. The custom authentication provider implements the authentication logic. For this, the AuthenticationProvider uses a UserDetailsService implementation and two PasswordEncoder implementations, one for each requested hashing algorithm. The UserDetailsService implementation, called JpaUserDetailsService, uses Spring Data and JPA to work with the database and to obtain the user’s details.
What we implement in this example is the AuthenticationProvider and everything related to the authentication logic. As presented in figure 6.1, we create the AuthenticationProviderService class, which implements the Authentication- Provider interface. This implementation defines the authentication logic where it needs to call a UserDetailsService to find the user details from a database and the PasswordEncoder to validate if the password is correct. For this application, we create a JpaUserDetailsService that uses Spring Data JPA to work with the database. For this reason, it depends on a Spring Data JpaRepository, which, in our case, I named UserRepository. We need two password encoders because the application validates passwords hashed with bcrypt as well as passwords hashed with scrypt. Being a simple web application, it needs a standard login form to allow for user authentication. For this, we configure formLogin as the authentication method.
NOTE In some of the examples in this book, I use Spring Data JPA. This approach brings you closer to the applications you’ll find when working with Spring Security. You don’t need to be an expert in JPA to understand the examples. From the Spring Data and JPA point of view, I limit the use cases to simple syntaxes and focus on Spring Security. However, if you want to learn more about JPA and JPA implementations like Hibernate, I strongly recommend you read Java Persistence with Hibernate, 2nd ed., written by Christian Bauer et al. (Manning, 2015). For a great discussion on Spring Data, you can read Craig Walls’ Spring in Action, 5th ed. (Manning, 2018).
The application also has a main page that users can access after a successful login. This page displays details about products stored in the database. In figure 6.2, I have shaded the components that we create. We need a MainPageController that defines the action that the application executes upon the request for the main page. The MainPageController displays the name of the user on the main page, so this is why it depends on the SecurityContext. It obtains the username from the security context and the list of products to display from a service that I call ProductService. The ProductService gets the list of products from the database using a ProductRepository, which is a standard Spring Data JPA repository.

Figure 6.2 The MainPageController serves the requests for the main page of the application. To display the products from the database, it uses a ProductService, which obtains the products through a JpaRepository named ProductRepository. The MainPageController also takes the name of the authenticated user from the SecurityContext.
The database contains three tables: user, authority, and product. Figure 6.3 presents the entity relationship diagram (ERD) among these tables.

Figure 6.3 The entity relationship diagram (ERD) of the database for the current example. The user table stores the username, password, and the algorithm used to hash the password. Also, a user has one or more authorities that are stored in the authority table. A third table, named product, stores the details of the product records: a name, a price, and a currency. The main page displays the details of all the products stored in this table.
The main steps we take to implement this project are as follows:
Let’s get started with the implementation. We first have to create the tables. The name of the database I use is spring. You should first create the database either by using a command-line tool or a client. If you are using MySQL, like in the examples in this book, you could use MySQL Workbench to create the database and eventually to run the scripts. I prefer, however, to let Spring Boot run the scripts that create the database structure and add data to it. To do this, you have to create the schema.sql and data.sql files in the resources folder of your project. The schema.sql file contains all the queries that create or alter the structure of the database, while the data.sql file stores all the queries that work with data. Listings 6.1, 6.2, and 6.3 define the three tables used by the application.
The fields of the user table are
-
id--Represents the primary key of the table that’s defined as auto-increment -
algorithm--Stores the valuesBCRYPTorSCRYPTand decides which is the hashing method of the password for the current record
Listing 6.1 provides the definition of the user table. You can run this script manually or add it to the schema.sql file to let Spring Boot run it when the project starts.
Listing 6.1 Script for creating the user table
CREATE TABLE IF NOT EXISTS `spring`.`user` (
  `id` INT NOT NULL AUTO_INCREMENT,
  `username` VARCHAR(45) NOT NULL,
  `password` TEXT NOT NULL,
  `algorithm` VARCHAR(45) NOT NULL,
  PRIMARY KEY (`id`));
The fields of the authority table are
Listing 6.2 provides the definition of the authority table. You can run this script manually or add it to the schema.sql file to let Spring Boot run it when the project starts.
Listing 6.2 Script for creating the authority table
CREATE TABLE IF NOT EXISTS `spring`.`authority` (
  `id` INT NOT NULL AUTO_INCREMENT,
  `name` VARCHAR(45) NOT NULL,
  `user` INT NOT NULL,
  PRIMARY KEY (`id`));
The third table is named product. It stores the data that’s displayed after the user successfully logs in. The fields of this table are
-
id--Represents the primary key of the table that’s defined as auto-increment -
price--Represents the price of the product, which is a double -
currency--Represents the currency (for example, USD, EUR, and so on), which is a string
Listing 6.3 provides the definition of the product table. You can run this script manually or add it to the schema.sql file to let Spring Boot run it when the project starts.
Listing 6.3 Script for creating the product table
CREATE TABLE IF NOT EXISTS `spring`.`product` (
  `id` INT NOT NULL AUTO_INCREMENT,
  `name` VARCHAR(45) NOT NULL,
  `price` VARCHAR(45) NOT NULL,
  `currency` VARCHAR(45) NOT NULL,
  PRIMARY KEY (`id`));
NOTE It is advisable to have a many-to-many relationship between the authorities and the users. To keep the example simpler from the point of view of the persistence layer and focus on the essential aspects of Spring Security, I decided to make this one-to-many.
Let’s add some data that we can use to test our application. You can run these INSERT queries manually or add them to the data.sql file in the resources folder of your project to allow Spring Boot to run them when you start the application:
INSERT IGNORE INTO `spring`.`user` (`id`, `username`, `password`, `algorithm`) VALUES ('1', 'john', '$2a$10$xn3LI/AjqicFYZFruSwve.681477XaVNaUQbr1gioaWPn4t1KsnmG', 'BCRYPT');

INSERT IGNORE INTO `spring`.`authority` (`id`, `name`, `user`) VALUES ('1', 'READ', '1');
INSERT IGNORE INTO `spring`.`authority` (`id`, `name`, `user`) VALUES ('2', 'WRITE', '1');

INSERT IGNORE INTO `spring`.`product` (`id`, `name`, `price`, `currency`) VALUES ('1', 'Chocolate', '10', 'USD');
In this code snippet, for user John, the password is hashed using bcrypt. The raw password is 12345.
NOTE It’s common to use the schema.sql and data.sql files in examples. In a real application, you can choose a solution that allows you to also version the SQL scripts. You’ll find this often done using a dependency like Flyway (https://flywaydb.org/) or Liquibase (https://www.liquibase.org/).
Now that we have a database and some test data, let’s start with the implementation. We create a new project, and add the following dependencies, which are presented in listing 6.4:
-
spring-boot-starter-data-jpa--Connects to the database using Spring Data -
spring-boot-starter-security--Lists the Spring Security dependencies -
spring-boot-starter-thymeleaf--Adds Thymeleaf as a template engine to simplify the definition of the web page -
spring-boot-starter-web--Lists the standard web dependencies
Listing 6.4 Dependencies needed for the development of the example project
<dependency>
   <groupId>org.springframework.boot</groupId>
   <artifactId>spring-boot-starter-data-jpa</artifactId>
</dependency>
<dependency>
   <groupId>org.springframework.boot</groupId>
   <artifactId>spring-boot-starter-security</artifactId>
</dependency>
<dependency>
   <groupId>org.springframework.boot</groupId>
   <artifactId>spring-boot-starter-thymeleaf</artifactId>
</dependency>
<dependency>
   <groupId>org.springframework.boot</groupId>
   <artifactId>spring-boot-starter-web</artifactId>
</dependency>
<dependency>
   <groupId>mysql</groupId>
   <artifactId>mysql-connector-java</artifactId>
   <scope>runtime</scope>
</dependency>
The application.properties file needs to declare the database connectivity parameters like so:
spring.datasource.url=jdbc:mysql://localhost/➥ spring?useLegacyDatetimeCode=false&serverTimezone=UTC
spring.datasource.username=<your_username>
spring.datasource.password=<your_password>
spring.datasource.initialization-mode=always
NOTE I might repeat myself on this subject, but make sure you never expose passwords! In our examples it’s fine, but in a real-world scenario, you should never write sensitive data as credentials or private keys in the application.properties file. Instead, use a secrets vault for this purpose.
6.2 Implementing user management
In this section, we discuss implementing the user management part of the application. The representative component of user management in regards to Spring Security is the UserDetailsService. You need to implement at least this contract to instruct Spring Security how to retrieve the details of your users.
Now that we have a project in place and the database connection configured, it is time to think about the implementations related to application security. The steps we need to take to build this part of the application that takes care of the user management are as follows:
-
Define the password encoder objects for the two hashing algorithms.
-
Define the JPA entities to represent the user and authority tables that store the details needed in the authentication process.
-
Declare the
JpaRepositorycontracts for Spring Data. In this example, we only need to refer directly to the users, so we declare a repository namedUserRepository. -
Create a decorator that implements the
UserDetailscontract over theUserJPA entity. Here, we use the approach to separate responsibilities discussed in section 3.2.5. -
Implement the
UserDetailsServicecontract. For this, create a class namedJpaUserDetailsService. This class uses theUserRepositorywe create in step 3 to obtain the details about users from the database. IfJpaUserDetailsServicefinds the users, it returns them as an implementation of the decorator we define in step 4.
We first consider users and password management. We know from the requirements of the example that the algorithms that our app uses to hash passwords are bcrypt and scrypt. We can start by creating a configuration class and declare these two password encoders as beans, as the following listing presents.
Listing 6.5 Registering a bean for each PasswordEncoder
@Configuration
public class ProjectConfig {

  @Bean
  public BCryptPasswordEncoder bCryptPasswordEncoder() {
    return new BCryptPasswordEncoder();
  }

  @Bean
  public SCryptPasswordEncoder sCryptPasswordEncoder() {
    return new SCryptPasswordEncoder();
  }
}
For user management, we need to declare a UserDetailsService implementation, which retrieves the user by its name from the database. It needs to return the user as an implementation of the UserDetails interface, and we need to implement two JPA entities for authentication: User and Authority. Listing 6.6 shows how to define the User. It has a one-to-many relationship with the Authority entity..
Listing 6.6 The User entity class
@Entity
public class User {

  @Id
  @GeneratedValue(strategy = GenerationType.IDENTITY)
  private Integer id;

  private String username;
  private String password;

  @Enumerated(EnumType.STRING)
  private EncryptionAlgorithm algorithm;

  @OneToMany(mappedBy = "user", fetch = FetchType.EAGER)
  private List<Authority> authorities;

  // Omitted getters and setters
}
The EncryptionAlgorithm is an enum defining the two supported hashing algorithms as specified in the request:
public enum EncryptionAlgorithm {
    BCRYPT, SCRYPT
}
The following listing shows how to implement the Authority entity. It has a many-to-one relationship with the User entity.
Listing 6.7 The Authority entity class
@Entity
public class Authority {

  @Id
  @GeneratedValue(strategy = GenerationType.IDENTITY)
  private Integer id;

  private String name;

  @JoinColumn(name = "user")
  @ManyToOne
  private User user;

  // Omitted getters and setters
}
A repository must be declared to retrieve users by their names from the database. The following listing shows how to do this.
Listing 6.8 The definition of the Spring Data repository for the User entity
public interface UserRepository extends JpaRepository<User, Integer> {

  Optional<User> findUserByUsername(String u);       ❶
}
❶ It’s not mandatory to write the query. Spring Data translates the name of the method in the needed query.
I use here a Spring Data JPA repository. Then Spring Data implements the method declared in the interface and executes a query based on its name. The method returns an Optional instance containing the User entity with the name provided as a parameter. If no such user exists in the database, the method returns an empty Optional instance.
To return the user from the UserDetailsService, we need to represent it is UserDetails. In the following listing, the class CustomUserDetails implements the UserDetails interface and wraps the User entity.
Listing 6.9 The implementation of the UserDetails contract
public class CustomUserDetails implements UserDetails {

  private final User user;

  public CustomUserDetails(User user) {
    this.user = user;
  }

  // Omitted code

  public final User getUser() {
    return user;
  }
}
The CustomUserDetails class implements the methods of the UserDetails interface. The following listings shows how this is done.
Listing 6.10 Implementing the remaining methods of the UserDetails interface
@Override
public Collection<? extends GrantedAuthority> getAuthorities() {
  return user.getAuthorities().stream()
    .map(a -> new SimpleGrantedAuthority(
                     a.getName()))          ❶
    .collect(Collectors.toList());          ❷
}

@Override
public String getPassword() {
  return user.getPassword();
}

@Override

public String getUsername() {
  return user.getUsername();
}

@Override
public boolean isAccountNonExpired() {
  return true;
}

@Override
public boolean isAccountNonLocked() {
  return true;
}

@Override
public boolean isCredentialsNonExpired() {
  return true;
}

@Override
public boolean isEnabled() {
  return true;
}
❶ Maps each authority name found in the database for the user to a SimpleGrantedAuthority
❷ Collects and returns all the instances of SimpleGrantedAuthority in a list
NOTE In listing 6.10, I use SimpleGrantedAuthority, which is a straightforward implementation of the GrantedAuthority interface. Spring Security provides this implementation.
You can now implement the UserDetailsService to look like listing 6.11. If the application finds the user by its username, it wraps and returns the instance of type User in a CustomUserDetails instance. The service should throw an exception of type UsernameNotFoundException if the user doesn’t exist.
Listing 6.11 The implementation of the UserDetailsService contract
@Service
public class JpaUserDetailsService implements UserDetailsService {

  @Autowired
  private UserRepository userRepository;

  @Override
  public CustomUserDetails loadUserByUsername(String username) {
    Supplier<UsernameNotFoundException> s =                     ❶
            () -> new UsernameNotFoundException(
                  "Problem during authentication!");

    User u = userRepository
               .findUserByUsername(username)                    ❷
               .orElseThrow(s);                                 ❸

    return new CustomUserDetails(u);                            ❹
  }
}
❶ Declares a supplier to create exception instances
❷ Returns an Optional instance containing the user or an empty Optional if the user does not exist
❸ If the Optional instance is empty, throws an exception created by the defined Supplier; otherwise, it returns the User instance
❹ Wraps the User instance with the CustomUserDetails decorator and returns it
6.3 Implementing custom authentication logic
Having completed user and password management, we can begin writing custom authentication logic. To do this, we have to implement an AuthenticationProvider (listing 6.12) and register it in the Spring Security authentication architecture. The dependencies needed for writing the authentication logic are the UserDetailsService implementation and the two password encoders. Beside auto-wiring these, we also override the authenticate() and supports() methods. We implement the supports() method to specify that the supported Authentication implementation type is UsernamePasswordAuthenticationToken.
Listing 6.12 Implementing the AuthenticationProvider
@Service
public class AuthenticationProviderService
  implements AuthenticationProvider {

  @Autowired                                               ❶
  private JpaUserDetailsService userDetailsService;

  @Autowired
  private BCryptPasswordEncoder bCryptPasswordEncoder;

  @Autowired
  private SCryptPasswordEncoder sCryptPasswordEncoder;

  @Override
  public Authentication authenticate(
    Authentication authentication)
      throws AuthenticationException {
        // ...
  }

  @Override
  public boolean supports(Class<?> aClass) {
    return return UsernamePasswordAuthenticationToken.class
        .isAssignableFrom(aClass);
  }
}
❶ Injects the necessary dependencies, which are the UserDetailsService and the two PasswordEncoder implementations
The authenticate() method first loads the user by its username and then verifies if the password matches the hash stored in the database (listing 6.13). The verification depends on the algorithm used to hash the user’s password.
Listing 6.13 Defining the authentication logic by overriding authenticate()
@Override
public Authentication authenticate(
➥ Authentication authentication)
    throws AuthenticationException {

  String username = authentication.getName();
  String password = authentication
                     .getCredentials()
                     .toString();

  CustomUserDetails user =                                             ❶
        userDetailsService.loadUserByUsername(username);

  switch (user.getUser().getAlgorithm()) {                             ❷
    case BCRYPT:                                                       ❸
        return checkPassword(user, password, bCryptPasswordEncoder);
    case SCRYPT:                                                       ❹
        return checkPassword(user, password, sCryptPasswordEncoder);
  }

  throw new BadCredentialsException("Bad credentials");
}
❶ With the UserDetailsService, finds the user details from the database
❷ Validates the password depending on the hashing algorithm specific to the user
❸ If bcrypt hashes the user’s password, uses the BCryptPasswordEncoder
❹ Otherwise, uses the SCryptPasswordEncoder
In listing 6.13, we choose the PasswordEncoder that we use to validate the password based on the value of the algorithm attribute of the user. In listing 6.14, you find the definition of the checkPassword() method. This method uses the password encoder sent as a parameter to validate that the raw password received from the user input matches the encoding in the database. If the password is valid, it returns an instance of an implementation of the Authentication contract. The UsernamePasswordAuthenticationToken class is an implementation of the Authentication interface. The constructor that I call in listing 6.14 also sets the authenticated value to true. This detail is important because you know that the authenticate() method of the AuthenticationProvider has to return an authenticated instance.
Listing 6.14 The checkPassword() method used in the authentication logic
private Authentication checkPassword(CustomUserDetails user,
                                     String rawPassword,
                                     PasswordEncoder encoder) {

  if (encoder.matches(rawPassword, user.getPassword())) {
    return new UsernamePasswordAuthenticationToken(
                      user.getUsername(),
                      user.getPassword(),
                      user.getAuthorities());
  } else {
    throw new BadCredentialsException("Bad credentials");
  }
}
Now we need to register the AuthenticationProvider within the configuration class. The next listing shows how to do this.
Listing 6.15 Registering the AuthenticationProvider in the configuration class
@Configuration
public class ProjectConfig extends WebSecurityConfigurerAdapter {

  @Autowired                                                     ❶
  private AuthenticationProviderService authenticationProvider;

  @Bean
  public BCryptPasswordEncoder bCryptPasswordEncoder() {
    return new BCryptPasswordEncoder();
  }

  @Bean
  public SCryptPasswordEncoder sCryptPasswordEncoder() {
    return new SCryptPasswordEncoder();
  }

  @Override
  protected void configure(AuthenticationManagerBuilder auth) {
    auth.authenticationProvider(
           authenticationProvider);                              ❷
  }
}
❶ Gets the instance of AuthenticationProviderService from the context
❷ By overriding the configure() method, registers the authentication provider for Spring Security
In the configuration class, we want to set both the authentication implementation to the formLogin method and the path /main as the default success URL, as shown in the next listing. We want to implement this path as the main page of the web application.
Listing 6.16 Configuring formLogin as the authentication method
@Override
protected void configure(HttpSecurity http)
  throws Exception {

  http.formLogin()
      .defaultSuccessUrl("/main", true);

  http.authorizeRequests()
      .anyRequest().authenticated();
}
6.4 Implementing the main page
Finally, now that we have the security part in place, we can implement the main page of the app. It is a simple page that displays all the records of the product table. This page is accessible only after the user logs in. To get the product records from the database, we have to add a Product entity class and a ProductRepository interface to our project. The following listing defines the Product class.
Listing 6.17 Definining the Product JPA entity
@Entity
public class Product {

  @Id
  @GeneratedValue(strategy = GenerationType.IDENTITY)
  private Integer id;

  private String name;
  private double price;

  @Enumerated(EnumType.STRING)
  private Currency currency;

  // Omitted code
}
The Currency enumeration declares the types allowed as currencies in the application. For example;
public enum Currency {
  USD, GBP, EUR
}
The ProductRepository interface only has to inherit from JpaRepository. Because the application scenario asks to display all the products, we need to use the findAll() method that we inherit from the JpaRepository interface, as shown in the next listing.
Listing 6.18 Definition of the ProductRepository interface
public interface ProductRepository
  extends JpaRepository<Product, Integer> {
}                                             ❶
❶ The interface doesn’t need to declare any methods. We only use the methods inherited from the JpaRepository interface implemented by Spring Data.
The ProductService class uses the ProductRepository to retrieve all the products from the database.
Listing 6.19 Implementation of the ProductService class
@Service
public class ProductService {

  @Autowired
  private ProductRepository productRepository;

  public List<Product> findAll() {
    return productRepository.findAll();
  }
}
In the end, a MainPageController defines the path for the page and fills the Model object with what the page will display.
Listing 6.20 The definition of the controller class
@Controller
public class MainPageController {

  @Autowired
  private ProductService productService;

  @GetMapping("/main")
  public String main(Authentication a, Model model) {
    model.addAttribute("username", a.getName());
    model.addAttribute("products", productService.findAll());
    return "main.html";
  }
}
The main.html page is stored in the resources/templates folder and displays the products and the name of the logged-in user.
Listing 6.21 The definition of the main page
<!DOCTYPE html>
<html lang="en" xmlns:th="http://www.thymeleaf.org">       ❶
  <head>
    <meta charset="UTF-8">
    <title>Products</title>
  </head>
  <body>
    <h2 th:text="'Hello, ' + ${username} + '!'" />         ❷
    <p><a href="/logout">Sign out here</a></p>

    <h2>These are all the products:</h2>
    <table>
      <thead>
        <tr>
          <th> Name </th>
          <th> Price </th>
        </tr>
      </thead>
      <tbody>
        <tr th:if="${products.empty}">                    ❸
          <td colspan="2"> No Products Available </td>
        </tr>
        <tr th:each="book : ${products}">                 ❹
          <td><span th:text="${book.name}"> Name </span></td>
          <td><span th:text="${book.price}"> Price </span></td>
        </tr>
      </tbody>
    </table>
  </body>
</html>
❶ Declares the prefix th so that we can use the Thymeleaf components in the page
❷ Displays this message on the page. After the execution of the controller action, ${username} is the variable that’s injected from the model to the page.
❸ If there are no products in the model’s list, displays a message
❹ For each product found in the model’s list, creates a row in the table
6.5 Running and testing the application
We have finished writing the code for the first hands-on project of the book. It is time to verify that it is working according to our specifications. So let’s run the application and try to log in. After running the application, we can access it in the browser by typing the address http://localhost :8080. The standard login form appears as presented in figure 6.4. The user I stored in the database (and the one in the script given at the beginning of this chapter) is John with the password 12345 that’s hashed using bcrypt. You can use these credentials to log in.
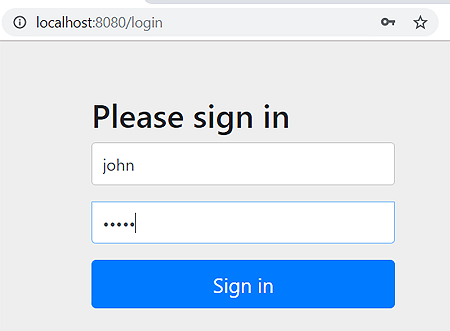
Figure 6.4 The login form of the application
NOTE In a real-world application, you should never allow your users to define simple passwords like “12345.” Passwords so simple are easy to guess and represent a security risk. Wikipedia provides an informative article on passwords at https://en.wikipedia.org/wiki/Password_strength. It explains not only the rules to set strong passwords, but also how to calculate password strength.
Once logged in, the application redirects you to the main page (figure 6.5). Here, the username taken from the security context appears on the page, together with the list of the products from the database.

Figure 6.5 The main page of the application
When you click the Sign Out Here link, the application redirects you to the standard sign out confirmation page (figure 6.6). This is predefined by Spring Security because we use the formLogin authentication method.
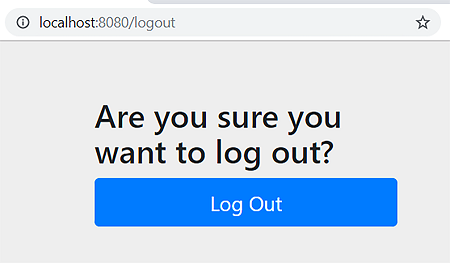
Figure 6.6 The standard log-out confirmation page
After clicking Log Out, you are redirected back to the login page should you want to order more chocolate (figure 6.7).

Figure 6.7 The login page appears after logging out from the application.
Congratulations! You’ve just implemented the first hands-on example and managed to put together some of the essential things already discussed in this book. With this example, you developed a small web application that has its authentication managed with Spring Security. You used the form-login authentication method, and stored the user details in the database. You also implemented custom authentication logic.
Before closing this chapter, I’d like to make one more observation. Like any software requirement, you can implement the same application in different ways. I chose this implementation to touch as many of the things as possible that we discussed earlier. Mainly, I wanted to have a reason to implement a custom AuthenticationProvider. As an exercise, I leave you to simplify the implementation by using a DelegatingPasswordEncoder as discussed in chapter 4.
Summary
-
It is common in a real-world application to have dependencies that require different implementations of the same concept. This can be the
UserDetailsof Spring Security and theUserentity of the JPA implementation, as in our case. A good recommendation for this is to decouple responsibilities in different classes to enhance readability. -
In most cases, you have multiple ways to implement the same functionality. You should choose the simplest solution. Making your code easier to understand leaves less room for errors and, thus, security breaches.