
Every computer offers a way to find files. And every system offers several different ways to open them. But Spotlight, a star feature of Mac OS X, combines these two functions in a fast, efficient way.
See the little magnifying-glass icon (![]() ) in your menu bar? That’s the mouse-driven way
to open the Spotlight search box.
) in your menu bar? That’s the mouse-driven way
to open the Spotlight search box.
The other way is to press ![]() -space bar. If you can memorize only one
keystroke on your Mac, that’s the one to learn. It works both at the
desktop and when you’re in other programs. In any case, the Spotlight
text box appears just below your menu bar (Figure 3-9).
-space bar. If you can memorize only one
keystroke on your Mac, that’s the one to learn. It works both at the
desktop and when you’re in other programs. In any case, the Spotlight
text box appears just below your menu bar (Figure 3-9).
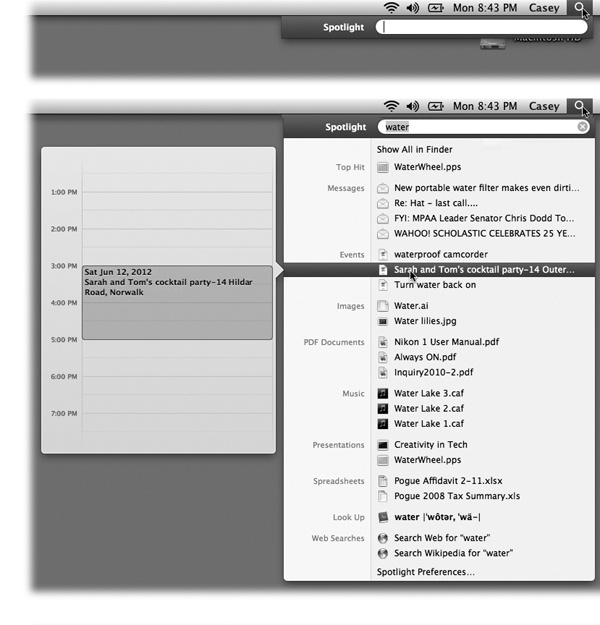
Figure 3-9. Top: Press ![]() -space bar, or click the magnifying-glass
icon, to make the search box appear. Bottom: As you type,
Spotlight builds the list of every match it can find, neatly
organized by type: programs, documents, folders, images, PDF
documents, and so on. But don’t miss what may be one of the most
useful tweaks in all of Liondom: If you’re not sure what something
is, point to it without clicking—or pause on it as you walk down the
list with the arrow keys. A Quick Look preview pops out to the left.
It shows exactly what’s in that movie, picture, document, or
whatever. If your search has found an appointment from your
calendar, you actually see a slice of that day’s calendar, showing
the appointment in context!
-space bar, or click the magnifying-glass
icon, to make the search box appear. Bottom: As you type,
Spotlight builds the list of every match it can find, neatly
organized by type: programs, documents, folders, images, PDF
documents, and so on. But don’t miss what may be one of the most
useful tweaks in all of Liondom: If you’re not sure what something
is, point to it without clicking—or pause on it as you walk down the
list with the arrow keys. A Quick Look preview pops out to the left.
It shows exactly what’s in that movie, picture, document, or
whatever. If your search has found an appointment from your
calendar, you actually see a slice of that day’s calendar, showing
the appointment in context!
Begin typing to identify what you want to find and open. For example, if you’re trying to find a file called Pokémon Fantasy League.doc, typing just pok or leag would probably suffice. (Spotlight doesn’t find text in the middles of words, though; it searches from the beginnings of words.)
A menu immediately appears below the search box, listing everything Spotlight can find containing what you’ve typed so far. (This is a live, interactive search; that is, Spotlight modifies the menu of search results as you type.) The menu lists every file, folder, program, email message, address book entry, calendar appointment, picture, movie, PDF document, music file, Web bookmark, Microsoft Office document (Word, PowerPoint, Excel, Entourage), System Preferences panel, To Do item, chat transcript, Web site in your History list, photo, iChat buddy name, and even font that contains what you typed, regardless of its name or folder location.
Tip
Spotlight can even find photos according to who is in them (using iPhoto’s Faces feature) or where they were taken (using iPhoto’s Places feature). If you use iChat (Chapter 12), Spotlight also finds the lucky members of your Buddy lists. It can also find things according to their file types (type .doc to find Word files), download source (type cnet.com to find programs you downloaded from that site), sender (a name or email address), and Finder label.
If you see the icon you were hoping to dig up, just click it to open it. Or use the arrow keys to “walk down” the menu, and then press Return to open the one you want.
You can use the Quick Look preview to see what something is before you take the time to open it, as described in Chapter 2. Or check out Figure 3-10 to see how to find out where something is.
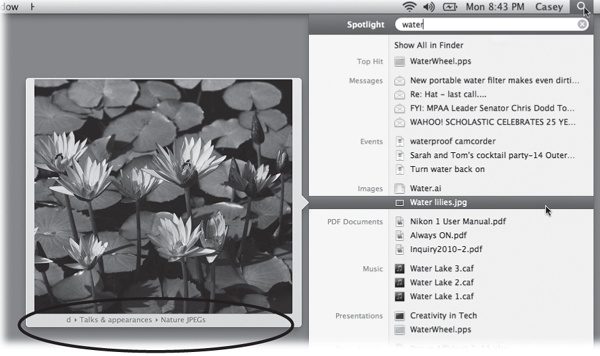
Figure 3-10. If you press ![]() -Option as you point to one of the results,
you get a line of text beneath the image that identifies the file’s
location.
-Option as you point to one of the results,
you get a line of text beneath the image that identifies the file’s
location.
If you click an application, it pops onto the screen. If you select a System Preferences panel, System Preferences opens and presents that panel. If you choose an appointment, the iCal program opens, already set to the appropriate day and time. Selecting an email message opens that message in Mail or Outlook. And so on.
Spotlight is so fast, it eliminates a lot of the folders-in-folders business that’s a side effect of modern computing. Why burrow around in folders when you can open any file or program with a couple of keystrokes?
Tip
You can drag icons right out of the results list. For example, you can drag one onto the Desktop to park it there, into a window or a folder to move it, into the Trash to delete it, onto the AirDrop icon (in the Sidebar) to hand it over to a colleague, to another disk icon to back it up, and so on.
It should be no surprise that a feature as important as Spotlight comes loaded with options, tips, and tricks. Here it is—the official, unexpurgated Spotlight Tip-O-Rama:
If the very first item—labeled Top Hit—is the icon you were looking for, just press Return to open it. This is a huge deal, because it means that in most cases, you can perform the entire operation without ever taking your hands off the keyboard.
Gem in the Rough: Sweet Spotlight Serendipity: Equations and Definitions
Spotlight has two secret features that turn it into a different beast altogether.
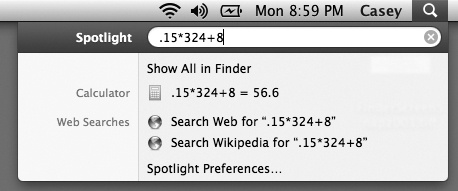
First, it’s a tiny pocket calculator, always at the ready. Click in the search box (or press
 -space bar), type or paste
38*48.2-7+55, and marvel at the first
result in the Spotlight menu: 1879.6.
There’s your answer—and you didn’t even have to fire up the
Calculator.
-space bar), type or paste
38*48.2-7+55, and marvel at the first
result in the Spotlight menu: 1879.6.
There’s your answer—and you didn’t even have to fire up the
Calculator.(For shorter equations—only a few characters long—the first result in the Spotlight menu shows the entire equation, like .15*234=35.1.)
And it’s not just a four-function calculator, either. It works with square roots: Type sqrt(25), and you’ll get the answer 5. It also works with powers: Type pow(6,6)—that is, 6 to the power of 6—and you’ll get 46656. You can even type pi to represent, you know, pi.
You can copy the result to the Clipboard, or even drag it out of the Spotlight bar into another program.
For a complete list of math functions in Spotlight, open Terminal (in your Mac’s Applications→Utilities folder), type man math, and press Return.
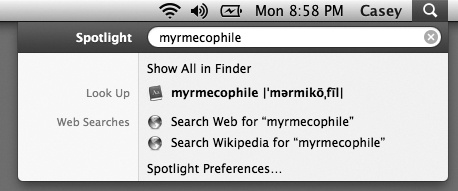
Second, the Spotlight menu is now a full-blown English dictionary. Or, more specifically, it’s wired directly into Mac OS X’s own dictionary, which sits in your Applications folder.
So if you type a word—say, myrmecophile—into the search box, you’ll see the Dictionary definition near the bottom of the results. Point to it without clicking to read the full-blown entry, thanks to the pop-out Quick Look preview. (In this example, that would be: “n: an invertebrate or plant that has a symbiotic relationship with ants.”)
To open Safari in a hurry, for example, press
-space bar (to open the Spotlight bar),
type safa, and hit Return, all in
rapid-fire sequence, without even looking. Presto: Safari is
before you.And what, exactly, is the Top Hit? Mac OS X chooses it based on its relevance (the importance of your search term inside that item) and timeliness (when you last opened it).
Tip
Spotlight makes a spectacular application launcher. That’s because Job One for Spotlight is to display the names of matching programs in the results menu. Their names appear in the list nearly instantly—long before Spotlight has built the rest of the menu of search results.
If some program on your hard drive doesn’t have a Dock icon, for example—or even if it does—there’s no faster way to open it than to use Spotlight.
To jump to a search result’s Finder icon instead of opening it,
-click its name.Spotlight’s menu shows you only 20 of the most likely suspects, evenly divided among the categories (Documents, Applications, and so on). The downside: To see the complete list, you have to open the Spotlight window (Limit by metadata).
The upside: It’s fairly easy to open something in this menu from the keyboard. Just press
-↓ (or -↑) to jump from category to category.
Once you’ve highlighted the first result in a category, you
can walk through the remaining four by pressing the arrow
key by itself. Then, once you’ve highlighted what you want,
press Return to open it.In other words, you can get to anything in the Spotlight menu with only a few keystrokes.
The Esc key (top-left corner of your keyboard) offers a two-stage “back out of this” method. Tap it once to close the Spotlight menu and erase what you’ve typed, so that you’re all ready to type in something different. Tap Esc a second time to close the Spotlight text box entirely, having given up on the whole idea of searching.
(If you just want to cancel the whole thing in one step, press
-space bar again, or
-period, or -Esc.)Think of Spotlight as your little black book. When you need to look up a number in Address Book, don’t bother opening Address Book; it’s faster to use Spotlight. You can type somebody’s name or even part of someone’s phone number.
If you’re searching for just one word, you’ll see a “Look Up” category near the bottom of the results menu. See the box on the previous page for details.
The bottom of Spotlight always lists commands for “Search Web for [your phrase]” and “Search Wikipedia for [your phrase].” They take you straight to the Google search or the Wikipedia (online encyclopedia) results for whatever you typed.
Among a million other things, Spotlight tracks the keywords, descriptions, faces, and places you’ve applied to your pictures in iPhoto. As a result, you can find, open, or insert any iPhoto photo at any time, no matter what program you’re using, just by using the Spotlight box at the top of every Open File dialog box (Gem in the Rough: Using the Dock or Sidebar for Drag-and-Drop)! This is a great way to insert a photo into an outgoing email message, a presentation, or a Web page you’re designing. iPhoto doesn’t even have to be running.
Spotlight is also a quick way to adjust one of your Mac’s preference settings. Instead of opening the System Preferences program, type the first few letters of, say, volume or network or clock into Spotlight. The Spotlight menu lists the appropriate System Preferences panel, so you can jump directly to it.
As shown in Figure 3-10, you get a preview of what’s inside a file listed in the Spotlight menu when you point to it without clicking. But if you add the
key, you see a tiny line of text
below the preview. It tells you the item’s actual name—which
is useful if Spotlight listed something because of text that
appears inside the file, not its
name—and if you wait a moment, you also see its folder path
(that is, where it is on your hard drive).While you’re pointing to something in the results list, you can press
-I to open the Get Info window for
it.Spotlight shows you only the matches from your account and the public areas of the Mac (like the System, Application, and Developer folders)—but not what’s in anyone else’s Home folder. If you were hoping to search your spouse’s email for phrases like “meet you at midnight,” forget it.
If Spotlight finds a different version of something on each of two hard drives, it lets you know by displaying a faint gray hard drive name after each such item in the menu.
Spotlight works by storing an index, a private, multimegabyte Dewey Decimal System, on each hard drive, disk partition, or USB flash (memory) drive. If you have some oddball type of disk, like a hard drive that’s been formatted for Windows, Spotlight doesn’t ordinarily index it—but you can turn on indexing by using the File→Get Info command on that drive’s icon.
Most people just type the words they’re looking for into the Spotlight box. But if that’s all you type, you’re missing a lot of the fun.
If you type more than one word, Spotlight works just the way Google does. That is, it finds things that contain both words somewhere inside.
But if you’re searching for a phrase where the words really belong together, put quotes around them. You’ll save yourself from having to wade through hundreds of results where the words appear separately.
For example, searching for military intelligence rounds up documents that contain those two words, but not necessarily side by side. Searching for “military intelligence” finds documents that contain that exact phrase. (Insert your own political joke here.)
You can confine your search to certain categories using a simple code. For example, to find all photos, type kind:image. If you’re looking for a presentation document, but you’re not sure whether you used Keynote, iWork, or PowerPoint to create it, type kind:presentation into the box. And so on.
Here’s the complete list of kinds. Remember to precede each keyword type with kind and a colon.
To find this: | Use one of these keywords: |
|---|---|
a program | app, application, applications |
someone in your Address Book | contact, contacts |
a folder | folder, folders |
a message in Mail | email, emails, mail message, mail messages |
an iCal appointment | event, events |
an iCal task | to do, to dos, todo, todos |
a graphic | image, images |
a movie | movie, movies |
a music file | music |
an audio file | audio |
a PDF file | pdf, pdfs |
a System Preferences control | preferences, system preferences |
a Safari bookmark | bookmark, bookmarks |
a font | font, fonts |
a presentation (PowerPoint, say) | presentation, presentations |
You can combine these codes with the text you’re seeking, too. For example, if you’re pretty sure you had a photo called “Naked Mole-Rat,” you could cut directly to it by typing mole kind:images or kind:images mole. (The order doesn’t matter.)
You can use a similar code to restrict the search by chronology. If you type date: yesterday, then Spotlight limits its hunt to items you last opened yesterday.
Here’s the complete list of date keywords you can use: this week, this month, this year; today, yesterday, tomorrow; next week, next month, next year. (The last four items are useful only for finding upcoming iCal appointments. Even Spotlight can’t show you files you haven’t created yet.)
These days, you can limit Spotlight searches by any of the 125 different info-morsels that may be stored as part of the files on your Mac: author, audio bit rate, city, composer, camera model, pixel width, and so on—so-called metadata. (Metadata means “data about the data”—that is, descriptive info-bites about the files themselves.) Here are a few examples:
author:casey. Finds all documents with “casey” in the Author field. (This presumes that you’ve actually entered the name Casey into the document’s Author box. Microsoft Word, for example, has a place to store this information.)
width:800. Finds all graphics that are 800 pixels wide.
flash:1. Finds all photos that were taken with the camera’s flash on. (To find photos with the flash off, you’d type flash:0. A number of the yes/no criteria work this way: Use 1 for yes, 0 for no.)
modified:3/7/12-3/10/12. Finds all documents modified between March 7 and March 10, 2012. You can also type created:6/1/12 to find all the files you created on June 1, 2012. Type modified:<=3/9/12 to find all documents you edited on or before March 9, 2012.
As you can see, three range-finding symbols are available for your queries: <, >, and - (hyphen). The < means “before” or “less than”; the > means “after” or “greater than”; and the hyphen indicates a range (of dates, sizes, or whatever you’re looking for).
Tip
Here again, you can string words together. To find all PDFs you opened today, use date:today kind:PDF. And if you’re looking for a PDF document that you created on July 4, 2012, containing the word “wombat,” you can type created:7/4/12 kind:pdf wombat—although at this point, you’re not saving all that much time.