
Another way to transfer Windows files to the Mac is to put them onto a disk that you then pop into the Mac. (Although Windows can’t read all Mac disks without special software, the Mac can read Windows disks.)
This disk can take any of these forms:
An external hard drive or iPod. If you have an external hard drive (USB or IEEE 1394, what Apple calls FireWire), you’re in great shape. While it’s connected to the PC, drag files and folders onto it. Then unhook the drive from the PC, attach it to the Mac, and marvel as its icon pops up on your desktop, its contents ready for dragging to your Mac’s built-in hard drive. (The Mac can read Windows disks and flash drives, which use unappetizingly named formatting schemes like FAT32 and NTFS, but Windows can’t read Mac hard drives or flash drives.)
Most iPods work great for this process, too; they can operate as external hard drives—even the iPod Nano. For details, see Note.
A Time Capsule. An Apple Time Capsule is a sleek white box that contains a huge hard drive plus a wireless base station. The idea, of course, is to create a WiFi network for your house or office and include a built-in disk for backing up all your computers, automatically and wirelessly.
That also means the Time Capsule makes a great transfer station between a PC and a Mac, since its icon shows up on the desktops of both.
A USB flash drive. These small keychainy sticks are cheap and capacious, and they work beautifully on both Macs and PCs. Like a mini-external hard drive, a flash drive plugs directly into your USB port, at which point it shows up on your desktop just like a normal disk. You copy files to it from your PC, plug it into your Mac, and copy the files off, just like you would for any other disk. And you’re left with a backup copy of the data on the drive itself.
A CD or DVD. If your Windows PC has a CD or DVD burner, here’s another convenient method. Burn a disc in Windows, eject it, and then pop it into the Mac (see Figure 6-3). As a bonus, you wind up with a backup of your data on the disc itself. CDs and DVDs use the same format on both kinds of computers, so you should have very little problem moving these between machines.
Move the hard drive itself. This is a grisly, technical maneuver best undertaken by serious wireheads—but it can work. You can install your PC’s hard drive directly into a Power Mac or Mac Pro, as long as it was prepared using the older FAT or FAT32 formatting scheme. (The Mac can handle FAT hard drives just fine, but it chokes with NTFS hard drives.)
When you insert a Windows-formatted disk, whatever the type, its icon appears in the Mac’s Computer window (or on the desktop, if you’ve turned on the relevant checkbox in the Finder→Preferences→General tab.)
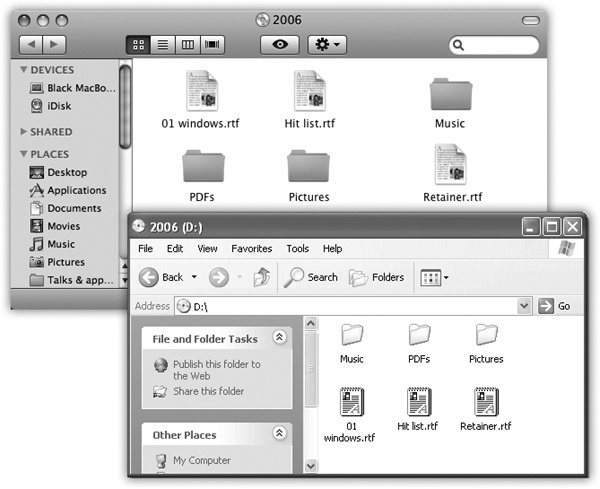
Figure 6-3. Burned CDs generally show up with equal aplomb on both Mac and Windows, regardless of which machine you used to burn it. Here’s a CD burned on a Windows XP machine (bottom), and what it looks like on the Mac (top)—same stuff, just a different look and a different sorting order. Either way, you can drag files to and from it, rename files, delete files, and so on.