6
Stabilization: Tools and Techniques
Randal K. West

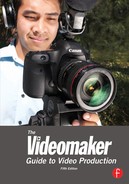
Figure 6-1
Like most people, you probably began shooting video handheld. After all, when confronted with a camcorder, often your first instinct is to pick it up, hold it to your eye and begin rolling tape. Chances are that your initial handheld footage was pretty shaky too. Sure, shaky shots have their place. Where would MTV and Blair Witch Project be without them? However, in the video world, shaky footage makes a statement about your professionalism. In the mind of the viewer, shaky video equals home video. And home video is considered the work of amateurs.
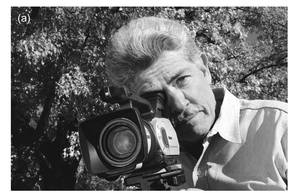
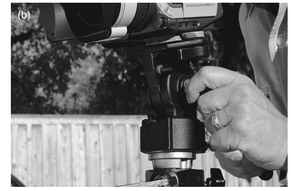
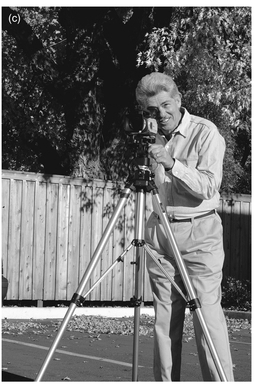
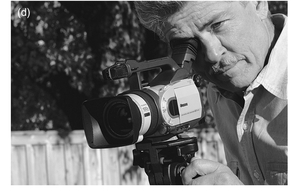
Figure 6-2 Tripods.
If you are serious about producing video, take a few moments to get familiar with the options available for camcorder stabilization and smooth movements: namely tripods, dollies, jibs and gliding camera stabilizers. In addition to smoothing out those shaky shots, each type of support will affect the look of a shot. In this chapter, we’ll investigate each type of stabilizer, and examine the impact that each will have on the look of your footage.
Tripods
The most common stabilization tool is the tripod. There are many well-made tripods on the market (see the August 2000 issue of Videomaker for a complete tripod buyer’s guide), and they offer a number of advantages. You get a rock-solid shot, the ability to make smooth pans and tilts, and the ability to shoot for hours without the right side of your body cramping up.
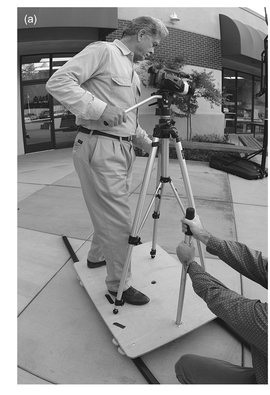

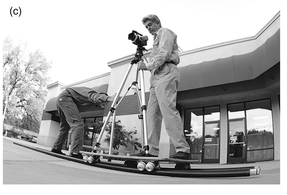
Figure 6-3 Dollies.
The “head” of the tripod connects to the legs and holds your camcorder. The camcorder mounting head (fluid is preferred) should have adjustments that will apply a variable amount of drag or resistance to the pan and tilt controls. These drags allow you to adjust the tension on the head so you can complete camcorder moves with a minimum of jittering and jumping. You accomplish any change of position, whether done as a continuing movement or simply for changing the shot for alternative framing or composition, by pivoting the camcorder mount side to side (pan), up and down (tilt) or in some combination. You will find that raising and lowering the actual height of the camcorder can dramatically change the composition of a shot. Generally, the level of elevation should place the lens at eye level with your talent. If you are having problems in the background, (a plant seeming to grow from someone’s head or a reflection from a light source), you can usually alleviate the problem by changing the height of the camcorder. Most adjust from as low as a foot or two from the ground to six feet or more in height.
Dollies
A dolly is simply a device that allows you to roll the camcorder from one position to another. Many of us think of film dollies as large carts that roll on tracks carrying a camera and camera operator.
In video, dollies tend to be smaller and lighter. The standard video dolly (sometimes referred to as a “crab dolly” because of its ability to move quickly in all directions) simply a set of wheels into which a tripod locks.
Some directors will use a dolly move in place of a zoom in or out by moving the camcorder closer or farther away from the subject. We call this “dollying.” There is a definite difference in the way the zoom lens, in a wide-angle mode, sees two objects

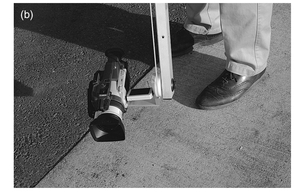

Figure 6-4 Jibs.
separated by 10 feet and the way the lens sees those two subjects in the high-magnification mode. A wide-angle setting makes backgrounds seem larger and farther from the subject. A telephoto setting compresses the apparent distance between subject and background. While a zoom in or out causes a change in perspective, a dolly towards or away from a subject maintains the perspective of the wide-angle or telephoto setting as the camera moves through a scene.
You can experiment with different camcorder-to-source distances and change lens focal length to get the effect you’re looking for. One effect to try is to slowly zoom from wide angle to telephoto as you dolly the camera towards your subject.
With a dolly, you can also “truck” the camcorder, or move it laterally. You can use this move to accomplish a change of framing and picture. As the camcorder “trucks left” or “trucks right,” it moves sideways but does not pan to the left or right. You might also use this move to follow alongside, or “track” with, a jogger as he runs.
You can watch almost any Hollywood film and spot a dolly move if you pay close attention. A classic instance occurred when Alfred Hitchcock used a zoom in combined with a dolly out in Vertigo. This was the first time a director moved the camera away from the subject at the same time the camera zoomed in. This created the illusion of “vertigo” as the background appeared to crash in on the subject.
Steven Spielberg’s famous shot in JAWS of the sheriff sitting in the lifeguard station and seeing the shark from the beach was a dolly shot. This time, the camera simultaneously dollied-in and zoomed-out.
Jibs and Cranes
The jib is a cost-effective alternative to the camera cranes that Busby Berkeley flew around on while shooting his 1930s dancing extravaganzas like Dames or 42nd Street. The camera crane actually raised both the camera and the operator
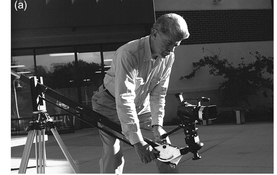

Figure 6-5 Crane shots.
into the air. For this reason, the crane had to be very large and very heavy.
The Jimmy jib, the professional standard, is a full-sized, remote controlled crane arm designed for motion picture photography. A full-sized Jimmy jib has a crane length of 4 to 28 feet. Standard gym weights make up the counterweight, which balances the weight of the camcorder.
Jibs often sit atop tripods mounted to dollies. Many models of jibs also run on a track to accommodate long, smooth dolly moves. The operator controls pans, tilts, zooms, focus, f-stops and the VTR with buttons, levers and/or a joystick at the weighted end of the jib. Since the jib operator controls both the camcorder and the jib arm, he has the ability to perform arcs, sweeps, cranes, trucks and dollies. A jib allows the operator to position the camera from as low as eight inches to as high as 35 feet.
The jib has brought a much broader range of shots to video. Any time you see a shot where the camera appears to fly over an audience toward the set of a game show, that’s a jib shot. When you see an over-the-shoulder shot of a chef in a cooking show, it’s most likely a jib shot. When the camera seems to rise above a city street as the hero rides into the sunset on his motorcycle, you guessed it, it’s a jib shot.
Gliding Camera Stabilizers
The gliding camera stabilizer, like the well-known Steadicam brand, usually attaches the camcorder to a harness worn by the operator, allowing him to move freely while the camera remains steady. This creates shots that seem as if the camcorder is rolling on a dolly on tracks, or floating through a scene.
The need for the gliding camera stabilizer arose from the need to move a camera into areas that operators could not access with a dolly. Kent Hofmeister operates a gliding camera stabilizer and provided us with an explanation of what a gliding camcorder stabilizer is and how it works. “A gliding camera stabilizer uses Newtonian physics to stabilize the camera. The mass of the camera is enlarged and, in turn, stabilized by mounting it on a post (known as a sled), which has a counterweight at the bottom. This sled is then suspended through a free-floating gimbal (horizontal stabilizing mechanism) at its center of gravity. This is essentially the same principle used by a high-wire walker with the long pole used as a balance mechanism. The camera/sled combination is then hung or suspended on a spring loaded arm.”
Smaller units for consumer models use the same principle on a smaller scale. The operator’s arm replaces the vest and spring-loaded arm. The operator simply moves the device by grasping a handle attached to the gimbal. The smaller units can be a little trickier to operate than the professional ones, because it takes less force to de-stabilize the system. However, the lighter systems fit into tighter places
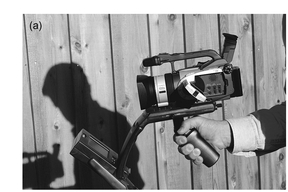

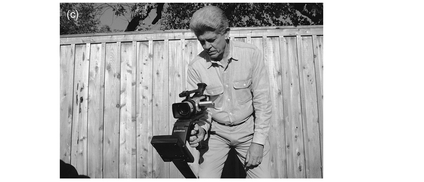
Figure 6-6 Stabilizers.
and are easier to maneuver than their larger counterparts.
The gliding camera stabilizer provides a cheaper, less time-consuming and more flexible method of creating dolly-style shots. A director can rethink and re-plot an entire camera move without having to relay the tracks. Good Steadicam operators make their work invisible and almost indistinguishable from dolly shots. The use of this sort of device allows the camera to steadily capture shots it simply couldn’t before: going up stairs, climbing ladders, riding horses and running, to name a few.
The director can use a gliding camera shot to make dramatic statements or very subtle ones. Action scenes have become much more involving and engrossing since the camera can move so freely through the action. Look at the action sequences in both Saving Private Ryan and Braveheart and you will see the results of substantial use of gliding camera stabilizers.
Get Moving
There are many ways to stabilize and move your camcorder to get more interesting shots, and it isn’t as difficult as you might think. You will be amazed at how quickly you can learn to operate any of this equipment.
I often tell clients, “Television is magic, but some forms of magic cost a little more.” Try that with your clients and see if you can get them to splash out for a jib or a gliding camera stabilizer! If you’re the director, perhaps it’s time to try some of this equipment yourself. The good news is that you can try many of these techniques without a big investment. You probably already have a tripod—you just need to use it. You can create an effective dolly shot with a wheelchair. Jibs and gliding camera stabilizers can be purchased for a few hundred dollars. If you don’t want to splash out with a big investment for purchasing stabilization gear, you can often rent production equipment from local vendors. Check around. You might be surprised at what is available.
If you want to add a professional look and feel to your camerawork, consider employing one of the stabilizers mentioned in this chapter, and exercising a bit of creativity. Your viewers will never mistake your camerawork for home video again. Unless, of course, you are shooting a Blair Witch spoof.