
48
Video Editing for N00bs
Mark Montgomery
Figure 48-1
So you’re the techie at your place of work and at home. You get called in to help the boss set up new equipment at work and you’re the one getting calls at home about what camera Aunt Linda should buy. It’s a fact of life. You’re the one people depend on to do the technical tasks and with it comes the assumed responsibility of video work too. Corporate slideshows, presentations, junior’s little league game and so many more projects are sitting on your desk waiting to get done. We can help you get started on the path to becoming a better video editor with these simple hints.
Don't be Afraid to Ask for What You Need
If you’re just starting your journey, you’re going to need to be prepared. A full-sized keyboard with a numeric keypad is a must. Keyboard shortcuts are an editor’s best friend.
Make sure you have plenty of hard drive space. It would be wise to have an external USB 2.0 hard drive handy. Get the most storage space money can buy. Lastly, a second monitor makes your workspace much more functional. Make sure to check if your computer can support a second monitor before you make this purchase.

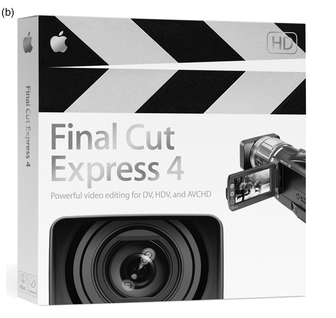
Figure 48-2 Adobe Premiere Elements and Apple’s Final Cut Express are both great editing applications for beginning editors to grow into.
Software is key, but as you’re starting off, sometimes it’s best to work your way up. Most free solutions, like Microsoft Movie Maker and Apple’s iMovie, are great for beginners as they don’t have a lot of features that can be more of a distraction to the editor in training. If you want a more options and control in your editing environment, take a closer look at Adobe Premiere Elements or Apple’s Final Cut Express. They are well worth the money as they can be real time savers and do a lot of what any editor (new or experienced) would need to do.
Techniques: Keep It Organized
Projects pile up quickly and video files all look the same when they’re just sitting in a folder. Naming conventions for files and folders become quite handy for a busy video editor. We organize our file structure by project, one folder with a descriptive name. For example, you’re creating a video for the local after-school program’s annual fundraiser, so you label a new folder called “Boys and Girls Club Fundraiser 2011” and that should clearly explain what will be in this folder. Then, you can put a few more generic folders into this folder, like a Video folder, Music folder, Photo folder. Just a little bit of work will keep you organized and help you find what you’re looking for. It will also make it easy to back up your work.
Techniques: Keep It Simple
Video projects big and small should start with a clear storyline (if it’s a narrative) or an objective if it’s a corporate presentation or something similar. Developing good storyline for narrative films is truly a fine art and outside of the scope of this chapter. But an objective for your video can be very simple and useful in saving yourself time and energy. A good objective should keep the audience in mind. Who will be watching your video? What do you want them to do as a result of viewing your video? Now ask yourself what is the most critical thing you can show them in your video to reach this outcome? There’s your objective. Now it’s time to get to work.
The building blocks of any video start with A/B editing. The primary action


Figure 48-3 A/B editing is a great way to carry along the story by giving your viewer a visual context and keep their attention span by separating long, drawn-out shots with more descriptive footage.
of the video is considered your A-roll and the secondary, supportive visuals are considered B-roll. Let’s use an example to illustrate this example. You’re producing a birthday video for your 3-year-old nephew. You have a video clip of your nephew telling the viewers what he received for his birthday. He describes in short detail, (he’s 3, remember), that he got a red tricycle. The clip is rather informal, with you behind the camera asking the questions and prompting your nephew. It takes you a good 15 seconds to get the details out of the birthday boy. A 15-second clip is a little long to run by most video editing standards, but you can’t omit this crucial first-hand account of the birthday. This is A-roll, a crucial part of your video. So you drop in the A-roll into the timeline and try to remedy the lengthy 15-second description of the birthday present. This is where B-roll comes in. Looking through your video footage, you find a clip of your nephew as he unboxes the new tricycle. Ah ha! Now we got a clip related to the first clip. We could just throw this in the timeline after the first clip, but better yet we should cut about 5 seconds into the video clip while preserving the audio from the first clip. In this way, the viewer continues to hear the boy describe his new tricycle while we see the action itself unfold. This is a much more powerful edit giving the viewer the visual context of what your nephew is describing on camera.
The trick with these edits is to think critically about what your audience needs to know (back to our objective) and then think how many different ways we can support that with visuals. The other trick is making sure that you (or whoever is working the camera) takes plenty of B-roll shots. Think of any professional wedding videographer; they are B-roll freaks. A wedding has so many different elements that comprise the entire day: not only the participants of the event, but the cake, the guest book, the church, the flower petals left by the flower girl, the table settings, etcetera, etcetera. All these elements must be recorded as they will be used later to build the bride and groom’s story. Plenty of B-roll is a must.
Techniques: Compressing Time and Pacing
The wonderful thing about being a video editor is that we have a lot of flexibility on how we will tell our story. We can unfold our story chronologically, or skip around in time. We can take an hour-long baseball game and edit it down to a riveting 60 seconds. Manipulating time is critical in producing compelling videos. The best of the best find clever ways to move the audience along the story as quickly as possible without losing them to confusion or without letting key moments pass too quickly. We can take a look at some examples to see how we can better manipulate time in our videos.
Start thinking of a video clip or a shot as a single idea. Put multiple shots together and you can start to put scenes together. Multiple actions in multiple shots can go together quite nicely as one thought. For example, your sister is having a baby and she wants you to put together a family video. The big day arrives and you’ve got 14 hours of footage (long labor, it was her first child). Now, she’d be more likely to watch a 14-hour video of her delivery, but most of her friends have realistic schedules and booking a showing at that length won’t do. So, you rely on our objective to focus our attention on the most important parts to the video.
You have a video clip of the original phone message your sister left as she urgently tried to get hold of you to let you know the baby is coming. That’s good place to start. Next clip is a short clip of the hospital waiting room where the extended family patiently awaits. Next shot a closeup of the clock in the hospital and you dissolve to your next sequence of your sister talking about her childhood and what her expectations are as a new mother. This was an interview you set up weeks ago and you’re using B-roll of childhood photos. This sequence goes on for 30 seconds or so and you dissolve back to the hospital break room where soon-to-be grandpa is getting a cup of coffee. He looks down at his watch and says bluntly “It’s been five hours.” Now dissolve back to your next sequence with your sister’s husband talking about his childhood. And, then we’ll dissolve back to the hospital again, perhaps this time with some more “waiting for it to happen” moments. The big idea here is that we don’t have to show things in a linear progression. Neither do we need to think literally for each action. A phone message can provide enough context to quickly move to the hospital location without confusing the viewer. That saves us a lot of time relating less interesting details, like how you actually got there. It doesn’t really matter. What matters is that the day came and you showed up (unless, of course the story of how you got there is riveting). Who knew the new parents arrived in a hot air balloon? That might be more interesting.
Pacing is a tricky subject but there are some basic rules to pacing your edits in a video. Scenes where fast action is important (a big play at home plate) will have the pace of the edits around 3 seconds per shot. That means every 3 seconds the viewer sees a new shot. Scenes where the pacing is slow (like a funeral) will have the pace of the edits around 5 to 7 seconds or more. These are general rules, and you can break them if you have good reason.
For beginning editors, a great trick to keeping a good pace to your edits is to lay down a bed of music that has a beat at the same tempo of your desired pacing. With the music in place, you can start making your edits on the “hits” of the musical tempo. More advance video editing software has markers on the timeline that you can use to visually mark where these musical “hits” fall. Once the video is edited, you can delete the music track and your secret is gone. The best editors use this technique, not only because it’s useful, but often times because the final video will feature music with a similar tempo.
Credit Roll
Lastly, make sure you give yourself credit for your hard work (and whoever else pitched in). Take pride in the work you do and don’t be afraid to share it with your video editing peers. YouTube is a great way to get your work seen. You should also consider Vimeo.com which houses a great deal of professional videos created by people who truly love the craft of filmmaking. Now, go forth and make video, contribute your videos, share them with us and make note of what you learn. It’s a great time in history to be a video editor.