47
Optimizing Edit Organization
Peter Zunitch
Figure 47-1
Organization is the key to a speedy, efficient and enjoyable edit. You know it; I know it. Every click, every drag of the mouse wastes time, and you certainly don’t need to constantly waste your time and your client’s money searching for a clip that should be at your fingertips. The time you waste hunting for footage is better spent tweaking and experimenting creatively. Proper labeling and placement of your material means you’ll be able to retrieve it quicker. Knowing where a clip is at any given moment lets you achieve great speed and meet deadlines others will perceive as impossible. So let’s dispense with every extra mouse click. Let’s cut out the needless hunting. Let’s minimize every repetitive gesture. Let’s talk organization.
Establishing a Routine
I have three tips I want to impress upon you with this chapter that will make your post-production life easier. The first, and most obvious is that you should be ordering every aspect of your business from the top down in a similar fashion. Ideally you want every project laid out identically, every type of material in the same place in every project, and every clip named and referenced in a like-minded
fashion. This way, you can always draw on material from previous edits at a moment’s notice, and will be able to recall exact tapes or clips even if you don’t remember any of the specific information about it.
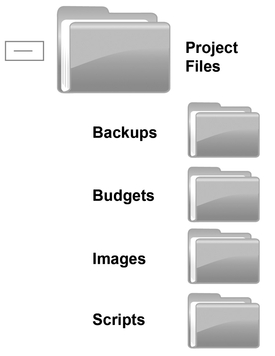
We all know that every editing project has more attributes to it than just footage. This is where organization must start. Before I create a project in my edit system, I create a supporting folder on my desktop. I like to label it the same as the project name, with a “_files” extension at the end. Everything from scripts to image files, budgets to backups is put inside this folder. Anything relating to this project that does not come from a source tape is kept here. This way, if I ever need to recreate the project in the future, I need only copy that one folder back to my desktop.
Beyond the A to Z
The second trick is going to sound rather overboard at first, but stick with me. As you’ll see later, when combined with the above it will come in handy over and over again.
So we all know editing programs allow you to sort everything alphabetically. In fact, they do this by default. However, it is a convenient, but limited organizing philosophy and you should know how to circumvent it. Why should you have to scan through to the middle of your bins to find, say, your “media” bin if it’s the one you open and close most often? But how can you move it without renaming it?
Your computer assigns a numerical value to each letter of the alphabet. When you ask it to sort, it simply looks for the lowest number and lists that item first. What you may not know is that the symbols on a keyboard all have values assigned to them as well. Further, some have lower values than the letter “A”, and others have higher values than “Z”. The tilde for example, (~) is a symbol I often use to make any entry jump to the bottom of an ordered list. It also has the added benefit of making the entry stand out from everything around it.
Be warned that your system will not allow every symbol to be used. The question mark for example is a reserved character on most platforms (used for searching) and you will likely not be allowed to use it in a bin, folder or project name. You should experiment to find the symbols that work for you.
The Details of Being Generic
The third device you should consider employing concerns how we handle the common material that we incorporate into multiple jobs. If you do a lot of similar projects, then chances are you have a pool of generic material you draw from often. Establish a project strictly for this material. If you have different types of generic material, consider multiple generic projects. Here’s a good place to use that tilde key. Let’s say you have a pool of royalty free or buyout music. Create a project titled ~Music. Log and load all your songs in there. Then when you need something in your current edit, simply copy the clips you’re considering.
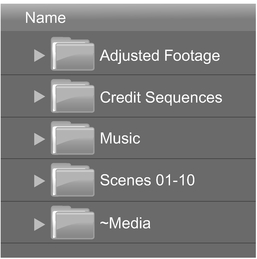
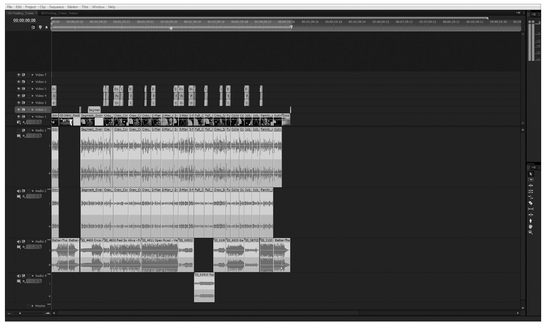
Figure 47-3 Alphabetically organizing your folders can put frequently used items out of reach. Adding character like the tilde at the front of a folder title can bump folders up or down on the list.
So what will this extra effort get you? First, you’ll have your catalog of music at your fingertips, searchable by any means you see fit. You won’t have to go searching piles of CDs for the right disc, and countless tracks for the right song. Second, each time you use the song, you won’t have to re-edit it. (Use the “add marker” tool to remember common looping points.) Third, you’ll be able to separate your generic clips from your project-specific clips in the media tool. Thus when editing is done, you can sort by project and delete only the media captured in your current project, while being assured that you won’t be deleting your music. Finally, if you ever have to recreate your edit, your music will still be in the sequence and properly mixed.
This grouping system should be employed for generic images as well. On my desktop is another folder containing any image I might use in multiple projects, like backgrounds, borders, and company logos.
A Well-Ordered Project
Let’s explore how to organize bins and folders within a single project. You should keep all of your edited sequences in one place. The name should be obvious, “EDITS” or “SEQUENCES”. Establish a method of calling attention to your vital folders. In this case, I’ve used all caps. It will stay that way until the project is done and I am ready to master. Then I will make it mixed case, and make a new bin called “~FINAL OUTPUT.” This new bin will contain only the timelines directly involved in mastering to the final medium(s). Any old timelines, and/or backups will remain in the (now named) “EDITS” bin.
My next favorite bin is the “working” or “scrap” bin. This bin holds all my effects templates, sub-clips that I use for mixdowns, pre-builds and one-off titles. This bin can fill up quick and tends to get messy, but since most of the items in here are only needed temporarily it’s OK. Resist the urge to sort such a bin by anything other than creation date/time. You’ll be able to find the previous effect much better by the things around it than by its name, especially when you will inevitably end up with 10 items all labeled “Title”. Speaking of . . . When you have an effect or title template you know you’ll be using often, don’t be afraid to give it a unique name.
The next few bins are specifically for sorting material by source type. In any given project, I may use “Photos”, “Stills” and “Graphics” bins to take care of all nonmoving images. Typically the latter is used for computer-generated text, backgrounds, frames, etc. The former holds headshots, and the middle contains any other real life photos or sketches of people places and things. Typically I don’t need all of them for every edit, and will often combine all still material into one bin. It all depends on the project.
Organizing your Audio Files and Footage
Next, audio. Typically I have a “Music and VO” bin, containing ADR, narration, background music and sound effects. Again, these may get split up if the project calls for intensive use of them. The music of
course will be reference clips I’ve selected and copied over from my generic music project and the stills are all imported from the project_files folder on the desktop.
The layout of your source video bins will undoubtedly be influenced by what type of projects you typically edit. Typically you’ll want to break them down either by location, subject, or scene. Tag them with buzzwords that remind you of the contents, as labeling only by scene number and take alone will usually mean nothing without rifling through the script. I also recommend making separate bins for your generic B-roll, and for your project specific footage. Consider names like “^ Broll”, “^ Cemetery” and “^ Host Stand-ups”. Notice too that we’re using a new symbol here, called an “up caret”, to keep all our source bins together.
Well we’re down to individual clips. Symbols at this level become rather redundant, so instead, we’re going to use a keyword first to help group clips together when sorting. I’ll then follow it with a hyphen, or underscore to separate it from the rest of the description. This is followed with framing, the typical description of the subject, and relevant development in the shot. “Tim—MS, Ghost steps in behind him. Zoom in.” Dialogue covered is a good fallback when the action isn’t distinguishing: “Table—WS Come on, you hardly . . . it’s my mother’”. As a general rule of thumb, if your clip description is more than half a screen long, you’re packing too much into a single clip, and should consider splitting the footage into smaller chunks.
Order —a condition when things are in methodical or harmonious arrangement
The key to efficiency is consistency. Have a plan and stick to it. Combine this with the ergonomics of language and symbols. Remember, too, that the edit system is made for organization beyond alphabetizing. Utilize the columns provided to annotate framing, scene and take, etc. This information in conjunction with a standardized workflow will allow you to manipulate your material by any criteria you desire, and minimizing search time. In the end, organization ensures a faster, and thus more profitable edit session, creating a better final product and a happier client.

