71
To DVD or not to DVD?
Bill Davis
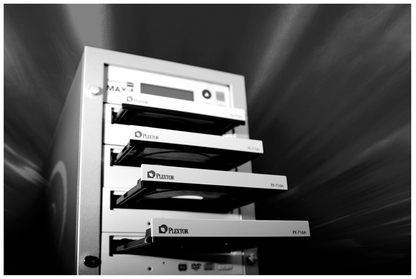
Figure 71-1
There is no question—we’re now officially smack dab in the middle of the era of the “homemade” DVD.
DVD burners are included with most modern computers and the ubiquitous shiny discs are rapidly pushing aside VHS tape as the “home recording” format of choice. So if you haven’t made the switch to your own home DVD authoring environment, now’s the time.
I use the term “environment” rather than “program” because quite a few people who want to create their own DVDs are turning to stand-alone DVD burners, rather than authoring their DVDs in a software application on a computer. Both approaches yield similar results—take your pick. This chapter focuses on computer-based DVD burning, but if you’re considering a standalone DVD recorder, see the sidebar “Standing Alone.”
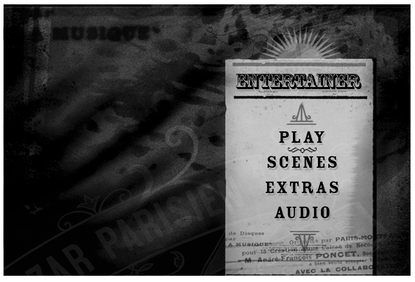
Figure 71-2 Many DVD authoring programs will allow the user to alter or replace buttons, backgrounds and other design elements in the included menu templates.
Getting Started
All DVD authoring requires at least some basic menu creation. This is the process of building a navigation “front end” so that the end-user can locate and play the content that is burned onto the disc.
Most DVD authoring software typically comes with pre-packaged menu templates, so if you just want to get the job done fast and easy, look for these templates to give you a head start or inspiration, or cues for how to proceed in making your own templates down the road. More robust software provides customization options, including control over the “look and feel” of your interface. The best software programs allow you to start with a professionally built template but essentially “deconstruct” them in order to customize them for your particular use.
For example, if the original template designer specified four animated picons (picture icons, or thumbnails) for scene selection, but you have five scenes that you want to fit onto your menu page, you can almost always copy and paste another picon link and, with a few clicks and some simple drag-and-drop screen re-arrangement, be ready to go.
Going Outside to Play
Power users will typically do a substantial amount of their menu design outside the DVD creation process, using tools like Adobe Photoshop or similar high-end image editing (or other design) software to precisely specify every background, button, nuance and shading of the interface that they are creating. After you have your menu design developed, you need to link it to the actual actions the buttons or hot zones should invoke. (A Hot Zone is basically a place on a DVD menu where a change occurs in the look of the area when the cursor reaches it—often used for highlighting buttons or other interface elements.) DVD programs have various ways of accomplishing this linking process.
Some use a table-like interface, where you link actions on one side to button titles on the other. Other programs provide robust graphical linking environments, where you drag connecting lines between the button itself and the action you want that button to invoke. Each software implementation might be different, but there must be a way—either automated or manual—to link buttons to actions, or your DVD won’t be able to do anything.
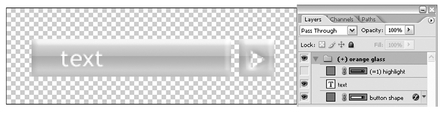
Figure 71-3 Imaging software can be used to make assets for your menus such as backgrounds and interactive buttons.
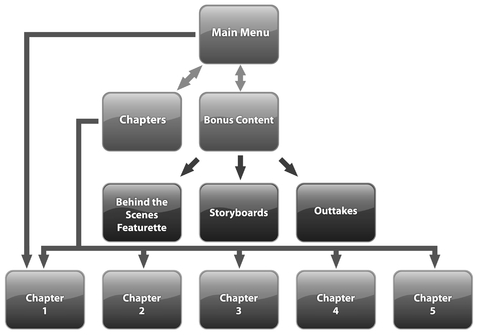
Figure 71-4 The arrowheads in this schematic represent buttons which the user will need to navigate to and from areas that do not automatically return to the previous menu.
Simplicity—Its Own Reward
The challenge with linking is that, if you have a lot of menu actions, the navigation can get complex. And there are lots of stories of beginners forgetting, for example, to link the END of a block of content to a “return to menu” function. So essentially someone will play a part of your DVD and get stuck in a blind alley, unable to do anything but eject and re-install the disc. Bummer.
Clear navigation that makes sense to the user and always provides clues to “what to do next” is an art. Studying the templates in good software can give you clues such as placing “home” buttons on all screens and making sure your user choices are clear.
DVD is not Videotape!
Finally, all of us trained to make videos are conditioned to thinking in a beginning-middle-end linear process. The magic of the DVD is that it’s non-linear in nature. As a DVD designer, you need to think differently. Are there parts of your project that your audience would enjoy being able to skip directly to? What about “special content” like outtakes and bloopers? The very non-linear nature of DVD makes it a perfect vehicle for providing your viewers with extras like these.
The flexibility of the DVD format makes it a much more robust way to store and play back video, but that same flexibility makes it a bit more complicated to burn even a simple DVD than it was, for example, to record to VHS tape. As with any complex endeavor, the key is to dive in, experiment and learn. Your first discs probably won’t be perfect, but before too long, you’ll be burning DVDs like a pro. And taking comfort in the fact that your creations should look better and be much more durable than the tapes of yesterday.
Happy Authoring!

