
In this section, we will learn how to implement user authentication using Auth0. Before we go ahead and implement Auth0 in our Angular application, we will need to implement some prerequisites. Let's get right to it:
- First, we will need to create an account with Auth0 at Auth0.com. Upon successfully logging in to the account, we should see the following dashboard screen:

We will have to register our application so that we can create the required settings to implement Auth0 in our app.
- Click on the Applications link on the left-hand-side menu:

- Now, click on the Create Application button to create an application:

- We will need to enter the name of the application and select the type of application we are building. In our case, it's a Single Page Web App, so go ahead and select the option and click on the CREATE button.
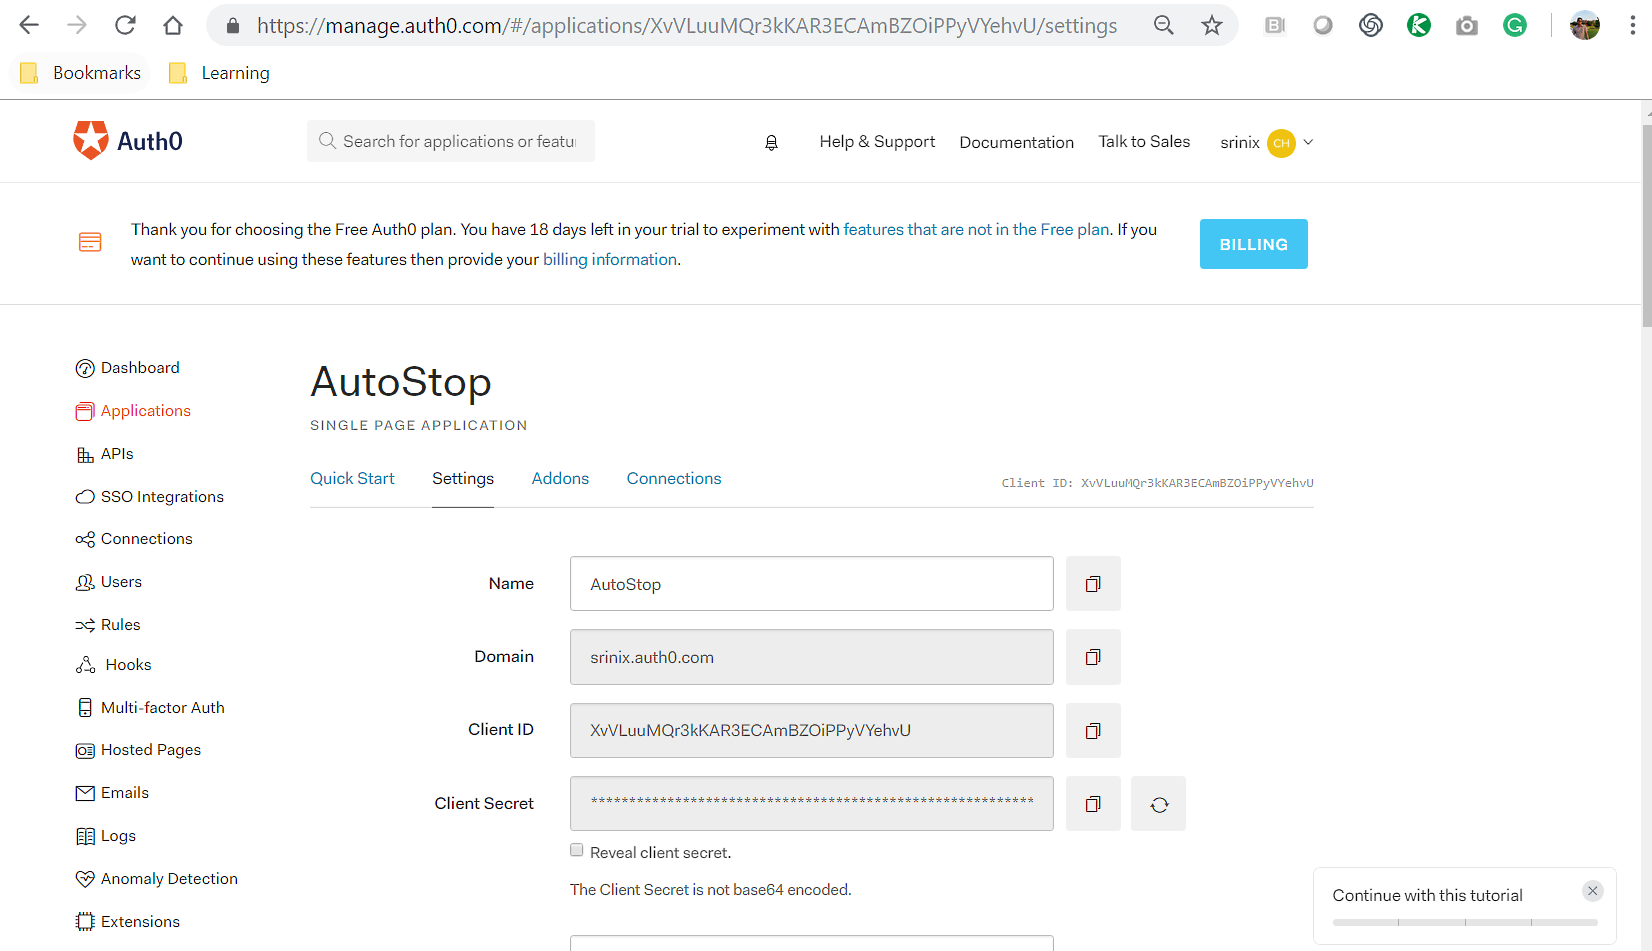
- The next thing we need to do is update the important settings of our application. So, click on the application name and navigate to the Settings tab:
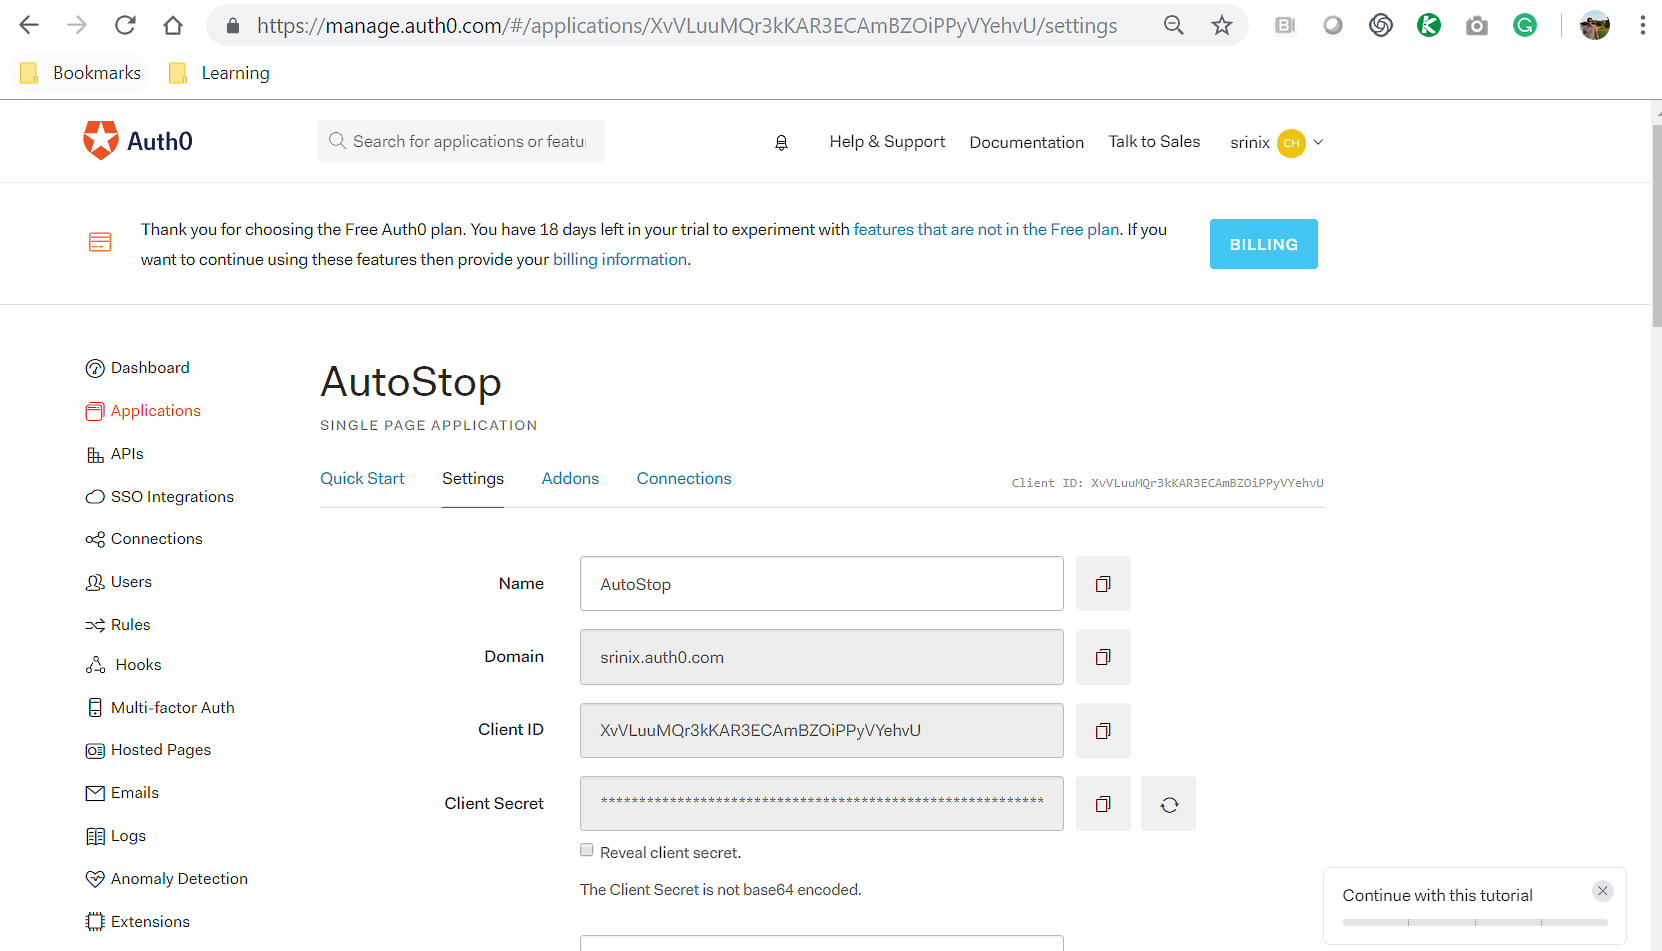
The following are some important things to keep in mind:
- We need to update the Allowed Callback URLs, Allowed Web Origins, and Allowed Origins (CORS).
- If we do update the details for Allowed Web Origins and Allowed Origins, we will get a cross-origin request (CORS) error.
We have adjusted the required settings in Auth0, so we are good to implement Auth0 in our application now.
In order to implement Auth0 in our application, we will need to install a few modules, namely auth0-js, auth0-lock, and angular2-jwt:

In the preceding screenshot, using the npm install command, we installed the required Auth0 modules. Now, it's time to generate the services and components for our application.
First, we will need to generate our service; let's call it authService. We need to run the following command to generate our service:
ng g service services/auth
Upon successful execution of the preceding command, we should see the following output:

We can verify and confirm that our service has been generated, along with the spec file (the file used to write our test specifications). Now that we have created our service, it's time to generate the components. We will run the following commands using the ng CLI in order to generate the required components:
ng g c login
ng g c profile
Upon successful execution of the preceding commands, we should see the following output:

In the preceding screenshot, we can verify and confirm that our required components, namely login and profile, have been generated successfully. Now, we are good to go ahead with implementing the functionality for our components.
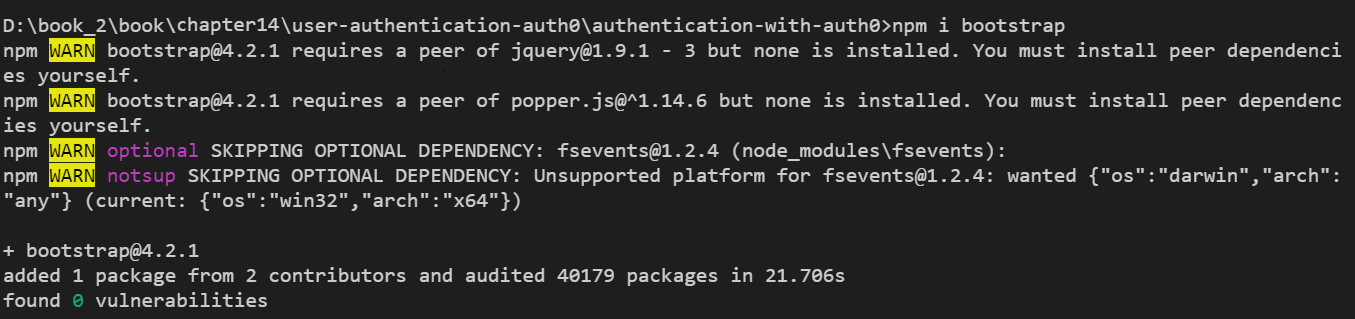
To make our application beautiful, let's install the bootstrap CSS framework as well:
npm i bootstrap
We will also need to install the jquery module:
npm i jquery
Upon successful execution of the preceding command, we should see the following output:
Super cool. Now, it's time to add a few links in the Nav component:
<nav class="navbar navbar-expand-lg navbar-light bg-light">
 <a class="navbar-brand" href="#">Auth0</a>
 <button class="navbar-toggler" type="button"
    data-toggle="collapse" data-target="#navbarSupportedContent"
    aria-controls="navbarSupportedContent" aria-expanded="false"
    aria-label="Toggle navigation">
 <span class="navbar-toggler-icon"></span>
 </button>

<div class="collapse navbar-collapse" id="navbarSupportedContent">
 <ul class="navbar-nav mr-auto">
      <li class="nav-item active">
        <a class="nav-link" href="#">Home
         <span class="sr-only">(current)</span></a>
      </li>
      <li class="nav-item">
        <a class="nav-link" *ngIf="!authService.isLoggedIn();"
           (click)="authService.login()">Login</a>
      </li>
      <li class="nav-item">
        <a class="nav-link" *ngIf="authService.isLoggedIn();" >Profile</a>
      </li>
      <li class="nav-item">
        <a class="nav-link" *ngIf="!authService.isLoggedIn();"
           href="#">Register</a>
      </li>
       <li class="nav-item">
        <a class="nav-link" *ngIf="authService.isLoggedIn()"
           (click)="authService.logout()">Logout</a>
      </li>
    </ul>
 </div>
</nav>
In the preceding code, the following important points should be noted:
- We are using the nav component of Bootstrap.
- We are adding a few links and attaching a click event, such as login and logout depending on the state of the user. If the user is logged in we will display logout link, else we will display register link
- We will implement these methods in our nav.component.ts file.
- We are using *ngIf to check whether the user is logged in and toggle the login and logout links accordingly
The output of the preceding code is shown in the following screenshot:

We will now need to work on the auth service that we have generated. In the services/auth.service.ts file, we need to import the required modules first and then add our methods, login and logout:
import { tokenNotExpired } from 'angular-jwt';
import { Auth0Lock} from 'auth0-lock';
Once we have imported the Auth0Lock and TokenNotExpired classes, we will create instances so that we can use them.
Take a look at the basic Auth0Lock object instance creation code:
var lock = new Auth0Lock(
'YOUR_CLIENT_ID',
'YOUR_AUTH0_DOMAIN'
);
In order to create a new object of the Lock class, we will need to pass the client ID and domain name to the instance.
Let's implement this in our auth.service.ts file:
public _idToken: string;
private _accessToken: string;
private _expiresAt: number;

 lock = new Auth0Lock('XvVLuuMQr3kKAR3ECAmBZOiPPyVYehvU','srinix.auth0.com',{
 allowedConnections: ["Username-Password-Authentication","google-oauth2"],
 rememberLastLogin: false,
 socialButtonStyle: "big",
 languageDictionary: {"title":"Auth0"},
 language: "en",
 responseType: 'token id_token',
 theme: {}
 });
In the preceding code, the following important points should be noted:
- We are creating three variables, namely _idToken, _accessToken, and _expiresAt.
- We are creating an instance of Auth0Lock and we need to pass params to the object.
- The Auth0Lock object will require two mandatory params to be passed. The first param is ClientId, and the second is the domain name.
- The third param includes options such as allowedConnections, theme, and so on, as it says they are optional.
- Client Id and Domain can be obtained from the Auth0 app settings, as shown in the following screenshot:
We can now listen to events attached to the lock object:
constructor(private router: Router) {

this.lock.on('authenticated', (authResult: any) => {
localStorage.setItem("userToken", authResult.accessToken);
this.router.navigate(['/profile']);
});

this.lock.on('authorization_error', error => {
console.log('something went wrong', error);
});

}
In the preceding code, we are performing the following steps:
- In the constructor method, we are listening to the on event for the authenticated and authorization_error states.
- When we get an authenticated message from the lock instance, we are storing a localStorage item called userToken and setting accessToken as its value.
- We are also listening to the error message and logging the message in the console.
Now, it's time to implement the login and logout methods:
login() {
 this.lock.show(function(err, profile, token){
 console.log(err);
 console.log(profile);
 console.log(token);
 });
 }
In the login method, we are calling the show method of the lock object. This will bring you to the dialog box of Auth0, with options to Log In, Sign Up, or Don't remember your password? The login dialog box will have social options if you selected any.
For the logout method, we just clear the userToken that we set when the user logs in and redirect the user back to the home login page:
logout(){
localStorage.setItem('userToken','');
this.router.navigate(['/']);
}
Once we clear userToken, the application will know that the user is not logged in.
We have implemented the login and logout methods, but we also need a method to check whether the user is logged in or not:
 isLoggedIn() {
 var token = localStorage.getItem('userToken');
 if(token != '')
 {
 return true;
 }
 else {
 return false;
 }
 }
In the isLoggedIn method, we are checking whether the value of the userToken variable in local storage is set or not. If the value is set, it means that the user is logged in; otherwise, the user is not logged in.
Just import the service into our app.component.ts file and inject it into the constructor:
import { Component } from '@angular/core';
import { AuthService } from './services/auth.service';

@Component({
 selector: 'app-root',
 templateUrl: './app.component.html',
 styleUrls: ['./app.component.scss']
})
export class AppComponent {
 title = 'Auth0 Tutorial';
 userToken:string;

 constructor(private authService: AuthService) {}
}
That's it. Wasn't that simple?
We should see the following output:

If we click on the Login link, we should see the Auth0 dialog window pop up:

Now, go ahead and click on the Sign Up tab to create an account and, once registered successfully, you should see that the user has been added to the Auth0 dashboard as well:

Once we log in successfully, we should see only the Logout link, as shown in the following screenshot:

When we click on the Logout link, the user should be taken back to the default landing page and should see the login and register options. Also, notice the params provided in the URL, such as access_token expires_in, and so on.
Awesome! We just implemented the entire user authentication using Auth0 in our application.