Armed with knowledge about deployment and compilation strategies, it's time to deploy our Angular application. When we run the ng build and ng build --prod commands, the native JavaScript files are generated, which we can deploy to our server. This is good if we are trying to deploy a single project application.
In this section, we will learn how to deploy more complex use cases, such as when we have multiple projects in our Angular application.
We are going to keep our applications simple in order for our readers to be able to follow along with these steps easily. However, you can practice the deployment commands by deploying the Angular projects you have developed so far. Let's get started by creating a new Angular app:
- To install Angular CLI, let's quickly use the following command:
npm i -g @angular/cli
The following screenshot shows the output of the preceding run command. We have just installed the Angular CLI, which we will use to generate our application:

- Now that we have successfully installed the Angular CLI, it's time to create an Angular app and call it prod-ready:
ng new prod-ready
Using the preceding command, we have generated a new project. The following screenshot shows the output that is generated:

Beautiful! We have our newly generated application.
- Now, let's navigate to the prod-ready application folder, as follows:
cd prod-ready
- All done. We are not going to change or add any new components. For now, I want you to understand the simplest way to deploy an app. Now, fire up the app using the ng serve command:
ng serve
The preceding command will get the application started, and we should see the output displayed in the following screenshot:

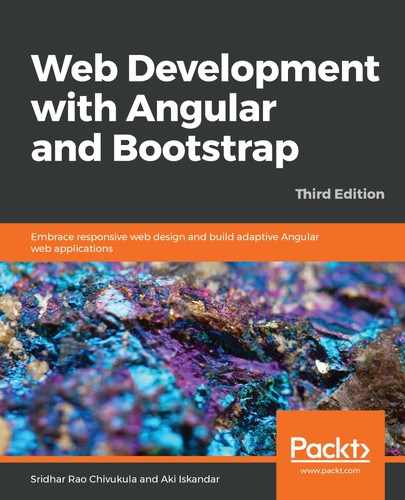
- Launch the browser and then type http://localhost:4200. The default vanilla application should be displayed as follows:
Awesome. So far, so good. We got our app working on our local environment and now it's time to deploy it to our application—that's right!
To make you comfortable with the whole deployment process, we will deploy the vanilla application as it is, without making any changes.
- To deploy, run the following ng command:
ng build --prod
Once the command runs successfully, you should see that the following folders and files have been created. Let's take a look at some of the important things to note:
- You should notice a new folder called dist/<defaultProject>.
- You should also notice the following files created inside the dist folder:
- runtime
- main
- polyfills
- styles
The output of the preceding build command is given as follows. The output will be under the dist folder with the same application name:

- We don't have to necessarily use the default folder name; that is, we can provide the output path and folder name as an argument and Angular will generate the code in that folder. It's easy to customize the output directory where we would want our files to be generated:
ng build --prod --output-path dist/compiled
Run the preceding command and we should see our custom folder and files generated in our folder. In the preceding command, we specified that we want our files to be generated in the folder named compiled, and we provided the path. The following is a screenshot after the command has run successfully:

That's all we need to do to generate and deploy our Angular application. Just copy all the files to the root directory on your server and that's it.
In the next section, we will learn how to deploy a more complex architecture of an Angular application, and we will then go on to deploy the composite application in multiple ways.