
One of the most striking changes in Wikipedia in the last few years is that most articles now include at least one image. Editors have added those images, one by one, and now an article without at least one illustration seems incomplete.
This chapter shows you how to upload an image for use in a Wikipedia article. Until you get an image off your computer and onto a server that Wikipedia uses, you can’t use that image in an article. This chapter also shows you how to place an image in an article, after you or someone else has uploaded it.
Note
In Wikipedia (and in this chapter), the word “image” doesn’t just mean a photo; it can be a map, a drawing, a chart, or even an animated gif. “Photo” refers only to an image taken by a camera.
When it comes to images, less is usually more. A glut of images in an article may make it worse, not better. Don’t overwhelm a medium-sized or small article by adding lots of images to it. Focus on uploading images that can support and illustrate the text of an article, not replace that text.
If you do have a bunch of images that you could use for an article, but that you don’t intend to use unless the article becomes much larger, you can still upload them. Instead of uploading them to the English Wikipedia (where every uploaded image needs to have a home in an article), you’ll upload such images to the Wikimedia Commons, the place where all the 200-plus different language Wikipedias can use it. In fact, this chapter recommends uploading all your images to the Commons, whether you immediately put them into articles or not.
Wikimedia Commons holds uploaded media files like photos, diagrams, animations, music, spoken text, and video clips, but no text documents. You can think of it as a stock media site for Wikipedia and other Wikimedia Foundation projects.
Tip
The Commons is also a place where you can find millions of photos and other images for your personal use outside Wikipedia at no cost. All you need to do is follow the licensing terms—for example, attributing a photo to the person who took it, if you send the photo to someone else.
Before getting to the tutorial on uploading, you need to go through a short checklist. While this list talks about photos, a similar policy applies to other types of images.
Is the photo you want to upload something you took and thus own? Is it in the public domain, or already licensed as free content by its owner? If it’s not any of the above, you can’t upload it to the Commons. For details, see “Uploading a Non-Free Image” on Uploading a Non-free Image.
Are you willing to give up certain rights for a photo you took yourself, when you upload it? You must agree that, once you upload the photo, anyone can use it for any purpose, including commercially, and you won’t get paid. Basically, you must agree to license your photo for use by anyone. All you can ask is that they attribute the photo to you.
Is the photo of acceptable quality? Is it a file type that Wikipedia can use? (See the box below.)
Do you have a user account at the Commons? If not, get one as described in the next section.
Once the answer to all four questions is “yes,” you’re ready to upload your image, following the steps on Uploading an Image to the Commons.
Images at Wikimedia Commons are available to all Wikipedias, not just the English one. Images in the Commons don’t have to actually be used in an article. They are there because they could be used in an article. You can take useful photos, upload them, and come back later to use them. Or not—they’re still available to every other editor at the different language Wikipedias.
To upload images to the Commons, you need an account. Creating one is a quick three-step process.
Go to http://commons.wikimedia.org/. Click the “create account” link (in the upper-right corner), click the bolded “Create an account” link, and then fill in the requested information (see Figure 15-1).
As when you’re creating a Wikipedia account (Registering), providing an email address is highly recommended.
Figure 15-1. Not surprisingly, the screen for creating a Commons account looks very similar to the one for creating an account at the English Wikipedia. That’s because the two sites are run by the Wikimedia Foundation, and both use MediaWiki software.
Note
If you checked across all Wikimedia Foundation websites before creating your Wikipedia account (see the box on IP addresses change), then you should have no problem creating your Commons account using the same account name.
When you’re done filling in the form in Figure 15-1, click “Create account”.
If you included an email address, as recommended, then you’ll get a confirmation email (Figure 15-2). Reply to that, and your email is set up.
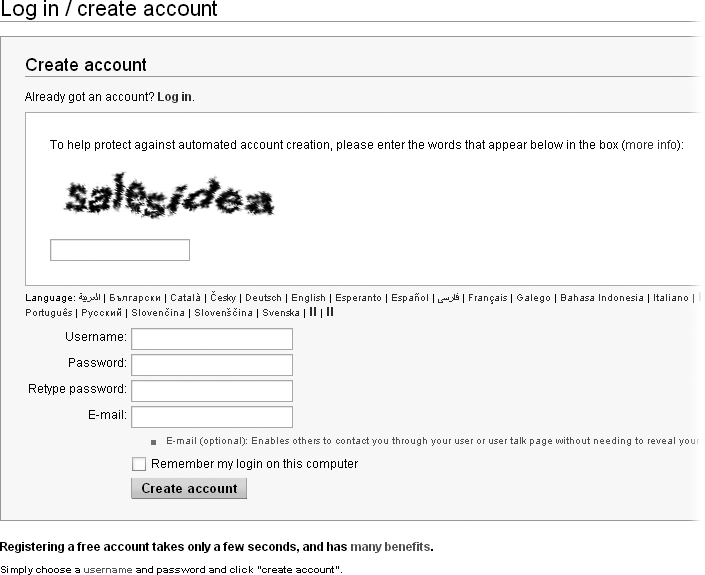
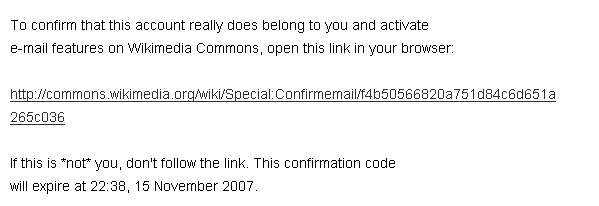
Figure 15-2. Here’s part of the email you’ll get at the email address that you provided when you created your account. All you need to do is click the link to confirm.
As with the English Wikipedia, you have the option of creating user pages. If you have an account only for the purpose of uploading images, you probably won’t want to bother. But if you do want to, the process is exactly the same as at Wikipedia; the Commons runs on the same MediaWiki software.
The standard setting in your user preferences at the Commons is “E-mail me when my user talk page is changed” (Figure 15-3). Keep it turned on. That way, you don’t have to log in periodically to check for notifications—for example, that there was a problem with an image you uploaded. Instead, you can just assume that no news in your email inbox is good news.
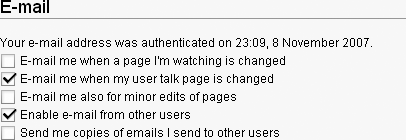
Figure 15-3. The standard email settings in the “User profile” tab of your user account’s preferences let the Commons notify you by email when something changes. The English Wikipedia, by contrast, doesn’t offer you the first three options, since the volume of outgoing email could overwhelm Wikipedia’s servers.
Once you’ve gone through the checklist on Before You Upload to determine whether you can use an image in Wikipedia, and you’ve got your Commons user account, you’re ready to upload an image.
These steps assume that you’re uploading for the first time, and that it’s a photo you took yourself. After you have more experience, you can skip to the upload form (see the bottom of Figure 15-4). Here’s the step-by-step process.
Once you’ve logged into your Commons account, click the “Upload file” link on the left side of the screen.
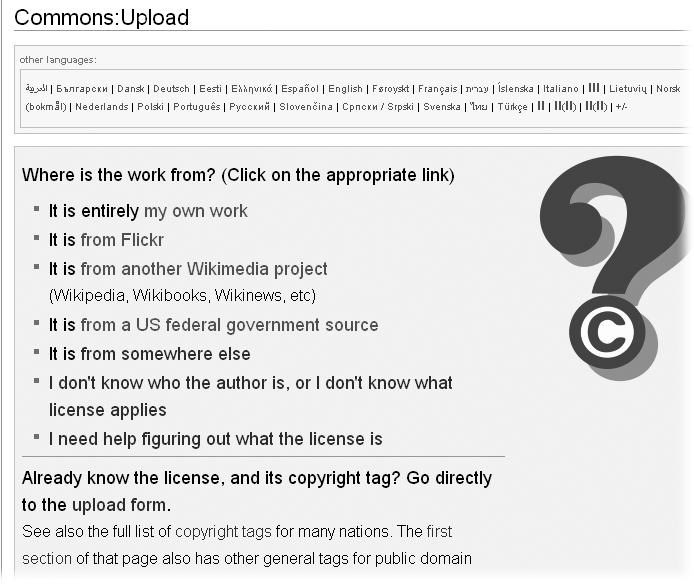
It’s the first link in the “participate” set of links. You’ll see the initial screen in the upload process (Figure 15-4).
Figure 15-4. The two critical components, for copyright purposes, are the source of an image, and the license for that image. When you start the upload process to the Commons, the first page is concerned with the source. Which link you click determines which page you’ll see next, a page that either helps you figure out the source or moves you to the question of the license.
Click the link on the line, “It is entirely my own work”.
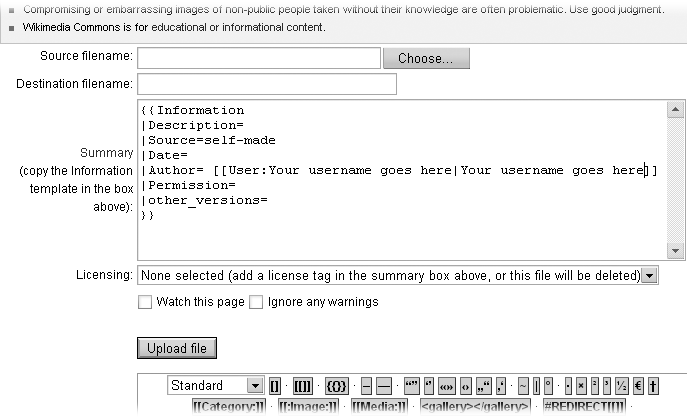
The page you see has a number of sections at the top (steps 1 to 3, and “Other tips”). You’re welcome to read them, but it’s also okay to start at the bottom of the page (Figure 15-5), where you fill out the required information for the upload.
For copyrights, only two things count: the source and the license. You’ve already specified a source (you took the photo); next, you need to specify the second. Figure 15-6 shows your choices.
Figure 15-5. Here’s what you need to fill out in order to upload an image to the Commons. The text in the Summary section is preloaded for you, including your user name.
Figure 15-6. Once you’re specified that what you’re uploading is your own work, you have a choice of six different licenses. The top three are categorized as “Best practices,” the next two as “Better practices (multi-licensing),” and the last one is in the category “Good practices (single license).” When you select one, you’ll see more information about it.
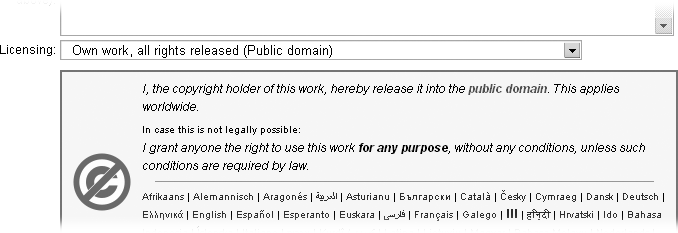
Select “Own work, all rights released (Public domain).”
Whatever you pick, you’ll see an explanation immediately below the box with the license choice (Figure 15-7).
The license you choose doesn’t affect the rest of the upload process. If you do want attribution, pick one of the other five options. If you’re unsure about licensing, just click each one and read the explanations.
Figure 15-7. When you select the public domain license, the page changes to show what the license actually is. If you decide you don’t like what you see, you can choose another license. To get further information about the license you’ve tentatively selected, you can follow the links in the box that states what the license is.
Click the “Choose” button to the right of the “Source filename” field.
Up pops a file selection dialog box for you to navigate to the image on your computer.
Double-click the file name.
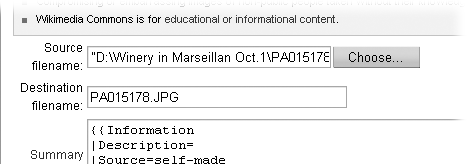
The text field displays the full path to the file on your computer. Figure 15-8 shows an example.
Change the “Destination filename” from whatever was put automatically into the field (see Figure 15-8) to something that describes the image.
The name you type becomes the name of the image page after you’ve finished uploading your photo. Make sure it ends with the correct suffix, such as “.jpg,” to match the actual file type. (See the box on Before You Upload for what file types are acceptable, if you’re not uploading a JPEG file.)
Warning
Get the name right the first time, because you can’t rename an image file once it’s been uploaded. If you don’t get the name right, you’ll have to upload the file again, this time specifying a better name.
Next is the large Summary field, which has already been partially filled out to indicate what is needed. You just add information to two parts.
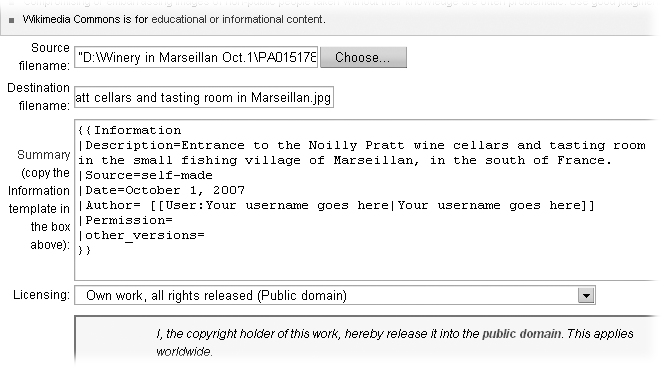
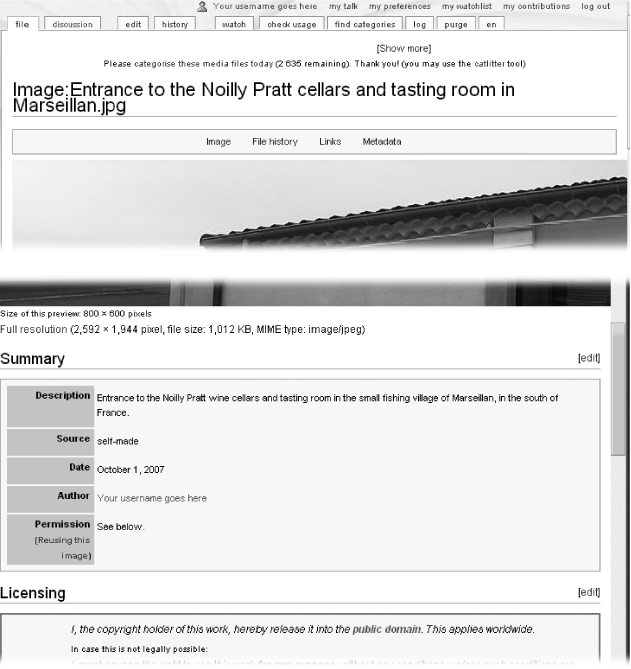
For Description, copy what you put into the Destination filename field, since that should have been descriptive, and then elaborate on that a bit, if you want to. You’re creating some searchable text here, so don’t be reluctant to go into detail. For example, if the photo was taken from another building, or if there is something unusual in the photo, mention that in the description.
For Date, type the date the photo was actually taken. (The Permission information is for licensing; since you’ve selected a license using the pull-down menu, leave this field blank.)
At this point, the page should look something like Figure 15-9.
Below the licensing information (scroll down as needed) you’ll see the “Upload file” button. Click that.
You’ll see something like Figure 15-10.

At this point, you’re done uploading. But it’s very helpful to add some categories to the photo, so others can find it more easily. To do so, see the next section.
At the Commons, you can add categories to an image page to help other editors find the page (for example, for a different language Wikipedia). These steps continue with the same image from the previous tutorial:
Right-click the “find categories” tab at the top of the image page.
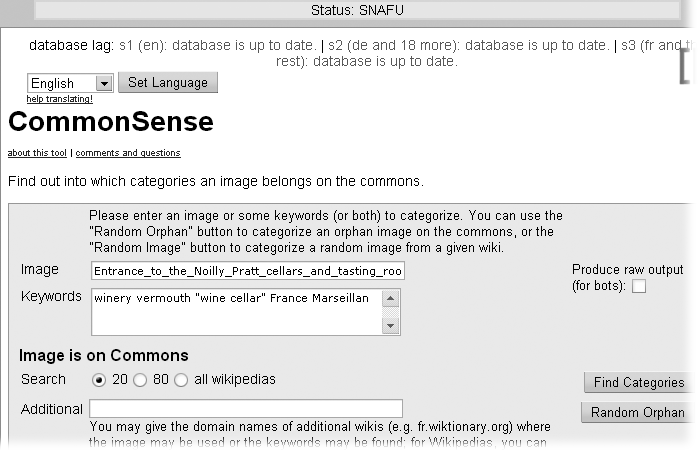
You arrive at a page labeled CommonSense, which is a search tool. It’s preloaded with the image page name, and it’s already done an initial search on that name. That initial search failed. So you’ll want to enter some keywords, as shown in Figure 15-11.
With keywords entered, click the Find Categories button.
The search results appear at the bottom of the page, with text ready to be copied and pasted into an image page to the right of the categories, at the bottom. (Figure 15-12.)
After expanding categories as needed, and looking for the most applicable subcategories, you’re ready to add categories. (For more on finding good categories, see Finding the Right Category.)
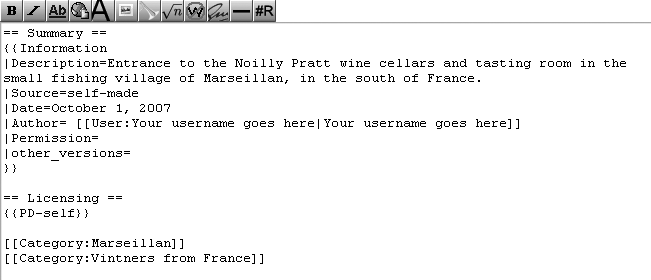
Back at the image page (Figure 15-10), click the “edit” tab, scroll down to the bottom of the page, and copy or type the category or categories you’ve decided fit the photo.
See Figure 15-13 for an example.
Figure 15-13. Two categories are being added to the wikitext for the image page: Entrance to the Noilly Pratt cellars and tasting room in Marseillan.jpg. The edit toolbar—the row of icons you can click to add text—is different in the Commons. That’s because the toolbar is customizable on a project-by-project basis. So, for example, the toolbar for the Spanish Wikipedia is different too.
Once you’ve entered the category you want, add an edit summary, like Adding categories.
At the Commons, the box for the edit summary is just labeled Summary.
Click the “Show preview” button.
Go down to the very bottom of the screen to make sure all the category links are blue, not red (if any are red, you mistyped something).
When all looks well, click the “Save page” button to make your change take effect.
Tip
For more information, see Wikipedia:Commons categories (shortcut: WP:CC).
![The search results, at the bottom of the CommonSense page, consist of two parts. On the left are categories that can be expanded (for looking at subcategories) by clicking the “[+]” symbol. On the right is some text that’s ready to be copied and pasted to the image page.](http://imgdetail.ebookreading.net/design/5/9780596515164/9780596515164__wikipedia-the-missing__9780596515164__httpatomoreillycomsourceoreillyimages20073.png)
You can’t change the name of an image page. If you get it wrong—for example, you forgot the extension (like “.jpg”), or you used a non-descriptive name that already existed on Wikipedia (blocking you from using the image you uploaded to the Commons)—then you have to start over. Upload the same image to a page with a new name, and then retype or copy the image description information to the new image page.
If you want to replace an image (you just found another photo of the same thing that’s much better than the one you uploaded, for example), simply upload it with the same name as the original image. The system asks if you’re sure you want to overwrite the old image; confirm that you do.
Note
The ability to upload a new image on top of an old one is restricted a bit: you have to wait until four days after creating an account at the Commons before you can do so.
There’s no automatic way to move an image from Wikipedia to the Commons. The standard way is to download the image to your computer (often right-clicking the image gives you this option), and then upload it to the Commons. This procedure gives you a chance to give the image a better (longer, more descriptive) name. If you do change the name, remember to change all links to that image in Wikipedia articles to point to the new image at the Commons, not to the old image.
Note
For a full description of the process for this type of move, including a link to the “Move-to-commons assistant” tool, see the page Wikipedia:Moving images to the Commons (shortcut: WP:MITC).