Wikipedia has two features to make readers’ lives easier—sections and tables of contents. Without these, most Wikipedia articles would be a mass of text, unbroken except for images and infoboxes. Getting a quick overview could cause eyestrain as well as mouse cramp.
A well-done table of contents is a godsend. It appears high on the page, giving readers a quick overview of the article, as well as a quick route to an interesting part of the article. Best of all, Wikipedia’s software generates the table of contents automatically from the section headings (page 11). If you get those right, then the TOC is going to be in good shape.
This chapter starts out showing you how to effectively use sections in an article. From there, you can tweak the automatic table of contents to make it even better.
Much like magazine and newspaper feature articles, Wikipedia articles have three different kinds of sections.
Lead. The lead section introduces the article’s topic. Like the introductory paragraph of a newspaper article or a term paper, it tells readers exactly what they’ll learn in the rest of the article.
Body sections. Even relatively short articles are easier to read when the main body is broken up into sections, one for each subtopic. Sections are so important that you learned to create them in Chapter 1 (???).
Bottom. Since Wikipedia articles should always be based on research from reliable sources, most articles have sections for footnotes, external links, and so on. These items always come at the bottom.
The lead section is always the first section in the article (which is why you may hear it called the top section). To help editors write strong leads, Wikipedia provides a guideline at Wikipedia:Lead section (shortcut: WP:LS). Unlike a tabloid magazine article lead, a Wikipedia article lead doesn’t tease or tantalize the reader into reading further. Instead, it provides a brief summary of what the article covers, and, equally important, why the article’s subject is important or notable.
The following four points can save you from committing the Lead section guideline to memory:
When an article is very short, a lead section isn’t necessary. The body of the article is one section and starts with an introductory sentence or introductory short paragraph. WP:LS has more detail on how to craft the first sentence of a lead section.
If an article’s in poor condition, focus most of your efforts on fixing the body (Chapter 18), and then, if you have time, do a thorough rewrite of the lead section. (You don’t have to do it all in one session, and other editors will probably pitch in.)
If the article’s long enough to have several sections in the body, but still less than roughly 32,000 characters in length (see Figure 13-1), aim for a lead section of about two paragraphs. For very long articles, the lead should be no more than four paragraphs, and the paragraphs should be no more than four or five sentences each.
A lead section generally doesn’t contain citations. A lead is a summary, and supporting information comes in the body of the article. However, if the summary contains a controversial statement, a footnote in the lead improves its credibility. If the consensus of editors working on the article is that certain statements need citations, don’t fight it, even if you disagree. An extra footnote isn’t a big issue.
Footnotes are always required in lead sections for contentious information about living persons, regardless of the generality of the statement or the supporting information in the body of the article.
Tip
You’ll also find some detailed advice about wording in the “Lead section” portion of the guideline Wikipedia:Writing better articles (shortcut: WP:BETTER).
If you make sure this sequence is in place, as specified by the guideline Wikipedia:Accessibility (shortcut: WP:ACCESS), you’ll help make Wikipedia accessible to everyone.
Breaking the body text of an article into sections makes it easier for readers to scan and follow, and makes for a more useful table of contents. Sections with more than 12 or so paragraphs could benefit from subsections, which provide additional headings for readers. On the other hand, sometimes you end up with a section of just one or two paragraphs. That’s okay if the subsection fits within the section, and the information can’t logically fit into another subsection.
Tip
Chapter 18 discusses at length how to improve the body of an article. This chapter, in contrast, focuses on the length of sections, and when to add subsection headings, since they affect the table of contents.
Here are some tips for paragraphs and subsections:
Aim to have few or no single-sentence paragraphs. At the other extreme, paragraphs beyond 1,000 characters (roughly 12 lines of typed text) are hard to read. In that case, there are probably multiple thoughts that would be better revealed if they were separated. In other words, make paragraphs short enough for readability, but long enough to develop an idea.
When creating subsections, your most important goal is to preserve the hierarchy of the article. For example, in an article about a movie, it makes sense to have a section called “Reception” (or perhaps “Reviews”), with subsections “Critical”, “Commercial”, and “Nominations and Awards”. On the other hand, adding a “Sequels” subsection to “Reception” could be questioned. “Sequels” should probably be its own section, even if it’s only a paragraph or two.
A chronological approach for subsections is also logical. For example, an article about a military battle might start with a section or two about events leading up to the battle; then a section about the battle itself, with subsections being the chronological phases of the battle; and finally one or more sections describing the immediate aftermath of the battle, and its longer-term consequences.
Even when you’ve gotten the sections exactly right, there may be too many of them—that is, the article may be too long. How long is “too long?” One hint is when Wikipedia starts telling you the size of the article, which will start happening at around 6,000 words. Next, at around 12,000 words, it starts advising you to consider splitting the article (see Figure 13-1).
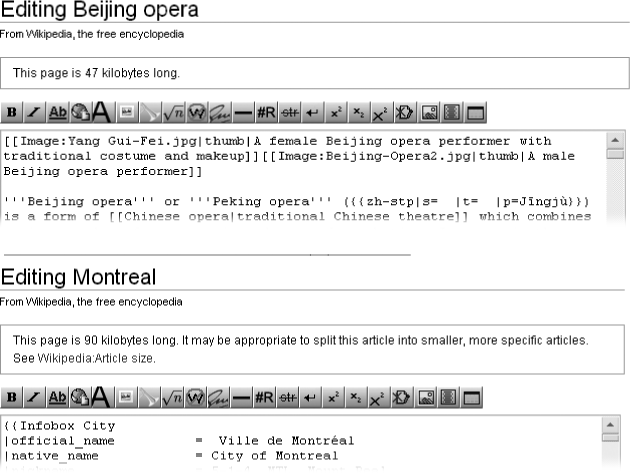
Figure 13-1. When you click “edit this page”, Wikipedia tells you if the page exceeds 32 kilobytes (a kilobyte is roughly 1,000 characters). If the size exceeds 64K, you see a link to the guideline on article size. Consider that a strong suggestion to look closely at whether one or more sections can be spun off as separate articles.
Anything over 100K (roughly 20,000 words) almost always need to be split. This general rule has several exceptions: lists, articles summarizing certain fields, and controversial subjects where an article is heavily documented. That last group includes examples like Hillary Clinton presidential campaign, 2008, at 253K; Franz Liszt, at 219K, and Roman Catholic Church, at 191K. These sizes are as of this writing. You can see more examples at Special:Longpages. (For more on lengthy articles, see the guideline Wikipedia:Article size, shortcut : WP:SIZE.)
When there’s an editorial consensus to shorten an exceptionally long article, you can do it in several ways. For example, you can split up long lists somewhat arbitrarily (for details, see ???). The standard solution when dealing with a long article, or even a too-long section, is to spin off part of that article—creating what Wikipedia calls a daughter article. The details are in the guideline Wikipedia:Summary style (shortcut: WP:SS), but the concept is straightforward. Two things get left in the original article: a link to the new daughter article, and a summary of the contents of that daughter article.
Creating daughter articles is a matter of judgment. Don’t start spinning off content as soon as article exceeds 32K or 64K or even 100K. Instead, discuss the matter with other editors on the article talk page, to determine whether to treat the topic as a whole as several shorter articles or to just create daughter articles for one or two sections.
Thus, you can either leave a too-long article as is, split it into multiple articles, or spin off a daughter article. But there’s a fourth alternative—you can remove content. You’ll probably only do so as a last resort when an article violates WP:NOT by including too much detail. If you can’t see a way to spin off that excess detail into its own article, advise other editors via the article talk page before you start chopping.
Warning
Don’t spin off a section of criticism about a subject into its own article unless the spun-off article truly can stand on its own. In almost all cases, criticism should be properly sourced and integrated into an article, not isolated in its own section. When you find an article with such a separate section, it’s generally incorrect. Only under rare circumstances should the criticism become a daughter article, because then both the main article, with only a small summary of criticisms, and the entirely negative daughter article are unbalanced; both are WP:NPOV violations.
Creating a daughter article isn’t hard, but it requires a lot of steps. The following example uses the article Dallas Independent School District as a case study. In late 2007, this 170K behemoth was number 50 on the list of biggest articles in Wikipedia.
Scan the article to determine why it’s so long.
In this case, it’s obvious: Section 6, list of schools, is made up of a number of very long tables. That’s perfect for a daughter article.
Decide on the name for the new daughter article.
Generally that’s a variant of the title of the existing section. In this case, the title of the section is “List of schools”. The daughter article will become List of schools of the Dallas Independent School District.
Open a second browser window (or tab) that shows any Wikipedia page.
You’re opening a second window because you want to continue to have a window open to the article you’re going to shorten. It doesn’t matter what page, because you’re going to be there only momentarily.
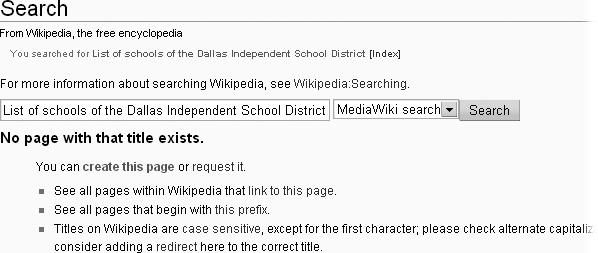
In the second window, in the search box, type the new title. Or type the name elsewhere, and then paste it into the search box. Click Go.
Presumably, the daughter article doesn’t already exist. You see something like Figure 13-2.
Click “create this page”.
That click puts you into edit mode at the new page, the one for the daughter article. The page for the new article is now ready to receive content from the parent article.
In the original article, click the “edit” link for the section you’re moving. Select all the text in the section except for the heading. Right-click the selected text, and then, from the shortcut menu, choose Cut, or use the keyboard shortcut Ctrl+X (Windows) or ⌘-X (Mac).
If cutting all this text feels scary, don’t worry—you can’t really damage the article. Remember, as discussed in Understanding Page Histories, that Wikipedia software keeps a copy of every version of the article. If anything goes wrong, you can always go to the history page and revert back to an undamaged version.
Tip
To easily select a large chunk of text in a section, click at the beginning of the text you want to select, use the scroll bar to get to the end of the section, and then Shift-click at the very end. That sequence selects everything between where you click and the final Shift-click point.
In the edit window of the new article, paste everything into the edit box. Add an edit summary, something like: Creating daughter article from content of [[Article name]], per [[WP:SS]]. Do a page preview, and then click “Save page”.
If you want to see what happens to the new article after you create it, turn on the “Watch this page” box below the edit summary before you save the page.
Now back to the original article. In the section still open for editing, which now has only a heading, add a {{main|Daughter article name}} template just below the heading, and a paragraph or two to summarize the daughter article.
In an ideal world, the daughter article’s first paragraph is already a summary that you can use; if not, usually much of it is usable for a summary. Figure 13-3 shows what the section of the DISD article looks like (both the reader’s version and the underlying wikitext) after a template and summary have been added.
Add an edit summary, something like: Creating daughter article at [[Name of daughter article]], per [[WP:SS]].
As usual, do a page preview, check the “Watch this page” box below the edit summary, if you wish, and then click “Save page”.
Finally, go back and polish the daughter article, adding some things that were in the original article but are now missing or need editing.
You’ll probably need to do most of the following:
Add or revise the lead section so it meets the criteria discussed earlier in this chapter (Lead Section) and the specifications of WP:LEAD.
Change the section headings to fit the new article (that generally means removing one equal sign from each side of every heading).
Add one or more categories to the article (you’ll want to use most, if not all of the categories on the parent article; you’ll see the wikitext when you edit the final section of the parent article). (For more on categories, see Chapter 17.)
If the text you moved contained any footnotes (<ref> tags), copy (don’t move) the “References” section (sometimes called “Notes”) from the original article.
Start a talk page for the daughter article (Posting to a Brand-new Article Talk Page), and paste in any WikiProject templates from the talk page of the parent article. (If there are article assessments of quality or importance, change those to be blank. Assessments of the parent article aren’t valid for the daughter article.)

Certain optional sections always go at the bottom of an article. Although they’re technically optional, all properly sourced articles have sections for footnotes and external links.
Note
Empty sections look unprofessional, just like “Under construction” signage on Web pages. If you don’t have anything to put in a section, don’t create that section. If you see an empty section, delete the heading. If you find an article that doesn’t cite its sources, don’t add a section for footnotes just in case.
The sections that can appear at the bottom of an article, in the preferred order, are:
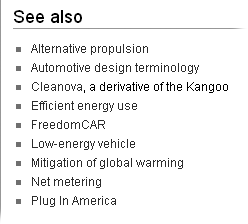
See also. A bulleted list of internal links and, optionally, a short explanation for any link whose purpose isn’t obvious. Figure 13-4 is an example. (If the link is already in the article, don’t add it to the “See also” section.)
References, Notes, Footnotes, or Notes and footnotes. Whatever you find, don’t change any of these four section headings when you find them in an article (unless you’re an experienced editor). But if the section is (incorrectly) called “Citations”, change it to “References” or “Notes”, whichever isn’t already being used.
If you’re adding footnotes for the first time to an article, set up a “References” section for that, as described in Chapter 2 (???).
Further reading. This section contains sources that weren’t used in writing the article, but that provide material that could eventually be used. It’s unusual to find this section, mostly because if a potential source is online, it should be listed under “External links”, not in “Further reading”. Figure 13-5 shows an example.
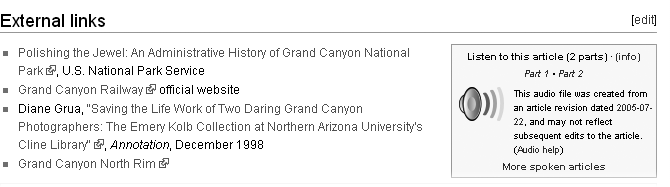
External links. Lists a small number of high-quality sites that most readers will find useful and that were generally not cited as sources. Figure 13-6 gives an example. Most experienced editors find links to prune from these sections. The external links section is where you’re most likely to find linkspam. And even when links to blogs, personal Web pages, and so on are well-intentioned, they normally don’t belong in an article. The guideline Wikipedia:External links (shortcut: WP:EL) has details.
Note
An exception is blogs and other pages maintained by the subject of the article. For example, an article about a band should include the band’s MySpace page, official Web site, or blog among the external links.