
Let's now finally get to working with these tools and learn the basics of structuring game apps on a broader storyboard level. As of the writing of this book, the latest version of Xcode available is version 7.0. This will be the version we shall work with, but Xcode is always updating with even a beta version available to separately test the newest features.
Visit https://developer.apple.com/xcode/ to download and read up on all that Xcode has to offer for iOS developers.
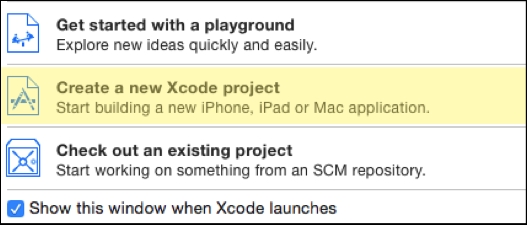
To start structuring your app using storyboards, follow these instructions:
- First, open Xcode in your
Applicationsfolder (or in your Dock if you placed it there for easy access). - Next, click on Create a new Xcode Project.
- You will now be asked to choose a template preset.
- For the sake of just understanding storyboards and segues, select the Single View Application template. (Don't worry, we will be using the game template in the next chapter).

- Now we choose our project's options. Name your project
StoryBoardExample. - In the Language dropdown, make sure that it is set to Swift and ensure the Devices dropdown is set to Universal.
- There should be other fields filled in by Xcode, such as your organization name and organization identifier. Those are involved with the information that will be published with your app when it comes to deployment as well as the content of your code's copyright comments. We can for now keep these at their default setting that Xcode has filled in.
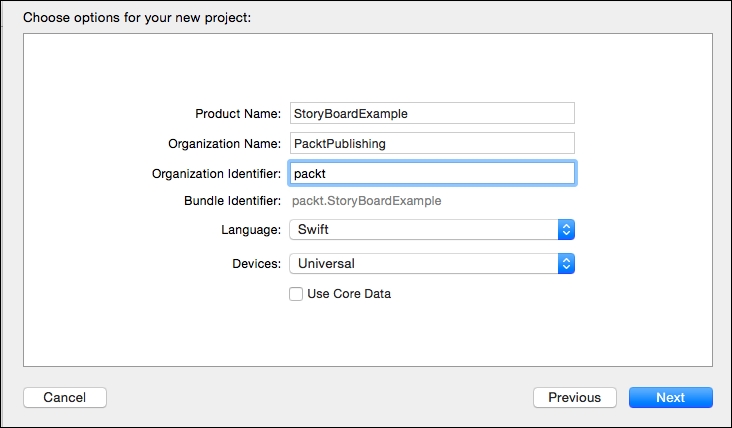
- Click on Next and then select a valid location in your files to save this project.
Now we have our default app created by the template. We should see on the left-hand side, in the File Navigator Pane, various files and folders created for us. As we can see, the AppDelegate.swift and the ViewController.swift files were automatically created for us and right below that, we'd find the Main.Storyboard file. This is our storyboard and when you click on it, you should see the two panes open at the center of your Xcode window. The left side is the view controller Scene dropdown, which shows the hierarchy of the scene controlled by the provided the view controller. The right pane in the center allows us to visually see the view controller and eventually elements that we can place in it. The main visual part of the storyboard can be zoomed in and zoomed out. As we add more scenes to it, this will allow us to see the entirety of our storyboard or the portions we are working on.
You might have to zoom out slightly to see it (using your mouse or using the pinching gesture on your trackpad with a MacBook), but to the left of the View Controller scene there's a gray arrow. This is the entry point and the first View Controller scene attached to this arrow is your RootViewController/Initial scene.
Let's start by creating a separate scene for our storyboard:
- At the bottom of the Utilities panel (the far right panel of the Xcode project), there are four icons designating the various snippets and objects we can place in our project's code and the storyboard. Click on the third icon from the left if it's not already selected. This will open the Object Library.
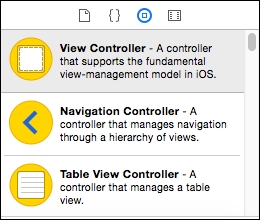
- We can see that the very top of the Object Library has a View Controller object.
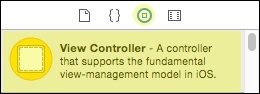
- Drag this onto the storyboard's canvas, preferably to the right of the initial scene.

Now we have two scenes in our storyboard, but nothing is there to tell us what they are. They are just two blank scenes!
Let's put a Label object in these scenes to represent what they are and at runtime tell us which one we are in.
To keep this in the mindset of developing a game, let's put a label in the first one called Intro Scene, where we'd maybe have an intro animation to our game with a Start/Options menu, and in the next one, put the label Game Scene to represent that this is where that actual gameplay would occur.
Here's how to do that:
- Go to the bottom of the Utilities panel and use the search field to search
label. This will isolate thelabelobject, so you don't have to scroll through the entire list.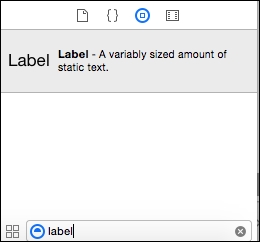
- Drag the
labelobject to the canvas of the first scene. If it doesn't look like it's trying to snap to the scene's canvas, you might have to select the View portion of that view controller scene's hierarchy, using the left pane of the Main/Storyboard's main view. Alternately, you can also double-click the view in the Inspector to get the scene in focus so that you can place the label onto it.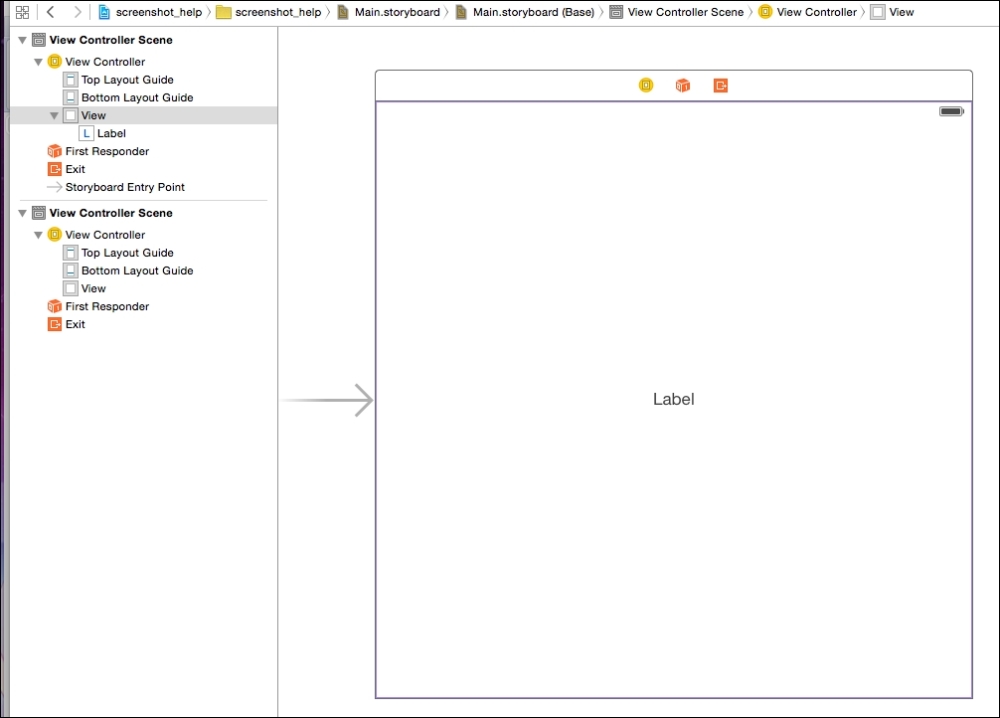
- As we drag it, try to center the label as best as possible. The canvas will indicate that we are at the vertical and/or horizontal part of that scene with dotted blue lines. Drop it in the center.
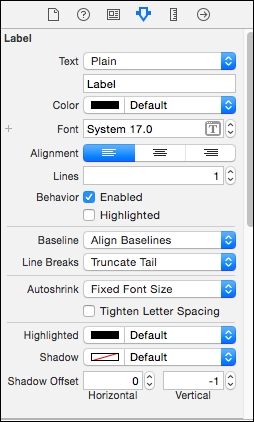
The Utilities pane should have some fields visible when selecting the label to control various aspects of its text like font size, alignment, and style.
- The label will just say
Labelas the default, so let's rename it toIntro Scenefor the first scene by either double-clicking the label itself in the canvas, or changing the name in the second field down from Text in the Utilities panel. - Let's make this label a bit more prominent, so single-click on the label, click on the [T] icon in the Font field, and make the style bold with a size of 28.
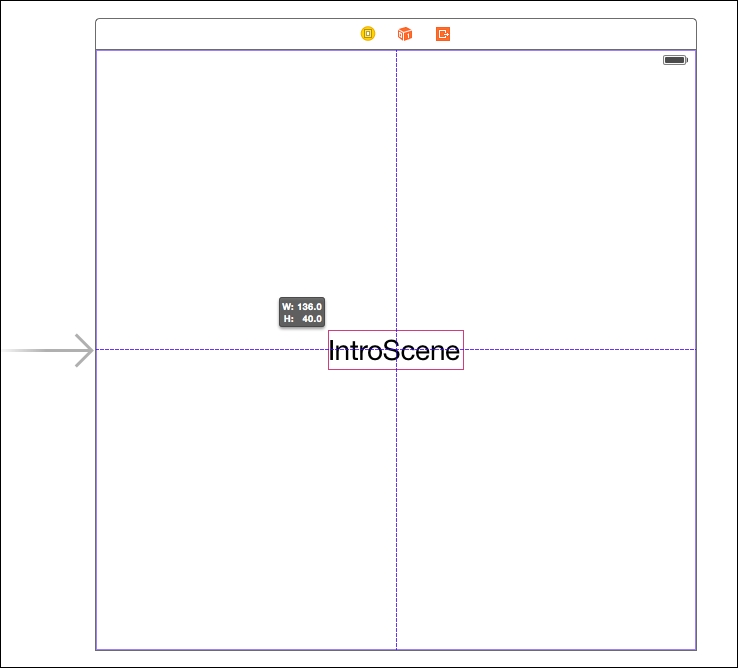
Note how the label is clipped from the size increase and hardly visible.

- Simply click on the label and expand out any one of the eight scaling icons at the corners of the label object on the canvas.
Reposition the label to return it to the center of the scene.
- Create the same label for the second scene we added by simply typing Command + D to duplicate the label (as to not have to repeat all of the steps) and then drag it to the center of the other scene. Zoom out as needed and possibly click back on to the view part of the hierarchy if the focus change prevents the ability to drag the label across.
Though rather rudimentary and with still some more work to do with, this is all it takes to create separate scenes visually. If you have an idea of how you want to structure your game, this is where you can start with the use of storyboards. Of course, there is still more to do here before we make this storyboard have any function.
We can see that Xcode is giving us the following warning:
Scene is unreachable due to lack of entry points and does not have an identifier for runtime access via -instantiateViewControllerWithIdentifier.
This is referring to the Game Scene object that is essentially orphaned due to no connection to the Intro Scene nor the app's entry point.
This is where segues come into play. Yet, before we work with segues and create a flow to these scenes and more, if we were to run this app, we'd note another issue. We could have sworn that we centered the text, but if simulating or running this in, say, an iPhone 6s, the text is completely off to the upper-right side. This is because the default canvas is a generalized all device template to begin with via Auto Layout.
Auto Layout has gotten easier with each new build of Xcode, but one could still argue it's still a bit of a hassle at times to fine tune, particularly when creating constraints (set spaces/margining between various storyboard objects). Let's take a quick look at how to work with constraints.
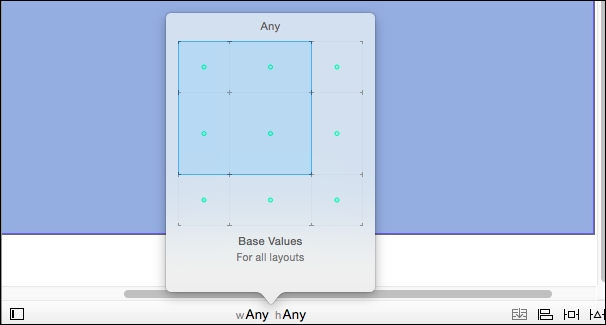
One quick way to alleviate the issue we have here is to just work with the Base Values panel found at the bottom center of the storyboard canvas by clicking on the w/Any h/Any text. Once clicked, a pop-up table of cells will appear. Rolling over with your mouse or trackpad to the various cells will bring up a number of different configurations as oppose to w/Any h/Any. What's great about this is that you can change/add and delete various objects simply based on the device type using these options.
Note
Before storyboards and Auto Layout, this would involve huge amounts of testing and refactoring of code in a view controller or Nib classes to get the layout just the way you'd like visually. Apple would then create the next device with a different screen size to prior devices, it would become an even greater hassle or the developer would risk a broken game on the newest device.
To make the labels be in the center for all iPhones in portrait mode for example:
- Hover and click on the center left-hand side of the Auto Layout panel where it'll say Compact Width | Any Height at the top of that pop-up panel/table.
- This should now change the display text at the bottom of the canvas to w/Compact h/Any and shrink the width of the scene as this layout represents all iPhones in Portrait and of any height (so it could be a bit off in height on an older iPhone 4S as oppose to the iPhone 5 or later).
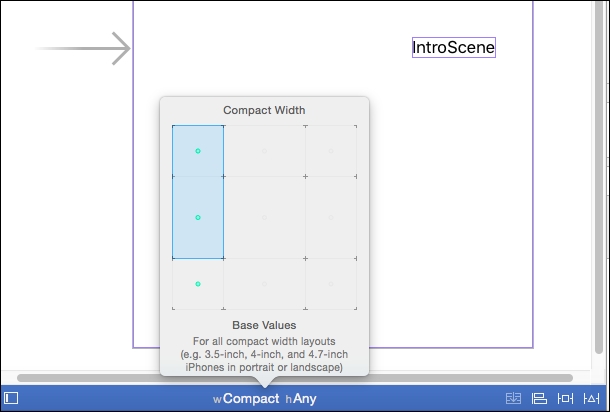
- Note how the labels are off center toward the upper right. This is what would have been seen in the simulator or on an actual iPhone in the portrait orientation. Drag them back to the center, and they should now look as they are seen in this configuration of the storyboard's canvas. If designing for iPad, then the other configurations would need to be changed for that.
Note
Pinning with constraints could actually streamline this process. For example, let's say that you want to place a Pause button at the upper right corner of your Game Scene and you know that no matter the orientation, it will always be at a certain distance (in percentages or pixels) away from the right and top of a device's screen. We can click on the pin button
 at the bottom of the canvas to create these constraints in the w/Any h/Any configuration and skip manually adjusting the icon on every one of the base configurations.
Xcode already gives us a scene, the
LaunchScreen.xibfile, which, if you have already ran your code, was actually what was seen first before the first view controller in the storyboard.To have just your
Main.Storyboardfile be at startup you can select the main project file at the top left corner in the Navigation pane and in the Launch Screen dropdown of the Apps Icons and Launch Images section, selectMain.Storyboard. Then, you can delete theLaunchScreen.xibfile if no longer needed. It can be a good file to see working constraints, and if so be it, it can be your initial splash screen for your game. More on constraints can be found here in the official documentation: https://developer.apple.com/library/prerelease/ios/documentation/UserExperience/Conceptual/AutolayoutPG/WorkingwithConstraintsinInterfaceBuidler.html.
Games have scenes, and all scenes have transitions between them. Segues are simply transitions between scenes in a storyboard. Segues come in various types:
- Show: This pushes the next view controller on top of the current one; it also allows for calling back if using a
UINavigationControllerinstance. - Show Detail: When using
UISplitViewController, a Container view controller is typically used in iPad apps to browse news/email apps, where the left side of the page is aUITableViewControllerobject and the other side of the same page are the details of that table/list. This calls the details for theDetailViewcontroller portion of the page when triggered by a gesture from the selected item on theUITableViewControllerside. - Present modally: This presents the next view controller over the current but in such a way that it can be canceled, such as a full-page popup.
- Popover: This is like Present modally but with more options in sizing to create a smaller pop-up window that can be closed and disposed of.
- Custom: This is a version of a segue that you can completely customize with OOP code.
The typical storyboard structure when building say, an e-mail app, will more than likely need to make use of a navigation controller and UITableView controllers to structure the data and flow of the app. Now, we can very well do the same thing for game apps. Game Over, Menu, Rankings, and Pause screens could make use of these view controllers. For our example, we'll keep it simple and unrestricted to let you, the developer, have a better starting point to branch from.
Let's take care of that warning and link up these scenes as well as begin to show the overall structure of a typical game using storyboards.
- First, in the Intro Scene, place a button labeled START right under the Intro Scene label. Placing a button on a storyboard is done exactly the same as with a label. Search for
buttonor scroll down the objects in the Utilities panel and then drag and drop the button onto the scene. - Now create two more buttons on the Game Scene view; one button labeled Pause at the top-right corner of the scene and another named Quit opposite the Pause button on the upper-left corner.
- Create a new
ViewControllerobject on the scene, preferably above or below the Game Scene on the canvas. - On the new Pause Scene, create a label
PAUSEDthe same way theGame SceneandIntro Scenelabels were made. - Then, add two buttons, Quit and Resume, and place them right under the PAUSED label.
Now to create the segues visually using the storyboard:
- Control-Click the START button object on the Intro Scene and then while still pressing Control-Click, drag the object toward the Game Scene on the canvas. You should see a blue line follow your cursor as you drag across. (if you need more space, zoom out a bit and also temporarily close the Navigation and Utilities panels using the toll bar buttons).
- Drop this point anywhere on the view that isn't another object; you should see the entire view glow blue while doing so.
- A popup asking for the type of Segue will come up. Select Show.
- That's it! You've created a segue, and you've also told the storyboard that when the user clicks that button, it'll open the Game Scene—View Controller.
- Before you move on to creating more segues, click on the door-like symbol on the canvas that represents the segue. On the top right in the Utilities panel's Assets inspector, you should see an empty Identifier field. We can leave the segue empty if we'd like, but naming it could be of use if we wish to call the segue in code with the following line:
performSegueWithIdentifier("segueIDNameeWithIdentifi) - Now repeat steps 1 through 3 to create the following segues:
- Link Game Scene's Quit button back to Intro Scene.
- Link Game Scene's Pause button to the PAUSED Scene.
- Link PAUSED Scene's Resume button to the Game Scene.
- Link PAUSED Scene's Quit button to the Intro Scene.
The warning should now be gone as all of the scenes are connected with segues, and after possibly some Auto Layout fixes, running the app now has a game-like scene structure that transition the way we'd normally see in other games. We can go from here and make other scenes, such as a Game Over scene, a Stage Win scene, or others. Even if this might not be the way you'd like your final game's transitions to end up (particularly since the default transition of the Show segue does a quick vertical), this can be a very quick way of prototyping your game right off the bat. Custom segues and segues triggered with code are how we can dive deeper into fine tuning when the default setting might not match with our vision of our games.
Here's more documentation on making custom segue classes if you really want to dive deeper into segues:
Similarly to how we Control-Dragged the button's linkage to the next view controller scene, we can do the same to our ViewController.swift file.
Here's a summery on how to do that for the first view controller:
- Remove the previous segue. One way to do so is to right-click the button and to click on x in the Triggered Segues section.
- Click on the Intro Scene's view in the hierarchy to get it in focus.
- Control-Drag a blue line from the yellow icon on the top left of the Intro Scene's view controller to the Game Scene's view controller and select the Show type of segue.
- Click on the segue icon in the canvas and now give the identifier of this segue the name
startGame. - Open the Assistant Editor (the two interlocking circles button on the top-right portion of the Xcode toolbar); close some panes to make any needed room.
- Control-Drag the Start button into the
ViewControllerclass; preferably at the bottom of the code but still within the class's closing brackets. - This will prompt the outlet/action popup. Select the Action option in the Connection dropdown and name it
startButton. - This will create the
IBActionfunction:@IBAction func startButton(sender: AnyObject) {}. - Type the following code between the braces:
self.performSegueWithIdentifier("startGame", sender: nil) - This tells the view controller to perform the segue when this button is prompted using code.