
Describing interactive problems
Speaking the ActionScript language
Understanding the value of variables
Working with conditionals
For many serious Web developers, Flash's enhanced programming capabilities are the most important new feature of each product release. Just when you think they've added it all, the Adobe Flash team manages to pull more rabbits out of the hat. Now, more than ever, elements inside Flash movies can be dynamic, have properties calculated on the fly, and respond to user input. Movies can communicate with server-side applications and scripts by sending and receiving processed and raw data. What does this mean for your movies? It means you have the capability to produce truly advanced movies (such as online secure banking applications, product configurators, hotel reservation systems, Flash asteroids, a multiplayer role-playing adventure game, or a navigational interface with a memory of the user's moves, just to name a few). It also means that Flash can be used to produce complex Web applications, such as database-driven e-commerce product catalogs, without the need for proprietary server-side applications.
Note
Between Flash 8 and Flash CS3 release cycles, Adobe released Flex Builder 2. Flex Builder 2 enables you to build Rich Internet Applications (RIAs) using a markup language called MXML and a scripting layer written in ActionScript 3.0. The Flex framework is included with Flex Builder. This framework enables you to add common application elements (buttons, windows, data grids) and state management. More and more RIAs are being built with the Flex development environment instead of the Flash authoring tool. Flex Builder 2 does not require use of a server technology to produce the application.
Although you can still use the any actions for any Flash Player version in Flash CS3, the structure of ActionScript programming has taken a tremendous leap forward with the ActionScript 3.0 version specification. ActionScript 3.0, or AS3, is a highly evolved form of programming compared to ActionScript 2.0 (or AS2) and older syntaxes used in Flash Players 5 and earlier. We feel that AS3 requires more than a fundamental understanding of basic programming, and as such, continue to provide our foundation coverage in the Flash Bible using ActionScript 2.0 principles. Luckily, most AS2 constructs can be used in AS3 with little modification.
Note
Refer to Chapters 31 "Applying HTML and Text Field Formatting" and 34 "Using Components" for special coverage of ActionScript 3.0 coding.
AS2 programming, introduced in Flash MX 2004, adheres closely to ECMAScript Edition 4-compliant standards. The Actions panel, now in its fifth version, only becomes more efficient at helping you code. Components continue to use the ActionScript 2.0 model, using complex event handling, and make it simpler for you to add interface elements and integrate data into your Flash projects. Flash CS3 continues to enable designers and developers alike to build the foundations for Rich Internet Applications, or RIAs, which bring a new world of real-time data and ease of use to the Web. These topics, however, are far beyond the scope of motion tweens and animations. In this chapter, we'll introduce you to the programming structure of ActionScript and explain how to start using code within your Flash movies.
Note
If you are new to scripting, we highly recommend that you review Part V, "Adding Basic Interactivity to Flash Movies," before you begin this chapter.
Note
For more information about ECMAScript Edition 4, see the original proposal at www.mozilla.org/js/language/es4/.
Before you can become an ActionScript code warrior, realize that this isn't just a weekend activity — if you want to excel at Flash ActionScripting, you'll need to commit the time and energy necessary for the proper revelations to occur. It's not likely that you'll understand programming simply by reading this chapter (or the whole book). You need to create some trials for yourself, testing your textbook knowledge and applying problem-solving techniques.
You might be thinking, "Oh no, you mean I have to revisit that torture of grade school math?" Not exactly, but programming, like math, requires strong reasoning and justification skills. You need to be able to understand how values (for example, the height of a MovieClip instance) are determined, what type of changes you can perform on those values, and how changes to one value might affect another value. If you're feeling overwhelmed, don't worry. We take this one step at a time.
Regardless of what interactive authoring tool you use (Adobe Dreamweaver, Adobe Flash, Macromedia Director, and so on), you can't begin any production work until you have a clear idea of the product. What is it that you are setting out to do? At this point in the process, you should use natural language to describe your problems; that is, define your objective (or problem) in a way that you understand it. For example, let's say that you want to make a quiz. You'll have to run through a list of goals for that interactive product:
Is it a true/false test?
Or will it be multiple choice?
Or how about fill-in-the-blank?
Is it an essay test?
How many questions will be on the quiz?
Will there be a time limit for each question?
Will you notify the person of wrong answers?
How many chances does the person get to answer correctly?
Other questions, of course, could help define what your product will encompass. Don't try to start Flash production without setting some project parameters for yourself.
After you have defined the boundaries for the project, you can start to map the process with which your product will operate. This step involves the procedure of the experience (in other words, how the person will use the product you are creating). With the quiz example, you might clarify the solution as:
The user starts the movie and types his or her name.
After submitting the name, the user will be told that he or she has 10 minutes to complete a 25-question quiz that's a combination of true/false and multiple-choice questions.
Upon acknowledging the instructions (by pressing a key or clicking a button), the timer starts and the user is presented with the first question.
The timer is visible to the user.
The first question is a true/false question, and the correct answer is False.
If the user enters a True response, a red light graphic appears and the sound of a buzzer plays. The user is asked to continue with the next question.
If the user enters a false response, a green light graphic appears and the sound of applause plays. The user is asked to continue with the next question.
This process repeats until the last question is answered, at which point the score is tallied and presented to the user.
The preceding eight steps are similar to a process flowchart, as we discussed in Chapter 3, "Planning Flash Projects." In real-life production, you would want to clarify Step 8 for each question in the same amount of detail as Steps 5 through 7 did. As you can see, once you start to map the interactive experience, you'll have a much better starting point for your scripting work. Notice that we're already using logic, with our if statements in Steps 6 and 7. We're also determining object properties such as _visible in Step 4. While you may not know all the ActionScript involved with starting a timer, you know that you have to learn how time can be measured in a Flash movie.
Note
We use the terms scripting, programming, and coding interchangeably through this chapter and other parts of the book.
After you have created a process for the movie to follow, you can start to convert each step into a format that Flash can use. This step will consume much of your time as you look up concepts and keywords in this book, the Flash ActionScript Bible series (Wiley), or Adobe's updated Help panel that ships with Flash CS3. It's likely that you won't be able to find a prebuilt Flash movie example to use as a guide, or if you do, that you'll need to customize it to suit the particular needs of your project. For the quiz example, we could start to translate the solution as:
1. Frame 1: Movie stops. User types name into a text field.
2a. Frame 1: User clicks a submit Button symbol instance to initiate the quiz. The instructions are located on frame 2. Therefore, the Button action uses a gotoAndStop(2) action to move the Playhead to the next frame.
2b. Frame 2: Static text will be shown, indicating the guidelines for the quiz.
3. Frame 2: User clicks a start quiz Button symbol instance. An action on the Button instance starts a timer and moves the Playhead to frame 3.
4. Frame 3: The current time of the timer is displayed in a text field, in the upper-right corner of the Stage.
5. Frame 3: The first question is presented in the center of the Stage. A button with the text True and a button with the text False are located just beneath the question. The correct answer for the question is hidden in a variable name/value. The variable's name is
answer, and its value isfalse. This variable declaration appears as a frame action on frame 3. A variable, calledscore, will also be declared to keep track of the correct answer count. Its starting value will be0.6a. Frame 3: If the user clicks the True button, an
if/elseaction checks whetheranswer's value is equal totrue. If it is, an action sets the_visibleof agreenLight MovieClipinstance totrue, and initiates and plays a newSoundobject for theapplause.wavfile in your Library. Also, the value ofscoreincreases by 1. If the value ofansweris nottrue, then an action sets the_visibleof aredLightinstance totrue, and initiates and plays a newSoundobject for theerror.wavfile in your Library. The value of score will be left as is.6b. Frame 3: A
Buttoninstance appears, and when it's clicked, it takes the user to frame 4.7a. Frame 3: If the user clicks the False button, an
if/elseaction checks whetheranswer's value is equal totrue. If it is, an action sets the_visibleof agreenLightinstance totrue, and initiates and plays a newSoundobject for theapplause.wavfile in your Library. Also, the value ofscoreincreases by 1. If the value ofansweris nottrue, an action sets the_visibleof aredLightMovie Clip instance totrueand initiates and plays a newSoundobject for theerror.wavfile in your Library. The value ofscoreis left as is.7b. Frame 3: A
Buttoninstance appears, and when it's clicked, it takes the user to frame 4.
Although there is more than one way we could have translated this into ActionScript-like syntax, you'll notice that a few key concepts are presented in the translation: where events occur (frames or buttons), and which elements (for example, Button symbols or MovieClip instances) are involved.
Most important, you'll notice that we used the same procedure for both the True and the False buttons. Even though we could hardwire the answer directly in the Button actions, we would have to change our Button actions for each question. By placing the same logic within each Button instance, we have only to change the value of the answer variable from frame to frame (or from question to question).
Granted, this example was already translated for you, and 90 percent of your scripting woes will be in the translation process — before you even have a testable Flash movie. You need to learn the basic terminology and syntax of the ActionScript language before you can start to write the scripting necessary for Steps 1 to 7. And that's exactly what the rest of this chapter (and the rest of Part VII) begins to teach you.
Note
Because the vocabulary of the ActionScript language has become so immense, Robert Reinhardt and Joey Lott created a separate Bible series, on Flash ActionScript, to thoroughly address the syntax of ActionScript. However, if you are new to scripting and programming, we recommend that you start with our coverage of ActionScript here before reading the Flash ActionScript Bible (Wiley).
With the enhanced Actions panel (also known as the ActionScript editor) in Flash CS3, you can program interactivity by writing interactive commands directly into the Script pane of the Actions panel.
Tip
Flash CS3's Actions panel can show you hidden characters, such as character spaces and line breaks, in your code. Choose Hidden Characters from the options menu of the Actions panel to see these characters. Due to the reactions of many Flash designers and beginner developers, the Actions panel also has an updated and improved Script Assist feature, which replaces the sorely missed "Normal mode" of Flash MX. For more information on Script Assist, see Chapter 18 "Understanding Actions and Event Handlers."
In the Actions panel, you can type your code from scratch, as well as insert your code with the help of Action booklets or the new Script Assist feature. Syntactically, ActionScript looks and feels very much like JavaScript. Adobe has gone to great lengths to make ActionScript compatible with ECMAScript 4 (the standard programming guidelines derived from JavaScript). And like other object-oriented languages, ActionScript is composed of many familiar building blocks: variables, operators, conditionals, loops, expressions, built-in properties, subroutines, and native functions.
All of the ActionScript commands are found in the Flash interface in the Action booklets or plus (+) button menu of the Actions panel. However, assembling actions with one another is not something Flash CS3 automatically performs unless you use the Behaviors panel to add interactive functionality to your movie elements. Although it is beyond the scope of this chapter to fully explain fundamental programming principles, we can give you a sense of the whole of ActionScript by providing an organized reference to each of its parts.
In the Actions panel, you can cut, copy, and paste code within the Script pane from one area of your movie to another using Ctrl+X (
Using Esc Shortcut Keys for actions
In Flash CS3, you can choose to show or hide shortcut keys in the Actions panel. In the options menu of the Actions panel, choose Esc Shortcut Keys (if it's not already checked). Now, click the plus (+) menu of the Actions panel to access ActionScript commands. Notice that shortcut keys are defined after the name of the command. Note that the Mac version of Flash CS3 only shows the shortcut keys in the action booklets, not in the plus (+) menu.
For example, loadMovie(), in the Global Functions
Most shortcut keys have been created for ActionScript 1.0 and 2.0 compatible actions.
Tip
To make sure that you don't have any syntax errors after reorganizing code, click the Check Syntax button in the Actions panel toolbar. Flash alerts you if there are scripting errors by placing messages in the Output panel.
Also, use the new Script Navigator in the lower-left corner of the Actions panel to quickly switch back and forth between keyframe or object code. For example, you can choose one frame in the Script Navigator, copy its code, and then switch to another frame to paste the code.
If you decide to write ActionScript with another editor, you can use the #include directive to load the contents of the external code file (.as) into the Flash movie at publish or export time. For more information on the #include directive, read Chapter 33, "Managing and Troubleshooting Flash Movies".
Don't know what the methods of the Sound object are? Need to see if the getVersion() function will work in a Flash Player 4–compatible movie? Flash CS3 has conveniently nested everything related to help documentation in the Help panel. Among other items, the updated Help panel contains all the syntax of the ActionScript language. You can access the Help panel in a few ways:
Choose Help

Click the Reference icon in the Actions panel.
Right-click (or Control+click on Mac) an action in the left-hand Script pane of the Actions panel and choose View Help in the contextual menu.
We'll quickly show you how to use the new Help panel in an actual Flash document:
Open a new Flash file (ActionScript 2.0), using File
Select frame 1 of Layer 1, and open the Actions panel by pressing F9 (Option+F9 on Mac).
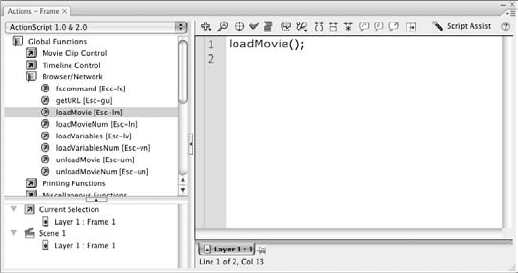
Open the Global Functions booklet and click the Browser/Network booklet. Double-click the
loadMovieaction. The action appears in the Script pane, as shown in Figure 24.1.Select the text
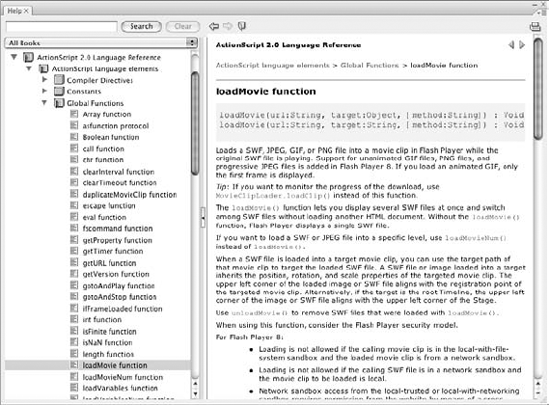
loadMoviein the Script pane, making sure not to select the();portion of the action. Click the Help icon (that is, the circle with the question mark) at the top right of the Actions panel. The Help panel will open, displaying the definition for theloadMovie()action, as shown in Figure 24.2.
You can select other actions from the left pane of the Help panel and view their descriptions.
Tip
You can also print descriptions from the Help panel by choosing Print from the options menu at the top-right corner of the panel, or clicking the Printer icon in the Help panel toolbar.
So why all the fuss about ActionScript now? Let's make one thing clear right away: For most Flash designers and developers, or rather for most of the work that's done in Flash, the graduation of ActionScript 1.0 to 2.0, may mean next to nothing at all. This isn't to say that ActionScript 2.0 should be ignored or is not a monumental leap forward for Flash programming — we simply want to calm or allay any fears you might have after reading about ActionScript 2.0 from other sources. If you've used ActionScript in Flash versions prior to MX 2004, then ActionScript 1.0 refers to the coding styles that those versions of the application used.
ActionScript 2.0 introduced a couple of major structural changes to the way in which you can code Flash ActionScript. To begin with, it uses strong data typing. You'll learn more about data typing in Chapter 26, "Using Functions and Arrays," but for now, know that ActionScript 2.0 imposes some rules on how you can assign values to variables, functions, and other objects in your code. Unless you're creating code that uses custom classes and object-oriented programming concepts such as inheritance and prototypes, you won't really need to worry about whether your code will work as ActionScript 2.0 code. Another big change with ActionScript 2.0 is case-sensitivity. Prior to Flash Player 7, most ActionScript terms were case-insensitive, meaning you could refer to object references or variables with varying cases, such as:
var firstName = "Robert";
var lastName = "Reinhardt";
var fullName = firstName + " " + lastName;
In ActionScript 1.0, you could have used the following code as the last line, without receiving an error:
var fullName = firstname + " " + lastname;
However, in ActionScript 2.0, that same line of code would be incorrect because firstname and lastname are not using the same case as the original variables.
Why should the distinction between ActionScript 1.0 and 2.0 even be an issue? For starters, when you publish a Flash movie for Flash Player 6, 7, or 8, you need to decide how Flash CS3 will compile the ActionScript code in your document. In the Publish Settings dialog box, you can choose which ActionScript version to publish in the Flash tab. Unless directed otherwise, you publish most of the Flash movies for Part VII of this book as ActionScript 2.0, even though it pretty much looks and feels like ActionScript 1.0.
In any scripting or programming language, you need some type of "memory" device — something that can remember the values and properties of objects or significant data. This type of memory device is referred to as a variable.
Variables are named storage places for changeable pieces of data (numbers and letters, for starters). One of the first obstacles for designers learning a scripting language is the concept that variable names in and of themselves have no meaning or value to the computer. Remember that the computer can't perform anything unless you tell it to. Even though any given scripting language has a certain set of built-in properties and functions, variables can simplify your scripting workload by creating shortcuts or aliases to other elements of the ActionScript language. One prime example of a "shortcut" variable is the path name to a deeply nested Movie Clip instance, such as:
_root.birdAnim.birdHouse.birdNest.birdEgg
truncated to a variable named egg as:
var egg = _root.birdAnim.birdHouse.birdNest.birdEgg;
If you wanted to declare egg in ActionScript 2.0 code, you would use the following syntax, which types the egg variable as a MovieClip object:
var egg:MovieClip = _root.birdAnim.birdHouse.birdNest.birdEgg;
Once egg is declared and given a value, you can reuse it without referring to the lengthy path name, as in:
with(egg){
    gotoAndPlay("start");
}
The important concept here is that you could just as easily have given egg a different name, such as myPath, or robPath, or whatever word(s) you'd like to use. As long as the syntax and formatting of the expression is correct, you have nothing to worry about.
Another example of a variable that stores path information is the URL to a Web resource, such as a server-side script. Oftentimes, you may have different server URLs for testing and deployment. Instead of changing the URL in every action of the Flash document, you can use a variable name. That way, you only need to change your variable's value once. In the following sample code, a variable named serverURL is set to the actual URL you want to access. You then refer to that serverURL name in other actions, such as getURL().
var serverURL = "http://www.flashsupport.com/";
getURL(serverURL);
Note
Variables in ActionScript are "typed," meaning that their value is explicitly set to be either a string, number, boolean, or object. When working with variables, you must therefore know what data type the value is. We discuss data typing in Chapter 26, "Using Functions and Arrays."
Variables in ActionScript are attached to the timeline of the movie or MovieClip instance on which they are created. If you create a variable x on the Main Timeline, that variable is available for other scripting actions on that timeline. However, from other Movie Clip timelines, the variable is not directly accessible. To access the value of a variable on another timeline (such as a MovieClip instance), enter the target path to the clip instance in which the variable resides, a dot (.); then enter the variable name. For instance, this statement sets the variable foo to be equal to the value of the variable hitCount in the MovieClip instance named ball:
var foo = ball.hitCount;
This statement, on the other hand, sets the variable foo to be equal to the value of a variable named hitCount on the Main Timeline:
var foo = _root.hitCount;
Tip
Variables in ActionScript 1.0 are not case-sensitive and cannot start with a number. Variables in ActionScript 2.0 are case-sensitive.
Flash Player 6 introduced a new location to store variables, independent of any timeline: _global. You can access global variables from any object or timeline in the Flash movie — hence the name global. You only need to specify the _global path to assign a value to the global variable. To read a global variable, you simply specify the name. For example, on frame 1 of the Main Timeline, you can specify the following ActionScript in the Actions panel:
_global.firstName = "George";
Then, if you wanted to use the firstName variable within a MovieClip instance's timeline, you simply refer to the variable firstName. The following code will insert the firstName variable into a TextField object named user. This code would be placed inside of a Movie Clip symbol containing the TextField object:
user.text = firstName;
Even though the _global path is not specified, Flash Player 6 or 7 looks for a variable named firstName on the current timeline. If a variable by that name does not exist on the current timeline, Flash Player 6 looks in _global for the variable and returns any value for that variable.
Warning
You need to publish your Flash documents as Flash Player 6 or higher movies to use the _global path. The global namespace can be used in ActionScript 1.0 or 2.0. Also, many experienced Flash developers frown upon the use of _global within a Flash document; overuse or overreliance on global variables can result in code that is difficult to debug. Why? Because the variable is global, you don't necessary know which element is setting a new value to the global variable, because the variable is available everywhere. By localizing your variables to custom objects and classes in proper object-oriented programming, you can manage the storage of information within your Flash movies more easily.
In programmer speak, a string is any combination of alphanumeric characters. By themselves, they have no meaning. It is up to you to assign something meaningful to them. For example, giving a variable the name firstName doesn't mean much. You need to assign a value to the variable firstName to make it meaningful, and you can do something with it. For example, if firstName = "Susan", you could make something specific to "Susan" happen.
You can also use much simpler name/value pairs, such as i = 0, to keep track of counts. If you want a specific Movie Clip animation to loop only three times, you can increment the value of i by 1 (for example, i = i + 1, i += 1, and i ++ all do the same thing) each time the animation loops back to the start. Then, you can stop the animation when it reaches the value of 3.
Flash uses the term expression to refer to two separate kinds of code fragments in ActionScript. An expression is either a phrase of code used to compare values in a Conditional or a Loop (these are known as conditional expressions), or a snippet of code that is interpreted at runtime (these are known as numeric expressions and string expressions). We discuss conditional expressions later in this chapter.
Numeric and string expressions are essentially just segments of ActionScript code that are dynamically converted to their calculated values when a movie runs. For instance, suppose you have a variable, y, set to a value of 3. In the statement x = y + 1, the y + 1 on the right side of the equal sign is an expression. Hence, when the movie runs, the statement x = y + 1 actually becomes x = 4, because the value of y (which is 3) is retrieved (or "interpreted") and the calculation 3 + 1 is performed. Numeric and string expressions are an extremely potent part of ActionScript because they permit most of the parameters used in actions to be based on mathematical calculations and external variables rather than requiring fixed information. Consider these two examples:
The parameter of a g
otoAndPlay()action could be set as an expression that returns a random number in a certain range, sending the movie to a random frame:this.gotoAndPlay(Math.round(Math.random()*100));
The URL option in a
getURL()action could be made up of a variable that indicates a server name and a literal string, which is the file path:var serverName = "http://localhost/"; var filePath = "resources/showRecent.cfm"; getURL(serverName + filePath);
As we mentioned in an earlier section, to change all the URLs in your movie from a staging server to a live server, you'd just have to change the value of the server variable. So, to change the latter example's code for a live Web server, you'd simply change the serverName variable, as the following code demonstrates:
var serverName = "http://www.flashsupport.com/";
All of the other lines of code would stay the same, because you only need to change the server location for the live Web site.
Anywhere that you see the word "expression" in any action options, you can use an interpreted ActionScript expression to specify the value of the option.
To use a string inside an expression, simply add quotation marks around it. Anything surrounded by quotation marks is taken as a literal string. For example, the conditional if (status == ready) wrongly checks whether the value of the variable status is the same as the value of the nonexistent variable ready. The correct conditional would check whether the value of status is the same as the string "ready" by quoting it, as in if (status == "ready").
You can even have expressions that indirectly refer to previously established variables. In ActionScript, you can use the dot syntax (and array access operators) to indirectly refer to variables, or you can use Flash 4's eval() function (to maintain backward compatibility).
We like to use the phrase "setting and getting" to help beginners understand how equations and expressions work in ActionScript code. An equation is any line of code that sets an object or variable to a new value. The order of syntax terms can be confusing to designers and developers new to code writing. Do you specify a value first? How do you know where to insert the equal sign (=)? If you remember the phrase "setting and getting," you'll know how to write basic equations. The variable you want to set (or assign a new value) is always on the left side of the equation, while the new value is always on the right:
what you want to set = the value you want to get
For example, if you wanted to set a variable named currentTime to the amount of time that has elapsed since the Flash movie started playing in the Flash Player, you would place currentTime on the left side of the equation and place the actual value of the time on the right side:
current time in the movie = the number of milliseconds that have elapsed
Translated into actual code, this would be:
var currentTime = getTimer();
Again, another important aspect of variables to remember is that the name of a variable is quite arbitrary. What we called currentTime could just as well be named myTime, movieTime, elapsedTime — or whatever you want to call it. As long as you consistently refer to your variable's name in subsequent ActionScript code, everything will work as expected.
If you have a variable called name_1 declared on the Main Timeline, you can write the expression _root["name_" + "1"] to refer to the value of name_1. How is this useful? If you have more than one variable, but their prefixes are the same (for example, name_1, name_2, name_3, and so on), you can write an expression with two variables as a generic statement to refer to any one of the previously established variables: _root["name" + i], where i can be any predefined number. This type of expression is most commonly found in a code loop; you learn more about loops later in this chapter.
If you want to use old-fashioned ActionScript to indirectly refer to variable names and values, you have two ways to go about it:
Use the
Set Variableaction, specifying the variable name as a Slash-notated expression:set("/name_" add i, "Robert Reinhardt");Use the
eval()function, specifying the variable as an expression:eval("_root.name_" add i) = "Robert Reinhardt";
Note
This usage is specific to Flash Player 4 and FlashLite 1.0/1.1 compatibility. Unless you are authoring movies to be compatible for these players, you should use the most current syntax.
In most scripting languages, you usually don't have to declare a variable without its value; that is, you don't need to say variable firstName and then address it again with a value. In Flash ActionScript, you don't need to pre-establish a variable in order to invoke it.
Note
As you start to code more complex scripts in ActionScript 2.0, such as creating custom classes, you do need to pre-declare variable names. As you're starting out with more basic scripts, you do not need to be so thorough with your code.
If you want to create a variable on the fly from a Movie Clip to the Main Timeline, you can. Most variables that you use in Flash will be declared in a timeline's keyframes. We'll show you how to create a couple of simple variables in a Flash document:
Open a new Flash file (File
Rename Layer 1 to actions.
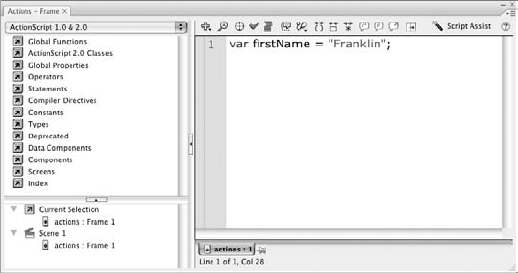
Select frame 1 of the actions layer in the Timeline window, and open the Actions panel by pressing the F9 key (or Option+F9 on Mac). Type the following action in the Script pane (see Figure 24.3):
var firstName = "Franklin";Save your Flash document as
variable_frame.fla, and test it (Ctrl+Enter or
Variable _level0.firstName = "Franklin"
Tip
By default, the Output panel is grouped with the Property inspector, and you may find it awkward to look for ActionScript messages in this small area. You can undock the Output panel into its own window by dragging its tab out of the Property inspector grouping.
As you can see in this example, the firstName variable is shown at _level0, which is the _root of the current Flash movie. All variables belong to a specific timeline or object.
Note
You can find the sample file, variable_frame.fla, in the ch24 folder of this book's CD-ROM.
Since Flash 4, text can be specified as text fields. A text field can be used as a dynamic text container whose content can be updated via ActionScript and/or the intervention of a server-side script (known in Flash CS3 as Dynamic text), or it can accept input from the user (known in Flash CS3 as Input text).
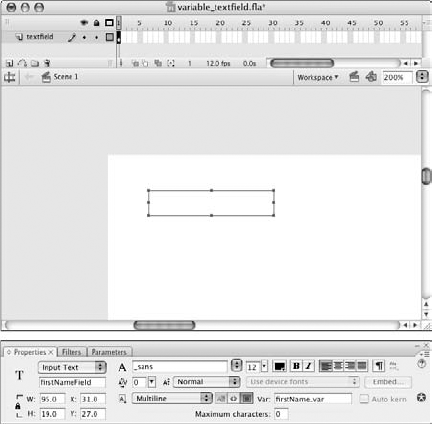
You can access a text field's properties by selecting the text field and opening the Property inspector. In the inspector, you can define the parameters of the text object, including its Var (for Variable) name and instance name.
Note
Text fields in Flash CS3 are TextField objects. The instance name of a TextField object should be different from the Var name. In fact, we recommend that, as a general rule of thumb, you do not specify a Var name for text fields in Flash Player 6 or higher movies.
An Input text field is editable when the Flash movie is played in the Flash Player; the user can type text into the text field. This newly typed text becomes the value of the text field's Var name, or the text property of the text field. On a login screen, you can create an Input text field with an instance name loginField, where the user enters his or her name, such as Joe. In ActionScript, this would be received as loginField.text = "Joe". Any text that you type into a text field during the authoring process will be that property's initial value.
To review this process of text fields and variable names, let's create a simple example:
Create a new Flash file (File
Save this Flash file as variable_textfield.fla.
Rename Layer 1 to textfield.
In the Tools panel, choose the Text tool, and click once on the Stage. Extend the text field to accommodate at least five characters. In the Property inspector (Window
Save your Flash file, and test it (Ctrl+Enter or
Variable _level0.firstName_var = "Holly"
Edit Text: Target="_level0.firstNameField"
    text = "Holly",
    variable = "firstName_var",
Note that this sample assumes that the name Holly was typed into the text field.
This simple exercise demonstrates how the Var assignment of a TextField object differs from the instance name assignment. In ActionScript 1.0 or 2.0, the actual text displayed in the TextField object can be accessed in two ways: as a variable called firstName_var or as a property of the TextField object, tFirstName.text. Dynamic text fields behave in the same manner as well.
There are several ways to establish, or declare, variables in a Flash movie. You can create them directly with ActionScript (or with TextField objects, as shown in the last section), load them from a text file or server-side script, or include them in HTML tags.
The most common way to create a variable is to type the variable's name and value in the Script pane of the Actions panel, on a specific timeline's keyframe. Most basic variables will have values that are string literals.
You can also establish variables by loading them from an external source, such as a text file located on your Web server or even through a database query or a server-side script. By using the loadVariables() action, you can load variables in this fashion. There are three primary parameters for the loadVariables() action: URL, target, and variables:
loadVariables(url, target, [,variables]);
The variables parameter is optional. In the Help panel pages in the ActionScript Dictionary, any parameters displayed with surrounding left and right brackets ( [ ] ) are optional.
Note
There's more than one way to load data into Flash Player 5 and higher compatible movies. While you're learning the basics of ActionScript, we recommend that you use the loadVariables() function to familiarize yourself with data-loading concepts. If you're publishing Flash Player 6 or higher movies, you should learn the syntax of the LoadVars class, discussed in Chapter 30.
URL specifies the source of the variables to be loaded. This can be a relative link to the variable source (you don't need to enter the full path of the resource). You can specify whether this URL value is a literal value ("http://www.theMakers.com/cgi-bin/search.cfm") or an expression that uses a variable or a combination of variables (serverURL + scriptPath + scriptApp). If you want to point to a specific file, type its relative path and name here. If you want to access a database that returns dynamic data, insert the path to the script, such as "http://www.domain.com/cgi-bin/search.pl".
The target parameter determines where the variables are to be loaded. You can send the name/value pairs to a level or a timeline target. If you want the variables to be available on the Main Timeline, use _root or _level0. You can also specify a Movie Clip target using a relative or absolute address. To load to the current Movie Clip (the one initiating the loadVariables action), use the target this.
The last option is variables, and this parameter specifies whether you are sending and loading (in other words, receiving) variables. If you want to load variables from a static source, such as a text file, you should omit this parameter. If you are sending a query to a database-driven engine, then you may need to specify either "GET" or "POST". Note that the use of loadVariables() in the GET or POST method means that you are sending variables declared on the active timeline to the specified URL, which, in turn, will send name/value pairs back to the Flash movie.
The formatting of name/value pairs is standard URL-encoded text. If you want to encode name/values in a text file (or a database), you need to use the following format:
variable=value&variable=value...
Basically, in URL-encoded text, name/value pairs are joined by an ampersand (&). To join multiple terms in a value, use the plus (+) symbol to add a single whitespace character between the terms, as in:
name1=Joe+Smith&name2=Susan+Deboury
Note
There are several ways to load data into a Flash movie. Flash Player 5 introduced the XML object, and Flash Player 6 introduced the LoadVars object, both of which give you more control over dynamic data. The LoadVars object is discussed in Chapter 30, "Sending Data In and Out of Flash." You also learn more about URL-encoded text in that chapter.
You can also send variables to a URL by using the getURL() action. Any name/value pairs that are declared on the active timeline will be sent along with the getURL() action if a variable send method is defined (GET or POST). Note that getURL() is only used to send variables out of a Flash movie — it will not retrieve or load any subsequent name/value pairs. If you use a getURL() action on a Movie Clip timeline as follows:
var firstName = "Robert";
getURL("/cgi-bin/form.cgi", "_blank", "GET");
the Flash movie will send the following request to your server:
http://www.server.com/cgi-bin/form.cgi?firstName=Robert;
The output of the form.cgi script would be opened in a new browser window ("_blank").
Note
Any terms that follow a question mark (?) in a URL are called a query string. The name/value pairs in a query string are usually provided as an input or a filter to a server-side script.
You can also send variables to Flash movies in the <embed> and <object> tags that call the Flash movie. In the src attribute of <embed> or the param name="movie" subtag of the <object> tag, attach the name/value pairs to the end of the Flash movie filename, separated by a question mark (?).
<object ... >
<param name="movie" value="flash.swf?name=Rob" />
<embed src="flash.swf?name=Rob" ... />
This method works with Flash Player 4 or later movies. However, Flash Player 6 and higher can recognize the HTML attribute flashvars. Now, you can specify longer strings of name/value pairs that will be declared in the Flash movie as soon as it loads into the Flash Player. The previous method that we showed is limited to strings that are about 1,024 characters long (depending on the Web browser), which include the movie's full URL. With the newer flashvars attribute, you don't need to rely on the URL of the movie. Here's an example of declaring a few variables with the flashvars attribute:
<object ...>
<param name="movie" name="flash.swf" />
<param name="flashvars"
   name="firstName=Gregory&lastName=Smith&address=1234+Hollywood+Way" />
<embed src="flash.swf"
flashvars="firstName=Greg&lastName=Smith&street=1234+Broadway" ... />
In practical use, you would not likely hard code the name/value pairs directly into the HTML document. You can use client-side JavaScript or server-side scripting (such as PHP, ASP.NET, or ColdFusion) to dynamically "write" the name/value pairs into the HTML document before it is served to the user's Web browser.
You can write expressions either by manually typing in the primary option fields of ActionScript commands, or by dragging and dropping actions from action booklets in the Actions panel. There are no scripting wizards in Flash; Flash CS3 does not automatically script anything for you (not counting components, which already include many lines of code to perform specific tasks for you). However, Flash provides you with booklets of operators, objects, and functions available in the ActionScript language.
Operators perform combinations, mathematical equations, and value comparisons. See Table 24.1 for a list of common operators in the ActionScript language.
These operators are used for common mathematical operations of adding, subtracting, multiplying, and dividing. You can also use these operators to compare numeric values, such as > or <.
if (results>1) name="Robert"; _root["name_"+i]="Ezra";
To join two String values to another in Flash Player 5 or higher movies, use the + string operator, such as:
var fullName = firstName + " " + lastName;
The Flash Player 4-specific operator add joins one value with another value or expression. If you want to concatenate two variables to create a new variable, use the add string operator. Again, this syntax should be used only for Flash Player 4 or FlashLite 1.0/1.1 movies.
set ("fullName", firstName add " " add lastName);These operators join several expressions to create conditions. We discuss these further in the "Checking conditions: if . . . else actions" section of this chapter.
// Flash Player 5 and later syntax below

if (results > 1 && newResults < 10){
   // do something...
}

// Flash Player 4 syntax below

if (results > 1 and newResults < 10){
   // do something...
}
Table 24.1 describes the ActionScript operators available in Flash 4 and higher syntax.
Table 24.1. ActionScript Operators
Flash Player 5+ | Flash Player 4 | Description |
|---|---|---|
|
| Adds number values (all player versions) and joins, or concatenates, strings in Flash Player 5 and later. |
|
| Subtracts number values. |
|
| Multiplies number values. |
|
| Divides number values. |
|
| Equals; used for assignment of variables, properties, methods, and so on in Flash Player 4 or later. |
| Numeric operator: Is equal to; used for comparison in | |
|
| Numeric operator: Does not equal. |
|
| Less than. |
|
| Greater than. |
|
| Less than or equal to. |
|
| Greater than or equal to. |
|
| Groups operations together, as in |
|
| Indicates that the enclosed value should be interpreted as a string, not as an expression. |
|
| String operator: Is equal to; for example, |
| N/A | Strict equality operator; both of the compared values must be the same data type and value. This operator is compatible only with Flash Player 6 or higher. |
|
| String operator: Is not equal to. |
| N/A | Strict inequality operator; both of the compared values must have different values and data types. This operator is compatible only with Flash Player 6 or higher. |
|
| Alphabetically before; if the strings compared have multiple characters, the first character determines the alphabetical position. |
|
| Alphabetically after. |
|
| Alphabetically before or the same as. |
|
| Alphabetically after or the same as. |
|
| Joins two strings together or adds a string to a variable. |
|
| Logical comparison; requires that two or more conditions be met in a single comparison. |
|
| Logical comparison; requires that one of two or more conditions be met in a single comparison. |
! | not | Logical comparison; requires that the opposite of a condition be met in a single comparison. |
Conditions lie at the heart of logic. To create an intelligent machine (or application), you need to create a testing mechanism. This mechanism (called a conditional) needs to operate on rather simple terms. Remember the true/false tests you took in grade school? if/else statements work on a similar principle: If the condition is true, execute a set of actions. If the condition is false, disregard the enclosed actions and continue to the next condition or action.
You can simply create isolated if statements that do not employ else (or else if) statements. Solitary if statements are simply ignored if the condition is false. else statements are used as a default measure in case the tested condition proves false. else if statements continue to test conditions if the previous if (or else if) was false. Refer to the following examples for more insight.
Basic
ifstatement. The code between the curly braces is ignored if the condition is false.if (condition is true){ then execute this code }Extended
if...else if...elsestatement. If the first condition is true, the code immediately after the first condition is executed and the remainingelse ifandelsestatements are disregarded. However, if the first condition is not true, the second condition is tested. If the second condition is true, its code executes and all other statements in theifgroup are ignored. If all conditions prove false, the code between the curly braces of the finalelseis executed:if ( first condition is true){ then execute this code } else if (second condition is true){ then execute this code } else { otherwise, execute this code }
In production, you could have an if/else structure that assigned the value of one variable based on the value of another, such as:
if (x == 1){
   name = "Margaret";
} else if (x == 2){
   name = "Michael";
} else {
   name = "none";
}
Warning
Do not use a single = sign in a condition, as this actually sets the variable's value. For example, if you wrote if (x = 1){}, ActionScript actually sets x = 1, and does not check whether x's value is equal to 1. Moreover, the condition always evaluates to true. In our experience, many beginners make this common mistake in their ActionScript code. We can't emphasize enough the importance of making sure you use an == operator in if and else if expressions for "is equal to" comparisons.
You can add an if statement in ActionScript by choosing the if action from the plus (+) button in the toolbar of the Actions panel, or by selecting it from the Statements
Note
There's nothing stopping you from just typing the actions directly in the Script pane as well. Use the booklets as a guide at first, to learn about the choices you have available.
Tip
If you find it confusing when to use parentheses or curly braces ( { } ) with your code, use the shortcut keys to create code blocks such as if statements. With your cursor active in the Script pane, type Esc+I+F in sequence to create the if statement with the proper set of parentheses and curly braces.
You can join two conditions using logical compound operators such as and (&&), or (||), or not (!), as in:
if (results >1 && newResults < 10){
     gotoAndPlay ("end");
} else if (results > 1 ! newResults < 10) {
     gotoAndPlay ("try_again");
}
In this sample code, the first if statement has two expressions — both need to be true in order for the gotoAndPlay("end"); code to execute. If both are not true, the else if condition executes. If the first condition is true and the second condition is not true, the gotoAndPlay("try_again"); code executes. If neither the if nor the else if condition is true, then no code is executed.
We'll take a look at a step-by-step example of if statements in the exercise at the end of this chapter.
In ActionScript, you can also use switch() and case statements. switch() and case can replace extended if and else if actions. Instead of declaring a true/false expression (as with if statements), switch() uses an expression that can return any value — you are not limited to true and false conditions with switch(). In pseudo-code, a switch() code structure looks like this:
test a value
   if the value equals this expression
      then execute this code
   if the value equals this expression
      then execute this code
   if none of the expressions match the value
      then execute this code
end test
In the previous code example, one or more if statements (called case clauses) can execute. Meaning, the tested value can execute more than one segment of code nested within the clauses. You could translate the previous pseudo-code into the following ActionScript code:
var currentFrame = _root._currentframe;
switch(currentFrame){
   case 10:
      helpBox.gotoAndStop("products");
   case 20:
      helpBox.gotoAndStop("services");
   case 30:
      helpBox.gotoAndStop("contact");
   default:
      helpBox.gotoAndStop("error");
}
In the previous code example, although it's only possible for currentFrame to equal one value, the default clause will also execute — regardless of the value of currentFrame. However, you may not want to execute the default clause (or multiple case clauses). In this situation, you need to use the break action to "escape" the switch() action. The break action prevents subsequent clauses from being evaluated.
In the following code, only one clause can execute:
var currentFrame = _root._currentframe;
switch(currentFrame){
   case 10:
      helpBox.gotoAndStop("products");
      break;
   case 20:
      helpBox.gotoAndStop("services");
      break;
   case 30:
      helpBox.gotoAndStop("contact");
      break;
   default:
      helpBox.gotoAndStop("error");
}
You can use switch() actions for many other situations. If you wanted to make a card game in Flash, you could use a switch() expression to pick a card suit based on a random number:
1.  var suitNum = Math.round(Math.random()*3);
2.  switch(suitNum){
3.     case 0:
4.        suit = "diamonds";
5.        break;
6.     case 1:
7.        suit = "spades";
8.        break;
9.     case 2:
10.       suit = "hearts";
11.       break;
12.    case 3:
13.       suit = "clubs";
14.       break;
15. }
16. cardFace.gotoAndStop(suit);
In this code, a random number is picked (line 1) and used as an expression in the switch() action (line 2). The random number (represented as a variable named suitNum) will then be matched to a case clause. The matching clause will set a variable named suit to equal a specific card suit and exit the switch() action (lines 3 through 15). A Movie Clip instance named cardFace will go to and stop on a frame named after one of the card suits (line 16).
Tip
In a working example of a card game, the switch() code for the suit matching would occur within a function. We discuss functions in Chapter 26 "Using Functions and Arrays."
Note
The switch(), case, and default actions can be used in Flash Player 4 or higher movies. Even though the switch() syntax was only introduced in Flash MX/Flash Player 6, the ActionScript will be compiled to be compatible with Flash Player 4 or 5 if you choose these versions in the Version menu of the Publish Settings' Flash tab.
A loop is a container for a statement or series of statements repeated as long as a specified condition exists. A basic loop has three parts: the condition, the list of statements to be repeated, and a counter update. There are four types of loops in ActionScript:
Each of these loop types has a specific use. Depending on the repetitive actions you wish to loop, you need to decide how best to accommodate your code with loop actions.
Warning
These types of code-based loops do not update the contents of the stage with each pass of a loop execution. If you want to automate changes over time on the stage through code, you'll need to use an onEnterFrame() event handler or a setInterval() function. You learn more about these types of actions in Chapter 25, "Controlling Movie Clips," and Chapter 32, "Creating a Game in Flash."
In this loop type, the condition of the loop is evaluated first, and, if it is true, the actions within the curly braces are executed. The actions will loop indefinitely (causing a script error) unless there is a way out of the loop — a counter update. A counter update will increment (or decrement) the variable used in the while condition. Here you see a breakdown of a typical while loop. Note that a variable used in the condition is usually set just before the while action is executed.
var count = 1;  // Initial variable
while (count <= 10){  // Condition
  _root["clip_" + count]._xscale = 100/count; // Statements to be repeated
  count = count + 1; // Counter update
}   // Termination of loop
In this example, a variable named count starts with a value of 1. The first time the while action executes, count's value is less than (or equal to) 10. Therefore, the actions within the curly braces are executed. The first action in the loop uses the count value to form the name of a Movie Clip instance, clip_1, and alter its X Scale property by a value of 100/1 (which is equal to 100). Then the count variable is incremented by 1, giving it a new value of 2. The while condition is then re-evaluated.
The second time the while action is executed, count's value, 2, is still less than (or equal to) 10. Therefore, the actions within the curly braces are executed again. This time, however, the first action in the loop will address the clip_2 instance's X Scale property, and make that property's value 50 (100/2 = 50). Then, count will be incremented by 1, giving it a new value of 3. Again, the while condition is re-evaluated.
The while condition will continue to execute its nested actions until count exceeds a value of 10. Therefore, clip_1 through clip_10 will show a decrease in X Scale.
This type of loop is very similar to the while loop we discussed previously, with one important exception: The actions in the do{} nesting are always executed at least once. In a do . . . while loop, the condition is evaluated after the actions in the loop are executed. If the while condition is true, the actions in the do{} nesting will be executed again. If the while condition is false, the loop will no longer execute.
count = 1;  // Initial variable
do {  // do loop
  // Statements to be repeated
  _root["clip_" + count]._xscale = 100/count;
  count = count + 1; // Counter update
} while (count <= 1); // Condition
In this example, the actions within the do{} nesting will execute automatically without checking any condition. Therefore, the X Scale of clip_1 will be set to 100, and the count value will increase by 1, giving it a new value of 2. After the actions execute once, the condition is checked. Because the value of count is not less than (or equal to) 1, the loop does not continue to execute.
The for loop is a supercondensed while loop. Instead of assigning, checking, and reassigning a variable action in three different actions, a for loop enables you to define, check, and reassign the value of a counter variable.
for(i = 1; i <= 10; i++){ // Initial variable value, condition, and update
  _root["clip_" + i]._xscale = 100/i; // Statements to be repeated
}  // Termination of loop
This for loop does exactly the same thing as the while loop example we used earlier. When the loop is started, the variable i is given a starting value of 1. A condition for the loop is specified next, i <= 10. In this case, we want the loop to repeat the nested actions until the value of i exceeds 10. The third parameter of the for loop, i++, indicates that i's value should be increased by 1 with each pass of the loop. Note that this parameter can use ++ (to increase by 1) or -- (to decrease by 1) operators. You can also use expressions such as i = i*2 for the update.
The final type of loop, for . . . in, is the most complex looping mechanism. A for . . . in loop does not need a condition statement. Rather, this loop works with a find-and-replace keyword mechanism. Basically, a variableIterant is declared, which is simply a placeholder for a property or position index within an object or array, respectively. For every occurrence of the variableIterant, the actions within the for . . . in {} nesting will be executed. The for . . . in loop can only be used with objects and arrays, and even then, not all properties of this element can be enumerated.
// Placeholder and object
for(name in _root){
  // Check the data type of the object
  if(_root[name] instanceof MovieClip){
    // Statements to be repeated
   _root[name]._xscale = 50;
  } // end if statement
} // Termination of loop
In the preceding code example, the term name is used to designate a property of the _root timeline. In this case, we want to change all MovieClip instances on the Main Timeline to a 50 percent X Scale value. We don't need to specify the actual target paths of each individual instance — the for . . . in loop will search for all instances on the Main Timeline, apply the change, and exit the loop.
Although this might look a bit confusing, it can be more helpful than you can imagine. Have you ever had a bunch of nested MovieClip instances that all needed to play at the same time? In Flash 4, you would have had to use several tellTarget(){} actions, each one specifying the target path. You could use a while loop to shorten the lengthy code, but, even still, you would need to list the specific parts of the each Movie Clip path, as in:
count = 1;
while(count <= 10){
     path = eval("_root.clip_" + count);
     tellTarget(path){
          play();
     }
     count++;
}
In Flash Player 4, the preceding code block would tell clip_1 through clip_10 to start playing. But what if you didn't know (or care to remember) all the paths to several differently named Movie Clip instances? For example, if you had a Movie Clip instance named nestAnim with several nested Movie Clip instances with different names (for example, squareAnim, triangleAnim, and circleAnim), you would have to specifically name these instances as targets. In ActionScript 1.0, 2.0, and Flash Player 5 or higher, the for . . . in loop lets you control any and all nested Movie Clip instances simultaneously:
for(name in nestAnim){
     nestAnim[name].play();
}
With just three lines of code, all Movie Clip instances in the nestAnim Movie Clip instance will start to play. How? Remember that the variableIterant name is simply a placeholder for a property of the nestAnim Movie Clip object. The for . . . in loop will find every occurrence of an instance inside of nestAnim. And the word name has no significance. You could use a variableIterant myName, and everything would still work fine. Think of the variableIterant as a wildcard in file searches or directory listings in MS-DOS or UNIX:
nestAnim[*].play();
Although this syntax won't work with ActionScript, it does illustrate the processing of a for . . . in loop. Everything and anything that is playable on the nestAnim timeline will play.
Note
Check out the play.fla and forInLoop.fla files, located in the ch24 folder of the CD-ROM that accompanies this book.
The break action is not a type of loop — it is an action that enables you to quickly exit a loop if a subordinate condition exists. Suppose you wanted to loop an action that hides, at most, clip_1 through clip_10 (out of a possible 20 Movie Clip instances), but you want to have a variable control the overall limit of the loop, as upperLimit does in the following code block. upperLimit's value could change at different parts of the presentation, but at no point do you want to hide more than clip_1 through clip_10. You could use a break action in a nested if action to catch this:
var count = 1;
while(count <= upperLimit){
   if(count > 10){
      break;
   }
   _root["clip_" + count]._visible = false;
   count++;
}
Tip
You can use break statements to catch errors in your loops (such as during a debug process). However, you may want to check out Flash's breakpoint feature in the Actions and Debugger panels. For more information on this feature, read Chapter 33, "Managing and Troubleshooting Flash Movies."
Like the break action, continue enables you to exit the execution of actions within a loop. However, a continue action won't exit the loop action. It simply restarts the loop (and continues evaluating the current condition). Usually, you will place a continue action with an if nest — otherwise, it will always interrupt the actions within the loop action. For example, if you wanted to omit a particular value from going through the loop actions, you could use the continue action to bypass that value. In the following code block, we hide clip_1 through clip_10, except for clip_5:
count = 1;
while(count <= 10){
  if(count == 5){
    count++;
    continue;
  }
  _root["clip_" + count]._visible = false;
  count++;
}To create a loop, add one of the loop-type actions in the Actions panel, using the plus (+) button in the toolbar of the panel (or selecting it from the Statements
Loops in ActionScript are not appropriate for running background processes that listen for conditions to become true elsewhere in the movie. While a loop is in progress, the screen is not updated and no mouse events are captured, so most Flash actions are effectively not executable from within a loop. Loop actions are best suited to abstract operations such as string handling (for example, to check each letter of a word to see whether it contains an @ symbol) and dynamic variable assignment.
You should create loops to execute repetitive actions over time, which affect tangible objects in the movie, as repeating frames in Movie Clips. To create a permanently running process, make a Movie Clip with two keyframes. On the first frame, call the subroutine or add the statements that you want to execute; on the second frame use a gotoAndPlay(1); action to return to the first frame. Alternatively, you can use the onClipEvent(enterFrame), onEnterFrame() handler, or setInterval() function to execute repetitive actions.
Properties are characteristics (such as width and height) of movies and Movie Clips that can be retrieved and set. You can use variables to store the current value of a given property, such as:
var xPos = _root._xmouse;
which stores the current X position of the mouse pointer (relative to the Stage coordinates of the Main Timeline) in the variable xPos.
ActionScript contains a number of native programming commands known as functions. Among others, these functions include getTimer(), getVersion(), parseFloat(), parseInt(), escape(), and unescape(). It's beyond the scope of this chapter (and this book) to discuss the practical use of every new function and ActionScript element in Flash CS3. We do, however, discuss many built-in functions throughout this part of the book.
Note
Because ActionScript has expanded so much over recent versions of the Flash authoring tool, Robert Reinhardt and Joey Lott created a companion book series on Flash ActionScript to specifically address all the terms of the ActionScript language.
Whether they're called functions, subroutines, or methods, most programming languages provide a mechanism for programmers to create self-contained code modules that can be executed from anywhere in a program. ActionScript supports subroutines by using the ActionScript function constructor. You can create functions on any timeline, and, just like Movie Clip instances, functions have absolute or relative paths that must be used to invoke them. For example, if you have the following function on a Movie Clip named functions_mc, located on the Main Timeline:
function makeDuplicate(target, limit){
   for(var i=1; i<=limit; i++){
     _root[target].duplicateMovieClip(target + "_" + i, i);
   }
}
then to invoke it from another timeline, you would execute it as follows:
_root.functions_mc.makeDuplicate("clip",5);Executing it creates five duplicates of the Movie Clip instance named clip, naming the duplicates clip_1, clip_2, clip_3, clip_4, and clip_5.
In this section, we show you how to use variables to create an interactive form in Flash that accepts or rejects user input. You will create two input text fields into which Web visitors will type a username and password. Using ActionScript, you will check the values of the entered data with predefined name/value pairs.
Warning
Do not use the following example for secure information over the Web. You could use a logon sequence like this in a Flash adventure game, or modify it to work in a Flash quiz. The logon information is not secure within the confines of a Flash movie file (.swf). This example is intended to demonstrate using conditional statements in a Flash movie.
Open a new Flash file (ActionScript 2.0).
Create two text fields on one layer called text fields. Make each text field long enough to accommodate a single first name and/or password. In the Text Type drop-down menu of the Property inspector, select the Input Text option for both fields. For demonstration purposes, make the text in the text fields large — around 24 points. Make sure that you use a non-white fill color for the text.
Access the properties for each text field by selecting the text field (with the Selection tool) and opening the Property inspector, shown in Figure 24.5. For the top text field, assign the instance name
userField. For the other text field, assign the instance namepasswordField, enable the Password option, and restrict the text length to eight characters. Do not assign a Var name to either text field.Create a new layer and name it static text. Create text blocks that describe the two text fields, as shown in Figure 24.6. For example, make a text block with the word Login: and another one with the word Password:. Align these text blocks to the left of the text fields. Note that these text blocks do not need the Input text behavior; they should be Static text blocks.
Create a new Movie Clip symbol (Ctrl+F8 or
Create another layer called labels. On frame 5 of this layer, make a keyframe and assign it the label start in the <Frame Label> field of the Property inspector.
Then, create a new layer called artwork and move it underneath the actions layer. On this layer, create a tweening animation of your message fading in and out (or scaling up and down, and so on). Start the Motion tween on frame 5 of the artwork layer, underneath the
startlabel of the labels layer. You'll need to make the message a Graphic symbol of its own in order to tween the alpha state. Add enough frames and keyframes to cycle this message animation twice. The very last frame of the animation should have a frame action (on the actions layer)gotoAndStop(1);. When you are finished with this step, your Movie Clip timeline should resemble the one shown in Figure 24.7.In the main movie timeline (Scene 1), create a new layer called errorMessage. Drag the errorMessageClip symbol from the Library on to the Stage. Position it underneath the user and password text fields. Select the Movie Clip instance on the Stage and access its settings in the Property inspector. Assign the instance name of
errorMessage.Tip
In the Property inspector, you can temporarily change the symbol type of the
errorMessageinstance to a Graphic instance, and specify frame number 5 in the first field. This technique enables you to more accurately place a symbol that has an empty first frame. When you are finished positioning the instance, make sure you switch the instance behavior back to Movie Clip and rename the instance. Do not change the behavior of the symbol in the Library panel; this method only applies to the symbol behavior on an instance level.Create another layer named labels. Assign a frame label of
startto frame 1 of the labels layer. Add a keyframe to frame 10 of the labels layer, and label it success. Make sure all other layers on frame 10 have empty keyframes.Create an actions layer, and place it at the top of the layer order. On the first frame, add a
stop();frame action in the Actions panel.Extend all the layers to frame 20 by selecting frame 20 across all of the layers and pressing F5.
Make a new layer called success and place a text block and/or other graphics suitable for a successful login entry. It should only appear on frame 10, so if necessary, move its initial keyframe to that frame. When you're finished with the step, your Stage and Main Timeline should resemble Figure 24.8.
Create a new layer on the Main Timeline called button, and make a Button symbol on it. You can make one of your own, or use one from Flash's Button library (Window
on (release){ if (userField.text == "Sandra" &&passwordField.text == "zebra24"){ this.gotoAndStop("success"); } else { this.errorMessage.gotoAndPlay("start"); } }
You can change the compared values for the
userField.textandpasswordField.textvalues to whatever string value you desire.Add an empty keyframe (F7) on frame 10 of the button layer.
Save the Flash document as
login_100.fla. Test the movie's functionality with the Test Movie command (Control


Most login forms like this work with the Return or Enter key active to submit the information. However, this key press also has functionality in the Test Movie environment, so assign a key press to the Button symbol instance only after you have tested the initial ActionScript code. You can also choose Control
As you'll learn later in Chapter 26, a Button instance is not a great place to store a lot of code — it's usually better to place the majority of your code in a keyframe, contained within a function, or better yet, in a separate .as file that is specified in an #include directive. For now, however, as you're learning the basics of the ActionScript programming, don't feel pressured to take on too much too fast; make sure you understand the core principles of logic and conditions before you move on to additional programming topics.
Note
See Chapter 33, "Managing and Troubleshooting Flash Movies" for more coverage of code debugging. You'll also find more information about using the Debugger panel and other useful features, such as breakpoints.
Note
You can find the completed example, login_100.fla, in the ch24 folder of this book's CD-ROM. You will also find other logon examples that use different methods to make the username and password comparisons.
Note
We'd like to know what you think about this chapter. Visit www.flashsupport.com/feedback to send us your comments.
Before you begin to add complex interactivity to your Flash document, you need to break down the steps in the interactive process in a natural language that you can understand.
After you know what you want your presentation to do, you can start to clarify the interactive steps and translate those steps into Flash-compatible actions.
You can add ActionScript to your Flash document with the Actions panel. The Actions panel's Script pane is where you type or insert the actions that are invoked from elements in a Flash movie.
ActionScript 2.0 can declare data types for each variable you use in a Flash movie. This practice, known as strong typing, enables you to catch errors within your ActionScript code more easily.
Variables, a programming device, enable you to store property values, strings, paths, or expressions in order to reduce the redundancy of code and to simplify the process of computing information.
Variables can be declared with actions, input, or dynamic text fields, or by loading them from an external data source, such as a server-side script, text document, or HTML-specified
flashvarsvalues.Expressions are equations that refer to a mathematical operation, a string concatenation, or an existing code object (another variable or object value).
You can use
if...else if...elseactions to add intelligence to your interactive actions. These actions test a condition and execute a certain set of actions if the condition is true.Loop actions execute a given set of actions repeatedly until a loop condition is no longer true.