Defining collisions
Using the
hitTest()methodUsing the
ColorTransformclassAccessing the Sound class
Controlling the volume and balance of a sound
Printing Flash content with the
PrintJobclass
This chapter continues your exploration of the MovieClip class in ActionScript. You explore the ins and outs of collision detection for MovieClip objects and learn how to control the visibility of the mouse pointer or to attach a custom cursor to the mouse pointer. You look at other ActionScript elements such as ColorTransform and Sound objects that work with MovieClip objects to create visual and audio effects, respectively.
Tip
Flash Player 8 introduced the ColorTransform class, which enables you to more easily apply color effects to your MovieClip objects. You can continue to use this class in ActionScript 2 targeted for Flash Player 9.
You will also learn how to print Flash content with the PrintJob class, introduced with Flash Player 7. The Flash Player creates high-quality output for hard copy artwork.
Have you ever wanted to detect the intersection of two elements in a Flash movie? If two Movie Clip instances overlap on the Stage, how would you know? How would you tell ActionScript to look for an overlap? In ActionScript, there are two primary types of intersections (or collisions):
User-initiated collisions: This type of intersection occurs when you click and drag an object (a
MovieClipobject) and overlap anotherMovieClipobject as you drag or release. You can also consider the mouse pointer an "object" that can intersect with another object. For example, if you move the mouse pointer over aMovieClipobject, you can detect when the mouse pointer enters the space of theMovieClipobject.Script- or time-based collisions: This type of intersection between objects happens when randomly moving objects collide with one another, such as balls bouncing around the Stage, detecting the edges of the frame, and responding to other boundaries or objects.
In this section, you look at examples in each of these categories. Let's begin with a quick review of the _droptarget property of the MovieClip object.
A collision between two MovieClip objects can occur if the user drags one Movie Clip instance to the location of another Movie Clip instance. We first examined the startDrag() action and method in Chapter 25, "Controlling Movie Clips." In the dog movie, you used the _droptarget property of a MovieClip object to detect whether the area of one MovieClip object occupied the area of another MovieClip object. To recap, you can test the intersection of two Movie Clips with the following code:
var mc_1:MovieClip;
var mc_2:MovieClip;
mc_1.onPress = function():Void {
 this.startDrag();
};
mc_1.onRelease = mc_1.onReleaseOutside = function():Void {
 trace(eval (this._droptarget));
 if(eval(this._droptarget) == mc_2){
   trace("this MC overlaps mc_2");
 } else {
   trace("this MC does NOT overlap mc_2");
 }
 stopDrag ();
}
This code could occur on a MovieClip object named mc_1. When the user clicks the MovieClip instance, the MovieClip.startDrag() method is invoked, and the user can drag the Movie Clip instance on the Stage. When the user releases the mouse, the _droptarget property (which returns target paths in slash syntax) is evaluated to convert the target path to dot syntax. If the _droptarget property returns the path to another instance, the if condition sees whether the path matches mc_2. If the paths match, the trace() action indicating an overlap is executed. Otherwise, a separate trace() action notifies you that the instance is not on top of mc_2.
You can also perform more advanced collision detection using the hitTest() method of the MovieClip object. hitTest() does exactly what it says—it tests to see whether a "hit" occurred between two elements. hitTest() has the following two formats:
mc.hitTest(anotherInstance);
or
mc.hitTest(x coordinate, y coordinate, shapeFlag);
With this method, you can determine whether the X and Y coordinates are within the space occupied by the Movie Clip instance. You can use onClipEvents such as mouseMove or newer event handlers such as onMouseMove() to check constantly for a hit occurrence:
onClipEvent(mouseMove){
 if(this.hitTest(_root._xmouse, _root._ymouse, true)){
  trace("A hit has occurred");
 }
}mc.onMouseMove = function(){
if(this.hitTest(_root._xmouse, _root._ymouse, true)){
trace("A hit has occurred");
}
};This code reports a trace() action anytime the mouse pointer is moved within the artwork of the Movie Clip instance to which the onClipEvent or onMouseMove() handler is attached. The shape flag attribute of hitTest() defines the actual test area for the hit. If the shape flag is set to true, a hit occurs only if the X and Y coordinates occur within the actual artwork of the Movie Clip instance. If the shape flag is set to false, a hit occurs whenever the X and Y coordinates occur within the bounding box of the Movie Clip instance. In Figure 27.1, if the left circle uses a shape flag of true, a hit is reported whenever the X and Y coordinates occur within the shape of the circle (not within the bounding box). If the right circle uses a shape of false, a hit is reported when the X and Y coordinates occur within the bounding box.

Figure 27.1. The shape flag determines the boundary of the Movie Clip instance for the hitTest() method.
Note
You can see a working example of shape flags and the hitTest() method in the hitTest_xy.fla file, located in the ch27 folder of this book's CD-ROM. Open this Flash document, and test the movie. As you move your mouse within the space of each object, you will notice that the hit area is different for each object. You create your own Flash movie that uses hitTest() in our coverage of the Mouse class in this chapter.
The other format for the hitTest() method is to simply specify a target path to compare for a hit occurrence. With this syntax, you cannot use a shape flag option; if any area of the bounding box for a Movie Clip instance touches the bounding box of the tested instance, a hit occurs. For example, you can modify the ActionScript used earlier to indicate a hit between instances, instead of X and Y coordinates:
onClipEvent(mouseMove){
 if(this.hitTest(mc_2)){
trace("A hit has occurred.");
}
}mc_1.onMouseMove = function(){
if(this.hitTest(mc_2)){
trace("A hit has occurred.");
 }
};This code assumes that other actions are actually initiating a startDrag() action. Also, we have omitted the other half of the if condition in both this example and the previous example. If you omit a condition operator and test condition, ActionScript assumes that you are testing for a true result (as a Boolean value). The following if conditions are exactly the same:
var myMouseClick:Boolean = true;
if(myMouseClick){
 trace("myMouseClick is true.");
}
if(myMouseClick == true){
 trace("myMouseClick is true.");
}
Therefore, to test for a true value with any if statement, specify the variable (or method) that has a Boolean value. The hitTest() method yields either a true (a hit has occurred) or a false (no hit has occurred) result. Note that, with scripting languages, it is more common to use the former example for testing true conditions.
Note
You can see a working example of targets and the hitTest() method in the hitTest_target.fla file, located in the ch27 folder of this book's CD-ROM. You will create a Flash movie that uses this type of hitTest() method in our coverage of the Sound class later in this chapter.
With ActionScript, you can emulate custom mouse pointers (that is, the graphic shown for the mouse pointer) by using the startDrag() behavior (with lock to center true) on Movie Clips containing icon graphics. However, this technique does not hide the original mouse pointer—it appears directly above the dragged Movie Clip instance. ActionScript features a static Mouse class, which has the following two simple methods:
show(): This method reveals the mouse pointer. By default, the mouse pointer appears at the start of a movie.hide(): This method turns off the mouse pointer's visibility. To reveal the mouse pointer again, execute theshow()method.
Once the Mouse object (that is, the mouse pointer) is hidden, you can lock a MovieClip object containing a new icon graphic to the position of the mouse pointer. In this section, you create a Flash movie with a large circle MovieClip object. When the mouse pointer moves into the area of this object, you attach a smaller circle to the mouse pointer's position. The hitTest() method will be used to determine when the mouse pointer moves into the area of the large circle, and the attachMovie() method of the MovieClip object will affix the small circle to the mouse pointer's position.
Create a new Flash document (Ctrl+N or

Select the Oval tool and draw a circle. In the Property inspector, set the circle's size to 25 × 25.
With the circle artwork selected, press the F8 key to convert the artwork into a Movie Clip symbol. Name the symbol circleClip.
Name the instance on the Stage circle_big in the <Instance Name> field of the Property inspector. Increase the size of this particular instance to 200 × 200, and apply a Tint effect to fill the instance with a different solid color. Center the instance on the Stage using the Align panel.
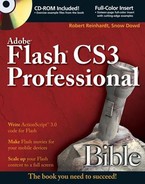
Now you have to link the circleClip symbol in the Library panel to the exported Flash movie file (.swf). Right-click (Control+click on the Mac) the circle symbol, and choose Linkage. Select the Export for ActionScript check box, and the Identifier field auto-fills with the text circleClip, as shown in Figure 27.2. Click OK to accept these settings.
After the circle symbol is linked, you can dynamically insert the symbol into the Flash movie with ActionScript. Remember that you want to attach the circle to the mouse pointer when it enters the space of the
circle_biginstance.On the Main Timeline (that is, Scene 1), create a new layer and name it actions. Select frame 1 of this layer, and open the Actions panel. Type the code shown in Listing 27.1 into the Script pane as follows. Do not type the

Tip
Any code listings, such as Listing 27.1, are available on this book's CD-ROM, in the respective chapter folder. Listing files are .as files, so you can even use the
#includedirective to just add the listing's code to your .fla file.Example 27.1. The onMouseMove() Handler for the circle_big Instance
1. var circle_big:MovieClip; 2. 3. circle_big.onMouseMove = function():Void { 4. if (this.hitTest(_root._xmouse, _root._ymouse, true)) { 5. var mc:MovieClip = !(circle_sm instanceof MovieClip) ?_root.attachMovie("circleClip", "circle_sm", 1) : circle_sm; 6. mc._x = _root._xmouse; 7. mc._y = _root._ymouse; 8. Mouse.hide(); 9. updateAfterEvent(); 10. } else { 11. if(circle_sm instanceof MovieClip) circle_sm.removeMovieClip(); 12. Mouse.show(); 13. } 14. };Here, you use the event handler
onMouseMove()forMovieClipobjects. This handler is assigned to thecircle_bigin line 3. When the mouse moves in the Flash movie, thefunction(){}code executes in lines 4 through 14.If the X and Y positions of the mouse pointer intersects with the
circle_biginstance, theifcondition in line 4 executes. Line 5 checks to see if the new graphic (that is, the circleClip symbol in the Library) exists in the movie. If it doesn't, the symbol is attached to the Main Timeline (_root) in line 5 as well. The new instance is namedcircle_sm.Note
For more information on the
?:conditional operator, search for the phrase "?: conditional operator" in the Flash Help panel (Help
Lines 6 and 7 position the X and Y coordinates of the
circle_sminstance by referencing the current position of the mouse pointer (_root._xmouseand_root._ymouse). Line 8 hides the mouse pointer icon, while line 9 uses theupdateAfterEvent()function to force a video refresh of the Flash movie. This enables thecircle_smto move very smoothly across the Stage.Lines 10 through 13 execute if the mouse pointer is not within the space of the
circle_biginstance. Line 11 checks to see ifcircle_smexists in the movie—if it does, it is removed. The mouse pointer reappears when the mouse moves outside of thecircle_biginstance (line 12).Save your Flash document as
mouse_hitTest.fla, and test it (Ctrl+Enter or


That might seem like a lot of work to hide a mouse pointer, but in the process, you have learned how to attach your own icons to the mouse pointer. You can use this same methodology to add any custom graphic to the mouse pointer. Simply add a different linked symbol to the Library, and change the linkage ID in the attachMovie() method.
Note
You can find the completed example, mouse_hitTest.fla, in the ch27 folder of this book's CD-ROM.
The ColorTransform class in ActionScript gives you unprecedented control of the appearance of your MovieClip objects. By controlling the color (and transparency) of your artwork with ActionScript's ColorTransform class, you can:
Create on-the-fly color schemes or "skins" for Flash interfaces.
Enable users to select and view color preferences for showcased products on an e-commerce site.
Instantly change the color attributes of a Flash design-in-progress for a client.
Because color is controlled through the ColorTransform class, we'll quickly review the unique properties within this class. Refer to Table 27.1 for more information. Note that this table is organized by order of practical use.
Warning
The ColorTransform class requires Flash Player 8 or higher. The older Color class for Flash Player 5 and higher is officially deprecated in Flash Player 8. If you need to control the color of MovieClip instances in Flash Player 7 or earlier movies, use the Color class instead. You can read our archived coverage of the Color class from the Macromedia Flash MX 2004 Bible (Wiley, 2004) at www.flashsupport.com/archive.
Table 27.1. Properties for the ColorTransform Class
To manipulate the color attributes of a Movie Clip instance, you need to create a new ColorTransform object that references the Movie Clip instance. In the following steps, you learn to use the constructor for the ColorTransform object. Let's work out the steps required to take control of color properties.
Note
For the exercises with the Color object, make a copy of the dogColor_starter.fla document in the ch27 folder of this book's CD-ROM. Thank you, Sandro Corsaro, of www.sandrocorsaro.com, for supplying the dog artwork!
Save the starter file as
dogColor_100.fla.Select the instance of the dog graphic on the Stage. Open the Property inspector and name this Movie Clip instance
dog_1.Create a new layer on the Main Timeline, and name the layer buttons.
Open the Components panel and drag an instance of the
Buttoncomponent onto the Stage. Place the instance near the left corner of the Stage. We discuss components in more detail in Chapter 33, "Using Components." For now, we guide you through the use of this component for the purposes of this exercise.Select the
Buttoncomponent instance on the Stage, and open the Property inspector. Make sure the Parameters tab is selected in the inspector. Name this instanceredButton. Type the text Red in the label field. Refer to the settings shown in Figure 27.4.Now you need to create a
changeColor()function in the movie. This function is executed by theredButtoninstance when the button is clicked. Create a new layer on the Main Timeline and name it actions. Select frame 1 of the actions layer, and open the Actions panel (F9, or Option+F9 on the Mac). Type the following code into the Script pane:1. import flash.geom.ColorTransform; 2. 3. var dog_1:MovieClip; 4. var redButton:mx.controls.Button; 5. 6. redButton.addEventListener("click", changeColor); 7. 8. function changeColor(evt:Object):Void { 9. var label:String = evt.target.label.toLowerCase(); 10. if (label == "red") { 11. var ct:ColorTransform = new ColorTransform(); 12. ct.rgb = 0xFF0000; 13. dog_1.transform.colorTransform = ct; 14. } 15. }Line 1 imports the
ColorTransformclass so that the ActionScript compiler can correctly create the Flash movie on publish. Lines 3 and 4 declare the data types of thedog_1andredButtoninstances, respectively.Line 6 tells the
redButtoninstance to register thechangeColor()function as a listener for click events. Whenever theredButtoninstance is clicked, thechangeColor()function is invoked.The
changeColor()function is defined on lines 8 through 15. In this function, theevtargument represents an event object that theButtoninstance passes to the function. When theredButtoninstance is clicked,evt.targetwill equalredButton. (You'll be adding another instance in short order.) Line 9 of this function establishes a local variable namedlabelthat returns the label text inside of thetargetinstance and converts the label text to lowercase. Iflabelequals"red"in line 10, lines 11 through 13 will execute. Line 11 creates a newColorTransformobject calledct. Once thectobject is initiated, you can access properties of theColorTransformobject, such asrgb. In line 10, you set the color to pure red, designated by0xFF0000in hexadecimal. In line 13, you apply thectinstance to thecolorTransformproperty of theMovieClip.transformproperty.Save the Flash document, and test the movie. Click the
redButtoninstance on the Stage. The color of thedog_1Movie Clip should change to bright red. Close the Flash movie and return to the Flash CS3 authoring environment.To see that
rgbis both a property you can write and read, let's create sometrace()messages for the Output panel. Go back to thechangeColor()function on frame 1. Add the following line of code just before the closing curly brace (}) of theif()action. Type this as one line of code:trace("ct's RGB numeric value = " + ct.rgb);Save the document and test the movie. When you click the
redButtoninstance, the Output panel opens and displays the following text:ct's RGB numeric value = 16711680
To change this value back to the hexadecimal value you entered in the
rgbproperty, you need to convert the value to base 16. Add the following action after the lasttrace()action from Step 8:trace("ct's RGB hex value = " + ct.rgb.toString(16));Save the document and test the movie. When you click the
redButtoninstance, the Output panel should open and display the new value:ct's RGB numeric value = 16711680 ct's RGB hex value = ff0000
However, you won't need to convert
rgb's native return value to set anotherColorTransformobject equal to a previousrgbvalue. In the following steps, you will create another dog andColorTransformobject team.Duplicate the
dog_1Movie Clip instance on the Stage (EditDuplicate the Button component instance on the Stage, and position the new instance below the original one. In the Property inspector, change its instance name to
passRedButton. Change itslabelvalue to Pass Red.Select frame 1 of the actions layer, and open the Actions panel. On the closing curly brace line of the existing
if()code in thechangeColor()function, add the code shown in bold in Listing 27.2. Also, add the new variables shown in bold formatting at the top of the listing.Example 27.2. Checking for the Pass Red Label
import flash.geom.ColorTransform; var dog_1:MovieClip;
var dog_2:MovieClip;var redButton:mx.controls.Button;var passRedButton:mx.controls.Button;redButton.addEventListener("click", changeColor);passRedButton.addEventListener("click", changeColor);function changeColor(evt:Object):Void { var label:String = evt.target.label.toLowerCase(); if (label == "red") { var ct:ColorTransform = new ColorTransform(); ct.rgb = 0xFF0000; dog_1.transform.colorTransform = ct; trace("ct's RGB numeric value = " + ct.rgb); trace("ct's RGB hex value = " + ct.rgb.toString(16)); }else if (label == "pass red") {var ct:ColorTransform = new ColorTransform();ct.rgb = dog_1.transform.colorTransform.rgb;dog_2.transform.colorTransform = ct;}}Tip
For this example, we wanted to demonstrate the reading and writing of the
rgbproperty. You can also simply pass thetransformproperty, which includes theMovieClipinstance's alpha value, to anotherMovieClipobject:dog_2.transform.colorTransform = dog_1.transform.colorTransform;
Save the Flash document and test the movie. When you click the
redButtoninstance, thedog_1Movie Clip instance turns red. When you click thepassRedButtoninstance, thedog_2Movie Clip instance turns red.

Note
If you click the second Button instance first, the dog_2 Movie Clip instance will turn black. Why? Because the first button's actions were not executed, and there was no previous rgb property value for the new rgb property. Consequently, ActionScript returns a zero value. In hexadecimal color, zero is equivalent to black.
Now that you've had some experience with the ColorTransform object's rgb property, let's move on to a more complex use of ColorTransform. You'll use the Flash document from this exercise, so keep the dogs on the Stage!
Note
You can find the completed Flash document, dogColor_100.fla, in the ch27 folder of this book's CD-ROM.
The ColorTransform class also features multiplier and offset properties, which require a more thorough understanding of RGB color space.
The multiplier and offset properties of the ColorTransform class are
redMultiplier—The Red channel percentageredOffset—The Red channel offsetgreenMultiplier—The Green channel percentagegreenOffset—The Green channel offsetblueOffset—The Blue channel offsetalphaMultiplier—The Alpha channel percentagealphaOffset—The Alpha channel offset
The multiplier properties are decimal values, ranging in value from −1 to 1. The offset properties are integer-based from −255 to 255 (derived from 24-bit RGB color space, in which each 8-bit color channel can have a range of 256 values).
These properties and values may seem complex, so refer to the Advanced options of the Color menu for symbol instances in the Property inspector for guidance. With the Advanced option chosen in the Color menu, click the Settings button. In the Advanced Effect dialog box, the left-hand color controls are percentage-based (or multipliers), whereas the right-hand controls are offset-based. Admittedly, color is difficult to visualize from numbers. To accurately predict the color changes with ColorTransform, we use the Advanced Effect dialog box to help us out.
Note
Make a copy of the dogColor_100.fla file if you didn't complete the previous section's exercise. This document is located in the ch27 folder of this book's CD-ROM.
Resave the Flash document from the previous section as
dogColor_200.fla.Select the original
dog_1Movie Clip instance on the Stage. Open the Property inspector, and choose the Advanced option in the Color menu. Press the Settings button to the right of the menu. In the Advanced Effect dialog box, enter the following value on the left-hand side: −100% Blue. On the right-hand side, enter these values: 37 G and 255 B. Refer to Figure 27.5. Click OK to close the dialog box. With these values, thedog_1instance should be a monochrome blue with yellow eyes. Normally, you would want to write these values down so that you had them to use later. Because you have them printed here in this book, erase them by choosing None from the Color menu in the Property inspector. Thedog_1instance should now appear in its original state.Duplicate one of the existing
Buttoncomponent instances on the Stage. Place the duplicated instance underneath the lastButtoncomponent instance. Name the instancerabidButton. Change thelabelvalue to Rabid.With this new instance, you will create some code that will initiate a new
ColorTransformobject. The new object will be given properties that have the same values as those determined in Step 2.Select frame 1 of the actions layer and open the Actions panel (F9, or Option+F9 on the Mac). Add the bold code shown in Listing 27.3.
Example 27.3. Checking for the rabid Label
import flash.geom.ColorTransform; var dog_1:MovieClip; var dog_2:MovieClip; var redButton:mx.controls.Button; var passRedButton:mx.controls.Button;
var rabidButton:mx.controls.Button;redButton.addEventListener("click", changeColor); passRedButton.addEventListener("click", changeColor);rabidButton.addEventListener("click", changeColor);function changeColor(evt:Object):Void { var label:String = evt.target.label.toLowerCase(); if (label == "red") { var ct:ColorTransform = new ColorTransform(); ct.rgb = 0xFF0000; dog_1.transform.colorTransform = ct; trace("ct's RGB numeric value = " + ct.rgb); trace("ct's RGB hex value = " + ct.rgb.toString(16)); } else if (label == "pass red") { var ct:ColorTransform = new ColorTransform(); ct.rgb = dog_1.transform.colorTransform.rgb; dog_2.transform.colorTransform = ct; }else if (label == "rabid"){var ct:ColorTransform = new ColorTransform();ct.blueOffset = 255;ct.blueMultiplier = −1;ct.greenOffset = 37;dog_1.transform.colorTransform = ct;}}In the preceding code, you created a new
ColorTransforminstance namedct. In addition torgb, ColorTransforminstances can have offset and multiplier values for each color (and alpha) channel. In Listing 27.3, you assigned the values you determined in Step 2. Offset values have a one-to-one relationship with the offset values displayed in the Advanced Effect dialog box, but multiplier values are divided by 100. So, if you have a multiplier value of −100 in the Advanced Effect dialog box, the equivalentColorTransformmultiplier value would be −1. After you have set the appropriate offset and/or multiplier values, you apply thectinstance to thecolorTransformproperty of thetransformproperty of thedog_1instance.Note
The
ColorTransformclass is one of two types of alterations to Movie Clips that can be made with theTransformclass. Thetransformproperty of theMovieClipclass uses theTransformclass, which is available in Flash Player 8 (and higher) and encompasses a wide range of characteristics that can be applied to theMovieClipclass. For more detailed information of theTransformclass, refer to the Flash Help panel.Save the Flash document, and test the movie. Click the new
Buttoninstance that you added in Step 3. The colors of thedog_1Movie Clip instance should change to match those you saw in Step 2. Close the Test Movie window, and return to the Flash CS3 authoring environment.Now you will create a button that restores the original look of the
dog_1Movie Clip instance.Duplicate one of the
Buttoninstances, and place the new instance underneath the lastButtoninstance. In the Property inspector, name this component instancerestoreButton. Change thelabelvalue to Restore.Select frame 1 of the actions layer, and open the Actions panel (F9, or Option+F9 on the Mac). Add the bold code shown in Listing 27.4 to the Script pane.
Example 27.4. Checking for the Restore Label
import flash.geom.ColorTransform; var dog_1:MovieClip; var dog_2:MovieClip; var redButton:mx.controls.Button; var passRedButton:mx.controls.Button; var rabidButton:mx.controls.Button;
var restoreButton:mx.controls.Button;redButton.addEventListener("click", changeColor); passRedButton.addEventListener("click", changeColor); rabidButton.addEventListener("click", changeColor);restoreButton.addEventListener("click", changeColor);function changeColor(evt:Object):Void { var label:String = evt.target.label.toLowerCase(); if (label == "red") { var ct:ColorTransform = new ColorTransform(); ct.rgb = 0xFF0000; dog_1.transform.colorTransform = ct; trace("ct's RGB numeric value = " + ct.rgb);trace("ct's RGB hex value = " + ct.rgb.toString(16)); } else if (label == "pass red") { var ct:ColorTransform = new ColorTransform(); ct.rgb = dog_1.transform.colorTransform.rgb; dog_2.transform.colorTransform = ct; } else if (label == "rabid"){ var ct:ColorTransform = new ColorTransform(); ct.blueOffset = 255; ct.blueMultiplier = −1; ct.greenOffset = 37; dog_1.transform.colorTransform = ct; }else if (label == "restore"){var ct:ColorTransform = new ColorTransform();dog_1.transform.colorTransform = ct;}}In Listing 27.4, you simply need to create a new
ColorTransforminstance (ct) and pass it to thecolorTransformproperty of theMovieClipinstance,dog_1. A newColorTransforminstance has default multiplier and offset values. So, when it's passed to aMovieClipobject, the color properties are set back to the original values.Save the Flash document again, and test the movie. Click the
rabidButtoninstance you created in Step 3. After thedog_1Movie Clip instance changes color, click therestoreButtoninstance you created in Step 6. Voila! Thedog_1Movie Clip instance reverts to its original color. Click theredButtoninstance that you created in the previous section. This button changes the appearance of thedog_1Movie Clip instance to a solid red color. Now click therestoreButtoninstance—thedog_1Movie Clip instance reverts to its original look!

Note
You can find the completed document, dogColor_200.fla, in the ch27 folder of this book's CD-ROM.
Although the ColorTransform.rgb property can alter basic color properties of MovieClip objects, the offset and multiplier properties are the color-control powerhouse. Any look that you can accomplish with the Advanced Effect dialog box, you can reproduce with the ColorTransform class.
ActionScript offers many classes, and one of the most exciting classes to use is the Sound class. As with most classes, the Sound class has predefined methods that you can use to control each new Sound class. Table 27.2 provides an overview of the Sound class and its common methods.
Tip
Flash Player 8 and higher can support up to 32 channels of audio (or 16 channels of stereo audio) simultaneously.
Table 27.2. Common Methods for the Sound Class
Definition | Options | |
|---|---|---|
| Creates a new instance of a sound file (.aif or .wav) available in the Library. The new instance becomes a part of the | soundObject.attachSound(libraryID); where: soundObject refers to the libraryID is the name of the sound in the Symbol Linkage properties (available in the Library). |
| Loads a separate MP3 audio source file (.mp3) into a | soundObject.loadSound(URL, isStreaming); where: URL is the location of the MP3 file. This location can be a relative or absolute path. isStreaming determines if the loading sound will begin playback as soon as enough bytes have downloaded ( |
| Plays the targeted | soundObject.start(inPoint, loopFactor); where: inPoint is the time (in seconds) in the sound where playback should begin. loopFactor is the number of times the sound should be repeated. Both of these parameters are optional and can be omitted. |
| Stops playback of the targeted | soundObject.stop(libraryID); where: libraryID is the name of the sound in the Linkage properties (available in the Library). |
Changes the overall volume of the specified | soundObject.setVolume(volume); where: volume is a number between 0 and 100. | |
| Retrieves the current volume of the | soundObject.getVolume(); No options or arguments for this method. |
| Changes the offset of sound output from both the left and right channels. | soundObject.setPan(panValue); where: panValue is a value between −100 (full left-speaker output) and 100 (full right-speaker output). Use a value of 0 to balance sound output evenly. |
| Retrieves the values created with a previous | soundObject.getPan(); No options or arguments for this method. |
| Changes the volume for each channel of the specified | soundObject.setTransform(soundTransformObject); where: soundTransformObject is the name of an object that has percentage properties for left and right output for the left channel, and left and right output for the right channel. |
| Retrieves the values established with the last setTransform execution. You use this method to reapply sound transforms to new Sounds objects, or to store setTransform values. | soundObject.getTransform(); No options or arguments for this method. |
The following list of Sound class features offers reasons for using Sound instances over traditional sound Movie Clips or keyframe sounds. You have:
Dynamic event sounds that play in a random or user-defined order
Precise control over volume and panning
The ability to dump (or erase) a
Soundobject when the sound is no longer needed
Note
All Sound objects are treated as Event sounds. You cannot use Sound objects to control the playback or frame rate like Stream sounds can. However, ActionScript does enable you to load MP3 files on the fly and "stream" their playback—these types of sounds, however, cannot control playback or frame-rate synchronization. For more information on Synch modes for sound, please refer to Chapter 15, "Adding Sound." (The usage of the term "stream" in this context does not imply real-time streaming, but rather a progressive download for the MP3 file.)
The Sound class uses sounds directly from the movie's library or from an MP3 file loaded at runtime. You cannot use the Sound class to control sounds specified in the Property inspector for any given keyframes.
Tip
You can, however, control Stream sounds attached to keyframes on a given timeline by controlling an empty Sound object. Any methods applied to the Sound object will be passed along to the Stream sound.
The next section shows you how to create Sound objects using the object constructor with the attachSound() and start() methods.
In the Chapter 19, "Building Timelines and Interactions," you learned how to use behaviors to identify and play sounds. From a conceptual point of view, manually creating each sound behavior enabled you to see and work with each sound "object" very easily. However, you can produce the sounds for a sound library much more quickly using your own ActionScript code.
Note
In this section, you start with the linked sounds you created in Chapter 19, "Building Timelines and Interactions." Make a copy of the pianoKeys_sounds.fla file from the ch19 folder of this book's CD-ROM.
Using the Open External Library command in the File
If you don't have a new untitled Flash document open, create a new Flash file (ActionScript 2.0). Save the new document as
soundLib_ActionScript.fla.Change the background color of the document to black in the Document Properties dialog box (Modify
Open the new document's Library panel (Ctrl+L or
Close the
pianoKeys_soundsLibrary panel, and save your Flash document.Now, you need to add the ActionScript code that will create your
Soundobjects. You will construct a function that, when executed, will form a list of sound instances. On the Main Timeline (that is, Scene 1), rename Layer 1 to actions. Alt+double-click (or Option+double-click on the Mac) frame 1 of this layer. This opens the Actions panel. Type the following code into the Script pane:var sounds:Array; function createLib(num:Number):Void { var lib:MovieClip = this.createEmptyMovieClip("lib", 1); sounds = new Array(); for (var i:Number = 1; i<=num; i++) {The first line establishes an array variable named
sounds, which will store references to each new sound added to the sound library. The next line of code establishes the name of your function,createLib(). You will want to dynamically change the number of sounds you create with this function. Therefore, we assign an optional parameter (called an argument)numthat will be passed to the nested actions within the function.The third line creates an empty
MovieClipobject,lib. This instance will hold individual sound targets, which you create in the next step.The fourth line creates a new
Arrayobject,sounds. This array stores theSoundobjects that thecreateLib()function creates.The fifth line starts a
forloop that cycles its nested actions until the conditioni<=numis no longertrue. istarts (or initializes) with a value of1, and the syntaxi++tellsito increase by1with each pass of theforloop.In the next step, you want the
forloop to create a new instance of theSoundobject for each sound in the Library, and attach each sound in the Library to its new instance.In the Actions panel, add the following ActionScript to the code from Step 6:
var mc:MovieClip = lib.createEmptyMovieClip("snd_"+i, i);
  var snd:Sound = new Sound(mc);
  snd.attachSound("key_"+i);
  sounds.push(snd);
 }
}
The first line creates a new
MovieClipobject, whose name starts withsnd_. This instance is stored with thelibinstance. The local variablemcis a reference to the newMovieClipobject as well. With each pass of the loop, a new instance is created (for example,snd_1, snd_2, and so on). Each instance is used to store the attached sound later in theforloop.The second line makes a new
Soundobject that points to the timeline referenced by thetargetvariable. Ultimately, yourSoundobjects will be tied to instances nested within thelibMovie Clip instance, which you'll see later.The third line uses the
attachSound()method to take a sound element in the Library and attach it to theSoundobject. The argument for theattachSound()method is specified as"key_" + i. On each pass of theforloop, this expression will return"key_1", "key_2", and so on until the limit prescribed by thenumargument is reached.The complete block of code on the first keyframe of the actions layer is shown in Listing 27.5.
Example 27.5. The createLib() Function
var sounds:Array;

function createLib(num:Number):Void {
   var lib:MovieClip = this.createEmptyMovieClip("lib", 1);
   sounds = new Array();
   for (var i:Number = 1; i <= num; i++) {
      var mc:MovieClip = lib.createEmptyMovieClip("snd_" + i, i);
      var snd:Sound = new Sound(mc);
      snd.attachSound("key_" + i);
      sounds.push(snd);
   }
}
Now that you have a function defined to create all the
Soundobjects, you need to invoke the function. With the code for frame 1 of the actions layer displayed in the Actions panel, type the following code just before thecreateLib()function definition:createLib(7);
This line of code invokes the
createLib()function. In addition to executing thecreateLib()method, you're also sending the function the number 7 as thenumargument. Therefore, sevenSoundobjects are created.Save the Flash document and test it (Ctrl+Enter or
Variable _level0.sounds = [object #2, class 'Array'] [
    1:[object #3, class 'Sound'] {
      id3:[getter/setter] undefined,
      duration:[getter/setter] 1752,
      position:[getter/setter] 0
    },
    2:[object #4, class 'Sound'] {
      id3:[getter/setter] undefined,
      duration:[getter/setter] 1602,
      position:[getter/setter] 0
    },
    3:[object #5, class 'Sound'] {
      id3:[getter/setter] undefined,
      duration:[getter/setter] 1822,
      position:[getter/setter] 0
    },
    4:[object #6, class 'Sound'] {
      id3:[getter/setter] undefined,
      duration:[getter/setter] 1672,
      position:[getter/setter] 0
    },
    5:[object #7, class 'Sound'] {
      id3:[getter/setter] undefined,
      duration:[getter/setter] 1660,
      position:[getter/setter] 0
    },
    6:[object #8, class 'Sound'] {
      id3:[getter/setter] undefined,
      duration:[getter/setter] 1728,
      position:[getter/setter] 0
    },
    7:[object #9, class 'Sound'] {
      id3:[getter/setter] undefined,
      duration:[getter/setter] 1785,
      position:[getter/setter] 0
    }
  ]
Close the Test Movie window and return to the Flash CS3 authoring environment. Select frame 1 of the actions layer and add this last bit of code to the Script pane:
sounds[0].start();
The first line of code targets the first declared element, 0, of the
soundsobject and tells it to begin playback with thestart()method of theSoundclass. Remember that element 0 in the array is aSoundobject, which references the key_1 ID in the Library.Save the Flash document and test it. You will hear key_1 sound (
key_1.wavorkey_1.aif) play.

Now you should practice targeting these Sound objects from other event handlers, such as buttons and more keyframes. To access a different sound, simply change the number in the array brackets. In the next chapter, you'll learn how to load a Flash movie file (.swf) into another Flash movie, as well as how to load MP3 files directly into the movie.
Note
You can view the completed sound library movie, soundLib_ActionScript.fla, located in the ch27 folder of this book's CD-ROM. We've also included a bonus file, soundLib_onSoundComplete.fla, that demonstrates the onSoundComplete() handler of the Sound class. This handler detects when a sound has finished playing. In the bonus example, each sound plays successively, from key_1 all the way through key_7, and repeats.
Warning
You should attach only one sound per timeline (or Movie Clip instance). Although you can create more than one Sound object instance on a timeline, you cannot use the setVolume() method of the Sound class to control each individual sound—the volume will be set for all Sound object instances on the targeted timeline.
Two other methods of the Sound class, setTransform() and getTransform(), work with transform objects with specific properties to control volume distribution across channels. You need to create a generic object using the object constructor before the setTransform() method can be used with a Sound object. This generic object will become a soundTransformObject after you have assigned sound channel properties to the generic object.
Luckily, the soundTransformObject doesn't have as many properties as the ColorTransform class, and they're much simpler to predict with trial-and-error testing. The properties of the soundTransformObject are
ll—The percentage of left channel output in the left speakerlr—The percentage of right channel output in the left speakerrr—The percentage of right channel output in the right speakerrl—The percentage of left channel output in the right speaker
The first letter of each property determines which physical speaker is being affected. The second letter determines which channel's output (or its volume) is played in that speaker. Each property can have a value between −100 and 100.
Tip
Use the soundTransformObject to vary the output of the sounds in the soundLib example you created in this section. As with the setTransform() example for the Color object, create buttons that create and execute unique transform settings.
In this section, you learn how to control the volume and balance output from a Sound object using the slider mechanism from Chapter 25, "Controlling Movie Clips." The slider mechanism works by taking the X position value of the slider's bar and applying it to a property of another object. In Chapter 25, you applied the position value of the bar to Movie Clip properties such as _xscale, _yscale, and _alpha. In this exercise, you apply the position values to the setVolume() and setPan() methods of the Sound object to control the volume and balance output, respectively.
Note
In this section, you need to use the slider_basic_104.fla file, located in the ch25 folder of this book's CD-ROM. If you want to learn how this slider was built, read Chapter 25, "Controlling Movie Clips."
The first part of this exercise shows you how to add the slider to a new document, import a sound, and control the volume of the sound with the slider. In the last steps, you apply the same methodology to the balance slider.
Open your copy of the
slider_basic_104.flafile via the FileCreate a new Flash file (ActionScript 2.0). Save this document as
soundSlider_100.fla.Rename Layer 1 to volumeSlider.
Drag the sliderClip symbol from the
slider_basic_104.flaLibrary panel to the new document's Stage. When you have finished, close theslider_basic_104.flaLibrary panel.With the slider instance selected on the Stage, open the Property inspector. Name the instance
volumeSlider. In the Transform panel, rotate the instance −90 degrees. (You can also use the Free Transform tool to rotate the instance.)Now you need to create a
Soundobject. Import a sound file into the Flash document. Use a sound file that is at least 20 seconds long. You can import theatmospheres_1.wav(or .aif) file located in theresourcesfolder of this book's CD-ROM.After you have imported a sound file, select the sound in the Library panel. Right-click (Control+click on Mac) the sound file and choose Linkage in the contextual menu. In the Linkage Properties dialog box, select the Export for ActionScript check box and type
sound_1in the Identifier field. Click OK to close the dialog box.Create a new layer on the Main Timeline (that is, Scene 1), and name the layer actions.
Select frame 1 of the actions layer and open the Actions panel (F9, or Option+F9 on Mac). In the Script pane, type the following code:
var sndBg:Sound = new Sound();
sndBg.attachSound("sound_1");
sndBg.start(0, 999);
Note
This code uses ActionScript 2.0's strict typing feature to declare the
sndBgvariable as aSounddata type. Notice that once you declare the data type of a variable, you'll see the code hints for the data type (in this case, theSoundclass) appear after you type the variable's name,sndBg, followed by a period.This code creates the
Soundobject that thevolumeSliderinstance will control. Line 1 uses thenew Sound()constructor to establish aSoundobject namesndBg. Line 2 links the sound_1 asset (that is, the sound file in the Library) to thesndBgobject. Line 3 plays the sound, starting at the beginning of the sound (0), and looping it 999 times for near-indefinite playback.Save your Flash document. Test the movie (Ctrl+Enter or
To change the volume of the
sndBgobject, you need to take the position of the bar in the slider and apply its value to thesetVolume()method of thesndBgobject. You'll use ActionScript's event handlers to accomplish this.Select frame 1 of the actions layer on the Main Timeline. Open the Actions panel, and insert the following code after the last action in the Script pane:
var volumeSlider:MovieClip;
volumeSlider.onMouseMove = function():Void {
 var vol:Number = this.pos._x/2;
 sndBg.setVolume(vol);
};
This code declares an
onMouseMove()handler for thevolumeSliderinstance. Each time a mouse move is detected, the function defined for this handler executes. The first line of the function retrieves the current_xvalue of themcPosinstance inside ofvolumeSliderand divides it by 2. (See our coverage of the slider in Chapter 25, "Controlling Movie Clips" to learn more about this operation.) This value, declared asvol, is then applied to thesetVolume()method of thesndBgobject.Save your Flash document again, and test it. Click and drag the bar on the slider. As you move it up, the sound increases in volume. As you move it down, the volume decreases.
Creating a slider that controls the balance output is almost identical to the process of creating the
volumeSliderinstance. You will make another instance of the sliderClip symbol, and add a newonMouseMove()handler for the new instance.Create a new layer on the Main Timeline, and name it
balanceSlider.Drag an instance of the sliderClip symbol from the Library to the Stage. Place the instance to the right of the
volumeSliderinstance. In the Property inspector, name the instancebalanceSlider.Select frame 1 of the actions layer, and open the Actions panel. After the last line of code in the Script pane, type the following code:
var balanceSlider:MovieClip;
balanceSlider.onMouseMove = function():Void {
 var pan:Number = this.pos._x - 100;
 sndBg.setPan(pan);
};
This code declares an
onMouseMove()handler for thebalanceSliderinstance. When the mouse moves within the Flash movie, the function for theonMouseMove()handler executes. In this function, though, we need to translate the_xproperty of themcPosinstance differently. Because pan values are within a range of −100 to 100, we need to map the 0 to 200 range of the slider accordingly. In order for the lowest value (0) to equal −100 and the highest value (200) to equal 100, you simply subtract 100 from the current_xproperty value returned by the position instance. You then apply this value to thesetPan()method of thesndBgobject.Save your Flash document and test it. As you drag the bar on the
mcBalinstance to the right, you should hear the sound play in the right speaker. As you drag the bar to the left, you should hear the sound play in the left speaker.
Note
You can find the completed soundSlider_100.fla file in the ch27 folder of this book's CD-ROM.
Volume Control Gadgetry, by Carla Diana
This tutorial covers strategies for controlling sound volume via graphic elements on the screen, in a similar fashion to some of the sound toys displayed in the interactive music project repercussion.org (www.repercussion.org). What I discuss here is the idea of "mapping" volume to another interactive element—in this case a user action such as mouse movement. Ultimately you'll look at creating an on-screen "gadget," a small box on the screen with a lid that the user can open and close by clicking and dragging with the mouse.
Part 1: Controlling the box lid
First you'll program the onPress event so that ActionScript pays attention to mouse movement until the mouse is released. You'll use enterframe so that you can have the box animation respond immediately and repeatedly to changes in the position of the cursor as it's dragged.
Open the tutorial file named
box_start.flalocated in thech27/cdianafolder of this book's CD-ROM. You should see a Movie Clip of a box on the stage, as shown in Figure 27.7. Within that Movie Clip is another clip that contains just the box opening animation. This animation was created using a 3-D rendering program called Cinema 4D, but you can use this technique for any series of frames in an animation. Note that the lid animation is separate from the static part of the box so that Flash doesn't have to redraw the entire box each time. There's a stop action at the first frame so it won't move past frame 1 if you don't want it to.Give the box an instance name by typing box1 into the Property inspector.
Next, give the user the ability to open and close the box lid using the mouse. The idea behind this is when the mouse is pressed you'll use a variable (
startY) to remember the Y location where the user first started dragging, and then continuously monitor the mouse position using anonEnterFramehandler. Create a new layer named actions, and add the following code to frame 1 of this layer, then select frame 1 and open the Actions panel.box1.lid.onPress = function(){ var startY:Number = _ymouse; this.onEnterFrame = function(){ var yMove:Number = _ymouse - startY; trace(yMove/this._totalframes); }; };Save your file, and test it (Ctrl+Enter or
Write an
onReleasehandler for thebox1.lidinstance so that the monitoring stops when the user stops dragging. You do this by simply deleting theonEnterFramehandler. Add this code after the actions you inserted in Step 3.box1.lid.onRelease = function(){ delete this.onEnterFrame; };It's always a good idea to also define the
onReleaseOutsideevent when definingonReleasein order to account for those moments when the user lets go of the mouse while it's no longer resting on the graphic itself. This just means adding theonReleaseOutsidehandler to the existing code as follows:box1.lid.onRelease =
box1.lid.onReleaseOutside= function(){ delete this.onEnterFrame; };While monitoring mouse position, you'll send the
box1instance to a new frame when there is enough change in position. Imagine that 200 pixels up is the most the user will move. This means that dividing −200 by the number of frames in the lid movie will give you a "divider" number that you can use to make thebox1.lidinstance go to a new frame. You can access the number of frames using the_totalFramesproperty of thebox1.lidinstance.To figure out the divider and save it in a variable, you'll use
var divider:Number = 200/this._totalframes;
To figure out the change in frames, you'll want to look for this value:
yMove/divider
You use
thisas the instance name because you are already inside a function scoped for thebox1.lidinstance.Since the previous value is negative, you'll want to multiply by −1, so that you make a positive change in frame numbers when the mouse movement is negative, and vice versa. This means now you're looking for:
−1*yMove/divider
Tip
If you ever want the absolute value of a number, you can use the
Math.abs()function. So, another way of saying−1*myValueisMath.abs(myValue)—but only whenmyValuehas a negative value.It's a good idea to round off this number since you're only interested in using it to send the playhead to a certain frame, meaning that you only want whole numbers. Use the
Math.ceil()method so that it rounds up.Math.ceil(−1*yMove/divider)
Now that you understand the logistics behind the interactivity, add the following code to the script on frame 1 of the Main Timeline (that is, Scene 1):
box1.lid.onPress = function(){ var startY:Number = _ymouse; var divider:Number = 200/this._totalframes; this.onEnterFrame = function(){ var yMove:Number = _ymouse - startY;trace(Math.ceil(−1*yMove/divider));}; };Note
You can check out the progress so far by opening up the file
box_part1Step5.fla, located in thech27/cdianafolder of this book's CD-ROM.Finally, you want to move relative to where the user first clicked, meaning that you are looking for the change in vertical movement, not absolute positions. In other words, a value of 2 will not send you to frame 2; instead, it will send you to a frame that's two more than the frame you started on with the first mouse click. You'll add a line to the beginning of the
onPresshandler that lets you remember the frame you started on, and store it in a variable calledstartFrame. The code now looks like this:box1.lid.onPress = function(){ var startY:Number = _ymouse;var startFrame = this._currentframe;var divider:Number = 200/this._totalframes; this.onEnterFrame = function(){ var yMove:Number = _ymouse - startY;var newFrame:Number = Math.ceil(−1*yMove/divider) +startFrame;this.gotoAndStop(newFrame);}; };The only thing added is computing the new frame number value. You use
this.gotoAndStopto actually send thebox1.lidframe to the right place.The last bit of cleanup for Part 1 involves checking the limits of the new frame value to make sure you don't go lower than 1 or higher than the last frame of the movie. You can do this using an if-then statement, or some clever use of the
Math.min()andMath.max()methods.newFrame = Math.min(Math.max(1, newFrame), this._totalframes);
This line of code will set
newFrameequal to itself unless it's smaller than 1 or larger than the total number of frames. In those cases it will get set to 1 or the last frame number, respectively. Insert this line before thegotoAndStop()action and you're good to go.

Note
Check out the box_part1Step7.fla file in the ch27/cdiana folder of this book's CD-ROM to see this code in action.
Part 2: Controlling volume
So now that you have your box lid resting on a different frame every time the user interacts with it, you can use that number to tell us where our sound volume should be. First, we need to create a Sound object and get control of its volume; then in Part 3 you'll link up the box lid value to the volume. You'll be using a very basic tone (which can be created using any program that can generate MIDI sounds; in this case, Melody Assistant X) and looping it so it plays continuously and sounds like one sound, rather than a series of "beats."
Note
You can find more information on Melody Assistant at www.myriad-online.com/en/products/melody.htm.
Create a new
Soundobject in ActionScript. In the sample file, a new layer named sound was created for the actions that correspond to the sound code. Here is the ActionScript for creating theSoundobject:s1 = new Sound(box1);
Note the
box1instance name in parentheses. It's a good idea to associate the sound with aMovieClipinstance because things like volume and panning are specific to eachMovieClipinstance.Attach a sound to the
Soundobject. In this case the sound has already been imported, but if you're starting from scratch you'll need to import it yourself via Files1.attachSound("C");The
"C"is the sound's linkage identifier. If you right-click (or Control+click on the Mac) on the sound namedMiddleC.aifin the scale folder of the Library panel and select Linkage in the contextual menu, you'll get the dialog box shown in Figure 27.8.Next, you'll actually play the sound:
s1.start(0, 999);
The 0 right after the parentheses corresponds to a time offset in the start of the sound, and the 999 is the number of loops. This is a short tone that you want to play continuously, so you'll also want to make sure to replay the sound when it's done with all the loops—unfortunately you have to give it a finite number of loops instead of just telling it to loop forever.
s1.onSoundComplete = function(){
   s1.start(0, 999);
};
To control the volume of the sound, add the following code:
s1.setVolume(50); //this will play at 50% of full volume
For your box lid gadget, you'll want the volume to be set to 0 when the lid is completely closed, and set to 100 when the lid is at the last frame of the animation.
If you've never worked with the sound object, you might want to do some quick tests with the
setVolume()method to see how the different values sound.
Note
You can use the box_part2Step4.fla file found in ch27/cdiana on this book's CD-ROM. Change the value in the setVolume() method to see how the volume changes.
Part 3: Putting the audio and visual controls together
At this point you know how to control volume, and you know how to set up interaction to let the user control the box lid opening. All you have to do to get your gadget working is put them together and you've linked the action of the box lid opening to the volume.
The key to linking the two actions is getting the numbers to relate to each other in the correct proportions. One number is the frame number corresponding to the current location of the box lid animation, and what you'll want to do is make the volume relate to this number. You can say that the two values need to be "mapped" to one another.
Calculate a fraction that describes how "open" the box lid is, taking its current frame location and comparing that to all the frames in that animation. From within the
onEnterFramehandler for thebox1.lidinstance, we need to determine this value:var howOpen:Number = this._currentframe/this._totalframes;
Next, multiply this fraction by 100 in order to scale the value to match the range of the volume (0 to 100). You can rewrite the code to look like this:
var howOpen:Number = 100*this._currentframe/this._totalframes;
Now that you have a number from 0 to 100, you can set the volume equal to it using the
setVolume()method. To simplify things, give it a whole number by taking aMath.floor()value, rewriting thehowOpendefinition just one last time:var howOpen:Number = Math.floor(100*
this._currentframe/this._totalframes); s1.setVolume(howOpen);
Note
You can test this code in the box_part3Step3.fla file found in the ch27/cdiana folder of this book's CD-ROM.
There's one small problem with this movie. When you trace howOpen, you'll see that it never reaches 0, which means that even with the box lid closed there will still be some volume. This is happening because the lowest the _currentframe value can ever be is 1, and the lowest fraction in this case will be 1 divided by the total number of frames, or 1/16. To resolve this, you can make the fraction into one that begins at 0 by subtracting 1 from the frame value. If you also subtract 1 from the total number of frames, you will wind up with the range we need:
var howOpen:Number = Math.floor(100*(this._currentframe-1)/(this._totalframes-1)); s1.setVolume(howOpen);
You could also have used the variable newFrame from Part 1 instead of this._currentframe; it indicates the same value. Note that in the meantime you should make sure that the volume code that you were playing with in Part 2 defaults to the following so you start out with silence when the box lid is closed:
s1.setVolume(0);
You're done! Test out your file, and have fun! Try combining a number of these gadgets and attaching a different tone to each one so that they can all play in unison. You can also take this principal of mapping volume to a value and use it with other mouse movements, or use it to match a MovieClip property such as _alpha, _width, _height, _x, _y, and so on.
A quick side note
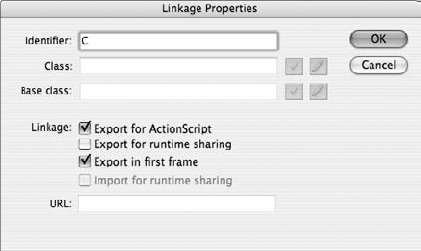
The Publish Settings for Audio event for this file are set to Raw, rather than one of the more common compression schemes like MP3. The reason for this is that with small looping tones it's essential that the sound loop seamlessly, and the compression will often clip the sound just a tiny bit. It's small, but very noticeable to the ear. In general, with special sound treatments like this one, it's often necessary to do a bit of trial and error testing to see how low you can go with compression before the sound quality gets degraded in some way that's no longer acceptable. Figure 27.9 shows part of the Publish Settings dialog box.
Using the new PrintJob class introduced with Flash Player 7 ActionScript, you can enable your Flash movies to output Flash artwork, text, and bitmaps. With these actions, you can do the following:
Create Flash ads that have printable specifications for e-commerce merchandise. Imagine if the next car ad you saw on your favorite Web site automatically printed dealer locations and maps without having to go to the car manufacturer's Web site?
Make Flash coupons. You can design printable coupons for e-tailers on the Web that can be printed and redeemed at their brick-and-mortar stores.
Automate dynamic Web-generated invoices and receipts at e-commerce sites. With ActionScript, you can format ordered items and add dynamic data to printable sheets.
Print rich vector illustrations or photorealistic bitmaps from a Web site. You can design Flash portfolio sites that print samples of stock images, or create personalized vector artwork that can print unique images for each visitor.
E-mail printable Flash artwork to clients. The next time you have a proof of concepts or finished artwork that needs final approval, you can e-mail your clients the Flash artwork in a stand-alone projector or .swf file.
Design custom contact information pages. Are you sick of HTML tables that won't print your nice row-and-column–formatted pages of information consistently from browser to browser? Printable Flash frames print beautifully each time. You can even add a visitor's contact information to a dynamic database and print it.
Although we can't describe how to do all these tasks in the space of this chapter, we will show you how to get started with the last idea. The following exercise shows you how to use the new PrintJob class to build pages that can be sent to a user's printer. You'll also practice new ActionScript 2.0 coding conventions using strict data types.
Note
Because Flash natively uses vector artwork, it translates best when it is output to a PostScript printer. Nevertheless, the Flash Player produces high-quality output to both PostScript and non-PostScript printers.
Warning
The PrintJob class is only available for use in Flash Player 7-compatible movies. If you need to generate printable output for Flash Player 5 or 6, use the older print() and printAsBitmap() functions, as discussed in the Flash MX Bible by Robert Reinhardt and Snow Dowd (Wiley, 2002).
Open the
printjob_starter.flafile in thech27folder of this book's CD-ROM. This document has sample artwork in the library that you can use to practice printing exercises. Resave this document asprintjob_noscale.fla.Rename Layer 1 to content.
Create a new Movie Clip symbol (Insert
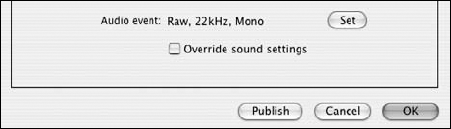
Select frame 1 of the page border layer. Using the Rectangle tool, draw a nonfilled rectangle with a black stroke. After you have drawn the rectangle, select the entire outline, and open the Property inspector. Choose a line style of Solid, at 1 px. In the width and height fields, enter values that are in the same aspect ratio as an 8.5″ × 11″ piece of paper. For example, as shown in Figure 27.10, the size 320 × 440 uses the same aspect ratio. Position the artwork's left corner at 0, 0.
Add another layer in the contentClip timeline, and rename this layer content.
Open the Library panel (Ctrl+L or
Save your Flash document.
Go back to the Main Timeline (that is, Scene 1). On frame 1 of the content layer, drag an instance of the contentClip symbol from the Library panel to the Stage. In the Property inspector, name this instance
content. Do not resize the instance. For now, just let the bottom edge of the instance run off the Stage.On the Main Timeline, create another layer named printButton. Place this layer above the content layer. The printButton layer will hold a
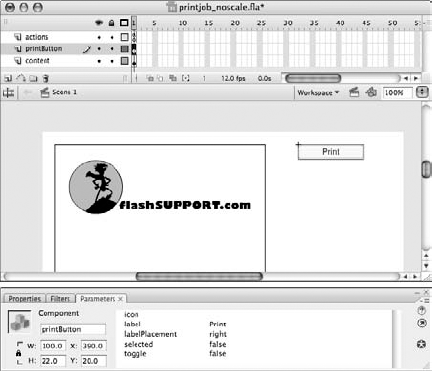
Buttoncomponent that the user can click to print thecontentinstance.On frame 1 of the printButton layer, drag an instance of the
Buttoncomponent from the Components panel to the Stage. In the Property inspector, name this instanceprintButton. In the Parameters tab of the inspector, typePrintinto the label field. Refer to the settings shown in Figure 27.12.Create another layer, and name it actions. Place this layer above the other layers.
Now, you're ready to add the ActionScript that will print the
contentinstance. Select frame 1 of the actions layer, and open the Actions panel (F9, Option+F9 on Mac). In the Script pane, type the code shown in Listing 27.6.Line 1 declares the
printButtoninstance as a Button component. By strong typing your variables (and instances) in ActionScript, the Actions panel displays the code hints for that variable (or instance) whenever you type the name and follow it with a period.On line 3, a
printContent()function is added as an event listener for theprintButtoninstance (line 16). Now, when the user clicks theButtoncomponent, theprintContent()function will be invoked.Line 5 declares the
printContent()function. Line 6 declares a local variable namedpj, set to use thePrintJobdata type, which invokes the constructor for thePrintJobclass. Line 7 creates a local variable namedmc, pointing to themcContentinstance.Line 8 uses the
start()method of thePrintJobclass to initiate a print session on the user's machine. When thestart()method is invoked, the system's standard Print dialog box appears. If the user clicks OK in this dialog box, then lines 10 through 12 execute. If the user cancels the print request, lines 13 through 15 execute. If the user clicks OK, the local variableinitis set totrue. If the user cancels the dialog box,initis set tofalse.Line 9 checks the result of the user's input in the Print dialog box. If
initistrue, then lines 10 through 12 execute. In line 10, atrace()message is sent to the Output panel, indicating that a print job is being submitted. In line 11, theaddPage()method of thePrintJobclass is invoked, specifying themcContentinstance, represented by the variablemc, as the target instance to print. TheaddPage()method enables you to submit individual pages in a print job that is sent to the printer. When all of theaddPage()methods are finished, you must initiate asend()method to complete the print job, as demonstrated in line 12.If the user cancels the Print dialog box, lines 13 through 15 execute. In line 14, a
trace()message is sent to the Output panel, indicating that the print request was denied.Example 27.6. The printContent() Function
1.  var printButton:mx.controls.Button;
2.
3.  printButton.addEventListener("click", printContent);
4.
5.  function printContent():Void {
6.     var pj:PrintJob = new PrintJob();
7.     var mc:MovieClip = content;
8.     var init:Boolean = pj.start();
9.     if (init) {
10.       trace("printing...");
11.       pj.addPage(mc);
12.       pj.send();
13.    } else {
14.       trace("print aborted by user");
15.    }
16. }
Save your Flash document, and test the movie. When you click the
printButtoninstance, you should see the Print dialog box. If you click OK, the Output panel displays the"printing..."message. The first frame of thecontentinstance will print at 100 percent on the outputted page. To accurately foretell what your printed dimensions will be in inches, divide the pixel width and height of your content clip by 72—there are 72 pixels to an inch. So, 320 × 440 will print at a size of 4.4″ × 6.1″. You can, however, scale the content clip to be printed, so that it will fill the entire page. In the next step, you'll learn how to do just that.Select frame 1 of the actions layer, and open the Actions panel. Add the bold code shown in Listing 27.7 to the
printContent()function. Here, you use thepageWidthandpageHeightproperties of thePrintJobobject,pj, to calculate two variables,xscaleandyscale. pageWidthandpageHeightreturn the size of the page output by the printer, in pixels. By dividing each value by the respective width and height of thecontentinstance (mc) you can determine how much you need to scale thecontentinstance to fill the entire page.Example 27.7. Scaling Content in the printContent() Function
function printContent():Void { var pj:PrintJob = new PrintJob(); var mc:MovieClip = content; var init:Boolean = pj.start(); if (init) { trace("printing...");var pageWidth:Number = pj.pageWidth;var pageHeight:Number = pj.pageHeight;var xscale:Number = (pageWidth / mc._width) * 100;var yscale:Number = (pageHeight / mc._height) * 100;with (mc) {_xscale = xscale;_yscale = yscale;}pj.addPage(mc); pj.send(); } else { trace("print aborted by user"); } }Save your Flash document as
printjob_scale.fla, and test it. When you click theprintButtoninstance, thecontentinstance scales to a larger size. The printed output will fill the entire page with thecontentinstance's artwork.The last step will be to scale the
contentclip back to original size after the print output has been sent to the printer. Add the bold code shown in Listing 27.8 to theprintContent()function.Example 27.8. Resetting the Scale of the clip Instance
function printContent():Void { var pj:PrintJob = new PrintJob(); var mc:MovieClip = mcContent; var bInit:Boolean = pj.start(); if (bInit) { trace("printing..."); var pageWidth:Number = pj.pageWidth; var pageHeight:Number = pj.pageHeight;var xscale_orig:Number = mc._xscale;var yscale_orig:Number = mc._yscale;var xscale:Number = (pageWidth / mc._width) * 100;var yscale:Number = (pageHeight / mc._height) * 100; with (mc) { _xscale = xscale; _yscale = yscale; } pj.addPage(mc); pj.send();with (mc) {_xscale = xscale_orig;_yscale = yscale_orig;}} else { trace("print aborted by user"); } }Save your Flash document, and test it. When you click the
printButtoninstance, the artwork no longer scales on the Stage, but the printed output will be scaled.

Note
You can find the completed documents, printjob_noscale.fla and printjob_scale.fla, in the ch27 folder of this book's CD-ROM.
Note
You can find additional PrintJob tutorials written by Robert Reinhardt at Community MX. You can find a list of Robert's content at www.flashsupport.com/cmx.
We'd like to know what you think about this chapter. Visit www.flashsupport.com/feedback to send us your comments.
Collisions occur when two or more elements in a Flash movie touch each other. Whenever the space by one Movie Clip instance occupies the space of another, a collision, or "hit," has occurred.
You can detect simple user-initiated collisions by using the
startDrag()method and_droptargetproperty of theMovieClipobject.Using the
hitTest()method of theMovieClipobject, you can detect the intersection of X and Y coordinates with a specified Movie Clip instance. You can also usehitTestin a similar fashion to_droptarget, where the overlap of two specific Movie Clip instances is detected.You can use the
ColorTransformclass to create new color values and apply them to Movie Clip instances.You can create sound libraries in less time by using ActionScript and the
Soundobject. You createSoundobjects by using Linkage identifiers for sound files in the movie's Library.By using the new
PrintJobclass, you can output high-quality artwork to a PostScript or non-PostScript printer.