Lesson 16. Install Applications
Goals
![]() Install applications from the Mac App Store
Install applications from the Mac App Store
![]() Understand application support and security issues
Understand application support and security issues
![]() Use traditional installation methods
Use traditional installation methods
People use computers because they want to run applications, not operating systems. Most users don’t care about the technologies underneath as long as the applications they want run smoothly. This is why, despite the growing popularity of Mac computers, users of other platforms are apprehensive about switching. It cannot be ignored that many applications run only on Windows-based computers.
Yet many applications that work only on Mac computers tempt other users because they represent the best solutions available. For several years now, Apple has been responsible for some of the most popular media creation applications with the iLife and Pro production suites. Third-party developers have stepped up their game in the last few years as well, as macOS provides a robust development platform with many unique features. For hundreds of examples, you need look no further than the Mac App Store.
In this lesson you will install applications using both the Mac App Store and traditional installation methods. You will also explore the various application environments and application security measures used in macOS.
Reference 16.1 Use the Mac App Store
With traditional installation methods, acquiring the software is often more difficult than actually installing it. Purchasing software in the traditional way means having to search through a variety of distribution channels with different delivery methods and possibly different pricing and versions.
Apple has taken a page from the iOS playbook and simplified software acquisition with the Mac App Store included in macOS. It gives users a single, easy-to-use interface for locating, downloading, and installing software via the Internet. Further, applications from the Mac App Store do not require complex serial numbers or activation codes. Instead, all purchases are associated with an Apple ID and can be installed on any number of computers you own or control.
More Info
If you support Mac computers for a large organization, Apple offers the Volume Purchase Program to acquire multiple licenses for Mac App Store items. You can find out more about Apple management technologies like VPP at https://support.apple.com/business-education/.
Chances are you are already familiar with the Mac App Store, the primary distribution method for all Apple software updates. However, if you have a new Mac with macOS preinstalled, you may not have used the Mac App Store yet. Even if you have used it, you may not be familiar with all its features. This section provides an introduction to the Mac App Store from a support perspective.
More Info
The Mac App Store has its own support site with more details available. You can find the site at www.apple.com/support/mac/app-store/.
About Mac App Store Requirements
Introduced in Mac OS X Snow Leopard 10.6.6, the Mac App Store is the premier location for Mac-compatible software, and it’s increasingly the only location where you can get new Apple software. The Mac App Store combines all the steps of acquiring new software into a single interface. These steps, covered in greater detail in the next section, include browsing and searching for new software, downloading and installing software, managing an account for purchasing software, updating installed software, and managing purchased software.
Aside from having Mac OS X Snow Leopard 10.6.6 or later, you must meet two additional requirements to install software from the Mac App Store: an Internet connection and an Apple ID. Obviously you must have an Internet connection to access content from the Mac App Store. A high-speed broadband connection is recommended, but slower connections are adequate, as long as you have the time to wait for the download.
An Apple ID with a verified email address is required to install anything from the Mac App Store, free or otherwise. If you intend to buy non-free items, you must also associate a valid credit card with your Apple ID. However, free items can be downloaded without a credit card. All Apple ID account management can be handled via the Mac App Store, as covered later in this lesson.
Local administrator authentication is not required to install items when using the Mac App Store on OS X Mavericks 10.9 or later. As covered later in this lesson, an administrator user can disable the Mac App Store for standard account users from the Parental Controls preferences.
Browse the Mac App Store
Even if you don’t have an Apple ID, you can easily browse and search the Mac App Store. To get started, open the App Store in the Dock, or choose App Store from the Apple menu. When the Mac App Store opens, you are greeted with the Featured view.

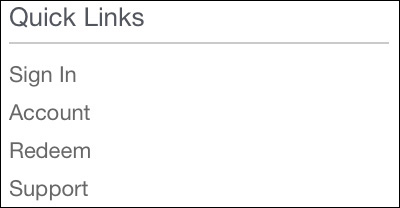
The main area of the Featured view allows you to browse new, popular, and staff favorite items. To the right of the Featured view you’ll find Quick Links, which link to specific categories and Mac App Store management features. Across the top of the Mac App Store window is a toolbar. Note the arrow buttons in the upper-left corner that allow you to navigate backward and forward much like a web browser’s history. If you’re still browsing for new applications, you can click Top Charts to see the most popular items, or click Categories to browse for a specific type of application.

The buttons in the Mac App Store toolbar correspond to keyboard shortcuts Command-1 through Command-5. For example, use the Command-2 keyboard shortcut to quickly navigate to the Top Charts page.
Search in the Mac App Store
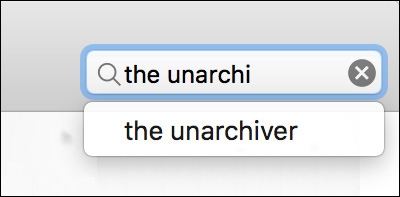
The most direct route for finding a particular application is the search field in the top right of the window. Simply start typing part of the name, and the search immediately returns a list of matching items.
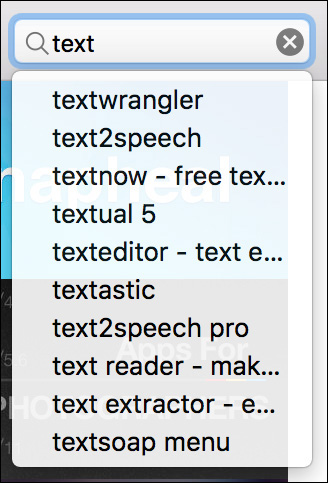
Pressing the Return key or selecting an item from the list returns a search results page, giving you a more detailed view of the matching items. Click an application’s icon or name to view the details page.

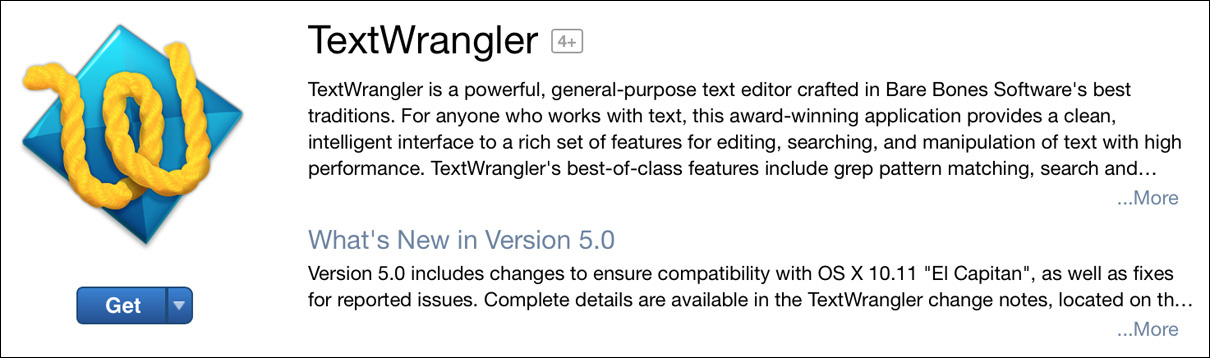
Once you’re at an application’s details page, you can read more about the application, view application screenshots, and, at the bottom, browse (or write your own) customer ratings and reviews. To the far right you’ll also see developer and application information, including version, download size, and system requirements.
Install from the Mac App Store
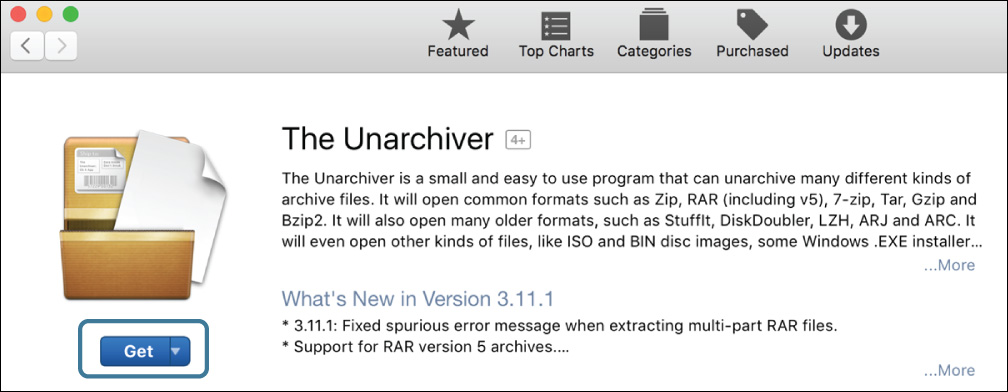
Directly under the application’s icon, you’ll see the application’s price. Some applications in the Mac App Store are free and can be purchased without entering any payment information. Paid items require that a valid credit card or PayPal account be associated with the Apple ID that will be used to purchase items. To download and install an item, click the purchase button. The purchase button will either say “Get” for a free application or display the purchase price for a paid application. Click either to start the installation process.

Tip
Clicking the small arrow to the right of the Install button reveals a pop-up menu that allows you to copy or share a link to the selected Mac App Store item.
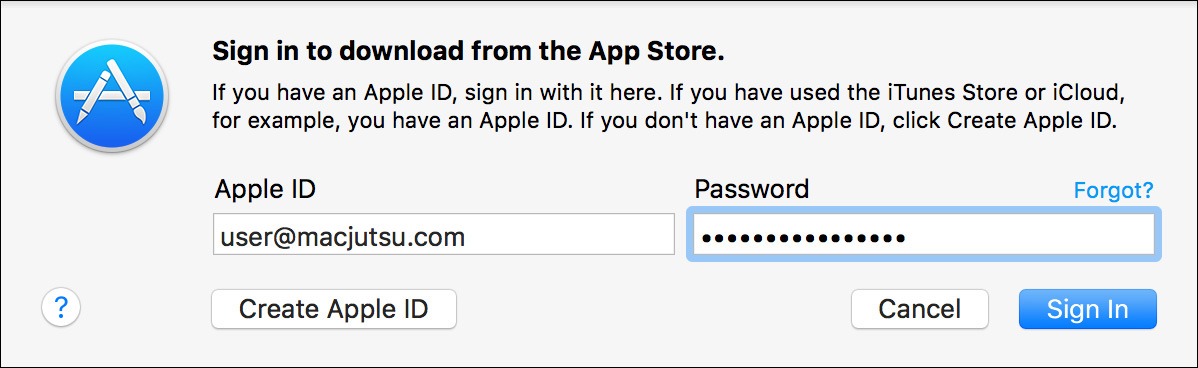
If you have yet to sign in to the Mac App Store with an Apple ID, or you did not enter an Apple ID during system setup, you are prompted to do so now. If you don’t have an Apple ID yet, you can create one in the Mac App Store. Details of the creation and management of accounts are covered in the next section. If, however, you already have an Apple ID that has been previously used to purchase items from any Apple online store, enter it to continue the installation process.
Note
On Mac computers with Touch ID you can make purchases in the Mac App Store by authenticating your Apple ID via Touch ID instead of your Apple ID password.
Note
You will receive a warning if you try to install an application from the Mac App Store that replaces an earlier version of the same application that was purchased outside the Mac App Store.
Once your Apple ID is validated, the selected application downloads and installs directly to what appears to be Launchpad. In reality, the application is being installed to the /Applications folder. Thus, if you prefer to use the Finder, you can also open the application from this folder. While the application is downloading, a progress bar is shown in the Purchases view of the Mac App Store, in Launchpad, in the Dock icon of Launchpad, and in the Finder. Once the application has been installed, you may notice Launchpad’s icon bounce in the Dock. Also, any new or recently updated applications will appear with a blue dot next to their name in Launchpad.

Any item your Apple ID has been used to purchase is always available to update or reinstall from the Mac App Store. You can find out more about this in the “Manage Purchased Applications” section later in this lesson.
Manage Your Store Account
Again, an Apple ID is required to purchase anything from the Mac App Store. If you have purchased items from Apple previously using the Apple Web Store, iTunes Store, or iOS App Store, you can use the same Apple ID you used for those previous purchases. If you have not purchased anything from Apple via an online store, you can add purchasing information to an existing Apple ID or create a new Apple ID.
The only requirement for creating a new Apple ID is a unique email address, which is used for contact and verification. If your primary email address is from a non-Apple source, you can use that email to define an Apple ID. Alternatively, you can use a free iCloud account, which also provides a free email address, acts as an Apple ID, and can be used to make purchases from any of Apple’s online stores. The Mac App Store also supports Family Sharing, which allows one user to organize a group of up to six Apple IDs that can share downloaded Apple items. The Family Sharing organizer is even allowed to create new Apple IDs for children that give them limited access to online purchases from Apple.
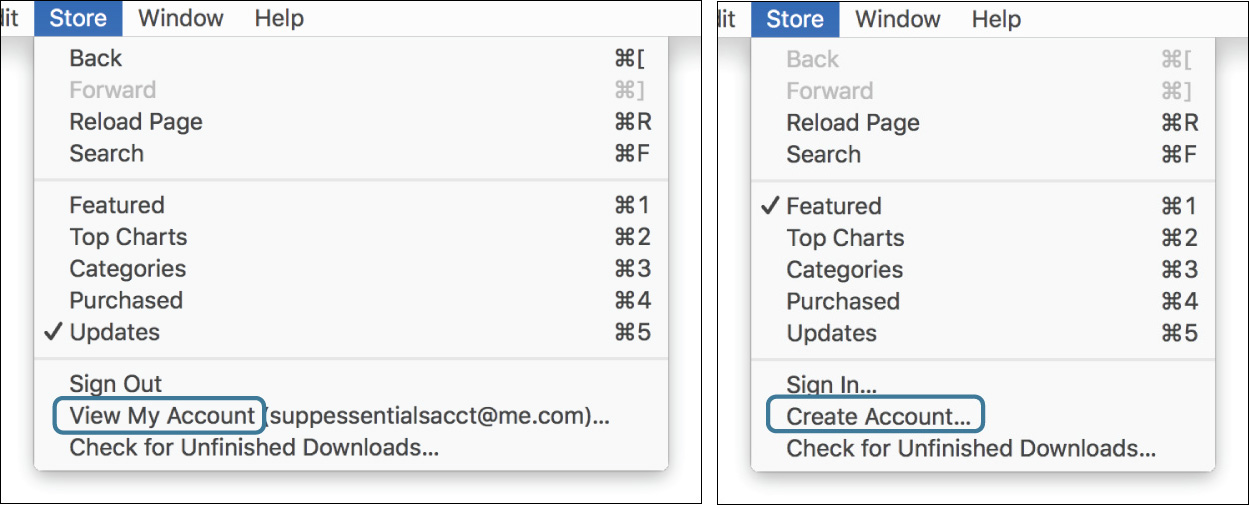
You can begin the account management process by clicking the Sign In link, found on the right side of the Mac App Store in the Quick Links list, or by choosing Store > Sign In.
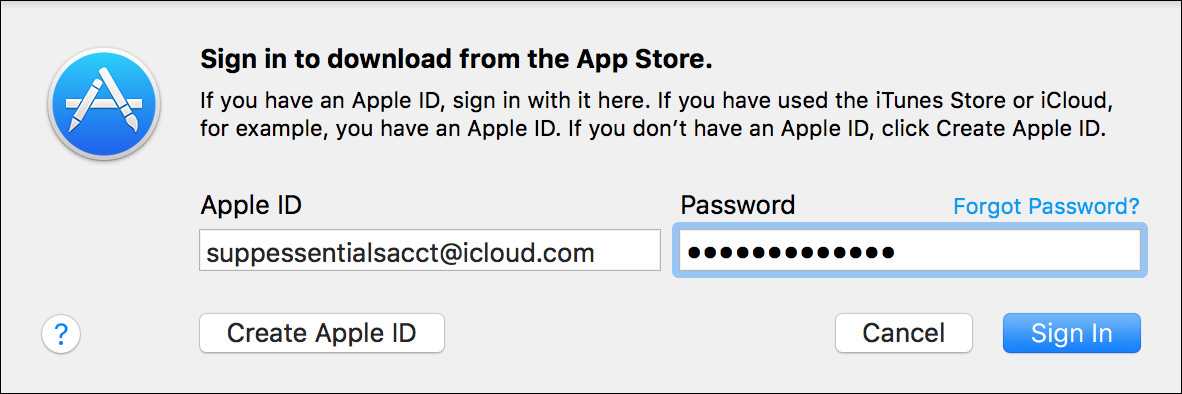
The Mac App Store authentication dialog appears. If you already have an Apple ID, enter it now. If you don’t have an Apple ID, or if you want to create a new one just for purchases, click Create Apple ID. What happens next depends on the state of your Apple ID: you can proceed to install items, you need to verify or update your Apple ID information, or you must enter some information to create a new Apple ID.
Your Apple ID Is Ready for Use in the Mac App Store
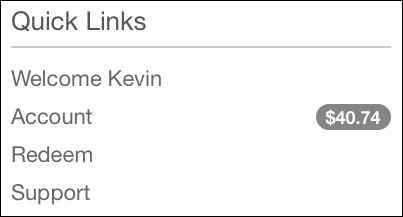
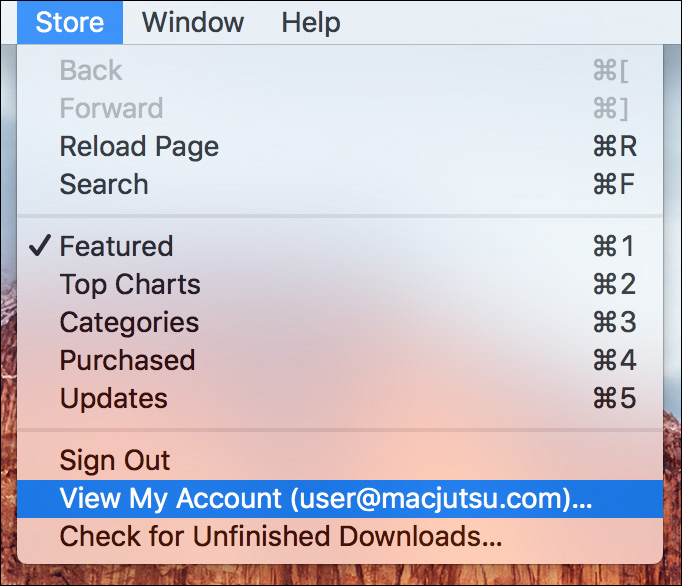
If your Apple ID has been used to purchase items from Apple previously, it may be ready to go for the Mac App Store. If this is the case, you won’t see any other screens. When you are signed in, the first Quick Links item is Welcome followed by your first name. Further, any balance you have on your account will show. You can also verify the signed-in Apple ID by clicking the Store menu. Note that you can sign out from the Store menu as well.
Your Apple ID Needs Updating
If your Apple ID information needs to be verified or updated, you’re prompted to review your account. You first need to agree to the Mac App Store terms and conditions, and then you have to verify your Apple ID security details. If you have used this Apple ID with an Apple online store previously, this may be all the verification that’s required.
However, if you have never used this Apple ID with an Apple online store, or if your existing billing information is incomplete or out of date, you will have to verify or update your billing information to continue with purchases.
As of this writing, when using the Mac App Store to update or verify the purchasing information of an existing Apple ID, you must enter credit card information.
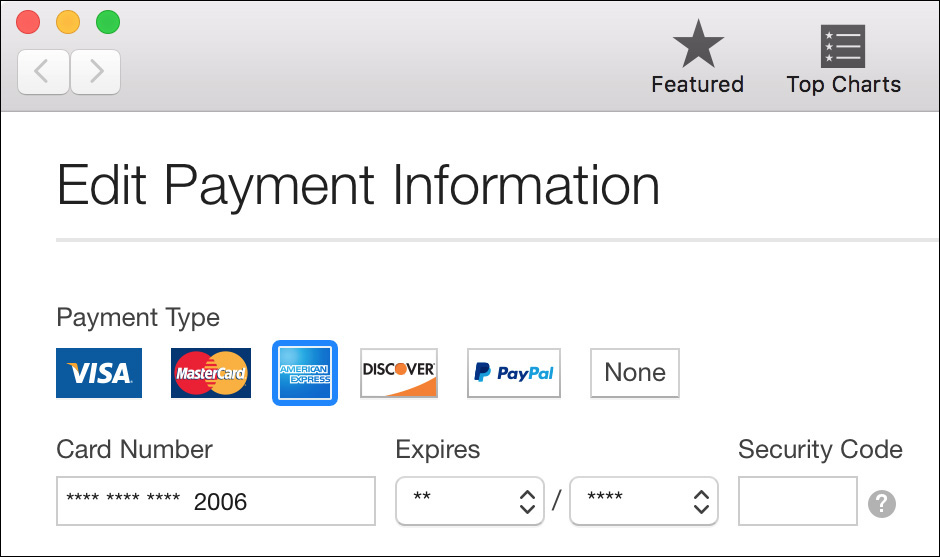
If you plan to make only free purchases, you have the option to remove your credit card information after your billing information has been verified. In the Mac App Store, you can remove payment information and set the account to None by editing the account payment options.
You’re Creating a New Apple ID
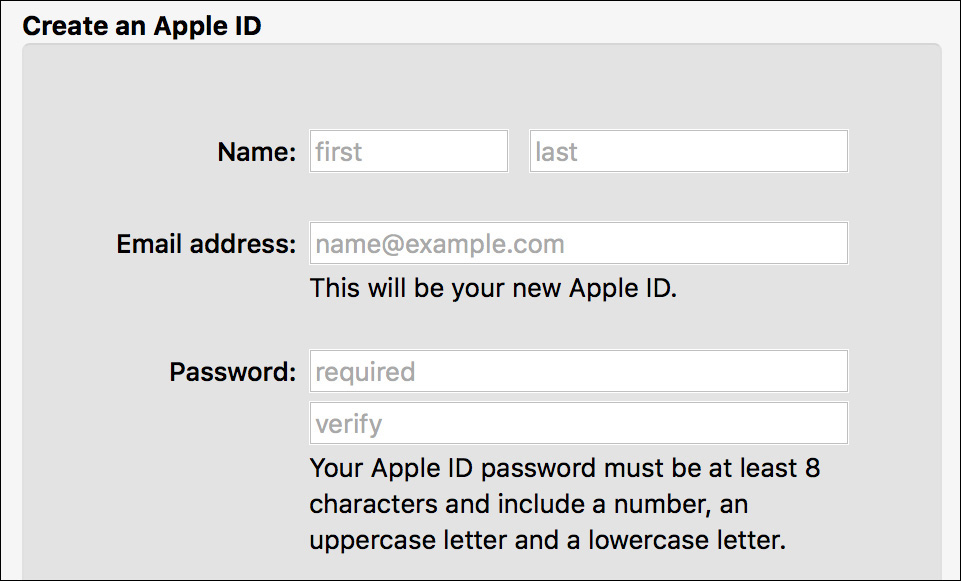
If you don’t have an Apple ID, or you want to create a new one just for making purchases, you can do so almost entirely from the Mac App Store. After agreeing to the terms and conditions, you are prompted to enter details for a new Apple ID. Whenever you create a new Apple ID, you must first provide account details that include a verifiable email address, three security answers, and your birthday.
As of this writing, if you want to create a new Apple ID for purchases without entering a credit card, you must do so from the iTunes store. If you choose to create a new Apple ID via the Mac App Store, you will have to enter credit card information.
More Info
For more information about creating a new Apple ID that can purchase free items without a credit card, see Apple Support article HT204034, “Create or use your Apple ID without a payment method.”
After entering your details, you’re prompted to provide a payment method. Finally, when creating a new Apple ID, you have to verify the email address specified. The Mac App Store system sends an email verification; click the link inside the email to open a webpage where you can authenticate and verify the account. Once you’ve done so, you have to sign in to the Mac App Store again to purchase or install any items.
Note
An individual must be over the age of 13 to create an Apple ID. However, a Family Sharing organizer can create Apple IDs for children that can be granted limited online purchasing ability. Education institutions can create Apple IDs for minors by taking advantage of the Apple School Manager program at http://school.apple.com.
Note
Purchases made from different Apple IDs cannot be merged. However, a Family Sharing organizer can invite existing Apple IDs into a group so that purchases can be shared.
Verifying and Managing Your Apple ID
Whenever you want to make changes to your Apple ID, you can do so from within the Mac App Store by clicking the Account link in the Quick Links section or by choosing Store > View My Account. From the Account Information page, you can change your Apple ID, payment information, and country or region setting.
Note
Significant changes made to your Apple ID will generate an automated email letting you know changes have been made. This is a protective measure should someone else attempt to make changes to your Apple ID.
Also, the Apple ID verification screen is the only location where you can create a nickname or change an existing one. Your Apple nickname is used to hide your personal identification in any reviews you post in any of Apple’s various online stores.
Manage iCloud Family Sharing
Apple devices with OS X Yosemite 10.10 and later or iOS 8 and later support iCloud Family Sharing, allowing families of up to six people to share each other’s iTunes, iBooks, and Mac App Store purchases without sharing account information. In other words, family members can sign in to the Mac App Store with their own personal Apple ID and share purchases with up to five other people in the Family Sharing group.
Although the effects of iCloud Family Sharing can be seen in the Purchases view of the Mac App Store, all management of the Family Sharing group is via the iCloud preferences. An adult user who is signed in to iCloud on macOS can start, or organize, a Family Sharing group by clicking the Manage Family button in the iCloud preferences.
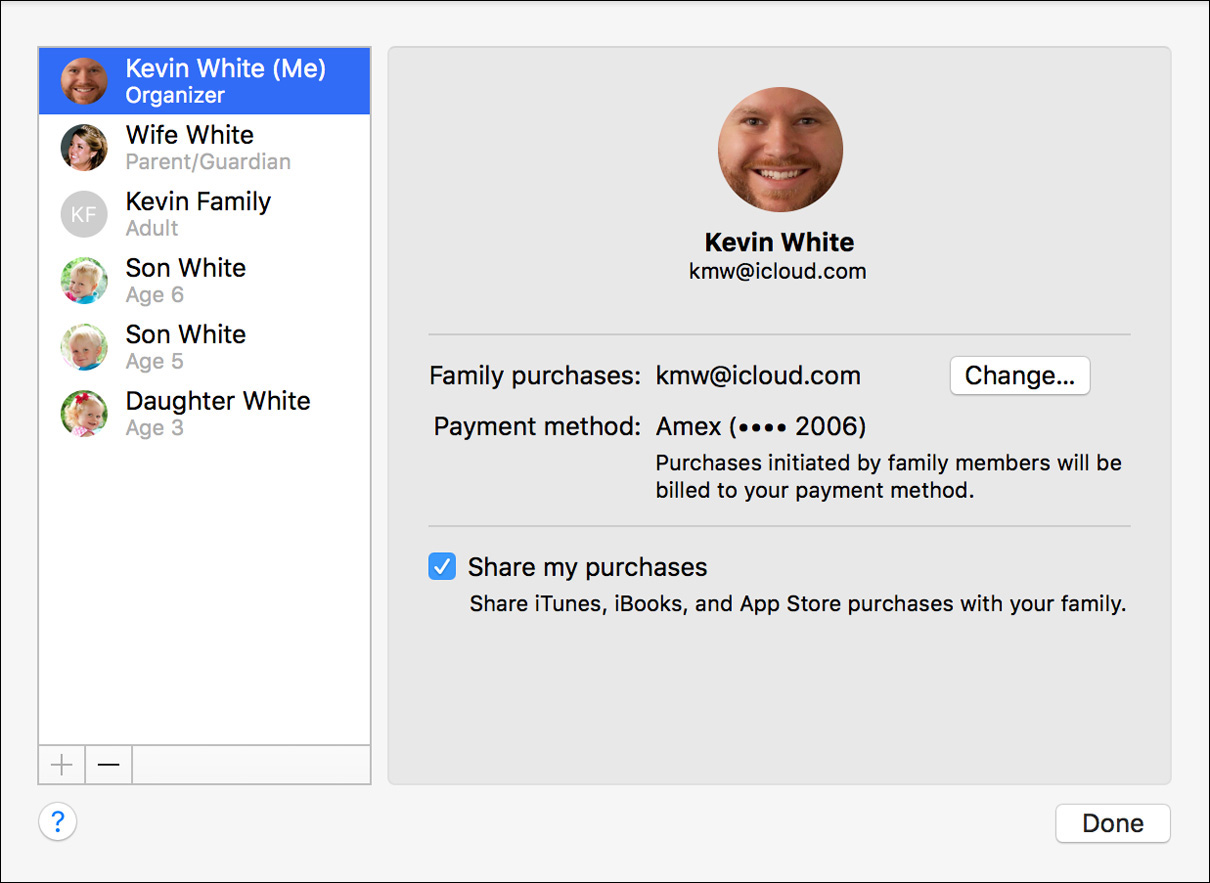
This first Apple ID is designated the “organizer” of the Family Sharing group. The organizer account must be set up with credit card payment information, as all other family members can be allowed to purchase using this payment information. The organizer can invite other adults via their Apple ID to the Family Sharing group and also create new iCloud accounts for children under 13 years of age. Child accounts are given full iCloud service access, including an email address using the @icloud.com domain.
Each member who joins the Family Sharing group is allowed to share existing Apple online purchases with the other group members. However, new purchases for any member of the Family Sharing group are all made via the organizer’s payment method. The exception to this rule is that all Family Sharing members can make their own purchases using redemption codes—this includes both monetary and item-specific redemption codes.
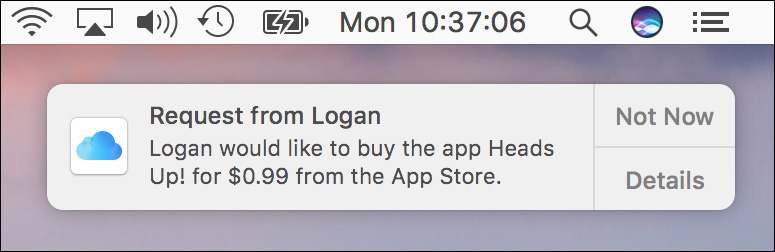
Family Sharing users who are children can be required to ask for approval for any purchase, including free items. By default, the organizer is the only person who can approve such requests. Other adult members of the Family Sharing group can also approve purchases if the organizer specifies the adult as a parent or guardian. Adults who can approve purchases will receive a notification on their Apple devices to approve (or decline) each purchase. Adults can also authenticate directly on the device that the child is using to approve a purchase.
More Info
iCloud Family Sharing also includes the ability to share other services between family members. You can find out more at www.apple.com/icloud/family-sharing/.
Manage Purchased Applications
A significant feature of the Mac App Store is that applications are associated with an Apple ID. According to Apple, “Apps from the Mac App Store may be used on any Macs that you own or control for your personal use.” This means that if you personally use multiple Mac computers, you can install items from the Mac App Store on all of them. This is possible because Apple keeps track of the items purchased or installed by your Apple ID. Further, as covered previously, iCloud Family Sharing allows you to easily share Mac App Store purchases.
Note
Family Sharing is specifically designed for personal family use. Use of Family Sharing by an organization or institution specifically violates the Apple Store terms and conditions. You can read more at www.apple.com/legal.
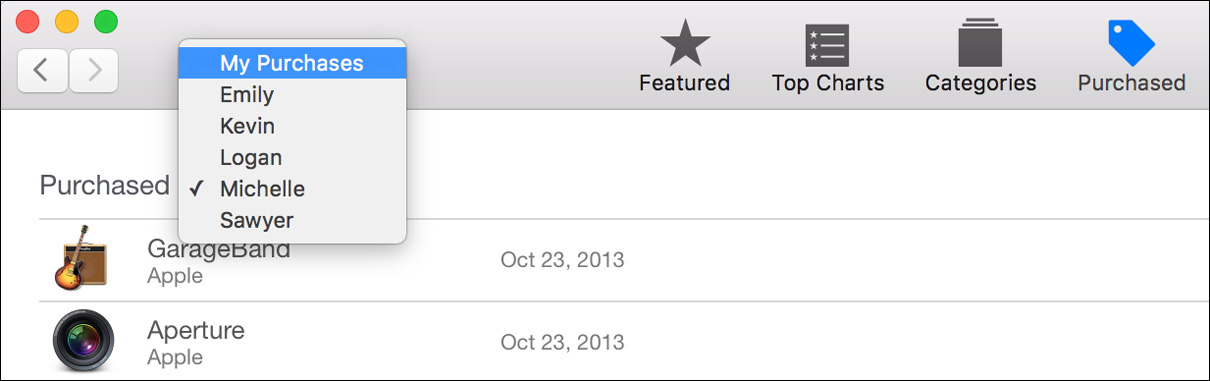
To install an application on a Mac that has already been purchased by you or another member of your Family Sharing group, open the Mac App Store, sign in with your Apple ID, and then click the Purchases icon in the toolbar. The Purchases page defaults to showing all the items owned by the signed-in Apple ID, both installed and not installed on the Mac.
If the currently signed-in Apple ID is part of a Family Sharing group, you can also view another family member’s purchases by selecting the person’s name from the Purchased pop-up menu just above the purchases list. Note that some Mac App Store items cannot be shared. The option to allow purchases to be shared is at the discretion of the application’s developer.
Once you have located an already purchased item, simply click the Install button to download and install the latest version of the application to the local Mac. If the button next to a purchased item reads “Open,” then the item is already installed on the Mac.
Tip
New Mac computers have additional Apple software preinstalled at the factory. Thus, the first time you view purchases in the Mac App Store, you may note these items listed at the top. You can associate these items with your Apple ID by clicking the Accept button.
Tip
If you use more than one Mac, you may want to enable automatic downloading of purchased applications. This option can be set from the Mac App Store preferences pane in the System Preferences for every Mac that has been configured with your Apple ID.
Tip
Mac App Storage purchases can be hidden by secondary-clicking (or Control-clicking) the purchase. To reveal hidden items you will need to navigate to your account settings. Again, you’ll find the Account settings link under the Quick Links on the Featured Mac App Storage page.
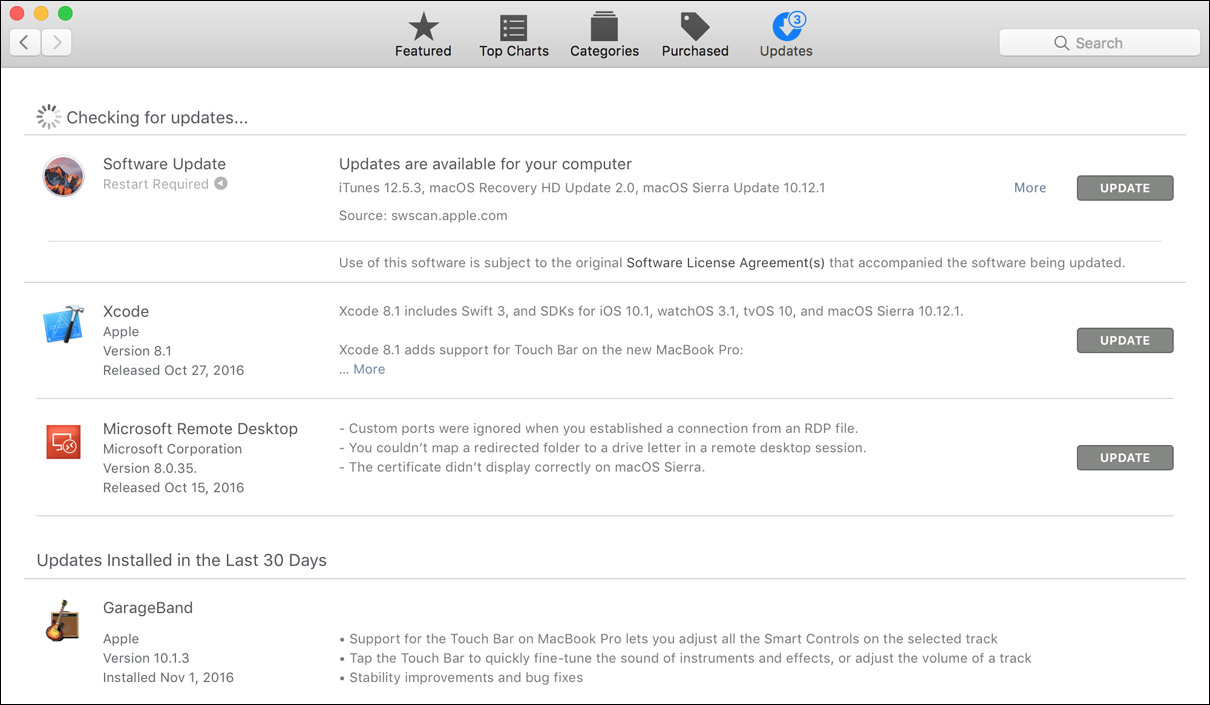
Update Mac App Store Applications
Updating applications you originally installed from the Mac App Store is also extremely easy. As covered in Lesson 4, “Update macOS,” macOS includes an automatic software update mechanism that is built into the Mac App Store. Automatic updates are enabled by default, and the system reminds you via notification when they are available for installation. Further, you can enable updates to install automatically without the need for user interaction.
However, you can also manually check for updates by opening the Mac App Store. Every time you open the Mac App Store, it scans your local Mac for any Apple-installed items and compares the results to what’s current on the Apple servers.
Tip
If the proper updates don’t seem to be appearing for your system, you can force the Mac App Store to reevaluate your installed software by holding down the Option key while opening the Mac App Store. Continue to hold the Option key while you click the Updates button as well.
If updates are available, you may notice in the toolbar that the Updates button has a small number by it. This represents applications that have updates available. Click the Updates button to reveal the list of available updates. You can choose to install individual updates by clicking specific Update buttons, or you can click the Update All button to install all updates.
Limit Access to the Mac App Store
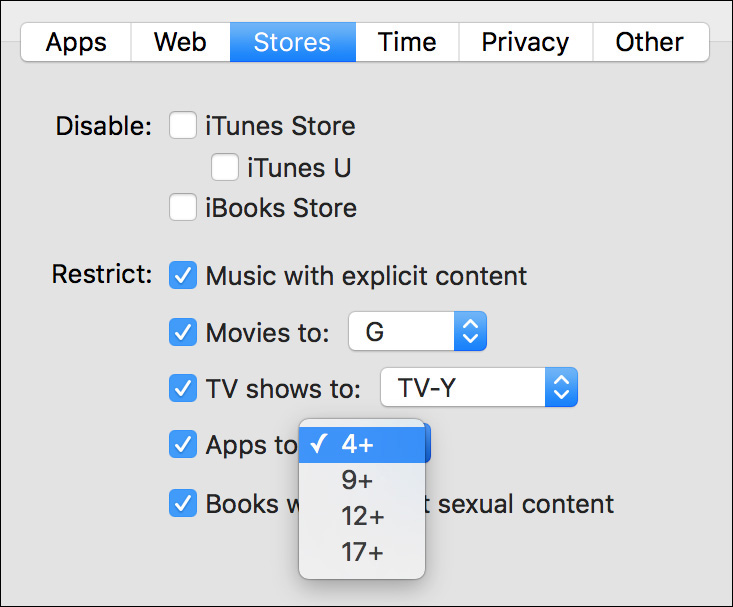
Some items in the Mac App Store, specifically games, may contain content not suitable for children. Because software in the Mac App Store is rated with a system similar to that for motion pictures, you can limit a user’s access to specific ratings. Further, if your organization prevents users from installing their own applications, then you may want to disable access to the Mac App Store altogether. If you want to limit access or completely disable the Mac App Store for a user, you can do so via the parental controls.
Note
The system will not allow you to delete the Mac App Store, because it is needed to perform system updates.
In Parental Controls preferences, you have several ways to limit applications from the Mac App Store. The easiest method is to simply choose an age requirement from the “Apps to:” pop-up menu in the Stores pane of Parental Controls. Selecting a minimum age here limits the user’s ability to both purchase new applications and open any applications already installed from the Mac App Store.
Alternatively, in the Apps pane of Parental Controls you can individually deselect the applications you want to disallow. Scrolling down through the allowed applications list also reveals an option, under the Other Apps disclosure triangle, to disallow the Mac App Store itself. This obviously prevents the restricted user account from installing or updating any item available from the Mac App Store.
More Info
Managing users using the parental controls is further covered in Lesson 5, “Manage User Accounts.”
Reference 16.2 About Process Environments
Obviously, applications from the Mac App Store are made specifically to work on macOS. Once you venture beyond the Mac App Store, though, you’ll find that there are thousands of other applications that also work on macOS. Aside from the Mac App Store, software can be delivered through a variety of mechanisms.
macOS supports several application environments. Application developers create their products based on support for these environments. Several are specific to macOS, whereas others add support for popular UNIX-based tools. Most importantly, though, average users do not need to concern themselves about which environment their application is using—the system will provide the appropriate resources automatically. The four primary application environments in macOS are native macOS applications, UNIX commands, Java applications, and UNIX applications that use the X Window System.
About Native macOS Applications
Most native macOS applications are created using a development environment known as Xcode. Unsurprisingly, applications designed using Xcode run only on Apple devices. Xcode leverages a variety of programming languages, but the two most often used are Objective-C and Swift.
More Info
To learn more about developing native applications for macOS, see the Apple development resources at https://developer.apple.com/macos/.
macOS Sierra continues to support earlier Mac applications created using a development environment known as Carbon. The Carbon application environment is a streamlined and significantly updated version of the previous Mac OS 9 environment.
However, Apple has made it clear that going forward, new development for macOS applications should not use Carbon. Often, developers must use Objective-C or Swift in Xcode if they want to take advantage of the latest macOS or iOS features. As an example, older Carbon-based applications cannot take advantage of Auto Save and iCloud services.
For this reason, nearly all Apple software and most third-party software available from the Mac App Store is developed using Objective-C or Swift in Xcode. Further, although macOS Sierra still supports Carbon applications, the technology has officially been deprecated, indicating that future releases of macOS may not support Carbon-based applications.
About Legacy Mac Applications
Previous Mac systems supported applications created for Mac OS 9 and for PowerPC processors. The Classic compatibility environment, which enables users to run software created for Mac OS 9, ceased to be supported as of Mac OS X Leopard 10.5. The Rosetta compatibility environment, which enables users to run software created for PowerPC processors, is not supported as of OS X Lion 10.7.
About UNIX Commands
Mac systems have long been both POSIX- and UNIX 03–compliant. Thus, macOS is compatible with most UNIX software. The macOS system foundation, named Darwin, is based on the open source Free Berkeley Software Distribution (FreeBSD) UNIX command-line interface. The command line is most often accessed via the /Applications /Utilities/Terminal application.
More Info
To learn more about Darwin, see the Apple open source development resources at https://developer.apple.com/opensource.
About Java Applications
Java is an application environment originally developed by Sun Microsystems but now owned and primarily maintained by Oracle Corporation. The goal of developing software in Java is to create cross-platform applications. This means a developer can write software code that can run on many environments. Although there is Java application runtime support for macOS, it is not included with the default macOS system installation.
Note
JavaScript, another technology, is used almost exclusively by web browsers and is fundamentally quite different from the Java application runtime. Safari, the web browser included in macOS, provides robust support for JavaScript.
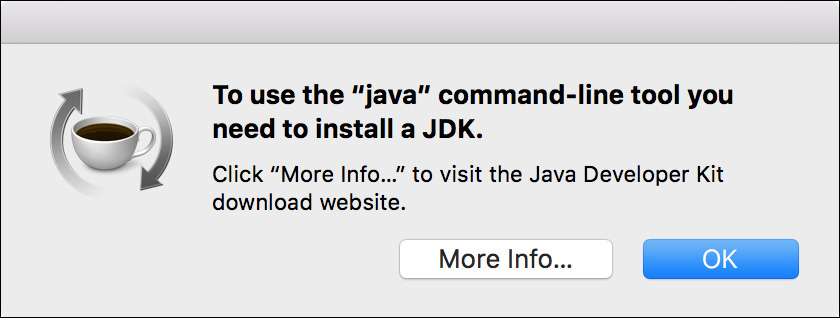
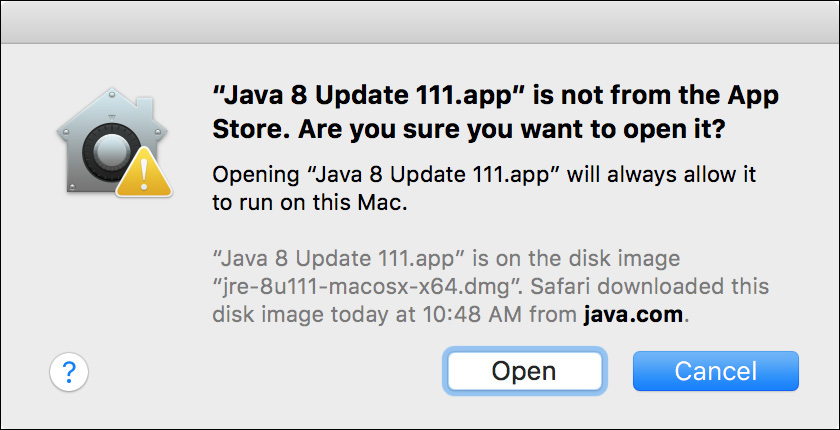
To acquire the latest versions of Java for macOS, you can download and install the Java runtime from Oracle directly at http://java.com/. In fact, the first time you attempt to run a standard Java applet or application on a new Mac system, you are prompted to navigate to the download page for the latest version of Oracle’s Java Developer Kit (JDK). The Oracle JDK includes the latest Java runtime environment along with Java developer tools.
Note
Although the Java 6 runtime is still available directly from Apple, this legacy Java version is not supported by macOS Sierra. Also, the macOS technology that detects known malware may disable outdated versions of Java with known security issues.
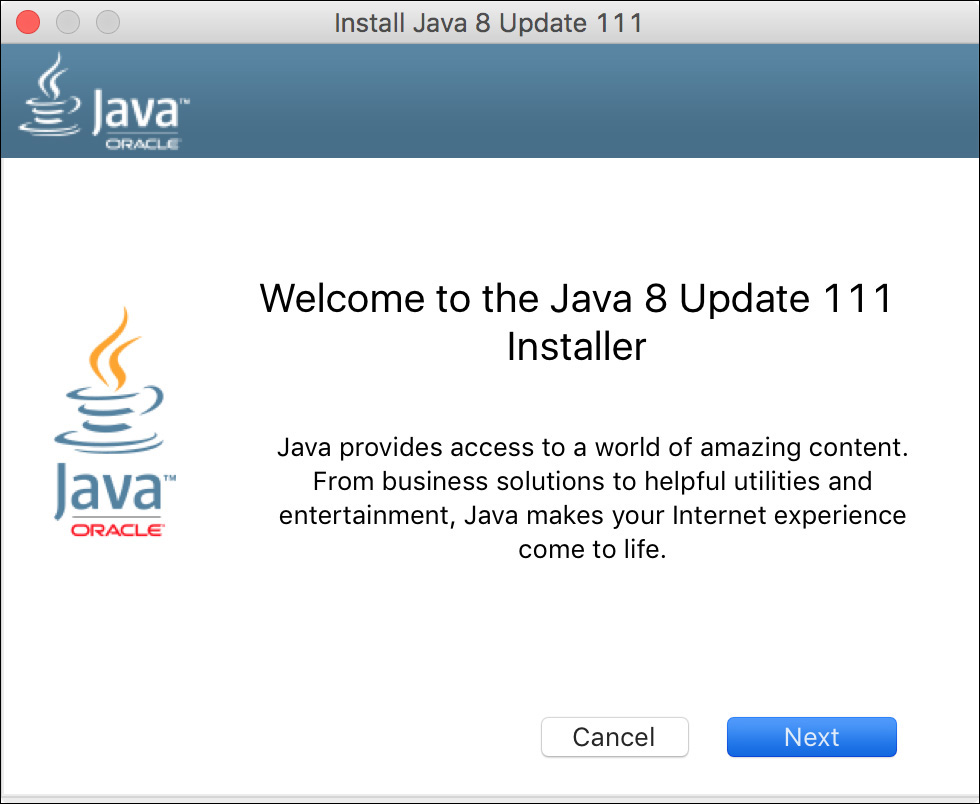
The Java website provides the Java runtime in the form of an installer package that requires administrator authentication. If you know that your users require access to Java applications, you may want to manually download and install the Java runtime as part of your standard macOS configuration.
After installation you can verify the specific Java version supplied by Oracle and adjust other Java settings by opening the Java preferences pane, which appears in the bottom section of System Preferences. Oracle’s implementation of the Java runtime features its own proprietary updater mechanism, which can also be managed from the Java preferences.
About X Window System Applications
The X Window System is an extension of the UNIX environment that provides a common graphical applications platform for UNIX workstations. Previous Mac systems included the Apple version of a popular implementation of the X Window System, known as X11. Open /Applications/Utilities/X11 to access X Window System applications.
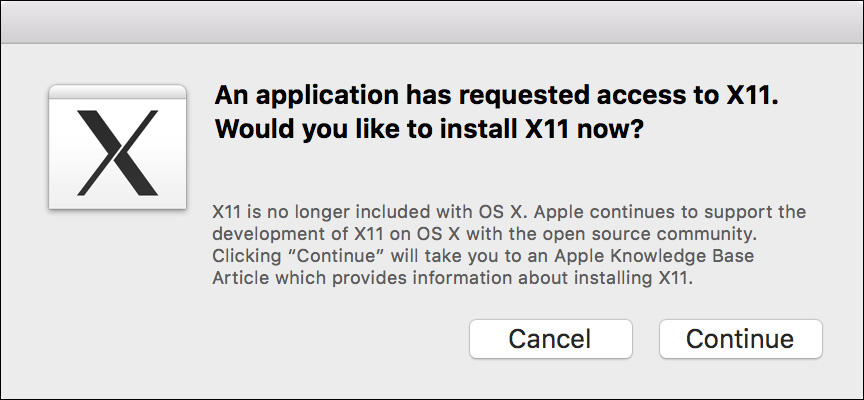
However, opening this application in OS X El Capitan 10.11 or later redirects you to Apple Support article HT201341, “About X11 for Mac.” From that article you are redirected to an open source implementation known as XQuartz, available at http://xquartz.macosforge.org. This is the Apple-supported implementation of the X Windowing System on macOS. Upon installation, the /Applications/Utilities/X11 application is replaced with /Applications /Utilities/XQuartz.
About Open Source Software
By now you may have noticed that quite a bit of macOS is based on something called open source software. Generally speaking, open source is a method of software creation based on the free distribution and contribution of software source code. In other words, it’s software whose code is available at no cost to anyone for general use or further modification. Interested individuals are expected and usually encouraged to provide improvements to open source software by adding to the software’s code. It’s expected that over time this community involvement will yield software products of exceptional quality, often free of cost.
Apple is deeply involved with many open source projects, including not just building on open source but also contributing to existing projects and creating entirely new open source projects. In fact, the core of macOS, Darwin, is an entirely open source operating system that includes more than 200 individual open source projects. Keep in mind, though, that Apple maintains proprietary closed software solutions as part of macOS as well.
To learn more about how Apple is involved in open source development, visit https://developer.apple.com/opensource.
The astounding growth of open source software in the last decade has not only produced some great software but also led to the rise of an entirely new operating system, Linux. With the growing popularity of Linux, high-quality open source applications have taken off as well. Because of the open source and UNIX heritage of macOS, you can also take advantage of many of these open source applications on your Mac. Some open source applications run in the command line, others run through XQuartz, and some have even been converted to full-fledged Mac applications. Take some time to explore these free open source solutions for your Mac—they may be suitable replacements for commercially purchased software.
More Info
The MacPorts project hosts over 24,000 open source software titles for macOS at www.macports.org.
Reference 16.3 About Application Security
One of the primary benefits of acquiring applications from the Mac App Store is knowing that Apple has processes for ensuring that the applications are free of malicious software, also known as malware. No system is perfect, but even if a bad application slips by the Apple procedures, the application can be pulled quickly from the store.
Despite the popularity of the Mac App Store, thousands of Mac applications are available only outside of the store. There are many reasons a developer might need to distribute software outside of the Mac App Store, including both technical and licensing issues. Apple recognizes the need for software developers to distribute their wares outside of the Mac App Store. At the same time, though, there is the need to ensure that Mac users are protected from bad software. To this end, macOS includes several application security technologies that help protect users when they install third-party applications.
About Process Security
Again, macOS inherits relatively robust process security due to its UNIX foundation. At both the command line and graphical interface, applications and processes are not allowed to access resources unless they are authorized. Access restrictions in the form of file system permissions are responsible for much of the security here. Simply, a running process is owned by a user and is therefore granted file-system access similar to that of the user.
OS X El Capitan 10.11 and later improve on this security with System Integrity Protection (SIP). SIP prevents processes running as root (or System Administrator) from being able to modify protected core system files and processes. Details regarding SIP are covered in Lesson 13, “Manage System Resources.”
Despite these security mechanisms, systemwide privileges are allowed when needed. The most obvious example of this is the Installer application, which requires administrator authorization to install software that affects more than one user. The moral of this story is to beware of applications that require administrator authorization, as you are granting that application system-level access. Of note, the only applications in the Mac App Store that may ask for administrator authorization are those developed by Apple. For example, setup of the macOS Server application requires administrator authorization because it installs additional system services.
About Application Sandboxing
Even with the default process security mechanism in place, an application could still access all the files owned by a user. This gives an application the potential to read all your files and potentially gain unauthorized access to personal information.
A significant security feature in macOS is support for full application and process sandboxing. As the name implies, applications and processes in macOS can “play” inside a restricted environment that has little or no access to other parts of the system. With application sandboxing, applications are granted access only to the items they need through a sophisticated arrangement of rules. This is implemented in macOS via application sandbox containers, as covered in Lesson 13, “Manage System Resources.”
It’s important to note that application sandboxing is an optional feature that developers must implement in their own time. Apple has already sandboxed any application or process built into macOS that could benefit from this feature. Further, as of June 2012 all applications available from the Mac App Store must use application sandboxing.
About Code Signing
Code-signed applications and processes include a digital signature, which is used by the system to verify the authenticity and integrity of the software code and resources. Code is verified not only on disk but also as it is running. Therefore, even if some part of the application’s or process’s code is inappropriately changed while it’s active, the system can automatically quit it.
In addition to identifying changes to applications, code signing provides guaranteed application identification for other parts of the system, including the keychain, the personal application firewall, Parental Controls preferences, application sandboxing, and Managed Client settings.
Finally, in macOS, code signing is used as the basis of identification for trusting newly installed items. Though code signing is optional, applications that have it are automatically trusted by the system. All Apple software and applications from the Mac App Store are always code signed, and thus trusted by macOS upon installation.
Software developers that choose not to use the Mac App Store can still take advantage of this system. A developer can code sign its installers and applications using an Apple-granted Developer ID. In this way, code-signed applications installed from any origin can be trusted by macOS.
About File Quarantine
macOS includes a file quarantine service that displays a warning when you attempt to open an item downloaded from an external source such as the Internet. Quarantined items include many file types, such as documents, scripts, and disk images. This lesson focuses primarily on quarantine as it relates to downloaded applications.
File quarantine goes into effect only when an item is marked for quarantine by the application that downloaded it. This is true for all applications built into macOS, but it may not be true for third-party applications that can download files. Also, files copied to the Mac using any other method are not marked for quarantine. For example, using the Finder to copy an application from a USB disk does not engage the quarantine system.
When a file is marked, the system requires you to verify your intent to open the item or cancel if you have any suspicions about the safety of an item. Any administrator user can permanently clear the quarantine by clicking Open. After an administrator clears the quarantine, the system will no longer show the quarantine warning. On the other hand, when a standard user clicks Open on a quarantined item, the item opens but the quarantine remains. Thus, subsequent users who try to open the item still get the quarantine warning.
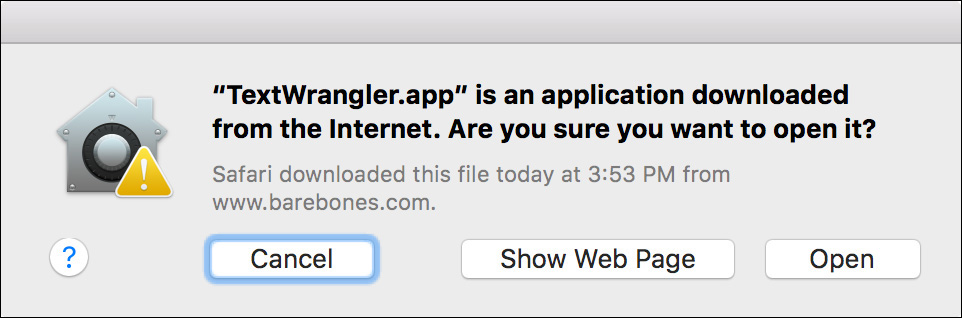
Note
The version of TextWrangler that was used to generate the previous screenshot was downloaded from the developer’s website. TextWrangler is also available from the Mac App Store; however, the Mac App Store version is not quarantined because it’s from a trusted source: Apple.
File quarantine can also be removed using the xattr command-line tool. This is useful for removing quarantine on multiple files at once, or in cases where the Finder can’t properly remove the quarantine. To use this tool in the Terminal application, enter xattr –dr com.apple.quarantine, followed by the path of the item.
About Malware Detection
Apple further secures macOS by maintaining a list of known malicious software. If you attempt to open any software on this list, the system presents a warning dialog suggesting that you move the item to the Trash. The list of malicious software is automatically updated via the macOS software update mechanism and is located on your Mac in the file /System/Library/CoreServices/CoreTypes.bundle/Contents/Resources/XProtect.plist.

To find out more about file quarantine, see Apple Support article HT201940, “About the ‘Are you sure you want to open it?’ alert (File Quarantine / Known Malware Detection) in OS X.”
About Gatekeeper
Gatekeeper is a technology that leverages both code signing and file quarantine to further protect your Mac from malicious applications. Because Gatekeeper relies on the file quarantine system, it restricts only applications downloaded by applications that properly set file quarantine. It does this by giving you the choice to allow downloaded applications from only trusted application sources.
Gatekeeper allows for three modes of application restriction:
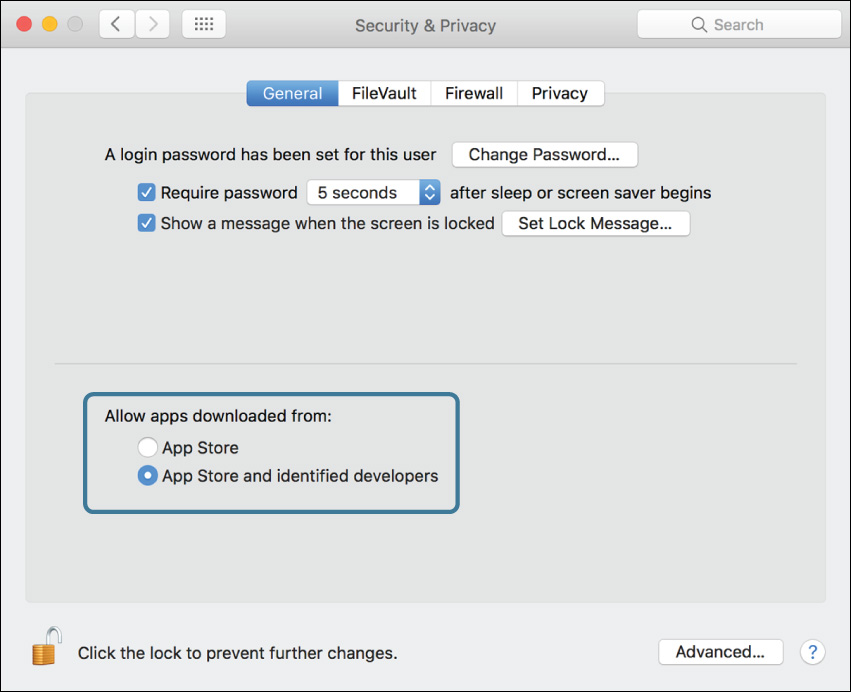
![]() App Store—This is the top option in the General pane of the Security & Privacy preferences. This is the most limited option, since it allows only applications from the Mac App Store to open. Even when a version of the application is available from the Mac App Store, if you download the application from somewhere else, it will still be blocked.
App Store—This is the top option in the General pane of the Security & Privacy preferences. This is the most limited option, since it allows only applications from the Mac App Store to open. Even when a version of the application is available from the Mac App Store, if you download the application from somewhere else, it will still be blocked.
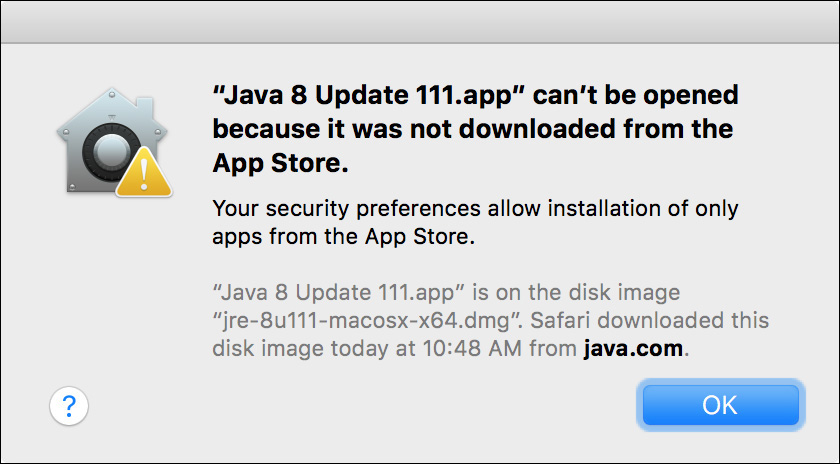
![]() App Store and identified developers—This is the second option in the General pane of the Security & Privacy preferences, and is the default option for macOS. As covered previously, developers can use an Apple-verified code-signing certificate to identify their application. If a developer has done this, the application is allowed to open, but the system still presents the file quarantine dialog for downloaded items. If an application isn’t properly signed, it will be blocked.
App Store and identified developers—This is the second option in the General pane of the Security & Privacy preferences, and is the default option for macOS. As covered previously, developers can use an Apple-verified code-signing certificate to identify their application. If a developer has done this, the application is allowed to open, but the system still presents the file quarantine dialog for downloaded items. If an application isn’t properly signed, it will be blocked.
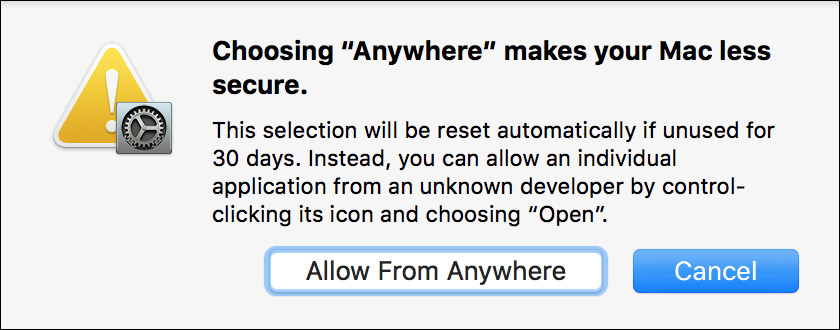
![]() Anywhere—Because this option makes your Mac less safe, it’s no longer available as a default in the Security & Privacy preferences. However, you can still enable this option via the following Terminal command: sudo spctl --master-disable. This option is similar to the behavior of previous Mac systems that did not include Gatekeeper. All applications are allowed regardless of source, but again the system presents the file quarantine dialog for downloaded items. Selecting this option will present a dialog reminding you that this will make your Mac less safe. Also, as the dialog states, Gatekeeper will reset if no unsigned software is installed in 30 days.
Anywhere—Because this option makes your Mac less safe, it’s no longer available as a default in the Security & Privacy preferences. However, you can still enable this option via the following Terminal command: sudo spctl --master-disable. This option is similar to the behavior of previous Mac systems that did not include Gatekeeper. All applications are allowed regardless of source, but again the system presents the file quarantine dialog for downloaded items. Selecting this option will present a dialog reminding you that this will make your Mac less safe. Also, as the dialog states, Gatekeeper will reset if no unsigned software is installed in 30 days.
Gatekeeper also identifies modified or damaged applications regardless of your security settings. In this case you are seeing code signing at work, since the system has identified changes to an application from its original state. Thus, the application is either damaged due to file corruption or someone other than the original developer has modified it. In either case you will not be allowed to open the application, because it may cause harm.
More Info
To find out more about Gatekeeper, see Apple Support article HT202491, “OS X: About Gatekeeper.”
Temporarily Bypass Gatekeeper
Even with Gatekeeper in place, an administrator user can override the system’s settings and allow untrusted applications. In the Finder, an administrator user can secondary-click (or Control-click) the application file and then choose Open from the shortcut menu. The Gatekeeper warning appears to verify the administrator’s intent.
Tip
An administrator user can also override the previous item blocked by Gatekeeper in the General tab of the Security & Privacy preferences.
Clicking Open opens the application and clears the file quarantine. However, this may not be enough for all unsigned applications, because some applications may automatically open other background or child applications. Examples include applications that also provide background software to facilitate hardware functionality.
These secondary applications also trigger Gatekeeper. Unfortunately, you will not be able to override the appropriate files from the Finder. In these cases, your first move should be to contact the software developer to ensure you have the latest macOS Sierra–compatible version of the software.
If you absolutely must install untrusted software, you can temporarily allow software by entering the following command in the Terminal: sudo spctl --master-disable. Once you have authenticated this command as an administrator, the Anywhere option becomes available in the General tab of the Security & Privacy preferences. Once you have launched the application and verified its full functionality, the quarantine is cleared, and you can then return the Gatekeeper settings to something more secure.
Reference 16.4 Use Traditional Installation Methods
Traditional installation methods fall into one of two categories: drag-and-drop installations or installation packages. Application developers can choose any method they want to deploy their wares. Often the distinction between the two traditional methods is the complexity of the software being deployed.
If a software developer creates a product that requires only a folder of a few items or even a single item, it’s often deployed as a drag-and-drop installation. However, if a software developer creates a product that requires a set of items that must be installed in multiple specific locations throughout the system, it’s often deployed as an installation package.
Note
As covered previously in this lesson, applications downloaded from any source outside of the Mac App Store are subject to file quarantine and Gatekeeper rules.
Install via Drag-and-Drop
Apple pioneered the era of drag-and-drop in computing, so it should come as no surprise that many traditional software installations in macOS are of the simple drag-and-drop variety. In general, macOS doesn’t care where an application or process resides. So long as the application itself doesn’t have a specific location requirement, applications can run from any location on the Mac. That said, as covered in previous lessons, some locations are more appropriate and secure than others.
Specifically, the /Applications folder is the default location for applications available to all users. Only administrator users can manually make changes to the /Applications folder. If users want to install their own drag-and-drop applications, they can create their own Applications folder in their home folder. However, users can place applications anywhere they please inside their own home folders. Again, many drag-and-drop applications work from any location on the system.
About Drag-and-Drop Application Security
Also, it’s important to recognize that because of the default security and permissions model in macOS, no application a standard user is allowed to install and open can interfere with other users on the system. Poorly written or malicious software could potentially harm items in the user’s home folder, but as long as the user is not allowed to authenticate as an administrator, it is extremely difficult for the software to cause damage to the system or other users.
Keep in mind, a user could deliberately cause damage to their own items. In short, allowing nonadministrator users the ability to install software is no more dangerous than allowing them to use the computer in the first place.
Install Drag-and-Drop Items
Drag-and-drop software deployed via optical disc, or any other physical medium, is often ready to copy to wherever the user wants to install it. On the other hand, software downloaded from the Internet is almost always deployed in some kind of archive format. As covered in Lesson 12, “Use Hidden Items, Shortcuts, and File Archives,” ZIP files and disk images are the most common archive formats for macOS.
In macOS, the Safari browser automatically unarchives ZIP files, by default, to the ~/Downloads folder. Users could technically leave the application in the ~/Downloads folder and continue to open it from there, but they should be trained to move the new application to a more appropriate location in their home folder.
In macOS the Safari browser does not, however, automatically mount a downloaded disk image. A user must double-click a disk image to make its contents available to the Finder. Once the disk image volume is mounted, again the user could technically leave the application inside the disk image and open it from there, but users should be trained to move the new application to another location. This is especially true of disk images, because if the user logs out or restarts the computer, the disk image unmounts.
For many novice users, this would result in their “losing” the application. Fortunately, many developers use a helpful Finder window background graphic that should encourage the user to copy the software to a more appropriate location. An example of this type of installation is found later in the exercise section of this lesson.
About Installation Packages
Installation packages are the default deployment mechanism for most Apple software updates and third-party software that requires the installation of items in multiple locations. Installation packages are deployed via user interaction with the Installer application. When a user opens an installation package, the Installer application opens automatically. This application has the user walk through a few simple screens to configure and initiate the installation process.
Most significantly, installation packages often require administrator user authentication, since they are frequently used to install items that can affect other users and the operating system. Lesson 4, “Update macOS,” details using and troubleshooting installation packages for Apple software updates. The same techniques apply to third-party installation packages deployed via the Installer application.
That said, on occasion you will find third-party installers that do not use the Apple Installer application. These installations are easily identified because the installation assets are themselves an application using the .app filename extension. The Apple native installation assets come only in the form of installation packages using the .pkg or .mpkg filename extension. If you have problems with a third-party installer, you must contact the developer for any issues regarding installation, since it has elected to use a proprietary installation mechanism.
Update Installed Software
Similar to installation, there are a variety of methods for keeping installed software up to date:
![]() Apple software and Mac App Store software—Any software acquired via the Mac App Store, including both Apple and third-party software, is also updated via the Mac App Store software update mechanism, as covered previously in this lesson and in Lesson 4, “Update macOS.”
Apple software and Mac App Store software—Any software acquired via the Mac App Store, including both Apple and third-party software, is also updated via the Mac App Store software update mechanism, as covered previously in this lesson and in Lesson 4, “Update macOS.”
![]() Automatically updating third-party software—Automatic update mechanisms for third-party software vary widely. Prior to the Mac App Store, no unified method for providing third-party software updates existed. Thus, software developers often implemented their own automatic update methods. Unfortunately, this means there is no standard method to determine if an application has automatic update capability. You can start by looking in common locations, including the application menu (the menu that appears with the application’s name), the application’s preferences window, or the application’s Help menu. If the third-party item installed a preference pane, it’s highly likely any automatic update mechanism will be found within. Finally, it’s important to note that nearly all automatic update mechanisms require administrator user authentication.
Automatically updating third-party software—Automatic update mechanisms for third-party software vary widely. Prior to the Mac App Store, no unified method for providing third-party software updates existed. Thus, software developers often implemented their own automatic update methods. Unfortunately, this means there is no standard method to determine if an application has automatic update capability. You can start by looking in common locations, including the application menu (the menu that appears with the application’s name), the application’s preferences window, or the application’s Help menu. If the third-party item installed a preference pane, it’s highly likely any automatic update mechanism will be found within. Finally, it’s important to note that nearly all automatic update mechanisms require administrator user authentication.
![]() Manually update third-party software—In some cases the only update mechanism for third-party software is to simply install a newer version. Keep in mind that only administrator users can replace or update software in the /Applications folder. Further, many package installations require administrator user authentication.
Manually update third-party software—In some cases the only update mechanism for third-party software is to simply install a newer version. Keep in mind that only administrator users can replace or update software in the /Applications folder. Further, many package installations require administrator user authentication.
Reference 16.5 Remove Installed Software
In many cases, removing installed software is much easier than installing it in the first place. One thing that often surprises veteran Windows support specialists who are new to the Mac is that there’s no default Apple software removal mechanism. This is because the vast majority of Mac software can simply be moved to the Trash.
Note
System Integrity Protection in macOS Sierra prevents any user from removing core system software and applications.
Software removal methods include:
![]() Mac App Store software—Although it’s true that applications installed from the Mac App Store can be dragged to the Trash, you can also remove these applications from Launchpad. To engage Launchpad, double-click its icon in the /Applications folder, or from a Multi-Touch trackpad use the “pinch with thumb and three fingers” gesture. In Launchpad, hold down the Option key, and a small x button appears next to applications installed from the Mac App Store. Click one of the buttons, and the system will remove that application.
Mac App Store software—Although it’s true that applications installed from the Mac App Store can be dragged to the Trash, you can also remove these applications from Launchpad. To engage Launchpad, double-click its icon in the /Applications folder, or from a Multi-Touch trackpad use the “pinch with thumb and three fingers” gesture. In Launchpad, hold down the Option key, and a small x button appears next to applications installed from the Mac App Store. Click one of the buttons, and the system will remove that application.
![]() Drag to the Trash—Yes, it’s true that most applications are “removed enough” if you simply move the primary application icon into the Trash. If the software item is a type of resource, like a preference pane or a font, just locate the item in one of the Library folders and drag it to the Trash. This method may leave some residual support files, but by removing the primary application or resource file you have rendered the software inoperable. This method works for applications installed using a traditional method and via the Mac App Store. Just don’t forget to empty the Trash before continuing with your work—a user logout wouldn’t hurt either.
Drag to the Trash—Yes, it’s true that most applications are “removed enough” if you simply move the primary application icon into the Trash. If the software item is a type of resource, like a preference pane or a font, just locate the item in one of the Library folders and drag it to the Trash. This method may leave some residual support files, but by removing the primary application or resource file you have rendered the software inoperable. This method works for applications installed using a traditional method and via the Mac App Store. Just don’t forget to empty the Trash before continuing with your work—a user logout wouldn’t hurt either.
![]() Application uninstaller—Only in very rare occasions will third-party software require an uninstaller. The only times you will find an uninstaller are in situations where the software’s developer has deemed the removal process complicated enough to warrant an uninstaller. If this is the case, the software developer must provide the uninstaller; it often comes along with the original software installer.
Application uninstaller—Only in very rare occasions will third-party software require an uninstaller. The only times you will find an uninstaller are in situations where the software’s developer has deemed the removal process complicated enough to warrant an uninstaller. If this is the case, the software developer must provide the uninstaller; it often comes along with the original software installer.
Exercise 16.1 Use the Mac App Store
![]() Prerequisite
Prerequisite
![]() You must have created the Local Admin (Exercise 2.1, “Configure a New macOS System for Exercises,” or Exercise 2.2, “Configure an Existing macOS System for Exercises”) and Chris Johnson (Exercise 5.1, “Create a Standard User Account”) accounts.
You must have created the Local Admin (Exercise 2.1, “Configure a New macOS System for Exercises,” or Exercise 2.2, “Configure an Existing macOS System for Exercises”) and Chris Johnson (Exercise 5.1, “Create a Standard User Account”) accounts.
In this exercise, you will use the Mac App Store to purchase, download, and install a free application on your computer.
Select an Apple ID to Use with the App Store
Note
The exact process of configuring Chris Johnson’s account with an Apple ID for the App Store will depend on whether you want to use the same Apple ID for iCloud and App Store purchases and what the Apple ID has been used for in the past. The instructions in this exercise attempt to cover most of the possibilities, but if you find that your experience does not match these instructions, the App Store will be able to guide you through the process.
1 If necessary, log in as Chris Johnson.
2 Open System Preferences, and select the App Store preference pane.
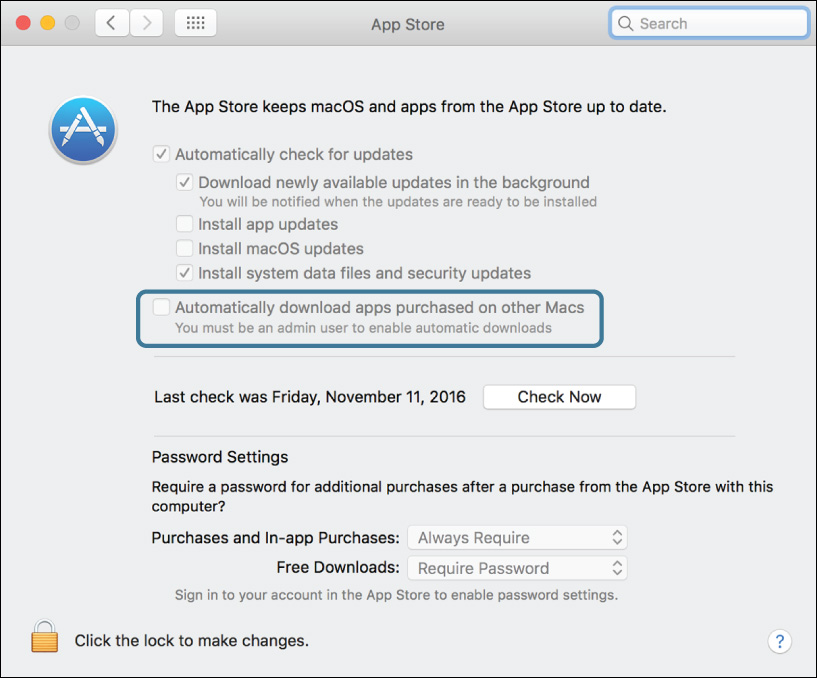
The settings in this preference pane allow you to automate updating and downloading App Store purchases, as well as system software. By default, the App Store automatically checks for all updates and downloads system updates in the background. It also automatically installs new security updates. In addition, you will find an option to automatically update purchased applications, as well as an option to automatically download applications, purchased on other Mac computers using the same Apple ID.
3 If “Automatically download apps purchased on other Macs” is selected, click the lock, authenticate as Local Admin, and deselect the checkbox.
Note
Although administrator access is required to change the update settings, you will not need administrator access to install an application from the App Store.
4 Quit System Preferences.
5 From the Apple menu, choose App Store.
6 In the App Store, pull down the Store menu, and see whether it shows you are signed in (it will list “View My Account”) or not (“Create Account”).
You may have been automatically signed in to the Apple ID you used for iCloud. Apple recommends using the same account for both (see Apple Support article HT204053, “Sign in with your Apple ID on a new device”), but it is also possible to use different Apple IDs for these different functions.
7 If you are signed in but want to use a different Apple ID for App Store purchases, choose Store menu > Sign Out.
You have several choices for an account to use:
![]() You can use the same Apple ID that you are using for iCloud services. If you are performing these exercises as part of a class, you should use this option.
You can use the same Apple ID that you are using for iCloud services. If you are performing these exercises as part of a class, you should use this option.
![]() If you have another existing Apple ID, you can choose to use that for the App Store instead.
If you have another existing Apple ID, you can choose to use that for the App Store instead.
![]() If you want to create a new Apple ID for use with the App Store, have access to an existing email account that is not already in use as an Apple ID, and want to use it to download free applications from the App Store without supplying a credit card, follow the instructions in Apple Support article HT204034, “Create or use your Apple ID without a payment method.” Once the account has been created, you can proceed with this exercise.
If you want to create a new Apple ID for use with the App Store, have access to an existing email account that is not already in use as an Apple ID, and want to use it to download free applications from the App Store without supplying a credit card, follow the instructions in Apple Support article HT204034, “Create or use your Apple ID without a payment method.” Once the account has been created, you can proceed with this exercise.
![]() If you want to create a new Apple ID for use with the App Store, have access to an existing email account that is not already in use as an Apple ID, and want to supply a credit card for future purchases, click the Create Apple ID button and follow the prompts. The details of this process are not covered here.
If you want to create a new Apple ID for use with the App Store, have access to an existing email account that is not already in use as an Apple ID, and want to supply a credit card for future purchases, click the Create Apple ID button and follow the prompts. The details of this process are not covered here.
8 If the Store menu shows that you are already signed in to the Apple ID you want to use for App Store purchases, skip ahead to the “Select an App to Purchase” section.
9 If you are not already signed in, choose Store menu > Sign In.
10 Enter the Apple ID and password, and click “Sign In.”
11 If you used an Apple ID with two-step verification or two-factor authentication enabled, you may be prompted to provide additional verification of your identity. If you cannot do this, click Cancel, choose Store menu > Sign Out, and then either start over using an instructor-provided Apple ID instead of your own or use one of the other options for an Apple ID.
12 If you receive a message that this Apple ID has not yet been used with the iTunes Store, you can do any of the following:
![]() Enable this Apple ID for use with the App Store by clicking Review and following the prompts (the process is not covered in detail here). Note that this may require you to supply a credit card or other payment source.
Enable this Apple ID for use with the App Store by clicking Review and following the prompts (the process is not covered in detail here). Note that this may require you to supply a credit card or other payment source.
![]() Switch to a different Apple ID by clicking Cancel, and start over using an Apple ID that has been used with the App Store.
Switch to a different Apple ID by clicking Cancel, and start over using an Apple ID that has been used with the App Store.
![]() Click Cancel, quit the App Store, and skip this exercise.
Click Cancel, quit the App Store, and skip this exercise.
Select an App to Purchase
1 Enter the unarchiver in the search field (at the top right of the App Store window), and press Return.
Note
If you are performing these exercises in a class, the instructor may recommend a different application for this exercise; in that case, substitute that recommendation for The Unarchiver throughout this exercise.
The App Store may find more than one relevant application. Find a free application named The Unarchiver (or the application your instructor recommended). Note that free applications have a Get button instead of a price (although if the application has already been purchased under this Apple ID, you will see an Install button).
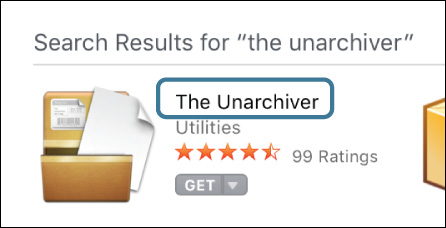
2 Click the free application’s name.
The App Store displays more details about this application. Again, there will be a Get button or an Install button.
3 Click the Get button or Install button.
4 If the application begins downloading immediately, skip ahead to “Test the App.”
5 If it changes to an Install App button, click that to confirm the download.
If additional confirmation or configuration is required, a dialog appears asking you to sign in to download the application. Note that depending on your App Store preference settings, the Apple ID password may be required, even though this is a free application.
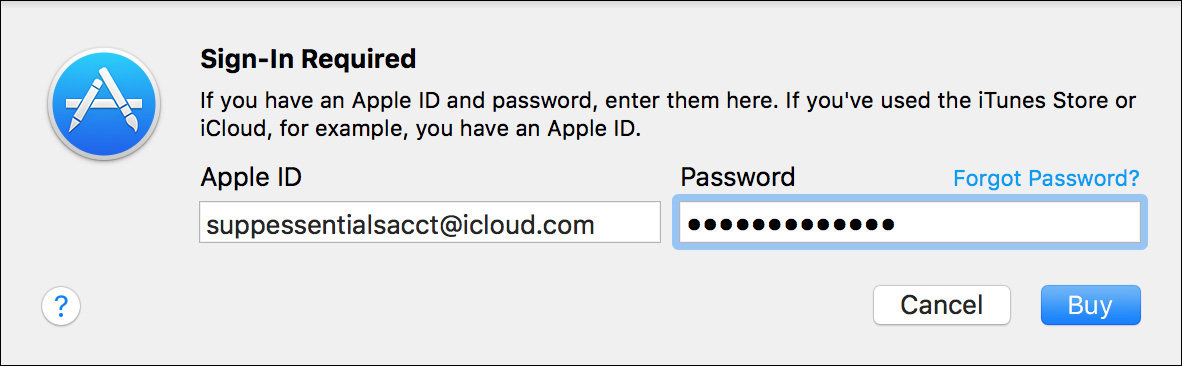
6 If you are prompted to, enter the Apple ID password, and click Buy.
7 If you are prompted to ask permission for the purchase, you are using an iCloud child account. In this case, you can do any of the following:
![]() Click Ask, and then continue the exercise after a parent has approved the purchase.
Click Ask, and then continue the exercise after a parent has approved the purchase.
![]() Switch to a different Apple ID by clicking Cancel, choosing Store menu > Sign Out, and then starting over using a different Apple ID.
Switch to a different Apple ID by clicking Cancel, choosing Store menu > Sign Out, and then starting over using a different Apple ID.
![]() Click Cancel, quit the App Store, and skip this exercise.
Click Cancel, quit the App Store, and skip this exercise.
8 If you are prompted for whether to always require a password when making a purchase, choose which policy you prefer and click the appropriate button.
9 If you used an Apple ID with two-step verification or two-factor authentication enabled, you may be prompted to provide additional verification of your identity. If you cannot do this, click Cancel, choose Store menu > Sign Out, and then either start over using an instructor-provided Apple ID instead of your own or use one of the other options for an Apple ID.
10 If you are asked to verify billing information for your Apple ID, click Billing Info, and enter it as requested. If the requested information is not available, click Cancel, choose Store menu > Sign Out, and then either start over using an instructor-provided Apple ID instead of your own or use one of the other options for an Apple ID.
11 If you receive a warning that the terms and conditions have changed, click OK and read the new terms. If you are using your own Apple ID and do not want to agree to them, click Cancel, choose Store menu > Sign Out, and then either use an instructor-provided Apple ID instead of your own or skip this exercise.
After agreeing to the new terms and conditions, you may need to reselect The Unarchiver.
When the application starts downloading, its progress is shown both in the App Store and under the Launchpad icon in the Dock.

Test the App
1 In the Dock, click the Launchpad icon.
If the application has not finished downloading, Launchpad displays its progress. When it finishes, you will see the application’s regular icon. A blue dot appears next to its name, indicating that it is new.

2 Click The Unarchiver’s icon.
The application launches.
3 If The Unarchiver asks where to extract archives, click “Extract to the same folder.”
The Unarchiver Preferences window may open. You do not need to set anything here.
4 Quit the application.
Examine the App Store
1 In the App Store toolbar, click the Purchased icon.
2 Choose Store menu > Reload Page (Command-R) to make sure the list is up to date.
The App Store lists all the applications purchased with this Apple ID. If you are using your own Apple ID, you see your previous purchases; if you are using an instructor-supplied Apple ID, you may see applications that previous students purchased.
If you are using Family Sharing, a pop-up menu will allow you to switch from My Purchases to other family members’ purchases. If you have not set up Family Sharing, this menu does not appear.

Note that if you had enabled the “Automatically download applications purchased on other Macs” option in Software Update preferences, any additional applications would be automatically downloaded and installed. Since this option is disabled, you see Install buttons that allow you to download and install them manually.
Note
The App Store terms and conditions limit the situations in which an application may be installed on several computers. See www.apple.com/legal/itunes/us/terms.html for the current terms and conditions.
If any other applications are listed, do not install them at this time.
3 In the App Store toolbar, click the Updates button. If you are prompted, authenticate as Local Admin.
This displays updates available for both system software and App Store purchases installed on this computer.

4 Quit the App Store.
Exercise 16.2 Use an Installer Package
![]() Prerequisite
Prerequisite
![]() You must have created the Local Admin (Exercise 2.1, “Configure a New macOS System for Exercises,” or Exercise 2.2, “Configure an Existing macOS System for Exercises”) and Chris Johnson (Exercise 5.1, “Create a Standard User Account”) accounts.
You must have created the Local Admin (Exercise 2.1, “Configure a New macOS System for Exercises,” or Exercise 2.2, “Configure an Existing macOS System for Exercises”) and Chris Johnson (Exercise 5.1, “Create a Standard User Account”) accounts.
Traditionally, one common way of distributing software is in the form of an installer package. Although this installation process involves more steps than the App Store method, it also offers some additional capabilities, such as allowing the developer to install files outside of /Applications, allowing the user to choose which optional components to install, and so on. For these reasons, package-based installation is likely to continue to be used for complex applications and other software. In this exercise, you will use it to install a simple application.
Install an App with an Installer Package
1 If necessary, log in as Chris Johnson.
2 Open the StudentMaterials/Lesson16 folder.
3 Open Hello World.dmg.
The image mounts, with the Hello World package inside it.
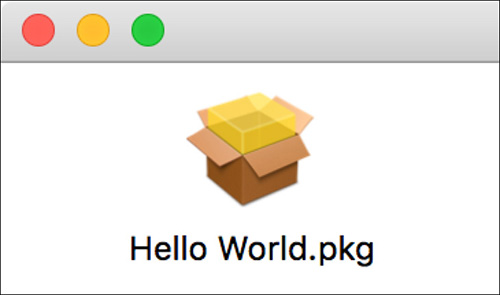
4 Open Hello World.pkg.
The Installer opens and prepares to install the Hello World application.
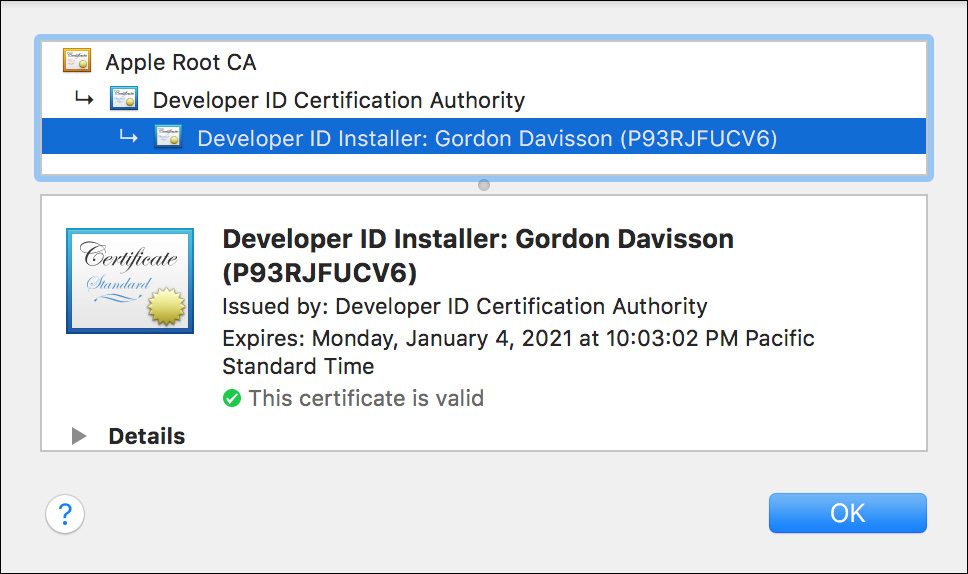
5 Click the lock icon at the upper right of the Installer window.
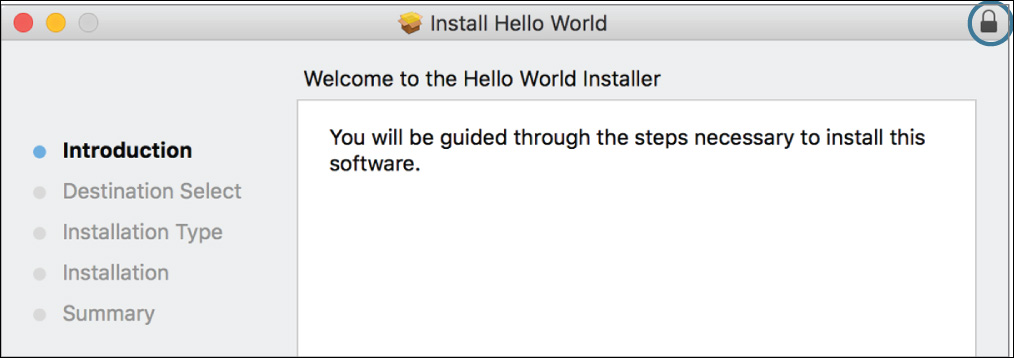
The lock icon indicates that this is a signed package; clicking it displays information about the certificate it was signed with. In this case, it was signed with Gordon Davisson’s Developer ID Installer certificate, which was signed by the Developer ID Certification Authority, which in turn was signed by the Apple Root CA. Essentially, this means that the Apple Root CA vouches for the authenticity of the Developer ID Certification Authority, which vouches for the authenticity of Gordon Davisson’s certificate, which vouches for the authenticity of the installer package.
This is the standard format of an Apple-issued Developer ID certificate.
6 Click OK to dismiss the certificate dialog.
7 Choose File menu > Show Files.
8 In the window that appears, click the disclosure triangle next to Hello World.
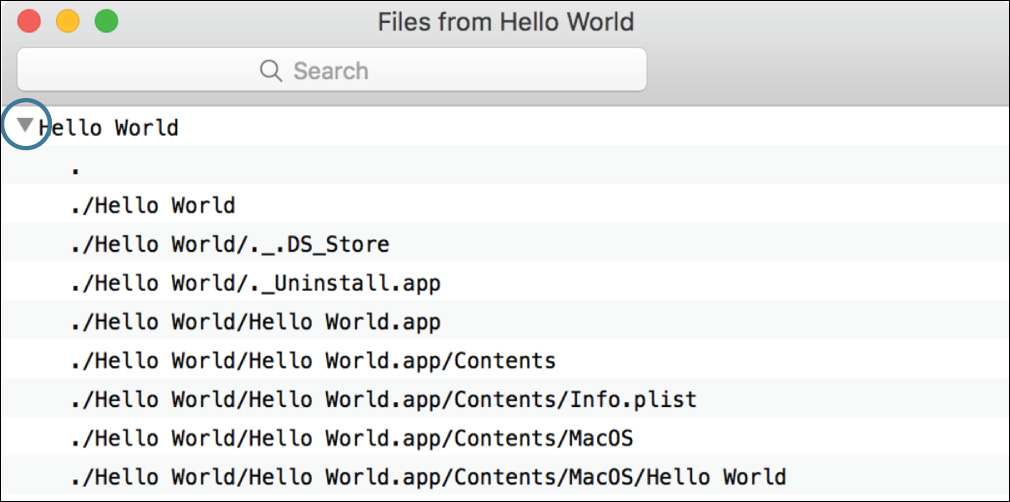
This shows what files the installer package contains. In this case, it is a folder named Hello World containing Hello World.app, Uninstall.app, and some metadata files.
9 Close the “Files from Hello World” window.
10 In the main Installer window, click Continue.
Some packages include additional steps, such as readme information, license agreements, choices of components to install, and so forth. This is a simple package, so it proceeds straight to the install pane.
11 In the Standard Install pane, click Install.
12 Authenticate as Local Admin when prompted.
The installation completes quickly, and the Installer informs you that it was successful.
13 Click Close, and the Installer exits.
14 Eject the disk image.
15 In the Finder, navigate to the Applications folder (you can choose Go menu > Applications or press Command-Shift-A).
Note that a Hello World subfolder has been installed. Inside is the Hello World application and an Uninstall script.
16 Open Launchpad.
Even though it was installed in a subfolder, the new application is displayed along with your other applications.
17 Open Hello World.
Because this application was installed with a package (and the package was properly signed), Gatekeeper does not activate, and no warning is displayed. You will see what happens with an untrusted application in the next exercise.
18 Quit Hello World.
Note that unlike the App Store, there is no standard update process for package-installed applications. Some applications manage their own updates, whereas others require you to manually download and install updates.
Exercise 16.3 Use a Drag-and-Drop Install
![]() Prerequisite
Prerequisite
![]() You must have created the Local Admin (Exercise 2.1, “Configure a New macOS System for Exercises,” or Exercise 2.2, “Configure an Existing macOS System for Exercises”) and Chris Johnson (Exercise 5.1, “Create a Standard User Account”) accounts.
You must have created the Local Admin (Exercise 2.1, “Configure a New macOS System for Exercises,” or Exercise 2.2, “Configure an Existing macOS System for Exercises”) and Chris Johnson (Exercise 5.1, “Create a Standard User Account”) accounts.
In this exercise, you will examine the process of installing a downloaded application via the drag-and-drop method. The way you will get this application depends on whether you have a server available to support these exercises (either one provided by the classroom or one you set up yourself). If you have a “Mainserver” available, follow option 1; otherwise, follow option 2.
Option 1: Download an Application from Mainserver
Follow these steps if you have a macOS server configured to support these exercises.
1 If necessary, log in as Chris Johnson.
2 Open Safari.
3 Enter mainserver.local.
4 If you receive a warning that Safari can’t verify the identity of the website, click Continue.
Note that continuing after this warning is not generally safe, since the web server might be a fake or impostor, but in this particular case, it should not be a problem.
5 Near the bottom of the page, click the link to download Dead End. When the download is complete, quit Safari.
6 Open Dead-End.dmg from your Downloads folder. Note that there is a shortcut to Downloads in your Dock.
Option 2: Use an Application from StudentMaterials
Follow these steps if you do not have a macOS server configured to support these exercises.
1 If necessary, log in as Chris Johnson.
2 Open the StudentMaterials/Lesson16 folder.
3 Open Dead-End.dmg.
Note that this disk image contains an application that was previously downloaded from a website and is still in quarantine, so macOS treats it as coming from an untrusted source.
Copy the Application to /Applications
Some applications distributed for drag-and-drop installations come with instructions or hints about how to install them, whereas others simply assume the user will know what to do. The Dead End application comes as a disk image with instructions in the background image.
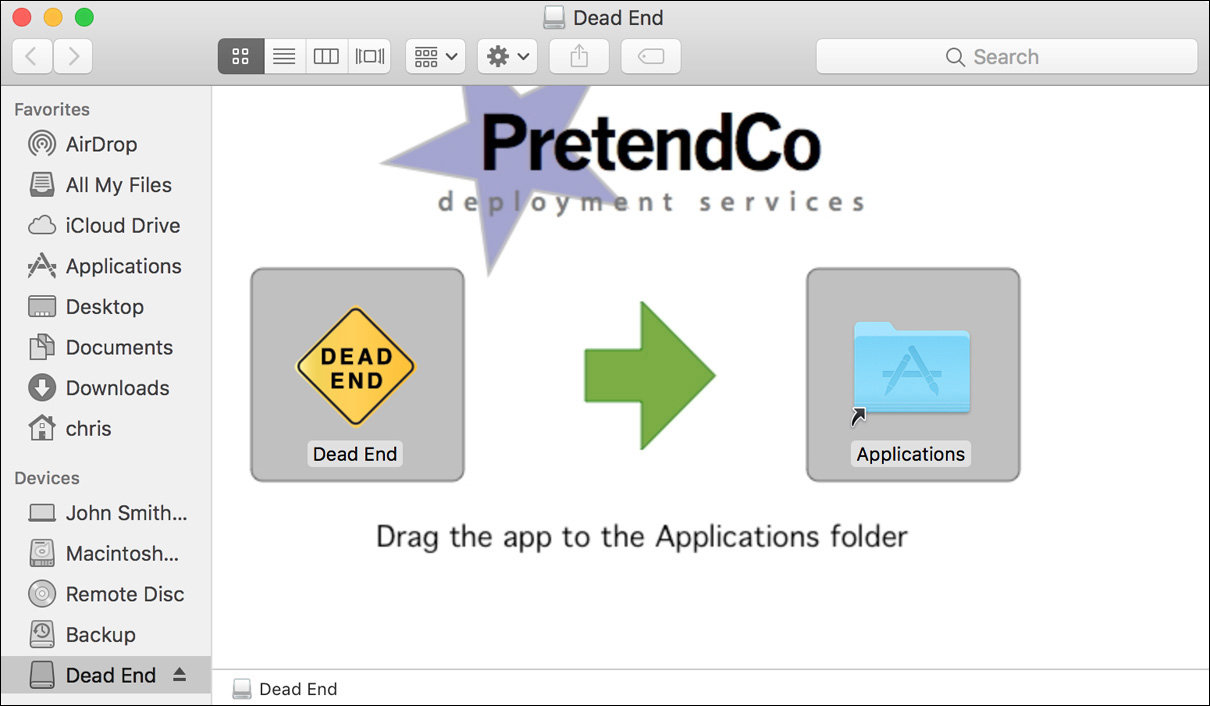
1 Drag the Dead End icon onto the Applications icon (which is a symbolic link to /Applications).
A dialog appears telling you that modifying Applications requires an administrator name and password.
2 Click the Authenticate button, authenticate as Local Admin, and click OK.
The Finder now copies Dead End into /Applications.
macOS is tolerant, and it allows you to run applications no matter where they’re stored, even if they are not in /Applications. Running the copy in the disk image you downloaded would work, but it may cause confusion or slightly odd application behavior, so you should avoid doing this.
Do not launch the Dead End application yet.
3 Eject the disk image.
Test the Gatekeeper Security Settings
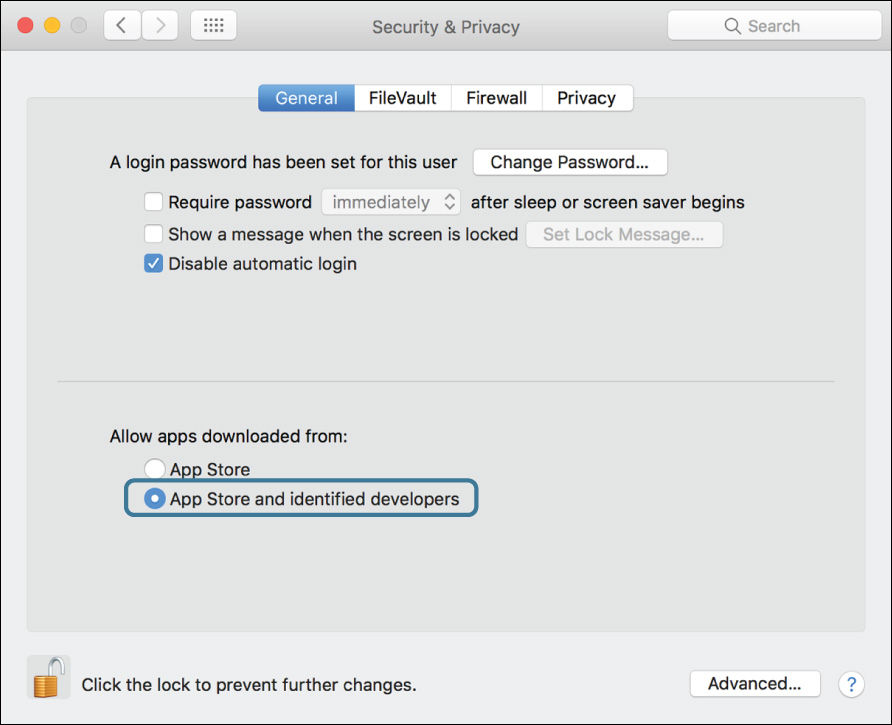
1 Open System Preferences, and select the Security & Privacy pane.
2 Click the General tab.
3 If necessary, authenticate and set the “Allow apps downloaded from” option to “App Store and identified developers.”
5 In the Finder, navigate to the Applications folder (you can use the shortcut Command-Shift-A).
6 Double-click Dead End.
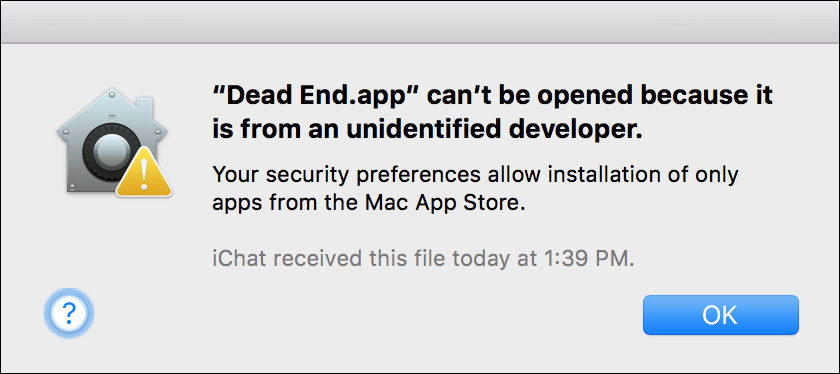
The file is labeled with some additional metadata to indicate that it is in quarantine because it was downloaded from the Internet. The first time you open it, Gatekeeper checks it against your allowed applications policy. Since the application is not signed with a Developer ID, Gatekeeper does not allow it to open.
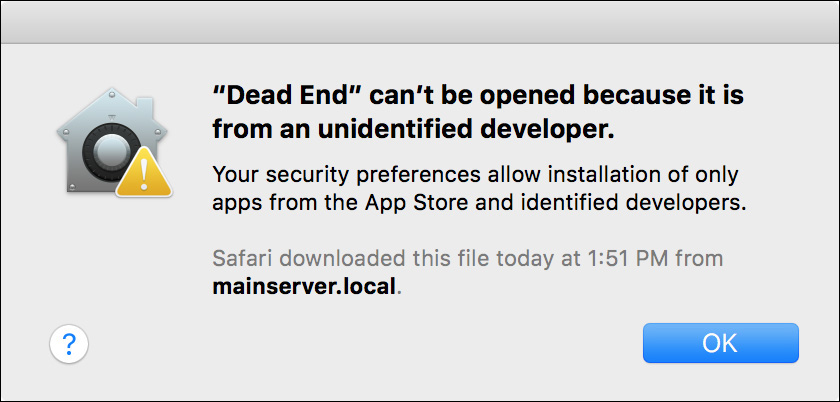
7 Click OK.
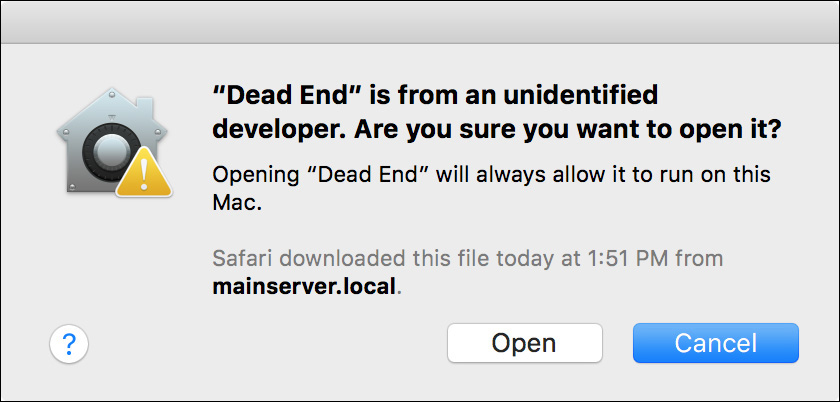
8 Control-click Dead End, and choose Open from the shortcut menu.
This time, Gatekeeper warns you about the application but gives you the option to bypass its normal policy and open the application.
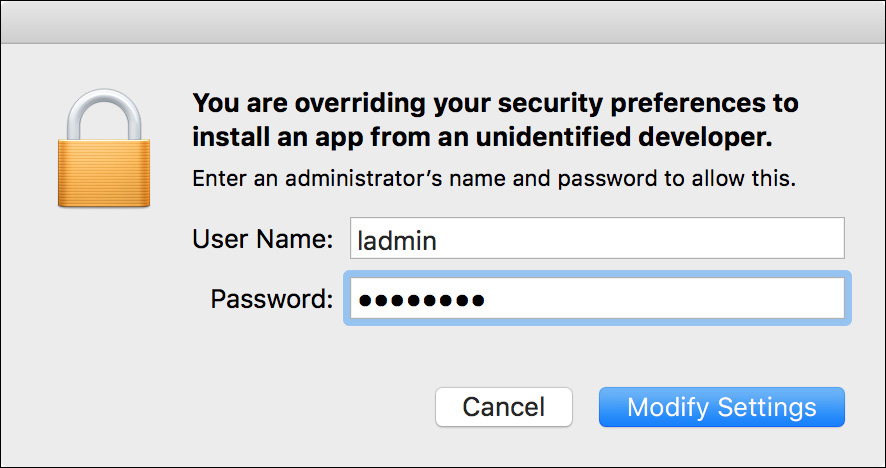
10 When you are prompted, authenticate as Local Admin.
11 If necessary, click the Dead End icon in the Dock to bring it to the foreground.
Do not click “Download the Internet” at this time. If you do, see Exercise 18.1, “Force Applications to Quit,” for information on forcing applications to quit. Although this application is not particularly malicious, it doesn’t do anything useful either.
12 Quit Dead End (File menu > Quit or Command-Q).
13 Double-click Dead End to reopen it.
This time it opens without the warning. Since you opened it once, your Gatekeeper policy has been modified to allow it to run normally.
14 Quit Dead End again.
Exercise 16.4 Remove Applications
![]() Prerequisite
Prerequisite
![]() You must have performed Exercise 16.1, “Use the Mac App Store,” and Exercise 16.2, “Use an Installer Package.”
You must have performed Exercise 16.1, “Use the Mac App Store,” and Exercise 16.2, “Use an Installer Package.”
Because macOS applications are usually just packages (or even single files), all that’s necessary to remove them is to drag them to the Trash. A few more complex programs consist of more than just an application, and these will generally include their own uninstaller.
View Installed Applications
1 Open System Information by holding the Option key and choosing Apple menu > System Information.
System Information opens and displays the system report.
2 From the Software section of the sidebar, select Installations.
This part of the report shows software that has been installed on the computer both by the App Store and by package, so it shows both The Unarchiver (or whatever application you installed in Exercise 16.1, “Use the Mac App Store”) and Hello World. It does not show software installed by other methods, so even if you installed Dead End (by the drag-and-drop method), it does not appear here.
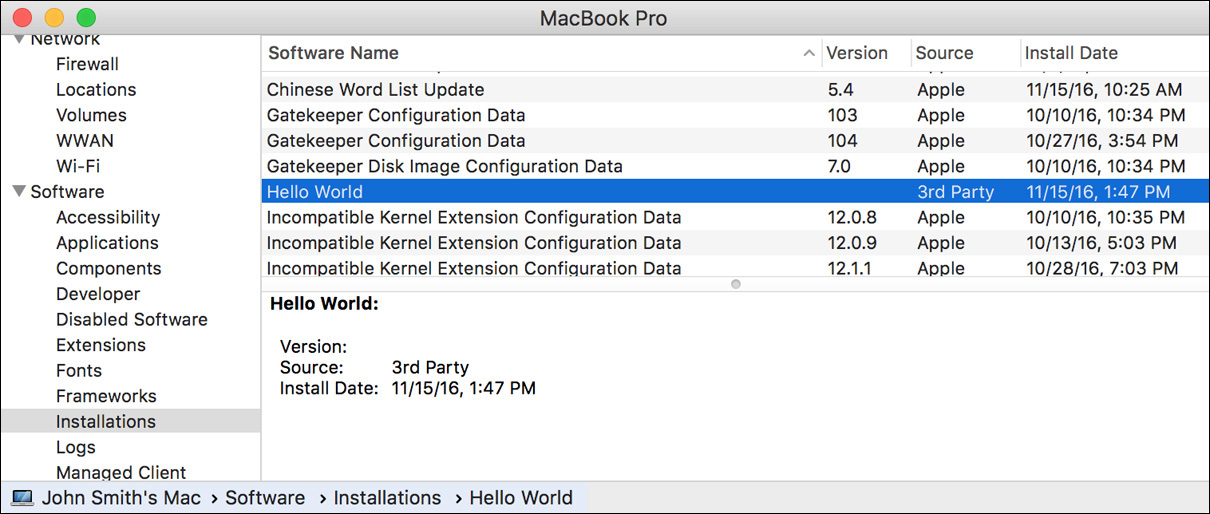
3 Quit System Information.
Remove an Application in Launchpad
1 Open Launchpad.
2 Click The Unarchiver (or whichever application you installed from the App Store), and hold down the mouse until an “X” appears at its top left and the other icons begin to wobble.

In this mode, Launchpad lets you drag application icons around to rearrange them and also use the “X” button to delete applications purchased from the App Store. Since The Unarchiver is the only one you purchased from the App Store, it is the only one that has an “X” by its icon.
3 Click The Unarchiver’s “X” button.
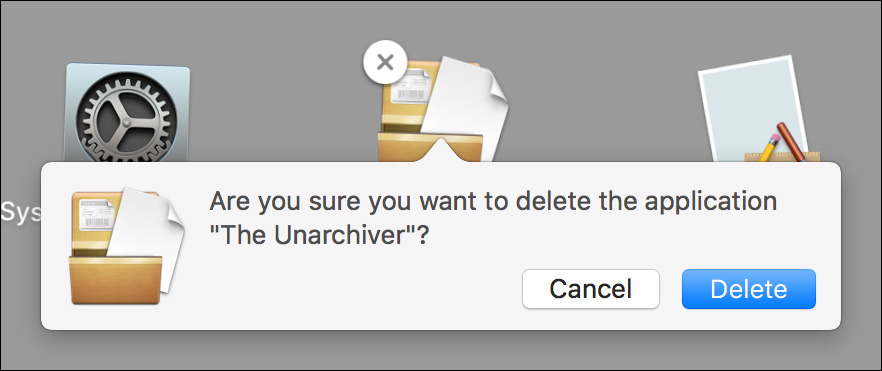
4 In the confirmation dialog that appears, click Delete.
5 If you are prompted, authenticate as Local Admin.
The Unarchiver is now uninstalled from your computer. Note that your preference file or files and user data still exist, so if you ever decide to reinstall the program, all of your settings are kept.
6 Click twice in the background to exit Launchpad.
Reinstall an Application in the App Store
1 Open the App Store.
2 In the toolbar, click the Purchased icon.
Since you purchased The Unarchiver, it is listed here and available to reinstall. Depending on the history of the Apple ID you are using, other applications may be listed as well.

3 Click the Install button for The Unarchiver.
4 If you are prompted, enter your Apple ID’s password to authenticate to the App Store.
The application is downloaded and reinstalled.
5 Wait for the download to finish, and then quit the App Store.
Remove an Application in the Finder
1 In the Finder, navigate to the Applications folder.
2 Select The Unarchiver, and drag it to the Trash icon in your Dock.
3 When you are prompted, authenticate as Local Admin.
4 Choose Finder menu > Empty Trash, and then click Empty Trash in the confirmation dialog.
The Unarchiver is now uninstalled from your computer.
Remove an Application with an Uninstaller
Since most applications can be uninstalled with the Finder, they don’t provide any special uninstaller. Applications that do will vary as to how they provide the uninstaller and exactly how it works. This exercise presents a simple example.
1 In the Finder, navigate to the Applications folder.
2 Open the Hello World folder.
3 Open the Uninstall script in the Hello World folder.
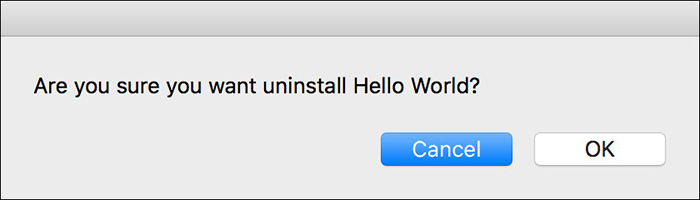
4 At the confirmation dialog, click OK.
5 When you are prompted, authenticate as Local Admin.
6 Reopen the Applications folder.
The entire Hello World folder has been removed from your computer.