Lesson 24. Troubleshoot Peripherals
Goals
![]() Understand and manage macOS peripheral connectivity
Understand and manage macOS peripheral connectivity
![]() Pair Bluetooth devices to your Mac
Pair Bluetooth devices to your Mac
![]() Troubleshoot peripheral and driver issues
Troubleshoot peripheral and driver issues
Apple pioneered the concept of automatic peripheral support with the original Mac. This feature, commonly known as plug-and-play, is now supported with varying success in all current operating systems. Peripheral hardware has also improved—now the most common connectivity standards support hot-pluggable or even wireless connections. macOS is compatible with all popular peripheral standards, demonstrating continued commitment by Apple to making peripheral use as easy as possible.
At the start of this lesson, you’ll learn how macOS supports different peripheral technologies. Then you’ll learn how to manage and troubleshoot both wired and wireless (Bluetooth) peripherals connected to macOS systems.
Reference 24.1 About Peripheral Technologies
For the purposes of this lesson, a peripheral is any non-networked device to which your computer system can be directly connected. A peripheral is also controlled by the computer, whereas network devices are shared.
Given the wide range of devices included in this definition, this lesson shows you how to categorize devices by their connectivity type and device class. A good understanding of the available connection methods and device types is necessary for you to manage and troubleshoot peripherals, which is the goal of this lesson.
Note
This lesson covers only connection technologies included with Mac systems that support macOS Sierra.
About Peripheral Connectivity
Most peripherals communicate with the Mac system via a connection mechanism commonly known as a bus. Bus connections are the most common peripheral connection types because they allow for a variety of different peripheral devices. Bus connections also allow multiple peripherals to connect to your Mac simultaneously.
Dozens of peripheral connectivity standards have been developed over the years, but in the last decade three have dominated the personal computing market: Universal Serial Bus (USB), FireWire, and Bluetooth. A fourth peripheral bus, Thunderbolt, represents the fastest and most capable personal computing peripheral bus to date. However, this connection type is common only on recent Mac computers.
The status of each of these four peripheral buses (and the items they are attached to) can be examined in macOS via the System Information application. You can access System Information by holding down the Option key and choosing Apple menu > System Information. Once System Information is open, select a hardware interface from the Contents list to view its information.

Using System Information for further troubleshooting peripherals is covered later in this lesson.
About Universal Serial Bus
Standard on every Mac that supports macOS, Universal Serial Bus (USB) is by far the most popular peripheral connection. In fact, every single type of peripheral can be found in USB versions. You’re probably already aware of the external USB ports on your Mac, but you may not know that Intel-based Mac computers also use USB for internal connectivity. For example, the MacBook keyboard, trackpad, infrared receiver, iSight camera, and Bluetooth controller are all connected via internal USB connections.

USB was originally designed by Intel and is a hot-pluggable interface that allows users to connect and disconnect devices while they are on, or hot. USB is also a highly expandable connection platform that allows for daisy-chained connections. So you can connect one USB device to your Mac, and then connect another USB device to the first, and so on. The USB specification allows for up to 127 simultaneous devices per host controller. Most Mac computers have at least two externally accessible USB host controllers.
About USB Performance
Four USB versions are currently supported by Apple hardware: USB 1.1, USB 2.0, USB 3.0, and USB-C (USB 3.1). Despite significant upgrades in performance, all USB ports on Mac systems are ultimately backward compatible with USB 1.1 devices. Physically, most Mac computers still feature USB-A ports that support up to the USB 3.0 specification. Only the latest Mac computers that feature the more recent USB-C ports require an adapter to support peripherals made for the more common USB-A ports.
More Info
You can find out more about USB at the official USB Implementers Forum website: www.usb.org.
The various USB versions offer the following performance characteristics:
![]() USB 1.1 supports low-speed connections at 1.5 megabits per second (Mbit/s) and full-speed connections at up to 12 Mbit/s. All Mac systems that support macOS Sierra support USB 1.1.
USB 1.1 supports low-speed connections at 1.5 megabits per second (Mbit/s) and full-speed connections at up to 12 Mbit/s. All Mac systems that support macOS Sierra support USB 1.1.
![]() USB 2.0 supports high-speed connections up to a theoretical maximum of 480 Mbit/s. In practice, though, high-speed USB 2.0 connections fall short of the theoretical maximum due to the compression algorithms in use. All Mac systems that support macOS Sierra also support a minimum of USB 2.0.
USB 2.0 supports high-speed connections up to a theoretical maximum of 480 Mbit/s. In practice, though, high-speed USB 2.0 connections fall short of the theoretical maximum due to the compression algorithms in use. All Mac systems that support macOS Sierra also support a minimum of USB 2.0.
![]() USB 3.0 supports superspeed connections up to a theoretical maximum of 5 Gbit/s (5 gigabits per second, or about 5000 Mbit/s). Peripherals and devices that support USB 3.0 are often identified by the use of bright-blue plastic for the interior of the physical connection, although no Apple device uses blue for identification. Mac systems introduced in mid-2012 and later support USB 3.0. You can also verify USB 3.0 support from the USB section of System Information.
USB 3.0 supports superspeed connections up to a theoretical maximum of 5 Gbit/s (5 gigabits per second, or about 5000 Mbit/s). Peripherals and devices that support USB 3.0 are often identified by the use of bright-blue plastic for the interior of the physical connection, although no Apple device uses blue for identification. Mac systems introduced in mid-2012 and later support USB 3.0. You can also verify USB 3.0 support from the USB section of System Information.
More Info
You can find out more about USB 3.0 from Apple Support article HT201163, “Using USB 3 devices on Mac computers.”
![]() USB-C (USB 3.1) supports superspeed connections up to a theoretical maximum of 10 Gbit/s. USB-C also introduced a new smaller, reversible connection that was developed by Intel and Apple. Mac computers featuring USB-C also support DisplayPort 1.3 video and internal battery charging via the same connection. Also, as covered later in this lesson, the latest Mac computers support Thunderbolt 3 via the same USB-C port. This allows for radical simplification in ports, with the latest Retina MacBook computers sporting only a single USB-C port for all purposes. A variety of USB-C adapters are available that allow for simultaneous connection to multiple peripherals, a display, and battery charging. Finally, USB-C is the only version of USB that supports target disk mode.
USB-C (USB 3.1) supports superspeed connections up to a theoretical maximum of 10 Gbit/s. USB-C also introduced a new smaller, reversible connection that was developed by Intel and Apple. Mac computers featuring USB-C also support DisplayPort 1.3 video and internal battery charging via the same connection. Also, as covered later in this lesson, the latest Mac computers support Thunderbolt 3 via the same USB-C port. This allows for radical simplification in ports, with the latest Retina MacBook computers sporting only a single USB-C port for all purposes. A variety of USB-C adapters are available that allow for simultaneous connection to multiple peripherals, a display, and battery charging. Finally, USB-C is the only version of USB that supports target disk mode.
More Info
You can find out more about USB-C from Apple support article HT204360, “Using USB-C and Thunderbolt 3 (USB-C) ports and adapters on your Mac notebook.”
About USB Power Delivery
All Mac computers featuring USB-A ports can supply up to 2.5 watts of power (500 mA of current at 5 volts) to the connected devices, which is all that some types of devices need to operate. Unpowered hubs, including those built into many USB keyboards, split the available power among their ports, usually supplying only 0.5 watts (100 mA) to each, enough for only very low-power devices. When the system detects that there is not enough power for a connected device, it displays a low-power notification and disables the device.

If you see this notification, you can verify the power issue by opening /Applications /Utilities/System Information and selecting USB from the report list. Selecting any USB device displays the electric current available to, and desired by, the device. You can try resolving USB power issues by connecting the peripheral directly to the Mac or through a powered hub, which uses an external power connection to supply full power to the attached device. Peripherals that require even more power to operate, such as printers or large disk drives, generally also include a separate power source.
Mac computers featuring USB-C ports have significantly upgraded power delivery specifications. This new standard allows a Mac to provide up to 15 watts of power (3000 mA of current at 5 volts). Even more convenient, Mac portable computers charge via USB-C at up to 100 watts of power (5000 mA of current at 20 volts)—again, proving USB-C to be the first peripheral connection to fit almost all needs (see “About Thunderbolt” later in this lesson).
About FireWire
Also standard on many Mac systems that support macOS, FireWire is a high-speed, general-purpose peripheral connection originally developed by Apple. FireWire has been ratified by the Institute of Electrical and Electronics Engineers (IEEE) as standard IEEE-1394 and has been adopted as a standard interface for many digital video devices.

Like USB, FireWire supports hot-pluggable and daisy-chained connections. Using hubs, each FireWire host controller can support up to 63 devices simultaneously. FireWire host controllers also allow your Mac to be used in target disk mode without the need for a functional operating system, as covered in Lesson 9, “Manage File Systems and Storage.”
All Mac systems with FireWire ports support FireWire 400 with a maximum transfer rate of up to 400 Mbit/s, and most newer Mac computers support FireWire 800 with a maximum transfer rate of up to 800 Mbit/s. These two FireWire standards use different port connections, but Mac computers with FireWire 800 ports can connect to FireWire 400 devices with an appropriate adapter. Newer Mac systems that feature Thunderbolt ports also support FireWire via the Apple Thunderbolt to FireWire Adapter.
Finally, FireWire ports on Mac systems generally supply about 7 watts per port, compared with the 2.5 watts for USB-A. In its heyday, this higher power capacity made FireWire the preferred connection for external bus-powered portable hard drives, because no additional power source was required.
Alas, the FireWire standard’s days are numbered. The additional cost and complexity of FireWire host controllers makes the technology impractical for many simple peripherals, such as mice, keyboards, and flash drives, which are well served by USB. And at the high end, the tremendous speed and flexibility of the newer Thunderbolt standard makes FireWire obsolete.
More Info
You can find out more about FireWire at the official 1394 Trade Association website: www.1394ta.org.
About Thunderbolt
Originally designed by Intel, then later in collaboration with Apple, Thunderbolt represents the latest in peripheral connectivity. At a minimum this standard folds PCI Express and DisplayPort data into a single connection and cable. Further, Thunderbolt 3 adds USB compatibility and advanced power management to provide a peripheral connectivity standard that can serve any need.

Thunderbolt provides for unmatched peripheral flexibility due to its mix of PCI Express, DisplayPort, and USB connectivity. With the appropriate adapters, a single Thunderbolt connection can provide access to any other networking, storage, peripheral, video, or audio connection. For example, a Thunderbolt display can provide not only a high-definition digital display but also a built-in camera, a microphone, audio speakers, USB ports, FireWire ports, Gigabit Ethernet ports, additional Thunderbolt ports for another peripheral, and even enough power to charge portable Mac computers—all through a single Thunderbolt cable from the Mac to the display.
One Thunderbolt host computer connection supports a hub or daisy chain of up to six devices, with up to two of these devices high-resolution displays. Further, Mac systems with Thunderbolt can be used in target disk mode without the need for a functional operating system, as covered in Lesson 9, “Manage File Systems and Storage.”
Physically, the original Thunderbolt and Thunderbolt 2 connector is identical to Mini DisplayPort. Thus, any Mac computer with Thunderbolt or Thunderbolt 2 can also accept Mini DisplayPort without the need for any adapters. Only copper Thunderbolt cabling can deliver power, but it is limited to a maximum 3-meter length. Optical Thunderbolt cabling is available in lengths of up to 100 meters.
Note
Mini DisplayPort devices and cables don’t support the additional PCI Express data used by Thunderbolt. Thus, items that only support Mini DisplayPort should be the last connection in a Thunderbolt daisy chain. You can identify items compatible with Thunderbolt by an icon that looks like a lightning bolt, whereas items compatible with only Mini DisplayPort feature an icon that looks like a flat-panel display.
The latest Thunderbolt 3 standard has adopted the USB-C port. Thus, any Mac computer that features Thunderbolt 3 can also accept USB-C without the need for any adapters. Again, only copper Thunderbolt cabling can deliver power and it is limited to a maximum 3-meter length. As of this writing, optical Thunderbolt 3 cabling is not yet available, but it is part of the specification.
Note
USB-C devices and cables don’t support the additional PCI Express data used by Thunderbolt. Thus, items that only support USB-C should be the last connection in a Thunderbolt daisy chain. Again, items compatible with Thunderbolt feature a lightning bolt icon, whereas items compatible with only USB-C feature the USB icon.
All this connectivity through one cable means that Thunderbolt provides significant data rates. In fact, Thunderbolt is the fastest external peripheral bus to date:
![]() Thunderbolt provides two bidirectional 10 Gbit/s (10,000 Mbit/s) channels. This means a total of 20 Gbit/s outbound and 20 Gbit/s inbound. With the first version of Thunderbolt, these channels can’t be combined to provide full bandwidth to a single peripheral. Thus, a single Thunderbolt peripheral has a maximum bandwidth of 10 Gbit/s, but the full bandwidth can be used when multiple peripherals are part of a single Thunderbolt chain. Thunderbolt also features DisplayPort 1.1 signaling, which allows for high-definition display resolutions. Copper Thunderbolt cabling also supplies up to 10 watts of power to connected devices, again providing more power than any previous external peripheral bus.
Thunderbolt provides two bidirectional 10 Gbit/s (10,000 Mbit/s) channels. This means a total of 20 Gbit/s outbound and 20 Gbit/s inbound. With the first version of Thunderbolt, these channels can’t be combined to provide full bandwidth to a single peripheral. Thus, a single Thunderbolt peripheral has a maximum bandwidth of 10 Gbit/s, but the full bandwidth can be used when multiple peripherals are part of a single Thunderbolt chain. Thunderbolt also features DisplayPort 1.1 signaling, which allows for high-definition display resolutions. Copper Thunderbolt cabling also supplies up to 10 watts of power to connected devices, again providing more power than any previous external peripheral bus.
![]() Thunderbolt 2 supports channel aggregation, wherein a single peripheral can take advantage of the full 20 Gbit/s throughput.
Thunderbolt 2 supports channel aggregation, wherein a single peripheral can take advantage of the full 20 Gbit/s throughput.
![]() Thunderbolt 3 provides two bidirectional 20 Gbit/s (20,000 Mbit/s) channels, providing a total of 40 Gbit/s outbound and 40 Gbit/s inbound. Thunderbolt 3 also features DisplayPort 1.2 signaling, which allows for 4K and 5K display resolutions. Finally, Thunderbolt 3 is fully backward compatible with USB-C (USB 3.1) signaling and power delivery, as covered earlier in this lesson.
Thunderbolt 3 provides two bidirectional 20 Gbit/s (20,000 Mbit/s) channels, providing a total of 40 Gbit/s outbound and 40 Gbit/s inbound. Thunderbolt 3 also features DisplayPort 1.2 signaling, which allows for 4K and 5K display resolutions. Finally, Thunderbolt 3 is fully backward compatible with USB-C (USB 3.1) signaling and power delivery, as covered earlier in this lesson.
More Info
You can find out more about Thunderbolt at Apple’s official website, www.apple.com/thunderbolt.
About Bluetooth
Bluetooth is a short-range wireless peripheral connection standard originally developed by Ericsson for mobile phone headsets. Most Bluetooth devices have a range of only 1 to 10 meters, ideal for peripherals but inadequate for wireless networking. Further, Bluetooth is designed for connections not nearly as fast as wireless Ethernet. However, Bluetooth has the advantage of working with low-power devices.

As Bluetooth increased in popularity, computer manufacturers adopted it for wireless peripherals as well. In addition to providing a wireless connection between your Mac and mobile phone, Bluetooth allows your Mac to use wireless headsets, mice, keyboards, and printers. Most Mac computers that support macOS include Bluetooth wireless, and for those that don’t, you can easily add it with a USB-to-Bluetooth adapter. Configuring Bluetooth is covered later in this lesson.
All Mac systems compatible with macOS Sierra include built-in support for Bluetooth. Depending on the age of the Mac, one of two Bluetooth variations is included:
![]() Any Mac capable of running macOS Sierra supports Bluetooth 1.2 with a maximum transfer rate of 721 kilobits per second (kbit/s) and Bluetooth 2.1 + Extended Data Rate (EDR) with a maximum transfer speed of up to 3 Mbit/s.
Any Mac capable of running macOS Sierra supports Bluetooth 1.2 with a maximum transfer rate of 721 kilobits per second (kbit/s) and Bluetooth 2.1 + Extended Data Rate (EDR) with a maximum transfer speed of up to 3 Mbit/s.
![]() Mac systems dating from 2011 or later support all previous versions of Bluetooth in addition to Bluetooth 3.0 + High Speed (HS) with a maximum transfer speed of up to 24 Mbit/s and Bluetooth 4.0 with low-energy support. Bluetooth low-energy (BLE) mode isn’t very fast, at a maximum of 200 kbit/s, but it uses much less energy, is quicker to pair with devices, and sports a larger maximum range. The Continuity features in iOS 7 and OS X Yosemite 10.10 and later (Handoff, Instant Hotspot, Phone Calling, and so on) are made possible due to the efficiencies of Bluetooth 4.0 wireless.
Mac systems dating from 2011 or later support all previous versions of Bluetooth in addition to Bluetooth 3.0 + High Speed (HS) with a maximum transfer speed of up to 24 Mbit/s and Bluetooth 4.0 with low-energy support. Bluetooth low-energy (BLE) mode isn’t very fast, at a maximum of 200 kbit/s, but it uses much less energy, is quicker to pair with devices, and sports a larger maximum range. The Continuity features in iOS 7 and OS X Yosemite 10.10 and later (Handoff, Instant Hotspot, Phone Calling, and so on) are made possible due to the efficiencies of Bluetooth 4.0 wireless.
More Info
You can find out more about Bluetooth at the official Bluetooth Technology Information website: www.bluetooth.com.
Reference 24.2 Manage Bluetooth Devices
Because Bluetooth is a wireless technology, some configuration is required to connect your Mac to a Bluetooth device. The process of connecting Bluetooth devices is known as pairing. Once two devices are paired, they act as if they were directly connected to each other. The macOS Bluetooth preferences make the process of configuring Bluetooth devices easy.
Note
When desktop Mac computers are purchased with Bluetooth wireless input devices, the Mac and its associated peripherals are factory-paired and require no further pairing.
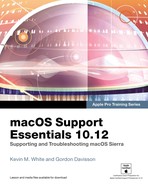
The quickest way to manage Bluetooth devices is to click the Bluetooth status menu. First, make sure your Mac computer’s Bluetooth is turned on.
Pair a Bluetooth Device
Before you begin the pairing process, you will need to enable Discoverable Mode on the Bluetooth device you’re going to pair with your Mac. Each device is different, so you may have to consult the device’s user guide to enable Discoverable Mode.
More Info
The Continuity features in OS X Yosemite 10.10 and later (Handoff, Instant Hotspot, Phone Calling, and so on) utilize Bluetooth 4.0, but traditional Bluetooth pairing isn’t required. Instead, the continuity features automatically connect as long as all devices are signed in to the same iCloud account. Find out more about Handoff from Apple Support article HT204681, “Use Continuity to connect your Mac, iPhone, iPad, iPod touch, and Apple Watch.”
From the Bluetooth status menu, select Open Bluetooth Preferences. You can also open the Bluetooth preferences using any other technique you prefer to access the System Preferences application. Once open, the Bluetooth preferences will scan for any Bluetooth devices in range that are in Discoverable Mode. In the following screenshot of the Bluetooth preferences you can see two states for a device: a connected device and a device waiting to be paired.

Alternatively, with Bluetooth preferences open, the Mac itself is put in Bluetooth Discoverable Mode. Discoverable Mode advertises your Mac as a Bluetooth resource to any device within range, which could invite unwanted attention to your Mac. So the only time you should be in Discoverable Mode is when you’re attempting to pair your Mac with a Bluetooth device. In other words, you shouldn’t leave Bluetooth preferences open for too long.
It may take several moments for the device’s name to appear. Once it does, select it and click the Pair button. For most Bluetooth devices, a passcode must be used to authorize pairing. Depending on the device, you will perform one of the following:
![]() Complete the pairing with little interaction by using an automatically generated passcode. This is often what will happen with a device that has no method to verify the passcode, such as a Bluetooth mouse.
Complete the pairing with little interaction by using an automatically generated passcode. This is often what will happen with a device that has no method to verify the passcode, such as a Bluetooth mouse.

![]() Enter a predefined passcode on your Mac, as specified in the device’s user guide, and click Continue to authorize the pairing.
Enter a predefined passcode on your Mac, as specified in the device’s user guide, and click Continue to authorize the pairing.
![]() Allow the Bluetooth Setup Assistant to create a random passcode, which you then enter or verify on the Bluetooth device to authorize the pairing. In this example of pairing to an iPhone, the passcode is generated automatically.
Allow the Bluetooth Setup Assistant to create a random passcode, which you then enter or verify on the Bluetooth device to authorize the pairing. In this example of pairing to an iPhone, the passcode is generated automatically.

The Bluetooth Setup Assistant automatically detects the capabilities of your Bluetooth device and may present you with additional configuration screens. Continue through these screens until you complete the setup process. When the pairing is complete, you can verify the pairing at any time by reopening Bluetooth preferences. Again, a device doesn’t have to be currently connected to maintain pairing status with the Mac.
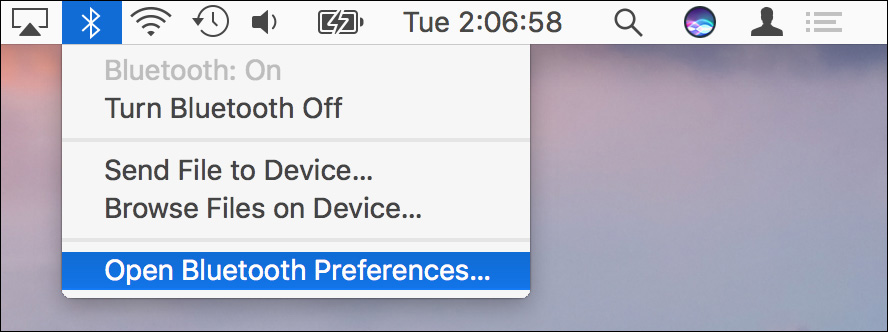
Remember, however, that opening Bluetooth preferences puts your Mac in Bluetooth Discoverable Mode, so a safer (and probably quicker) method for verifying Bluetooth devices is via the Bluetooth status menu. Notice that this menu indicates a connected device using bold letters.
Note
The system will also save Bluetooth input device parings, like mice and keyboards, to NVRAM so that they can be used prior to the system fully starting up. This is necessary to support FileVault and startup keyboard shortcuts when using Bluetooth input devices.
Manage Bluetooth Settings
You can adjust settings such as the peripheral’s name from the Bluetooth preferences. To access all the Bluetooth management settings, open the Bluetooth preferences from either the Apple menu > System Preferences or the Bluetooth status menu > Open Bluetooth Preferences.
To manage a Bluetooth peripheral, select it from the list and then secondary-click (or Control-click) to reveal a pop-up menu. From this menu you can connect or disconnect a device, and possibly rename a device. Some devices, such as iPhones, are named on the device and cannot be changed from Bluetooth preferences. You can also delete a device pairing from this pop-up menu by clicking the small x button to the right.

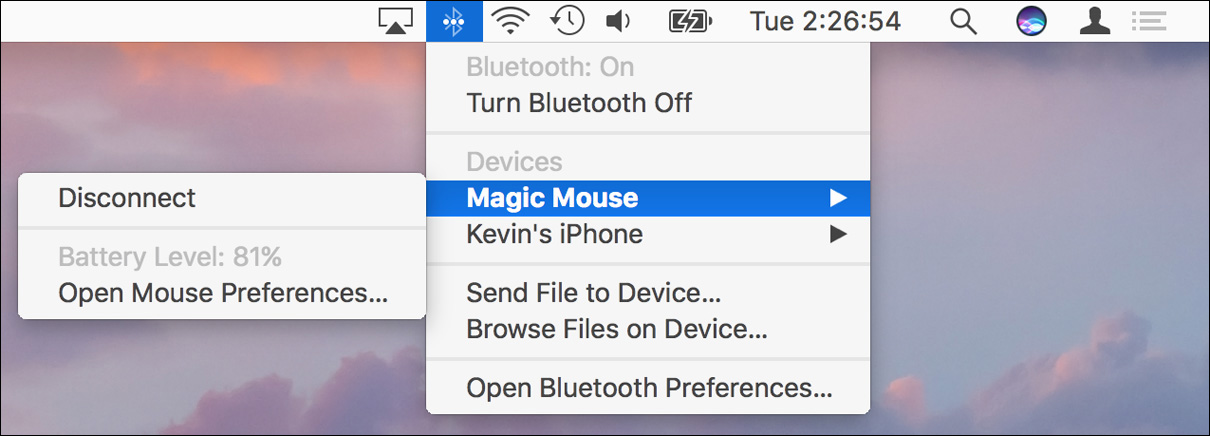
Clicking the Advanced button at the bottom of the Bluetooth preferences reveals a dialog where you can adjust additional Bluetooth settings. The settings here are extremely important for desktop systems that use only wireless keyboards and mice.
Finally, you’ll find Bluetooth sharing settings in the Shared preferences. Like all other sharing services, Bluetooth sharing is off by default. Enabling Bluetooth sharing should only be considered as a last resort when traditional file-sharing methods aren’t possible. Lesson 23, “Manage Host Sharing and Personal Firewall,” discusses a variety of alternative file-sharing methods, including AirDrop wireless file sharing.

Reference 24.3 Troubleshoot Peripheral Issues
Troubleshooting peripheral issues can be difficult because of the wide variety of devices out there. However, peripheral issues can usually be categorized as either software related or hardware related. The first part of this section looks at how the system software interacts with peripherals and how to identify peripheral issues related to software. As for peripheral hardware issues, replacing or repairing the peripheral or its connections usually resolves the issue. Yet a few general troubleshooting techniques can help you identify and possibly resolve the problem.
About Peripheral Device Classes
Peripherals are divided into device classes based on their primary function. macOS includes built-in software drivers that allow your Mac to interact with peripherals from all device classes. Although these built-in drivers may provide basic support, many third-party devices require device-specific drivers for full functionality. Detailed information about software drivers is covered in the next section.
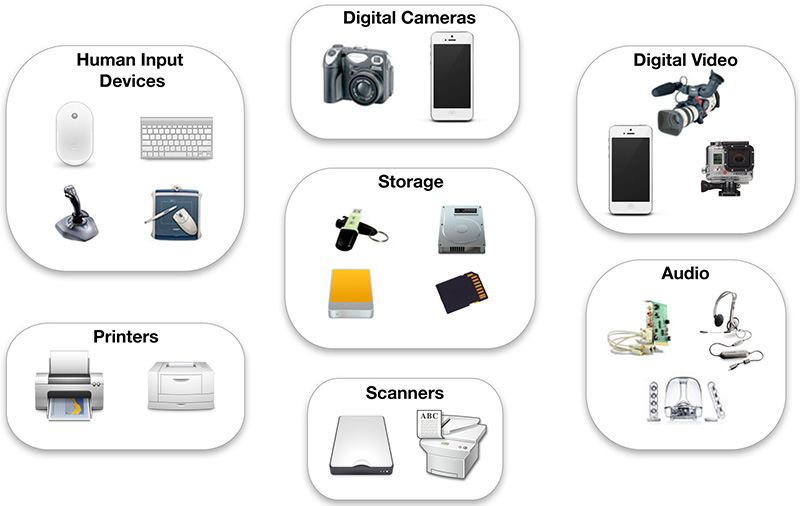
Device classes as defined in macOS include:
![]() Human input devices (HIDs)—Peripherals that allow you to directly enter information or control the Mac interface. Examples are keyboards, mice, trackpads, game controllers, tablets, and even Braille interfaces.
Human input devices (HIDs)—Peripherals that allow you to directly enter information or control the Mac interface. Examples are keyboards, mice, trackpads, game controllers, tablets, and even Braille interfaces.
![]() Storage devices—Internal disks, flash disks, optical discs, and iPods. Storage peripherals are covered in Lesson 9, “Manage File Systems and Storage.”
Storage devices—Internal disks, flash disks, optical discs, and iPods. Storage peripherals are covered in Lesson 9, “Manage File Systems and Storage.”
![]() Printers—Printers of all types and fax machines. Printing is covered in Lesson 25, “Manage Printers and Scanners.”
Printers—Printers of all types and fax machines. Printing is covered in Lesson 25, “Manage Printers and Scanners.”
![]() Scanners—Flatbed, negative, slide, and drum scanners. macOS supports scanners via the Image Capture framework, which allows you to control scanners from /Applications/Image Capture or any other compatible third-party capture application, such as Photoshop. This topic is also covered in Lesson 25, “Manage Printers and Scanners.”
Scanners—Flatbed, negative, slide, and drum scanners. macOS supports scanners via the Image Capture framework, which allows you to control scanners from /Applications/Image Capture or any other compatible third-party capture application, such as Photoshop. This topic is also covered in Lesson 25, “Manage Printers and Scanners.”
The Image Capture application supports both locally attached scanners and scanners being shared via the network. Further, the Sharing preferences also allow you to share a locally attached scanner to the network. Network scanner discovery is accomplished using Bonjour, so usually no additional setup is required to locate shared scanning resources.
![]() Digital cameras—These peripherals include both directly connected cameras and camera storage cards mounted to the Mac computer’s file system. Recall that many digital cameras, when connected to a computer, simply extend their internal storage to the computer. In this case, macOS accesses the camera’s internal storage, or any directly attached camera storage cards, as it does any other storage device. Applications like iPhoto or Aperture then take over to copy the picture files from the camera storage to the Mac computer’s storage. Some cameras support a tethered capture mode in which they are directly controlled by the Mac and send the captured picture data directly to the Mac. macOS supports this type of camera connection via the Image Capture framework, which also allows you to use /Applications /Image Capture or another compatible third-party capture application.
Digital cameras—These peripherals include both directly connected cameras and camera storage cards mounted to the Mac computer’s file system. Recall that many digital cameras, when connected to a computer, simply extend their internal storage to the computer. In this case, macOS accesses the camera’s internal storage, or any directly attached camera storage cards, as it does any other storage device. Applications like iPhoto or Aperture then take over to copy the picture files from the camera storage to the Mac computer’s storage. Some cameras support a tethered capture mode in which they are directly controlled by the Mac and send the captured picture data directly to the Mac. macOS supports this type of camera connection via the Image Capture framework, which also allows you to use /Applications /Image Capture or another compatible third-party capture application.
![]() Video devices—These peripherals include video cameras and video converters connected via USB, FireWire, Thunderbolt, or an expansion bus. macOS supports these video devices via the QuickTime framework, which allows you to use /Applications/QuickTime Player or any other compatible video application, such as iMovie or Final Cut Pro.
Video devices—These peripherals include video cameras and video converters connected via USB, FireWire, Thunderbolt, or an expansion bus. macOS supports these video devices via the QuickTime framework, which allows you to use /Applications/QuickTime Player or any other compatible video application, such as iMovie or Final Cut Pro.
![]() Audio devices—These peripherals include external audio interfaces connected via USB, FireWire, Thunderbolt, or an expansion bus. macOS supports these audio devices via the Core Audio framework, so you can use any compatible audio application, such as GarageBand or Logic Pro.
Audio devices—These peripherals include external audio interfaces connected via USB, FireWire, Thunderbolt, or an expansion bus. macOS supports these audio devices via the Core Audio framework, so you can use any compatible audio application, such as GarageBand or Logic Pro.
About Peripheral Device Drivers
One of the primary responsibilities of the system software is to act as an intermediary between peripherals and applications. If an application supports a general device class, the operating system handles all the technical details of communicating with each model of peripheral in that class.
Here’s an example: For an application to receive user input, it needs to receive information from the keyboard, mouse, trackpad, and the like, but it doesn’t need to know any details about how to interpret the electrical signals from that device, because that’s handled by the operating system. This separation of peripherals and applications by the operating system allows you to use nearly any combination of the two with few incompatibilities.
macOS supports peripherals using device drivers, specialized pieces of software that allow peripherals to interoperate with the system. Some peripherals are supported via a generic driver, but many require a device driver created specifically for the peripheral. Although macOS includes a decent selection of common device drivers, you may have to install third-party device drivers to support your peripherals. Nearly all device drivers are installed using an installer utility that places the driver software in the correct resource folder on your Mac. Device drivers are implemented in one of three ways: kernel extensions, framework plug-ins, or applications.
macOS uses a driver only if it’s already installed. In other words, if you’re adding support for a new third-party peripheral that requires custom drivers, install those drivers first before you connect the peripheral to the Mac. Further, it’s always best to check the peripheral manufacturer’s website to obtain the latest version of the driver software.
Device driver implementations in macOS include:
![]() Kernel extensions (KEXTs)—This is a special type of software created to add peripheral support at the lowest level of macOS: the system kernel. KEXTs load and unload from the system automatically, so there’s no need to manage them aside from making sure they are installed in the correct locations. Although some KEXTs are hidden inside application bundles, most are located in the /System/Library/Extensions or /Library/Extensions folders. Remember that in general, nearly all the items in the /System folder are part of the standard macOS install. Examples of peripherals that use KEXTs are human input devices, storage devices, audio and video devices, and other expansion cards.
Kernel extensions (KEXTs)—This is a special type of software created to add peripheral support at the lowest level of macOS: the system kernel. KEXTs load and unload from the system automatically, so there’s no need to manage them aside from making sure they are installed in the correct locations. Although some KEXTs are hidden inside application bundles, most are located in the /System/Library/Extensions or /Library/Extensions folders. Remember that in general, nearly all the items in the /System folder are part of the standard macOS install. Examples of peripherals that use KEXTs are human input devices, storage devices, audio and video devices, and other expansion cards.
![]() Framework plug-ins—This type of device driver adds support for a specific peripheral to an existing system framework. For example, support for additional scanners and digital cameras is facilitated via plug-ins to the Image Capture framework.
Framework plug-ins—This type of device driver adds support for a specific peripheral to an existing system framework. For example, support for additional scanners and digital cameras is facilitated via plug-ins to the Image Capture framework.
![]() Applications—In some cases a peripheral is best supported by an application written just for that peripheral. Examples are the iPod, iPhone, and iPad, which are managed by the iTunes application.
Applications—In some cases a peripheral is best supported by an application written just for that peripheral. Examples are the iPod, iPhone, and iPad, which are managed by the iTunes application.
Inspect Kernel Extensions
Even though the macOS kernel is designed to manage KEXTs without user interaction, you may still need to verify that a specific KEXT is loaded. You can view the currently installed and loaded KEXTs from the System Information application (while holding down the Option key, choose Apple menu > System Information). Once System Information is open, select the Extensions item in the Contents list; it may take a few moments for the system to scan all currently installed KEXTs. Once the list appears, you can further inspect individual KEXTs by selecting them from this list. Sorting this list by the Loaded column clearly indicates which KEXTs are in use by the system.

A key feature of macOS is support for a 64-bit kernel, thus necessitating 64-bit KEXTs. OS X Mountain Lion 10.8 and later require that the kernel start up in 64-bit mode. From System Information, you can easily verify that all loaded kernel extensions support this mode. However, third-party KEXTs that have not made the transition won’t work, because macOS simply ignores any KEXTs that don’t support 64-bit mode or are not properly signed by Apple.
Troubleshoot General Peripheral Issues
Use the following techniques for general peripheral troubleshooting:
![]() Always check System Information first. If you remember only one peripheral troubleshooting technique, it should be this. Connected peripherals appear in System Information regardless of whether their software driver is functioning. In other words, if a connected peripheral does not show up in System Information, then you are almost certainly experiencing a hardware failure. If a connected peripheral appears as normal in System Information, you are probably experiencing a software driver issue. In that case, use System Information to validate whether the expected kernel extensions are loaded.
Always check System Information first. If you remember only one peripheral troubleshooting technique, it should be this. Connected peripherals appear in System Information regardless of whether their software driver is functioning. In other words, if a connected peripheral does not show up in System Information, then you are almost certainly experiencing a hardware failure. If a connected peripheral appears as normal in System Information, you are probably experiencing a software driver issue. In that case, use System Information to validate whether the expected kernel extensions are loaded.
![]() Unplug and then reconnect the peripheral. Doing this reinitializes the peripheral connection and forces macOS to reload any peripheral-specific drivers.
Unplug and then reconnect the peripheral. Doing this reinitializes the peripheral connection and forces macOS to reload any peripheral-specific drivers.
![]() Plug the peripheral into a different port or use a different cable. This helps you rule out any bad hardware, including host ports, cables, and inoperable hubs.
Plug the peripheral into a different port or use a different cable. This helps you rule out any bad hardware, including host ports, cables, and inoperable hubs.
![]() Unplug other devices on the same bus. Another device on the shared bus may be causing an issue.
Unplug other devices on the same bus. Another device on the shared bus may be causing an issue.
![]() Resolve potential USB power issues. As covered previously in this lesson, the USB interface can prove problematic if devices are trying to draw too much power. Try plugging the USB device directly into the Mac instead of a USB hub.
Resolve potential USB power issues. As covered previously in this lesson, the USB interface can prove problematic if devices are trying to draw too much power. Try plugging the USB device directly into the Mac instead of a USB hub.
![]() Shut down the Mac, fully power down all peripherals, and then restart everything. This tried-and-true troubleshooting technique reinitializes all the peripheral connections and reloads all the software drivers.
Shut down the Mac, fully power down all peripherals, and then restart everything. This tried-and-true troubleshooting technique reinitializes all the peripheral connections and reloads all the software drivers.
![]() Try the peripheral with another Mac. This helps you determine whether the issue is with your Mac or the peripheral. If the device doesn’t work with other computers, your Mac is not the source of the issue.
Try the peripheral with another Mac. This helps you determine whether the issue is with your Mac or the peripheral. If the device doesn’t work with other computers, your Mac is not the source of the issue.
![]() Check for system software and driver software updates. Software bugs are constantly being fixed, so it’s always a good time to check for software updates. You can use the macOS built-in software update system, but you should also check the peripheral manufacturer’s website for the latest driver updates.
Check for system software and driver software updates. Software bugs are constantly being fixed, so it’s always a good time to check for software updates. You can use the macOS built-in software update system, but you should also check the peripheral manufacturer’s website for the latest driver updates.
![]() Check for computer and peripheral software updates. Like software updates, firmware updates may also be necessary to resolve your peripheral issue. This possibility is especially likely for more sophisticated devices like the iPod, iPhone, and iPad, which have their own internal software as well.
Check for computer and peripheral software updates. Like software updates, firmware updates may also be necessary to resolve your peripheral issue. This possibility is especially likely for more sophisticated devices like the iPod, iPhone, and iPad, which have their own internal software as well.
Exercise 24.1 Examine Peripherals via System Information
![]() Prerequisite
Prerequisite
![]() You must have created the Chris Johnson account (Exercise 5.1, “Manage User Accounts”).
You must have created the Chris Johnson account (Exercise 5.1, “Manage User Accounts”).
In an earlier exercise, you used System Information to view information about your hard disk. Because it is bus oriented, System Information is extremely useful when troubleshooting peripheral issues. In this exercise, you will use System Information to identify devices on a particular bus. Most Mac computers have several USB ports and use USB internally for several devices. In a class, your instructor may choose to do this exercise as a demonstration if the equipment in the room doesn’t provide USB devices.
Examine Internal Devices
1 If necessary, log in as Chris Johnson.
2 Click the Apple menu.
3 Hold down the Option key.
The first item in the Apple menu changes from “About This Mac” to “System Information.”
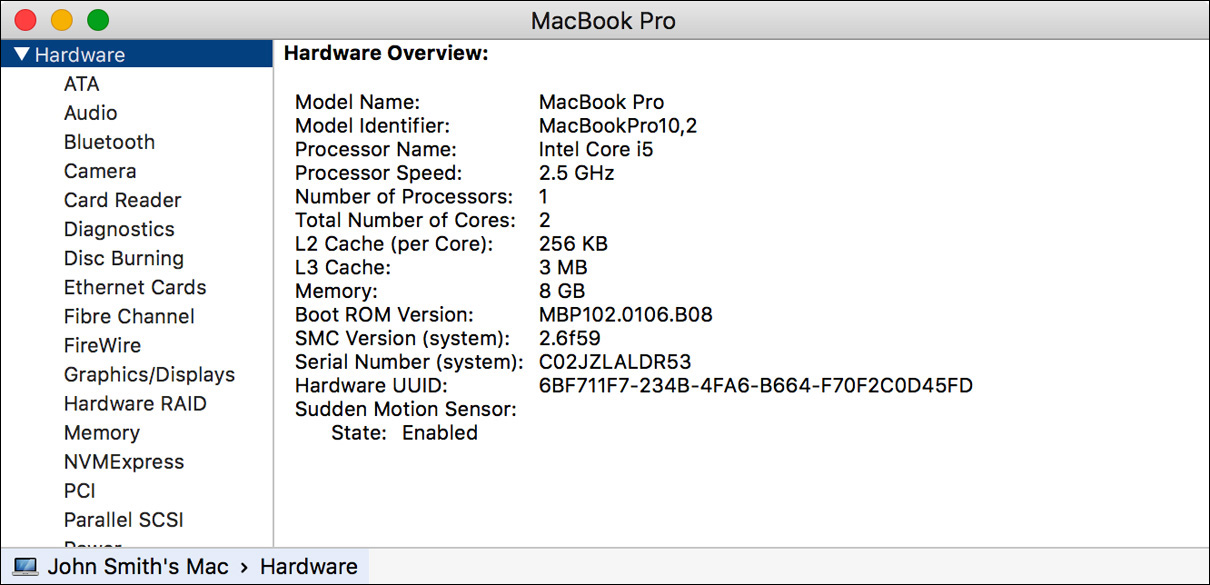
4 With the Option key held down, choose System Information from the Apple menu.
A System Information report opens with the Hardware Overview displayed. The Contents list on the left displays all the report topics that System Information can generate, listed in three main sections: Hardware, Network, and Software.
There are several ways of opening System Information. In an earlier exercise, you opened it by choosing Apple menu > About This Mac and then clicking System Report.
5 In the Hardware list on the left, click Graphics/Displays.
This shows information about your Mac computer’s graphics adapters and displays.
6 In the Hardware list, click USB to view devices connected to the USB bus.
USB is a common peripheral bus. It is often used for keyboards, mice, trackpads, printers, scanners, storage devices, and digital cameras.

In this example, System Information indicates that there are three USB buses, two of which have devices connected to them. Several of the buses are internal to the computer; in this example, the FaceTime HD Camera, Apple Internal Keyboard / Trackpad, and Bluetooth USB Host Controller entries are all internal devices connected to internal USB buses.
If a device is connected to a hub, it is listed beneath the hub and indented. This example shows a Keyboard Hub entry with a Macally USB Optical Net Mouse and an Apple Keyboard connected. Although the hub and keyboard are separate devices at the USB level, they are both parts of a single physical device: an Apple USB keyboard. Most USB keyboards contain a built-in hub so you can attach other USB devices to them.
7 Examine the USB report for your computer and determine which devices are internal and which are external.
Examine External USB Devices (Optional)
For this section, you will need at least one external USB device connected to your computer. If you are performing these exercises in class, your instructor may be able to provide a device. If no suitable USB device is available, quit System Information and skip the rest of this exercise.
1 If it isn’t already connected, plug in the external USB device, and refresh the System Information report by choosing File menu > Refresh Information (Command-R).
2 Select an external USB device in the USB report for your computer.
Details about the device appear in the lower pane.
3 Examine the speed listed for the device.
The speed at which a USB device can run depends not only on its own capability but also on the speeds of the port and any intermediate hubs through which it is connected.
4 Examine the Current Available and Current Required figures.
Your computer can supply only a certain amount of electrical power through each of its USB ports, and if there are too many devices chained off a port, there might not be enough for all the devices. To prevent this problem, macOS keeps track of how much electrical power is available at each point in the USB bus and disables devices if it calculates that not enough power is available for them.
5 While viewing the USB information, unplug the device from your computer (if it is a storage device, eject it first), plug it into a different USB port, and then choose File menu > Refresh Information (Command-R).
System Information does not update its display unless you tell it to do so.
6 Locate the external device in the report to see whether it has changed places or whether any of its statistics have changed.
7 If you have an external hub available, try plugging the device in via that, and then refresh the display in System Information.
Note whether enough power is available from the hub to run the device and whether its speed decreased because of being connected through a hub.