Lesson 8. Manage Password Changes
Goals
![]() Change known passwords
Change known passwords
![]() Use different methods to reset lost user passwords
Use different methods to reset lost user passwords
![]() Secure system startup by setting a firmware password
Secure system startup by setting a firmware password
As covered in the previous lesson, passwords are the most common method to prove the identity of a user, thus allowing access to resources. This lesson focuses on methods to modify passwords and the ramifications of those modifications.
A password change is different from a password reset. A known password can be changed, but an unknown password needs to be reset by some other authorization mechanism. Both methods result in a new password, but resetting a password should only be attempted if the user doesn’t know the password. As you’ll see in this lesson, changing a password is simple and often trouble-free, but resetting passwords may lead to security issues and possibly even data loss.
Reference 8.1 Change Known Passwords
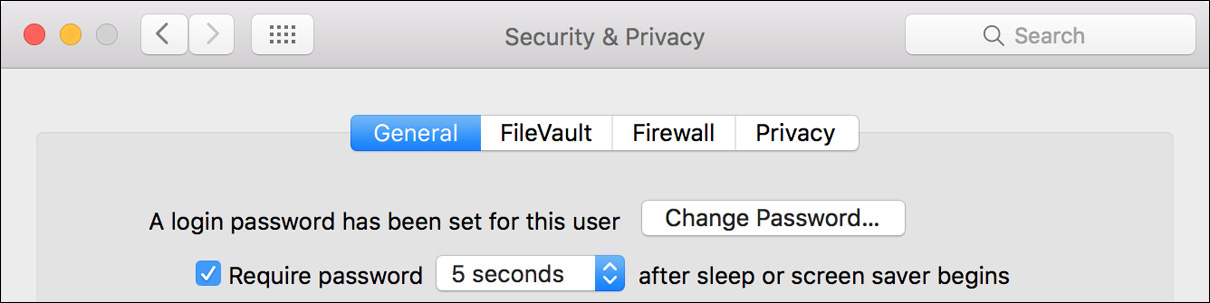
If you already know your local computer account password but want to change it, you can do so at any time from the General pane of Security & Privacy or by selecting your user account in the Users & Groups preferences. In either case, you can click the Change Password button, which will reveal a series of dialogs allowing you to change the password to your local computer account.
The change password dialogs vary depending on whether your local account is using an associated Apple ID password or a separate local account password. As covered in Lesson 7, “Manage Security and Privacy,” although macOS Sierra doesn’t allow you to add new local accounts that use an Apple ID password, it will still allow you to use this type of account password.
Note
The macOS interface sometimes uses “iCloud password” instead of “Apple ID password.” Because all Apple services, including iCloud, are accessed via Apple ID authentication, this guide uses the term Apple ID when discussing Apple service authentication.
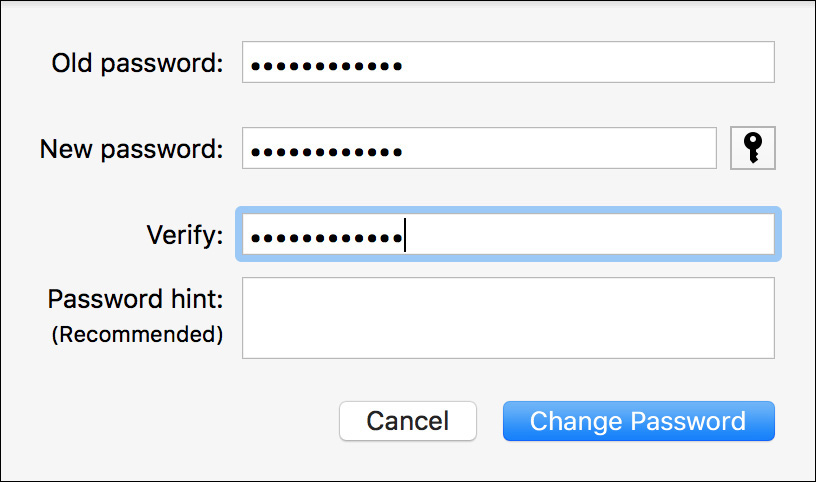
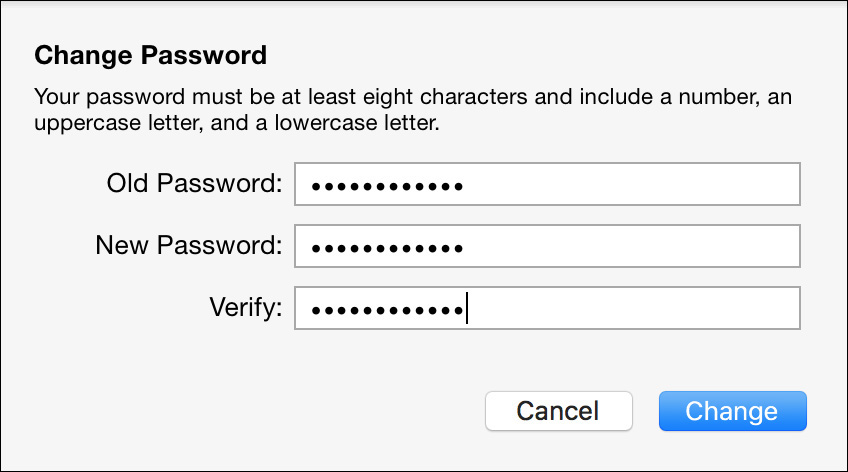
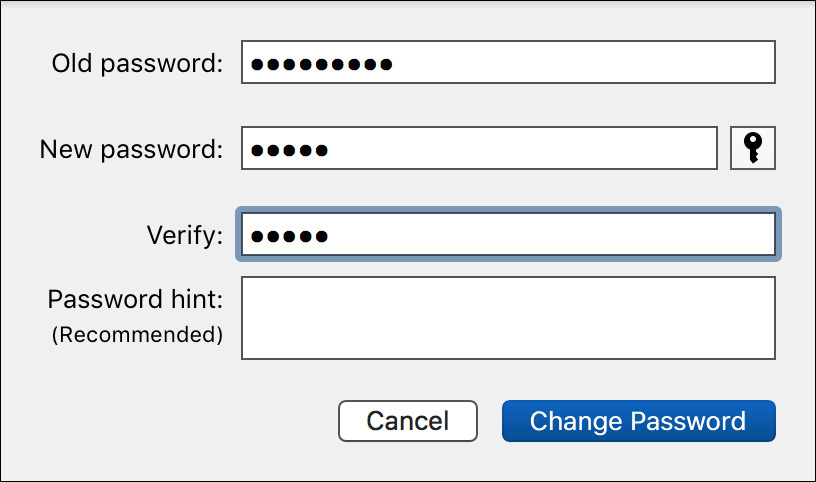
In most cases, users change their local account password independently from an Apple ID. Assuming this is the case for your account, you will do so via the default local account password change dialog. In the local account password change dialog, you must enter your old password once, followed by the new password twice. You enter the new password twice to avoid typos. Because you are using a local account password, the new password doesn’t have to conform to any Apple-mandated password requirements.
Change Password: Local Account Using an Associated Apple ID Password
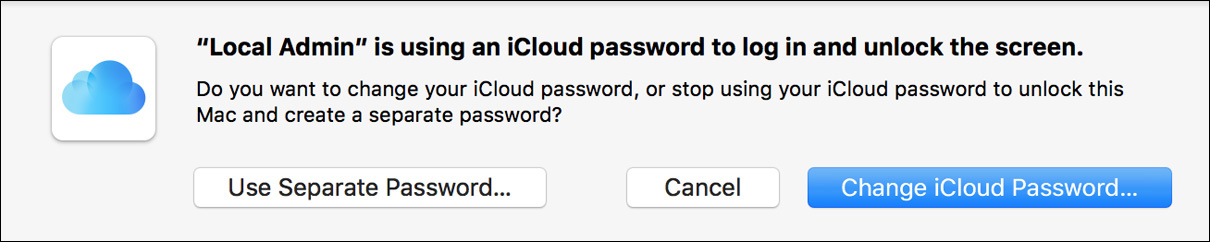
If you wish to change a local account password, which has an associated Apple ID (or iCloud) password, you are prompted to select whether you want to switch to using separate passwords or to change your current Apple ID password.
Note
Changes to Apple ID passwords can be made only if the Mac has Internet access. Specifically, the Mac must be able to communicate with Apple’s authentication services.
If you want to change your Apple ID password, you will need to enter the password and any additional codes if two-step verification or two-factor authentication is enabled. After the account is verified, you can change the Apple ID password. Again, whenever a password is changed, macOS presents a dialog requiring that the new password be entered twice to avoid typos. Also, because this is an Apple ID password, there are specific password requirements to ensure a strong password.
Tip
Changes to Apple ID passwords can also be made from another Apple device that is signed in to the Apple ID or via any web browser from the Apple ID website: https://appleid.apple.com. If you change an Apple ID password using another device or web browser, the local user account on the Mac won’t take the new password until you log out and back in using the new Apple ID password.
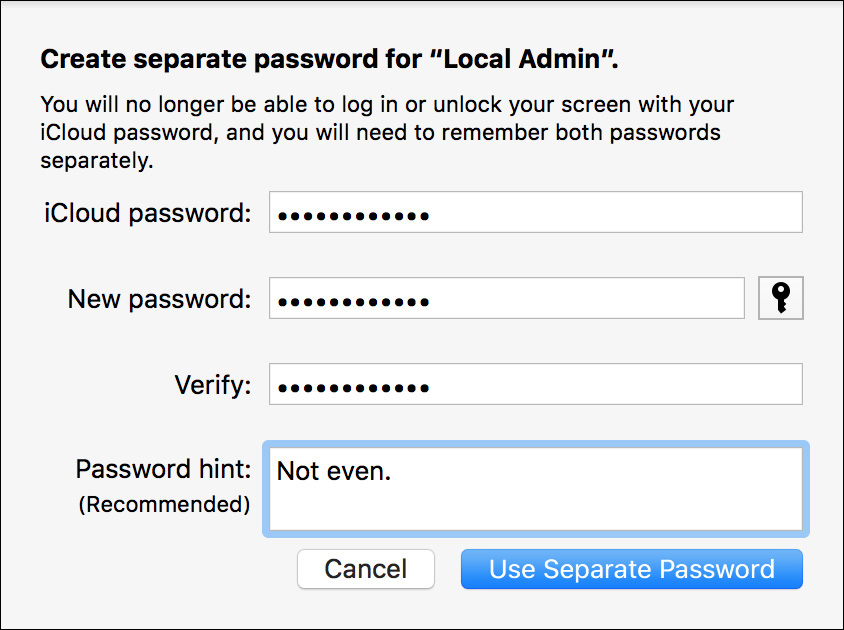
If you choose to switch to using a separate local password, you will be presented with a different dialog. In this case, you must enter the Apple ID password along with a new local account password. Once you complete this dialog, your local account password is no longer tied to your Apple ID password. Also, because your new password isn’t tied to your Apple ID, it doesn’t have to conform to Apple password requirements.
Note
As of this writing, macOS Sierra won’t allow you to change back to using an Apple ID password for login.
Use Password Assistant
Regardless of how sophisticated a security system is, the protection it affords is only as strong as the password you choose. For this reason, new Apple ID passwords must meet minimum password complexity requirements. As you’ve seen in this lesson, local account passwords don’t have to meet any password complexity requirements by default.
Tip
Administrators can enforce local password complexity rules via a configuration profile. You can find out more about configuration profiles in Lesson 2, “Set Up and Configure macOS.”
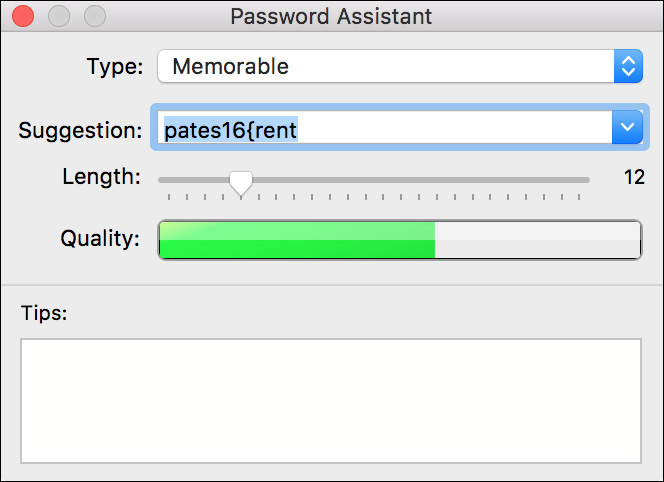
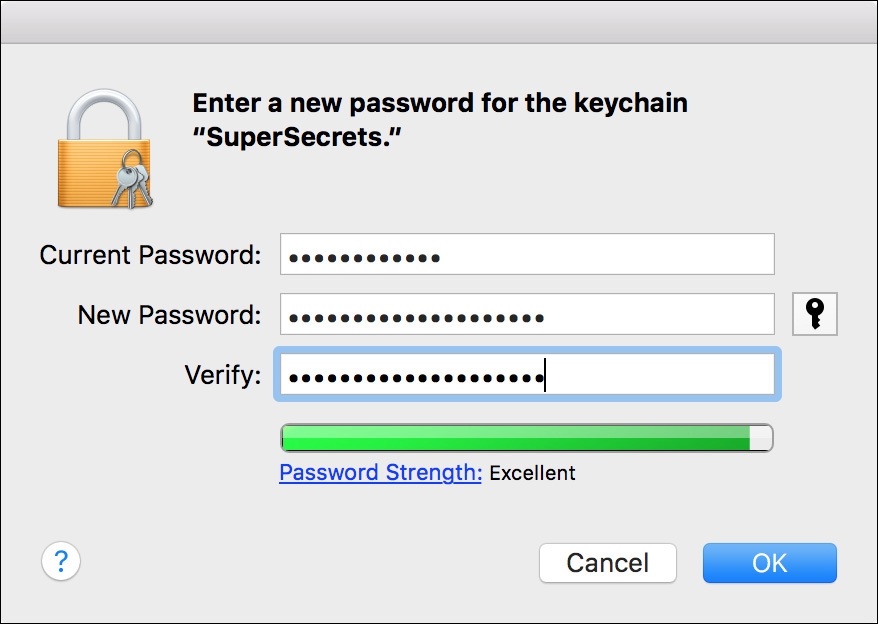
To help you pick a strong password, macOS Sierra includes a handy utility, called Password Assistant, that gauges the strength of your passwords or automatically creates strong passwords for you. Anytime you are creating or modifying a local password that grants access to a substantial resource, like an account or keychain password, you can use Password Assistant. It is available whenever you see the small key icon next to a password field, as you can see in the previous screenshot of the local account password change dialog.
About Master Passwords
The master password can be used to reset regular account passwords and is required to reset Legacy FileVault user account passwords. The master password isn’t tied to any local user account, so it’s an effective way to provide a password reset mechanism that does not require the creation of an additional administrator account. If you are maintaining a large deployment of Mac computers that are using local accounts, setting a uniform master password is an easy method for ensuring you always have a back door in without having your own local administrator account.
New installations of macOS Sierra do not normally have the master password set. However, there are two cases in which the master password may already be set. The first is if you have upgraded a computer from a previous version of the Mac operating system where the master password was set. The second is if you used Migration Assistant to transfer a Legacy FileVault user account to the Mac, in which case the master password is transferred as well.
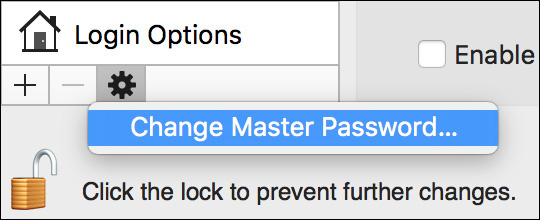
If you think you know the current master password and you would like to set a new master password, you can do so in the Users & Groups preferences. Once you have opened Users & Groups preferences and authenticated as an administrator, click the Action pop-up menu (the small gear icon) at the bottom of the users list. A menu with the option Change Master Password appears (if you have not set a master password, then the menu offers the Set Master Password option). As you’d expect, changing the master password requires that you know the current master password.
Tip
If you are logged in to a Legacy FileVault account, you can also change the master password from the Legacy FileVault pane of the Security & Privacy preferences.
Reference 8.2 Reset Lost Passwords
Users mistyping or forgetting their passwords is the primary cause of login and access issues on any platform. The second most common issue, specific to macOS, is when a user’s login keychain password becomes out of sync with that user’s account password. Fortunately, macOS Sierra provides several ways to easily resolve these types of password issues.
About Password Reset Methods
There are multiple methods for resetting a local user account password in macOS Sierra:
![]() Administrator account in Users & Groups—If you have access to an administrator account on the system, you can easily reset other user account passwords from Users & Groups preferences. Authenticate as an administrator, select another user account, and click Reset Password. If the selected user account is configured for Legacy FileVault, you must enter the master password to reset the account password. However, in all other cases, by virtue of previously authenticating as an administrator, you can enter a new password for the user. If the selected user account is using an Apple ID password, during the reset you can change it to a separate local account password.
Administrator account in Users & Groups—If you have access to an administrator account on the system, you can easily reset other user account passwords from Users & Groups preferences. Authenticate as an administrator, select another user account, and click Reset Password. If the selected user account is configured for Legacy FileVault, you must enter the master password to reset the account password. However, in all other cases, by virtue of previously authenticating as an administrator, you can enter a new password for the user. If the selected user account is using an Apple ID password, during the reset you can change it to a separate local account password.
Note
You cannot reset the password for another user who is still logged on to the computer via Fast User Switching. You must first restart the system, thus forcing the user to be logged out of their account, as covered in Lesson 5, “Manage User Accounts.”
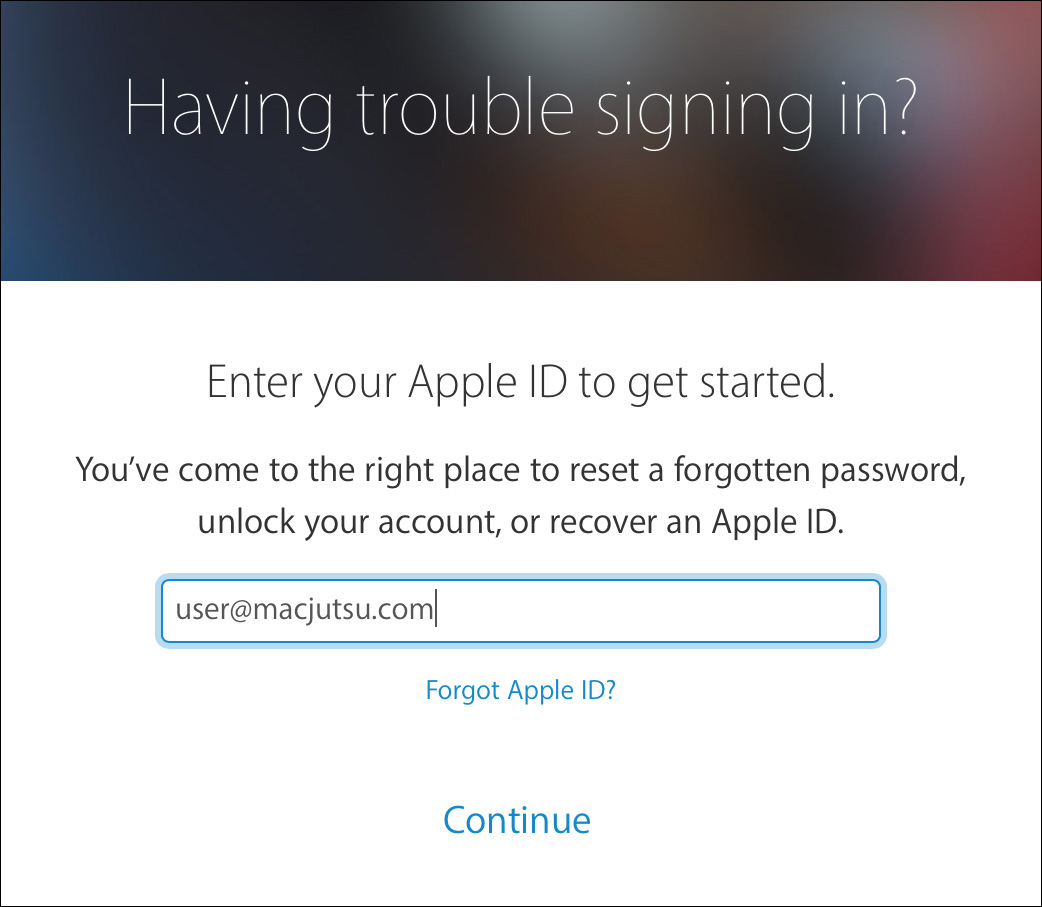
![]() Apple ID website—If the user account is tied to an Apple ID password, the user can try to reset the Apple ID password from any web browser via the Apple ID website: https://iforgot.apple.com. If the Apple ID has two-step verification or two-factor authentication enabled, the user will need to enter additional codes. Alternatively, for Apple IDs without this feature enabled, the user will have to successfully answer the recovery questions and respond to an email sent to the Apple ID. If the user is unable to reset the Apple ID password online, you can still reset the local user account password using the previous method as an administrator or by using the Reset Password assistant, as covered later in this section.
Apple ID website—If the user account is tied to an Apple ID password, the user can try to reset the Apple ID password from any web browser via the Apple ID website: https://iforgot.apple.com. If the Apple ID has two-step verification or two-factor authentication enabled, the user will need to enter additional codes. Alternatively, for Apple IDs without this feature enabled, the user will have to successfully answer the recovery questions and respond to an email sent to the Apple ID. If the user is unable to reset the Apple ID password online, you can still reset the local user account password using the previous method as an administrator or by using the Reset Password assistant, as covered later in this section.
More Info
Resetting an Apple ID may require multiple security verification steps. For more info see Apple Support article HT201487, “If you forgot your Apple ID password.”
![]() Master password at login—When the master password is set, users who enter an incorrect password three times at the login window are prompted to reset their account password. Authenticating with the current master password allows you to enter a new password for a local user account. Note that this method does not work for local user accounts with Apple ID passwords. On the other hand, this is the only method for resetting a Legacy FileVault user account at login. If you don’t know the master password, it won’t help you now, but eventually you can reset the master password, as covered later in this section
Master password at login—When the master password is set, users who enter an incorrect password three times at the login window are prompted to reset their account password. Authenticating with the current master password allows you to enter a new password for a local user account. Note that this method does not work for local user accounts with Apple ID passwords. On the other hand, this is the only method for resetting a Legacy FileVault user account at login. If you don’t know the master password, it won’t help you now, but eventually you can reset the master password, as covered later in this section
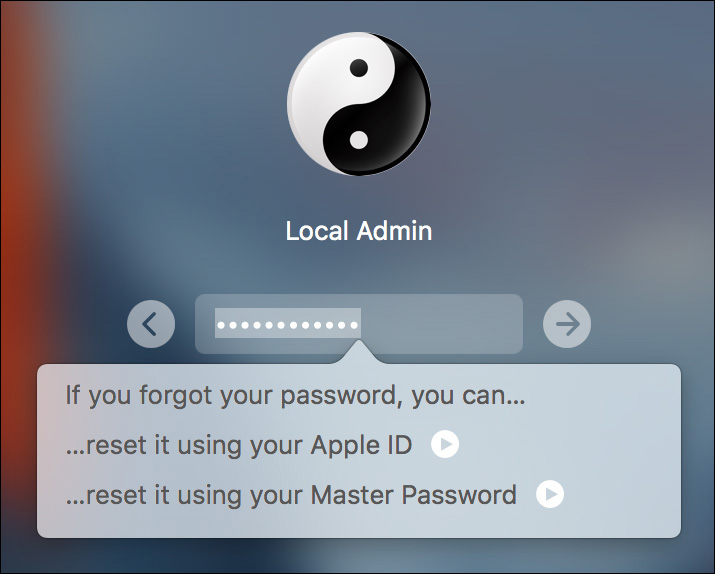
![]() Apple ID at login—Two conditions must be met for users to be able to reset their local account password at login using an Apple ID. First, they must not be using Legacy FileVault (most users won’t be). Second, the user account must have previously signed in to the iCloud service but still be using a separate local account password. As you can see in the previous screenshot, after three failed attempts at login, local users can enter their Apple ID to reset the password for a local user account. Details on setting up the iCloud service are covered in Lesson 2, “Set Up and Configure macOS.”
Apple ID at login—Two conditions must be met for users to be able to reset their local account password at login using an Apple ID. First, they must not be using Legacy FileVault (most users won’t be). Second, the user account must have previously signed in to the iCloud service but still be using a separate local account password. As you can see in the previous screenshot, after three failed attempts at login, local users can enter their Apple ID to reset the password for a local user account. Details on setting up the iCloud service are covered in Lesson 2, “Set Up and Configure macOS.”
Note
User accounts on Mac systems protected by FileVault system disk encryption cannot have their local passwords reset at the login window using the master password or an Apple ID.
![]() FileVault Recovery Key at Startup—On a Mac with FileVault system disk encryption enabled, users who enter an incorrect password three times at startup are prompted to reset the password using a Recovery Key. Lesson 10, “Manage FileVault,” covers this topic in greater detail.
FileVault Recovery Key at Startup—On a Mac with FileVault system disk encryption enabled, users who enter an incorrect password three times at startup are prompted to reset the password using a Recovery Key. Lesson 10, “Manage FileVault,” covers this topic in greater detail.
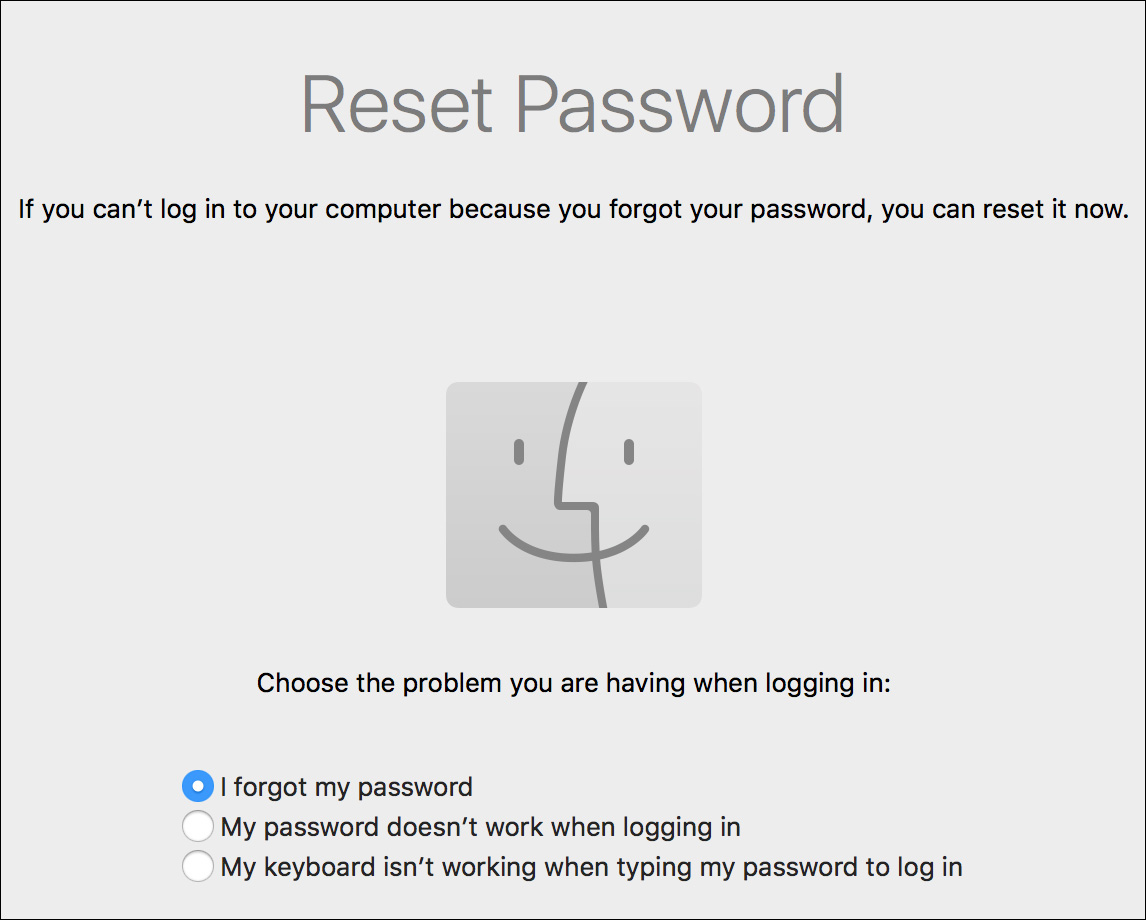
![]() Reset Password assistant via macOS Recovery—Anyone with access to macOS Recovery can use the Reset Password assistant to reset local account passwords. While this last-resort option is useful, it’s also a significant security risk, as, by default, it requires no knowledge of any other passwords. Enabling FileVault system disk encryption or a firmware password can mitigate this risk by requiring authentication to access the system disk from macOS Recovery. Use of the Reset Password assistant and firmware passwords is covered later in this lesson
Reset Password assistant via macOS Recovery—Anyone with access to macOS Recovery can use the Reset Password assistant to reset local account passwords. While this last-resort option is useful, it’s also a significant security risk, as, by default, it requires no knowledge of any other passwords. Enabling FileVault system disk encryption or a firmware password can mitigate this risk by requiring authentication to access the system disk from macOS Recovery. Use of the Reset Password assistant and firmware passwords is covered later in this lesson
Reset Legacy FileVault Passwords
Legacy FileVault user accounts are unique because the user’s home folder is saved inside an encrypted disk image protected by that user’s account password. Consequently, it is extremely important for an administrator to be able to reset a Legacy FileVault user’s account password so that the user can access home folder files again.
A normal administrator user account is not enough to reset a lost Legacy FileVault user’s password. After all, Legacy FileVault wouldn’t be very secure if just any old administrator user could come along and break in. Therefore, if a Legacy FileVault user has forgotten the account password, the master password is required to reset the account.
As covered previously, if you know the master password, macOS provides two methods for easily resetting Legacy FileVault user passwords. The first method allows you to reset a Legacy FileVault user at the login window, and the second method involves resetting a Legacy FileVault account password in the Users & Groups preferences.
If the master password, as well as the user’s Legacy FileVault password, is lost, you are completely out of luck. You must have at least one of these two passwords to recover a Legacy FileVault user account. Otherwise, you are never, ever going to be able to recover the user’s data. Not even Apple can help you. Apple designed Legacy FileVault to be as secure as possible, and thus created only one way to reset a Legacy FileVault user account: the master password. For this reason alone, you should abandon using Legacy FileVault user accounts in favor of FileVault 2 full-system volume encryption.
More Info
Turning off Legacy FileVault and using FileVault system disk encryption technology is covered in Lesson 10, “Manage FileVault.”
Reset the Master Password
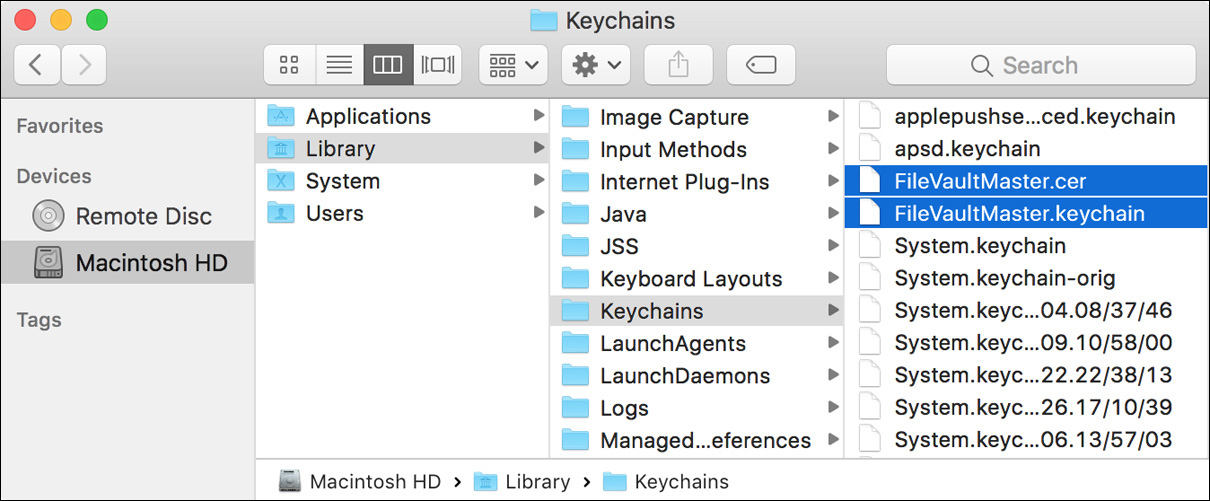
If Legacy FileVault user accounts are still active, it’s vital that the master password be properly configured and known by an administrator. If the master password is lost, an administrator user should reset it immediately just to be able to reset normal user passwords. Resetting the master password involves deleting the /Library/Keychains /FileVaultMaster.cer and /Library/Keychains/FileVaultMaster.keychain files.
Once these files are deleted, an administrator user can return to the Users & Groups preferences and set a new master password using the techniques covered previously in this lesson. However, just because you can set a new master password for your Mac doesn’t mean you can recover a Legacy FileVault user account that was created with the old master password. Only the master password created when the Legacy FileVault user account was enabled can unlock an inaccessible account.
Even if a new master password is set, it cannot reset existing Legacy FileVault user account passwords. This is because macOS does not support reencrypting Legacy FileVault user accounts, which is a necessary step for lost master password resets. Thus, if you lost the master password used to create a Legacy FileVault user account, there is no recovery method if users also lose their password. This is yet another reason to abandon the use of Legacy FileVault user accounts in favor of FileVault 2 system disk encryption.
Reset Password Assistant via macOS Recovery
Many Mac computers intended for personal use have only the single primary administrator user account that was created when the Mac was initially configured with Setup Assistant. Even if more than one person uses this Mac, quite often its owner is not very concerned about security. Thankfully, macOS now defaults to requiring the user to enter a password at login.
However, if the computer was upgraded to macOS, it’s common for the primary user account to automatically log in during startup and for a master password not to be set. This can result in Mac owners forgetting their primary administrator account password and not having any way to reset it because they never enabled the master password or created another administrator account. Fortunately, Apple has prepared for these occasions by including the Reset Password assistant in macOS Recovery.
The Reset Password assistant is available only from macOS Recovery system, as covered in Lesson 3, “Use macOS Recovery.” Once the Mac is running from macOS Recovery, open the Terminal application (via the Utilities menu), type resetpassword, and then press Return. The Reset Password assistant will open and provide several methods to rest the local user’s account.
The Reset Password assistant presents several screens that vary based on the system’s storage and password configuration:
![]() Storage volume selection—If the system has more than one attached storage volume, you will need to select the system volume containing the account password that you wish to reset.
Storage volume selection—If the system has more than one attached storage volume, you will need to select the system volume containing the account password that you wish to reset.
![]() FileVault enabled volume—If the selected volume is protected with FileVault system volume encryption, you will have to either have the password for a local account on the system that has permission to log in to FileVault or enter the password for the Apple ID that was used to save the FileVault recovery key. Again, Lesson 10, “Manage FileVault,” covers this topic in greater detail.
FileVault enabled volume—If the selected volume is protected with FileVault system volume encryption, you will have to either have the password for a local account on the system that has permission to log in to FileVault or enter the password for the Apple ID that was used to save the FileVault recovery key. Again, Lesson 10, “Manage FileVault,” covers this topic in greater detail.
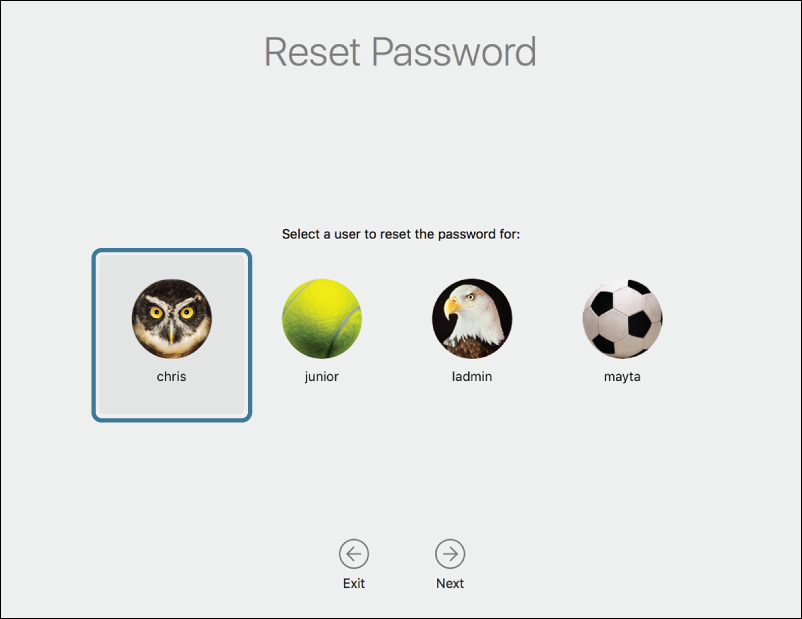
![]() Local user selection—If there is more than one local account user on the selected system volume, you will have to select the specific account you wish to reset the password for.
Local user selection—If there is more than one local account user on the selected system volume, you will have to select the specific account you wish to reset the password for.
![]() Local user with associated Apple ID—If the selected local account is associated with an Apple ID, then you may be able to reset the local account password by entering the password for the associated Apple ID. However, this method requires that the system have Internet access when running from the macOS Recovery system.
Local user with associated Apple ID—If the selected local account is associated with an Apple ID, then you may be able to reset the local account password by entering the password for the associated Apple ID. However, this method requires that the system have Internet access when running from the macOS Recovery system.
![]() Local user without an associated Apple ID—If the selected local account is not associated with an Apple ID, then you can simply enter a new password for the local account.
Local user without an associated Apple ID—If the selected local account is not associated with an Apple ID, then you can simply enter a new password for the local account.
Obviously, the Reset Password assistant is a dangerous application that can completely bypass the user account security settings you’ve configured to protect your Mac. For this reason, the Reset Password assistant does not run if copied off the original media, but this still doesn’t prevent any user with access to macOS Recovery from using this utility. Once again, Apple prepared for this situation by providing another utility on macOS Recovery: the Firmware Password utility. As covered in Reference 8.4, “Secure System Startup,” setting a firmware password prevents any unauthorized user from circumventing normal system startup.
Reference 8.3 Reset User Keychains
As detailed in Lesson 7, “Manage Security and Privacy,” all macOS user accounts are given local encrypted keychains accessed by a password that is normally synchronized with their account password. So that they remain as secure as possible, keychain passwords cannot be changed by any outside password-resetting process. Apple did not design the keychain system with a back door, because doing so would render the system less secure.
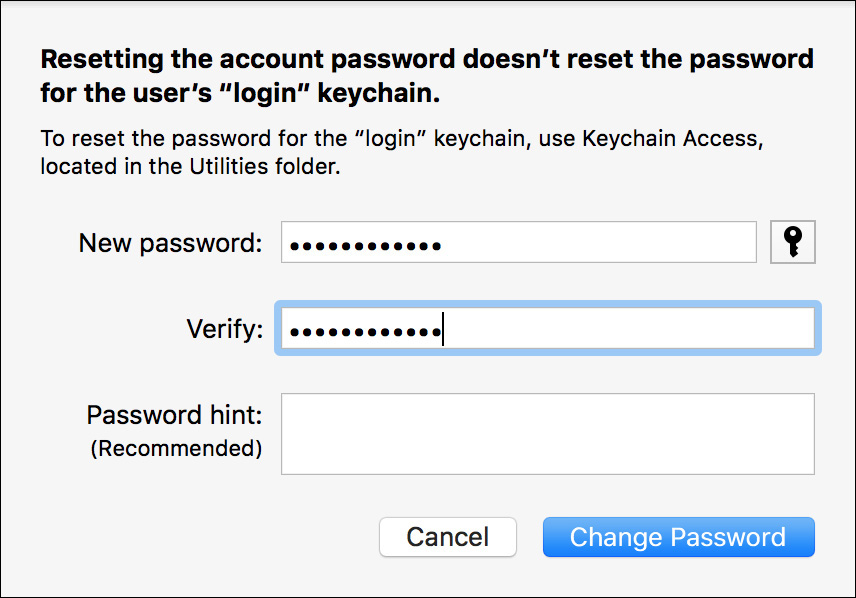
Consequently, whenever a user’s account password is reset (as opposed to changed), the user’s login and Local Items/iCloud keychain passwords remain unchanged and will not automatically open when the user logs in to the account. As such, when users with a recently reset password log in, they will be prompted with a dialog to update or reset the keychain password.
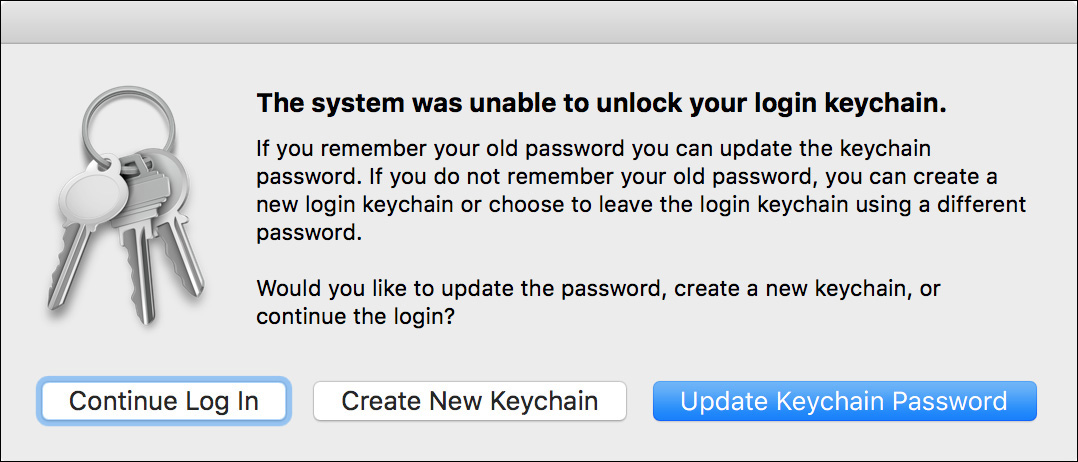
The default selection, Update Keychain Password, works only if the user knows the previous keychain password, which is probably not the case if you just had to reset the password. In that case, the user should click the Create New Keychain button to create a new login keychain. The system renames the old login keychain and leaves it in the user’s Keychains folder in case the user ever remembers the old password. Finally, though it’s not recommended, the user can choose to ignore the warning by clicking Continue Log In.
Note
Creating a new login keychain effectively erases all saved authentication secrets. This means the system will have lost saved authentication for any services, such as those configured via the Internet Accounts preferences and iCloud preferences, including access to additional secrets saved in the Local Items/iCloud keychain.
If the automatic keychain update dialog does not appear, you can still reset the user’s login and Local Items/iCloud keychain passwords from the Keychain Access application, assuming the previous password is known. As you’d expect, if you do not know the user’s previous keychain password, the contents of that keychain are lost forever.
Manage Keychain Files
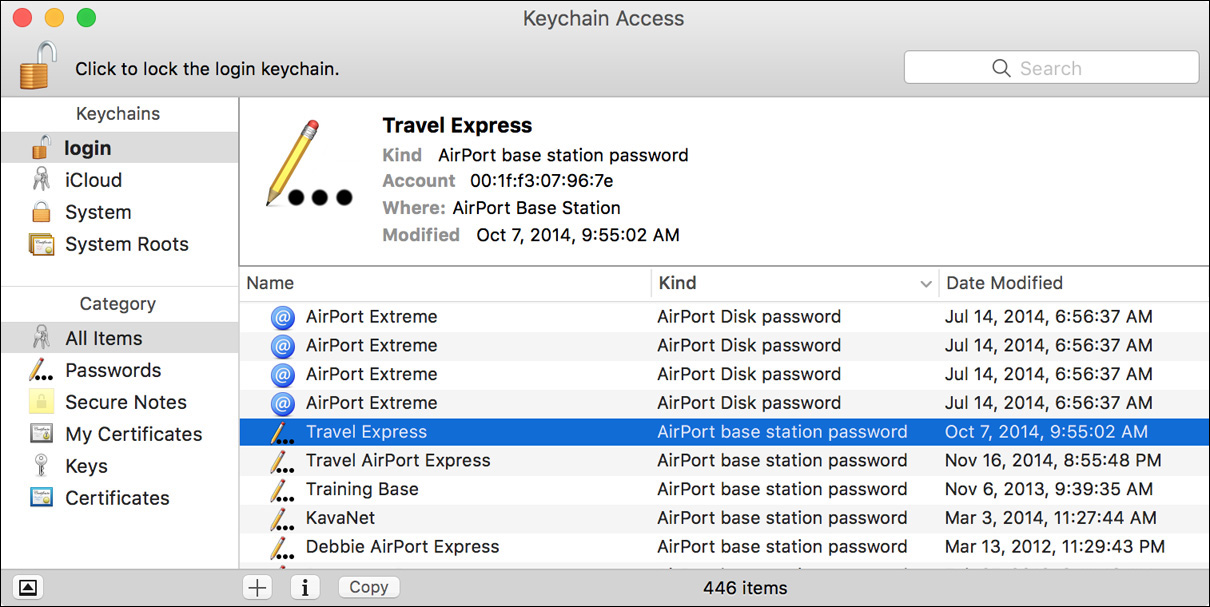
At any point while the user is logged in to the system, you can manage keychain files, including resetting a keychain’s password, from the /Applications/Utilities/Keychain Access application. As covered in Lesson 7, “Manage Security and Privacy,” Keychain Access allows you to manage secrets saved inside the keychain files once they are unlocked. In this lesson you will learn how to manage the keychain files themselves.
Creating a new local keychain is as simple as choosing File > New Keychain and then entering a password, six characters or longer, for the keychain. The default location for new keychains is the Keychains folder inside your home folder.
Note
The user’s Local Items/iCloud keychain is accessed using the same password as the user’s login keychain. In other words, the password used to unlock and manage the user’s login keychain is also used to unlock and manage the Local Items/iCloud keychain. Thus, changes to the login keychain password are automatically applied to the Local Items/iCloud keychain. For this reason, the Keychain Access application does not allow you to change the Local Items/iCloud keychain password.
You can further adjust a keychain’s settings by selecting it from the list and then choosing Edit > Change Settings for Keychain. A dialog appears where you can change automatic keychain locking settings for the selected keychain file.

To change a keychain’s password, first select it from the list and then choose Edit > Change Password for Keychain. You have to enter the keychain’s current password first, followed by a new password and verification.
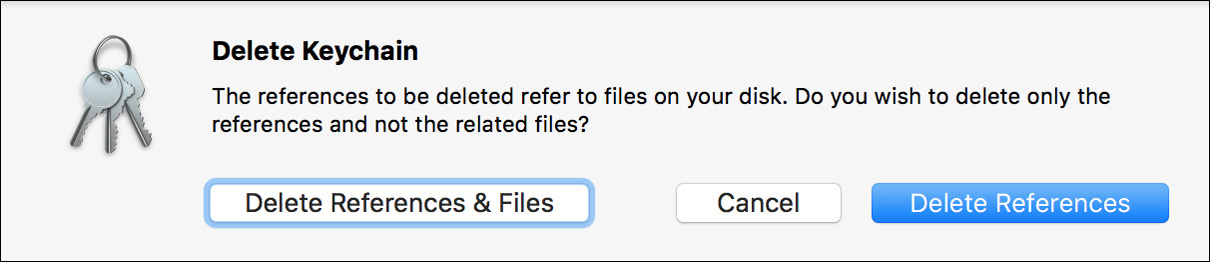
Finally, to delete a keychain, select it from the list and choose File > Delete Keychain. When the Delete Keychain dialog appears, click Delete References to simply ignore the keychain, or click Delete References & Files to completely erase the keychain file.
It’s best to avoid deleting the original keychain file manually in the Finder, because this will confuse the keychain system. Also, it’s obviously not a good idea to delete the Login keychain unless another keychain is there to take its place. A user should always have access to at least one local keychain.
Tip
You can move keychain items between keychains by dragging and dropping an item from one keychain to another. The exception to this is the Local Items/iCloud keychain, for which the system automatically manages the addition and removal of items.
Tip
For quick access to your keychains and other security features, you can enable the Keychain menu item by choosing Keychain Access > Preferences. Then select the “Show keychain status in menu bar” checkbox to display the Keychain menu item, as indicated by a small key icon.
Manually Reset Keychain Files
If the system is unable to open a keychain file or retrieve secrets from it, the keychain file may have become corrupted. If so, the user’s keychain files will need to be replaced or simply reset. As covered previously, the user’s keychain files reside in /Users/<username>/Library/Keychains.
Ideally users have maintained a backup of their home folder using a backup technology like Time Machine, as covered in Lesson 15, “Manage Time Machine.” In this case you can manually replace the user’s entire Keychains folder with earlier versions of the files. After replacing the keychain files, you should restart the computer and re-log-in as the user. Opening the Keychain Access application will verify the recovered keychain files.
Unfortunately, if the user’s keychain files are corrupted and the user doesn’t have a backup, the keychain items will need to be reset. In this case, delete the contents of the user’s Keychains folder and then restart the computer. Re-log-in as the user, and the system will create new empty keychain items for the user.
Resetting iCloud Keychain
Not only does the iCloud Security Code give you an additional way to add new devices, it also provides a last resort should the iCloud Keychain service become unavailable to all your devices. In other words, if you lose access to all your devices, a new device can be authorized via the iCloud Security Code. However, if you don’t create an iCloud Security Code and somehow all your devices are lost or have disabled the iCloud Keychain service, then your iCloud Keychain contents are no longer accessible and must be reset.
Note
If you lose both your iCloud Security Code and access to authorized devices, the iCloud Keychain service must be reset to regain access to the service. However, if you lose access only to the SMS text message phone number, you can contact Apple Support to help resolve this issue.
Note
Resetting the iCloud Keychain service destroys all previously saved items in the iCloud Keychain. After a reset, enabling this service will again prompt you to set up an iCloud Security Code.
Also covered previously, as the local login keychain goes, so does the iCloud keychain. If the login keychain is locked, the iCloud keychain is also locked.
Further, if the login keychain password is lost, so is the user’s access to the local instance of the iCloud keychain. If a new login keychain is created, as is recommended by the keychain update dialog, the local iCloud keychain is also automatically reset. This results in a new empty Local Items keychain for the user, but the contents of the iCloud Keychain service remain “in the cloud.” You can then gain access to your secrets by reenabling the iCloud Keychain service; however, doing so will treat the device as if it were a new device. Thus, you will again be prompted to authenticate with an Apple ID and to use either the iCloud Security Code or device authorization to regain access to the iCloud Keychain service.
More Info
You can find out more about iCloud Keychain from Apple Support article HT204085, “Frequently asked questions about iCloud Keychain.”
Reference 8.4 Secure System Startup
As covered earlier, setting the firmware password prevents unauthorized users from using any startup-interrupt keyboard shortcuts. This protects your system from someone trying to circumvent an otherwise secure installation of macOS. A firmware password is not in any way tied to a user account. Instead, the password is saved to the Mac computer’s firmware chip so it remains separate from the installed software.
Tip
Even without setting a firmware password, enabling macOS FileVault system disk encryption prevents unauthorized access to the encrypted system disk.
With a firmware password set, all startup keyboard shortcuts are disabled except for shortcuts that allow you to choose a different startup system. Further, you must provide authentication to gain access to another startup system. For example, on a Mac with a firmware password enabled, if you start up while holding down the Option key, an authentication window appears, prompting you to enter the firmware password. If you enter the correct firmware password, you can select a different startup disk from the Startup Manager. This gives the administrator the flexibility to start up from another system should the need arise, but otherwise prevents users from affecting the standard macOS startup process.
More Info
All the available startup keyboard shortcuts are covered in Lesson 26, “Troubleshoot Startup and System Issues.”
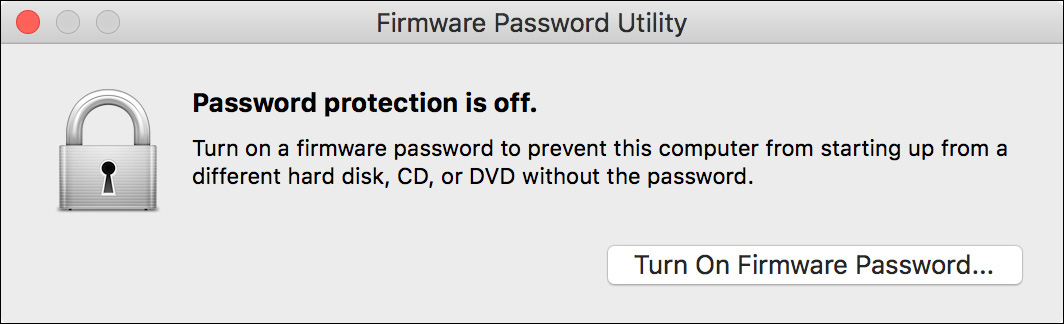
If you require the highest level of security for your Mac, you must set the firmware password. This is because any user with access to macOS Recovery can set the password if it hasn’t already been set. You can set the firmware password using the Firmware Password utility, available when the Mac is started up from macOS Recovery, as covered in Lesson 3, “Use macOS Recovery.”
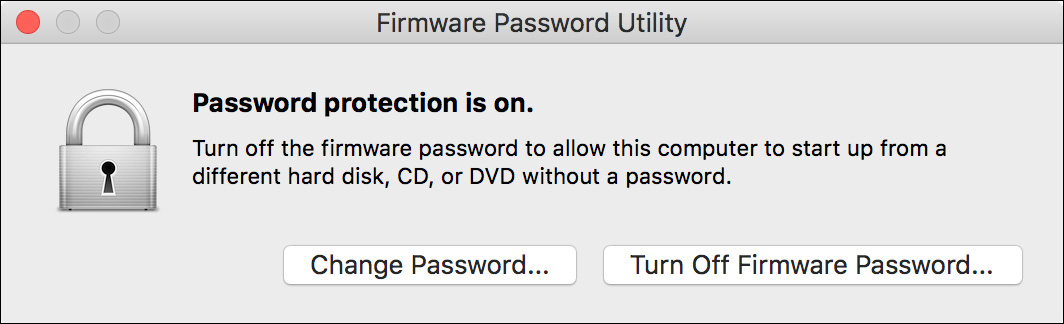
Once the Mac is started in macOS Recovery, the Firmware Password utility is available in the Utilities menu. If the firmware password isn’t currently set, click Turn On Firmware Password and enter the desired password.
If a firmware password is already set for the system, you can change it or turn it off using the corresponding button. However, you must know the current firmware password to change or disable it.
If for some reason the computer’s firmware password is lost, it can be reset. For many Mac models made before 2010, you can reset the firmware password by first removing some of the system memory from the Mac. This “proves” that you have access to the internals of the Mac. Then, when you restart the Mac, hold down Command-Option-P-R. Continue holding until you hear the Mac restart; then you can release the keys. At this point, the firmware password has been cleared.
To provide enhanced security, most Mac models from 2010 or later don’t support this method of resetting the firmware password. If you are in the position of needing the firmware password cleared on a later Mac, you need to visit an Apple Authorized Service Provider.
More Info
You can find out more about firmware passwords from Apple Support article HT204455, “Use a firmware password on your Mac.”
Exercise 8.1 Reset Account Passwords in macOS Recovery
![]() Prerequisites
Prerequisites
![]() You must have created the Local Admin (Exercise 2.1, “Configure a New macOS System for Exercises,” or Exercise 2.2, “Configure an Existing macOS System for Exercises”) and Chris Johnson (Exercise 5.1, “Create a Standard User Account”) accounts.
You must have created the Local Admin (Exercise 2.1, “Configure a New macOS System for Exercises,” or Exercise 2.2, “Configure an Existing macOS System for Exercises”) and Chris Johnson (Exercise 5.1, “Create a Standard User Account”) accounts.
![]() Your computer must have a local hidden Recovery HD partition. This partition is normally created by the macOS installation process.
Your computer must have a local hidden Recovery HD partition. This partition is normally created by the macOS installation process.
![]() You must not have turned on FileVault encryption on your Mac.
You must not have turned on FileVault encryption on your Mac.
macOS provides a number of ways to reset lost account passwords. In this exercise, you will use macOS Recovery mode to reset Chris Johnson’s password.
Reset a User Password in macOS Recovery
1 Restart your computer, and hold down Command-R until the Apple logo appears on the screen.
2 If a language selection screen appears, select your preferred language, and click the right-arrow button to continue.
3 From the menu bar, choose Utilities > Terminal.
Terminal provides access to a command-line (text-based) interface in macOS. This guide doesn’t cover the command-line interface, but using it is necessary to reach the Reset Password utility in macOS Recovery.
4 Type the command resetpassword, and press Return.

The Reset Password utility opens.
5 If you are asked to select a volume to recover, select your system volume (usually Macintosh HD), and then click Next.
6 Select the Chris Johnson user account, and click Next.
7 Enter the password for the Apple ID account that you linked Chris Johnson to, and then click Next. If you did not link Chris Johnson to an Apple ID, this step will be skipped.
8 If you used an Apple ID with two-step verification or two-factor authentication, follow the prompts to finish authenticating.
9 Enter password1 in both password fields. Leave the hint field blank.
10 Click Next.
11 When you are notified that your user account password has been reset, click Restart.
Note
Chris Johnson’s login keychain is no longer synchronized with his login password. You may perform Exercise 8.2, “Reset Account Passwords,” next, followed by Exercise 8.3, “Create a New Keychain,” or you may skip directly to Exercise 8.3. In any case, reset Chris’s keychain by performing Exercise 8.3 before going on to any other lesson.
Exercise 8.2 Reset Account Passwords
![]() Prerequisite
Prerequisite
![]() You must have created the Local Admin (Exercise 2.1, “Configure a New macOS System for Exercises,” or Exercise 2.2, “Configure an Existing macOS System for Exercises”) and Chris Johnson (Exercise 5.1, “Create a Standard User Account”) accounts.
You must have created the Local Admin (Exercise 2.1, “Configure a New macOS System for Exercises,” or Exercise 2.2, “Configure an Existing macOS System for Exercises”) and Chris Johnson (Exercise 5.1, “Create a Standard User Account”) accounts.
macOS provides a number of ways to reset lost account passwords. In this exercise, you will reset Chris Johnson’s password as an administrator and then again using a master password.
Reset a User Password as an Administrator
1 If necessary, log in as Local Admin (password: ladminpw, or whatever you chose when you created the account).
2 Open System Preferences, and select Users & Groups.
3 Click the Lock icon, and authenticate as Local Admin.
4 Select the Chris Johnson account.
5 Click Reset Password.
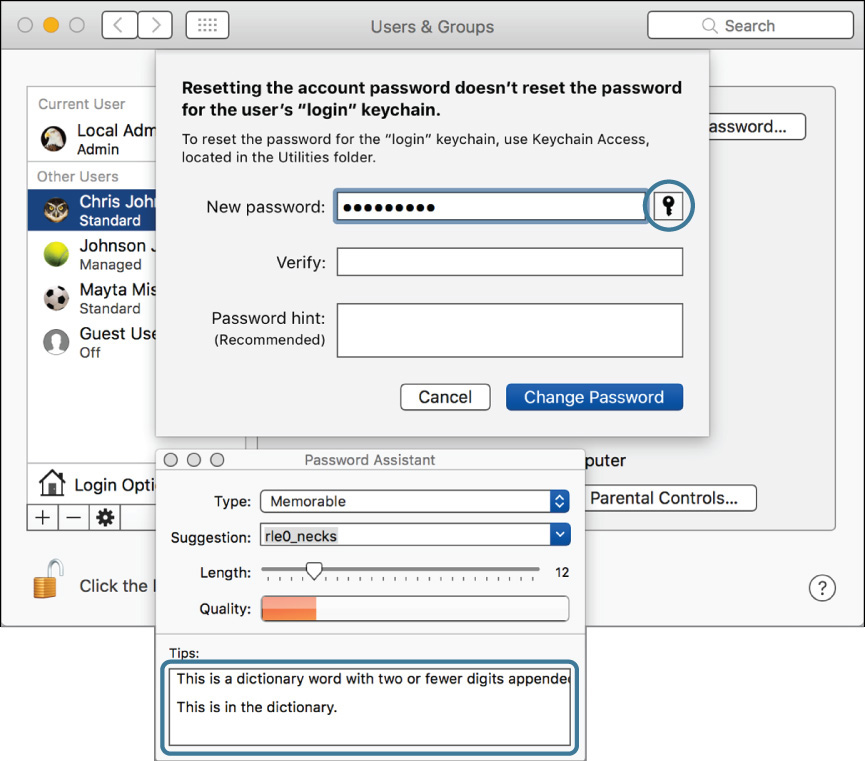
6 In the dialog that appears, enter password2 in the “New password” field.
7 Click the small key icon next to the “New password” field.
Password Assistant opens to help you choose a better password. It rates the quality of this proposed password (red, to indicate it’s bad), suggests a better password (in the Suggestion field), and lists tips on how to avoid such bad passwords.
8 Click the triangle next to the Suggestion field to show more suggested passwords.
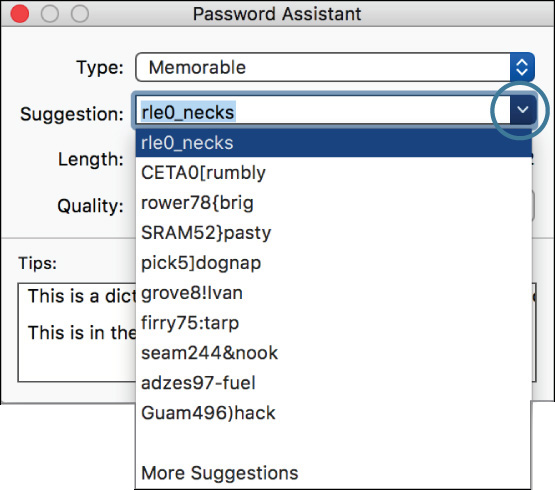
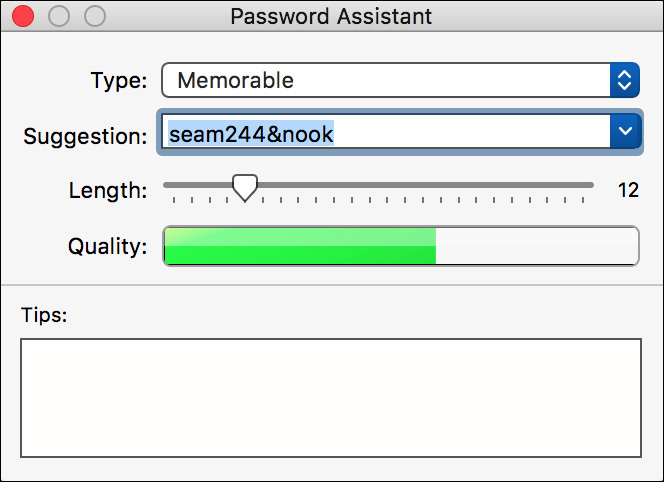
9 Click one of the suggested passwords. The selected password is copied into the “New password,” Verify, and Suggestion fields, and the Quality bar expands and turns green to indicate this is a much better option.
You do not need to memorize or record this password because you will not need it later.
10 Close Password Assistant.
11 Click Change Password.
12 Click the Action (gear icon) menu under the user list, and choose Set Master Password from the pop-up menu that appears.
13 If you are performing this exercise in a class, enter masterpw in the Master Password and Verify fields. If you are performing this exercise on your own, select a more secure master password. Be sure to remember the password you have chosen since you will need to reenter it in the next section.

14 Click OK.
15 Quit System Preferences, and log out as Local Admin.
Reset a Password with the Master Password
1 At the login screen, select Chris Johnson.
2 Enter the wrong password for Chris, and press Return three times.
You’ll see options for resetting Chris’s password.
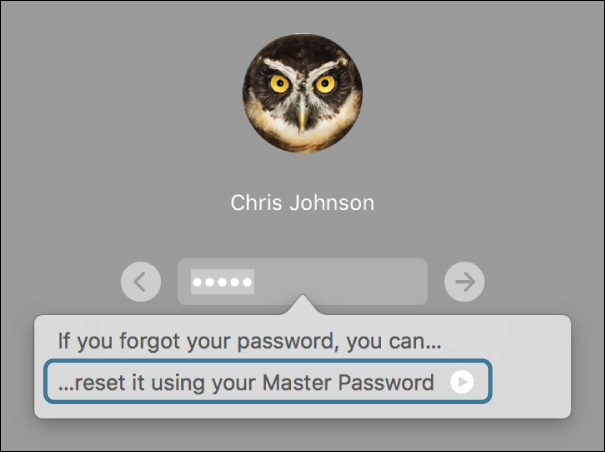
3 Click the arrow next to “reset it using your Master Password.”
4 Enter the master password (masterpw, or whatever you chose earlier in the exercise); then enter password2 in the “New password” and “Verify password” fields.
Do not enter a password hint.

5 Click Reset Password.
A dialog warns that the system was unable to unlock your login keychain. Leave this dialog open for the next exercise.
Chris Johnson’s login keychain is no longer synchronized with his login password. You need to reset his keychain by performing Exercise 8.3, “Create a New Keychain,” before going on to any other exercise.
Exercise 8.3 Create a New Keychain
![]() Prerequisites
Prerequisites
![]() You must have created the Local Admin (Exercise 2.1, “Configure a New macOS System for Exercises,” or Exercise 2.2, “Configure an Existing macOS System for Exercises”) and Chris Johnson (Exercise 5.1, “Create a Standard User Account”) accounts.
You must have created the Local Admin (Exercise 2.1, “Configure a New macOS System for Exercises,” or Exercise 2.2, “Configure an Existing macOS System for Exercises”) and Chris Johnson (Exercise 5.1, “Create a Standard User Account”) accounts.
![]() You must perform Exercise 8.1, “Reset Account Passwords in macOS Recovery,” or Exercise 8.2, “Reset Account Passwords,” before this exercise.
You must perform Exercise 8.1, “Reset Account Passwords in macOS Recovery,” or Exercise 8.2, “Reset Account Passwords,” before this exercise.
After Chris’s (or anyone’s) account password has been reset, his keychain will still be encrypted with his old account password. If Chris remembers the old password, he can update the keychain to match the new account password. But if his password was reset because he forgot it, he will not be able to recover the contents of the old keychain, and he must create a new one using his new account password.
In this exercise, you can assume that Chris’s account password was reset because he forgot the old password, and so he needs to abandon the old keychain and create a new one.
Create a New Login Keychain
Warning
Creating a new keychain makes the old keychain contents inaccessible. If this were a real user’s account and there was anything important in the keychain, it would be worth trying to remember the old password before replacing it with a new (blank) keychain.
1 If you aren’t already logged in (or logging in) as Chris Johnson, log in now (after the previous exercises, his password is either password1 or password2).
Because Chris’s account password no longer matches his keychain password, the system cannot use this password to unlock his keychain, and you receive a warning to this effect.
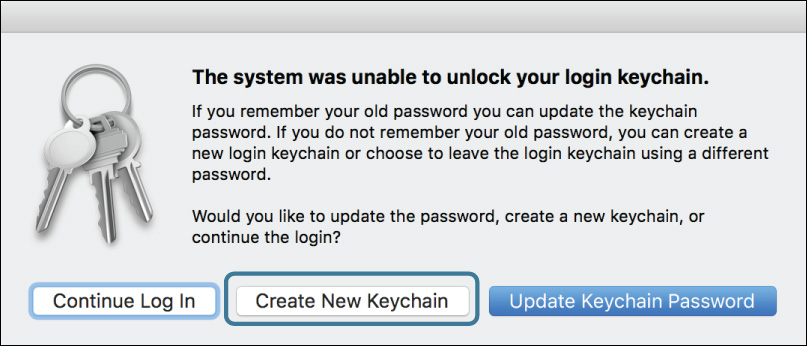
2 Click Create New Keychain.
The login session proceeds as usual, and Chris’s desktop appears.
3 If a dialog appears indicating that your Mac can’t connect to iCloud, click iCloud Preferences.
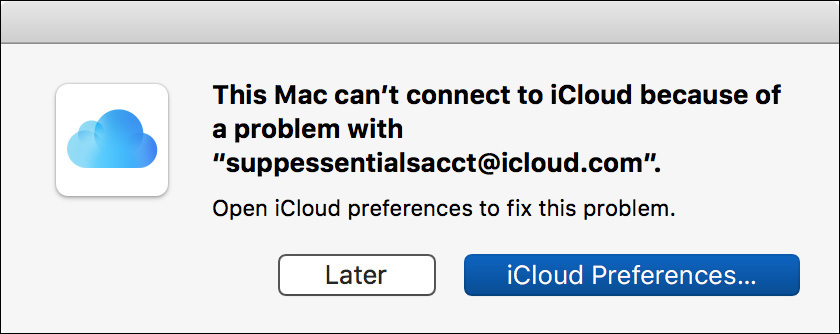
Since Chris’s keychain has been reset, his iCloud credentials have been lost and will need to be reentered.
4 Enter the password for the Apple ID Chris’s account is linked to, and click Sign In.
5 If the Apple ID has two-step verification or two-factor authentication, follow the prompts to finish authenticating.
6 Quit System Preferences.
Keychain Access displays the status and contents of your login keychain. Note that the keychain appears as unlocked, which means that the correct password has been supplied and its contents are available.
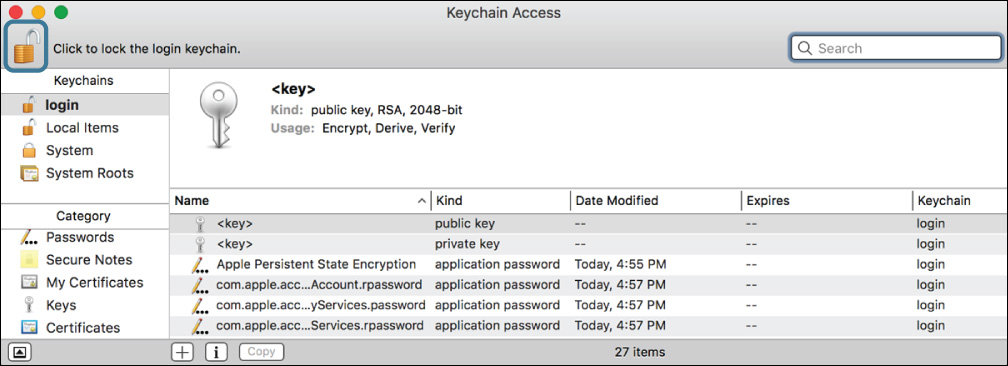
The new keychain normally contains a number of entries, but it consists only of items that are automatically created in a new keychain plus those items relating to the Apple ID Chris’s account is linked to. The items that were in the old keychain are no longer available.
2 Click the padlock icon in the upper-left corner of the window to lock the keychain.
3 Click the padlock again to unlock it.
You are prompted for the keychain password.
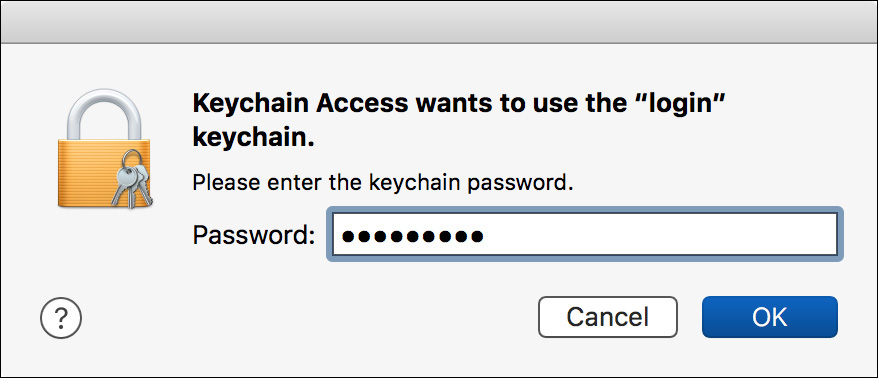
4 Enter Chris’s current account password (password1 or password2), and then click OK.
Since this is the new keychain’s password, it unlocks.
5 Quit Keychain Access.
Change Chris’s Password
Resetting Chris’s account password desynchronized it from his login password. A normal password change does not cause this problem. To test this, change Chris’s password the normal way.
1 Open the Users & Groups pane in System Preferences.
2 Make sure the Chris Johnson account is selected.
3 Click Change Password.
Note that unlike the Reset Password options you used earlier, this has a field for the old password. It uses this old password to decrypt the login keychain and then reencrypt it with the new password.
4 Enter the following:
Old password: password1 or password2
“New password” and Verify: chris (or whatever you chose when you originally created his account)
You may enter a password hint if you want.
6 Quit System Preferences.
Reverify the Synchronization
1 Reopen the Keychain Access utility.
2 As you did before, click the padlock twice to lock and unlock the keychain.
3 Enter Chris’s current account password (chris, or whatever you chose when you created his account) in the Password field, and click OK.
As before, the account password unlocks the keychain.
4 Quit Keychain Access.
5 Log out as Chris Johnson.
Exercise 8.4 Use a Firmware Password
![]() Prerequisite
Prerequisite
![]() You should perform this exercise only on a Mac computer that you own and for which you can provide proof of ownership.
You should perform this exercise only on a Mac computer that you own and for which you can provide proof of ownership.
In this exercise, you will set a firmware password to control the startup process of your computer.
Warning
If you forget the firmware password, you might have to take your computer to an Apple Authorized Service Provider and provide proof that you own the computer to unlock it. If you do not want to risk this, please skip ahead to the next lesson.
Set a Firmware Password
1 Restart your computer, and hold down Command-R until the Apple logo appears on the screen.
2 If a language selection screen appears, select your preferred language, and click the right-arrow button.
3 From the menu bar, choose Utilities > Firmware Password Utility.
4 Click Turn On Firmware Password.
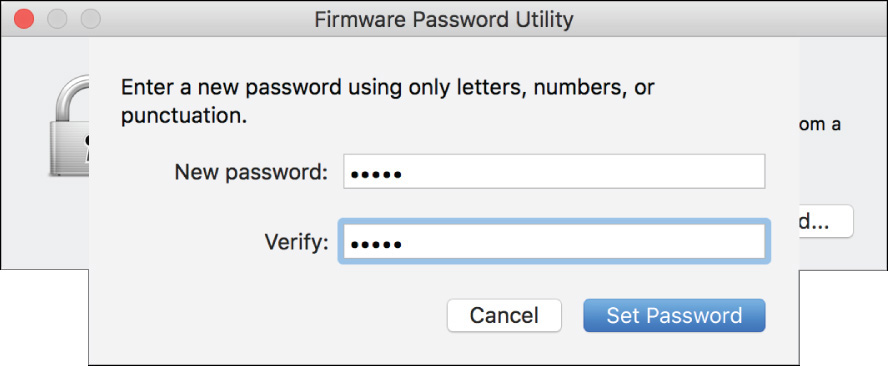
5 Enter the password apple in both the “New password” and Verify fields.
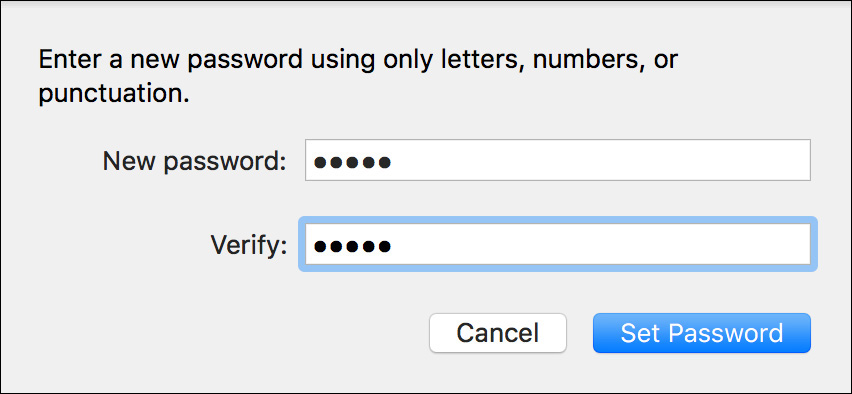
6 Click Set Password.
The utility indicates that password protection is enabled.
Test the Firmware Password
1 From the Apple menu, choose Restart.
Your computer restarts normally. The firmware password does not interfere with a normal startup.
2 At the login screen, click Restart, and then hold down Command-R until a Lock icon appears onscreen.

Alternative boot modes, including macOS Recovery, are not available without entering the firmware password.
3 Enter the password (apple), and press Return.
Remove the Firmware Password
If you are performing these exercises on your own and want to leave the firmware password enabled, restart your computer normally, and skip this section.
If you are performing these exercises in a classroom or you do not want to leave the firmware password set on your own computer, follow these steps to remove the password:
1 Choose Utilities menu > Firmware Password Utility.
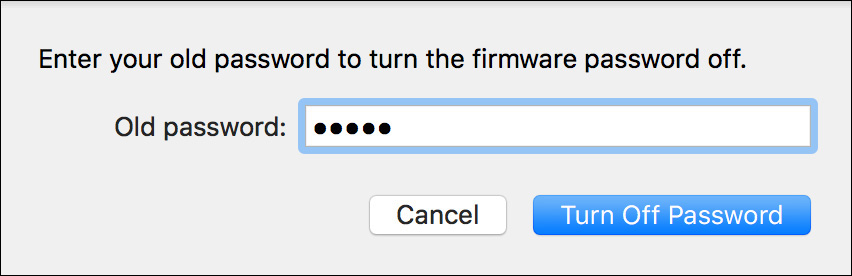
2 Click Turn Off Firmware Password.
3 When prompted, enter the firmware password (apple), and click Turn Off Password.
There is no simple way to remove or reset a forgotten firmware password. You might have to take your computer to an Apple Authorized Service Provider to unlock it.
The Firmware Password utility shows that password protection is disabled.
4 From the Apple menu, choose Restart.
Your computer restarts normally.