
The tweens we have used until now were components we added to GameObjects in the scene. It is also possible to easily add tweens to GameObjects through code.
You can see all available tweens by simply typing Tween inside any method in your favorite IDE. You will see a list of Tween classes thanks to auto-completion, as shown in the following screenshot:
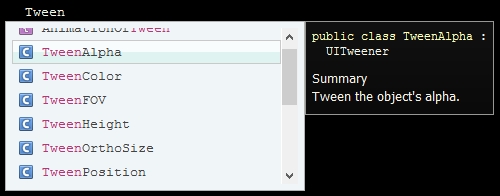
The strong point of these classes is that they work in one line and don't have to be executed at each frame; you just have to call their Begin() method!
Here, we will apply tweens on widgets, but keep in mind that it works in the exact same way with other GameObjects since NGUI widgets are GameObjects.
Previously, we've used the Tween Scale component to make our main window disappear when the Exit button is pressed. Let's do the same when the Play button is pressed, but this time we'll do it through code to understand how it's done.
We will first create a new DisappearOnClick.cs script that will tween a target's scale to {0.01, 0.01, 0.01} when the GameObject it's attached to is clicked on:
- Select our
UI Root|Main|Buttons|PlayGameObject. - Click the Add Component button in the Inspector view.
- Type
DisappearOnClickwith your keyboard. - Hit Enter twice to create and add the new
DisappearOnClick.csscript. - Open this new
DisappearOnClick.csscript.
First, we must add this public target GameObject to define which object will be affected by the tween, and a duration float to define the speed:
// Declare the target we'll tween down to {0.01, 0.01, 0.01}
public GameObject target;
// Declare a float to configure the tween's duration
public float duration = 0.3f;
Ok, now, let's add the following OnClick() method, which creates a new tween towards {0.01, 0.01, 0.01} on our desired target using the duration variable:
// When this object is clicked
private void OnClick()
{
// Create a tween on the target
TweenScale.Begin(target, duration, Vector3.one * 0.01f);
}
In the preceding code, we scale down the target for the desired duration, towards 0.01f.
Save the script. Good. Now, we simply have to assign our variables in the Inspector view:
- Go back to Unity and select our
Playbutton GameObject. - Drag our
UI Root|Mainobject in theDisappearOnClickTarget field.
Great. Now, hit Unity's play button. When you click the menu's Play button, our main menu is scaled down to {0.01, 0.01, 0.01}, with the simple TweenScale.Begin() line!
Now that we've seen how to make a basic tween, let's see how to add effects.
Right now, our tween is simple and linear. In order to add an effect to the tween, we first need to store it as UITweener, which is its parent class.
Replace lines of our OnClick() method by these to first store it and set an effect:
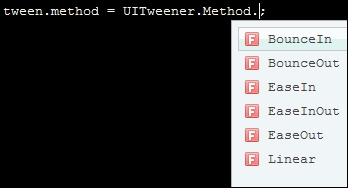
// Retrieve the new target's tween
UITweener tween =
TweenScale.Begin(target, duration, Vector3.one * 0.01f);
// Set the new tween's effect method
tween.method = UITweener.Method.EaseInOut;
That's it. Our tween now has an EaseInOut effect. You also have the following tween effect methods:
Perform the following steps:
- BounceIn: Bouncing effect at the start of tween
- BounceOut: Bouncing effect at the end of tween
- EaseIn: Smooth acceleration effect at the start of tween
- EaseInOut: Smooth acceleration and deceleration
- EaseOut: Smooth deceleration effect at the end of tween
- Linear: Simple linear tween without any effects
Great. We now know how to add tween effects through code. Now, let's see how we can set event delegates through code.